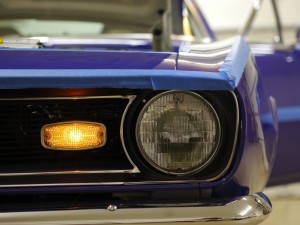
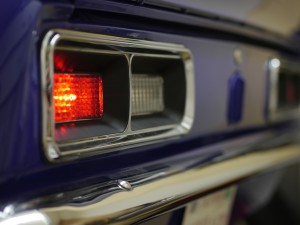
Let there be light!
Decided to take a few days off work, partly to get a little more time to work on the car. As so often happens when you take time off, I got the flu! Ugg.
Still managed to spend a little time today hooking up some basic wiring. One amusing aspect of this car, is how little wiring there is. When I bought the car, the wiring was some poorly installed Ron Francis aftermarket thing, a big mess. It now has all new OE-replacement harnesses, of which there are four:
- Engine harness
- Front body harness
- Dash harness
- Interior and rear body harness
If the car had a center console, or a stereo, or A/C, or any of several other packages, then it’d have more wiring, but this is all. The dash harness has maybe 40 wires altogether, with the others each having only 10-15.
Amazingly simple!
Lots of things are a pain
Have lots of different assembly sub-projects in the works at the moment. About 40 items on the to-do list left. Try to see them through, but often times they reach a frustrating point, and instead of getting aggravated and potentially causing a mess-up I’d regret later, the approach is to move to another project. That gives the subconscious time to work on the problem, maybe order a new tool or part that would help, and re-address it later when fresh.
Unfortunately after a while, you run out of stuff to switch to, and have to pick back up a frustrating aspect of the project. Here’s a brief rundown of some things causing frustration at the moment.
Power steering pump catastrophic leakage.
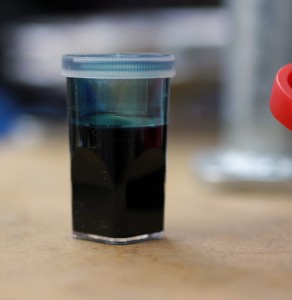
Spent a lot of time getting the power steering lines all cinched up, with the basic routing done. Poured in a couple ounces of the new Redline PS fluid, turned the wheel a bit (car in the air), all seemed fine. Added about half a quart. What’s that I hear? The PS fluid is streaming directly onto the floor! It’s not leaking from any of the fittings or orifices, it’s leaking from between the main pump body and the outer reservoir housing. No way to stop the leak, so I put the half full bottle of PS fluid back underneath and let it pour right back in. Used the above little lab bottle to collect the drips that continued for the next couple weeks, haven’t had the heart yet to get in there and undo all the painstakingly attached hoses. Need to get a new pump too.
Not hard to see how Donohue gave up on PS after only one or two races! It’s a lot of weight (20+ lbs.) and complexity, all up at the nose of the car, that also robs power. Just don’t think I can autocross this beast with a lot of caster without it though. Not and provide very precise driving inputs anyway.
Brake line fittings
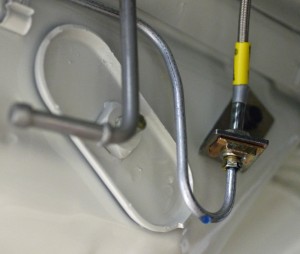
This project has made me realize how easy most of my earlier car projects have been. Something as simple as brake lines, has been a big pain. The OE-style replacement hard lines don’t thread into the regular Wilwood calipers. Have to get a special adapter. Then there’s stuff like this one-
Have to figure out if it’s a bad fitting, mismatched threads, bad flex line, or something else, now after the system has some brake fluid in it. At least it’s a neat blue (ATE Superblue). Speaking of blue, took this photo of some oil. The LAT engine oil now in the car is a really fantastic blue color. Tried to capture it here by pouring a little in another bottle-
If you’ve ever seen the movie the Fifth Element, it looks just like blood from the Diva Plavalaguna after she gets shot. I’m sure that’s just what the oil engineers had in mind when they were blending it… 😉 Fortunately the engine oiling system is currently all set (though the pan install was not without its challenges), and doesn’t leak, now that an oil temp sender has been installed in the pan. Even have a dipstick now!
Leaf Springs
As noted back here, ride heights are all wrong at the moment. Front is relatively easy to adjust, with some turns of the Afco adjuster. Rear, not so much…variable height spacer blocks are available, but you don’t want to run any more spacer block than you have to.
The Hypercoil springs I first bought way back when are the only composite leafs they offer, and come with a 4.5″ “true arch”, whatever that mens. Of the many mistakes I’ve made in the progress of this project, one was assuming this would be a reasonable ride height. Turns out it is way way off, even with a 1″ spacer block. Car needed to be about 3″ lower from where it was with the Hypercoils, so the only real option was another set of springs. Liteflex LLC, who makes the springs for Hypercoil, didn’t return my message (their unit is a very high quality piece, despite the poor fitment for my application), so I called Flex-A-Form. With one call they were able to take my order. I wanted to replicate the Hypercoil specifications (spring rate and size), but be 3″ lower.
To their credit, they did get the springs to me relatively quickly, considering they had to be custom made. To their discredit, they weren’t going to offer anywhere near 3″ lower height than the Hypercoils. But again to their credit, they have an offset eye design in the spring end, which helps mitigate this – by disassembling the spring end and mounting it upside-down on the leaf, you can lower the effective mounting point by 1″ at one or both ends.
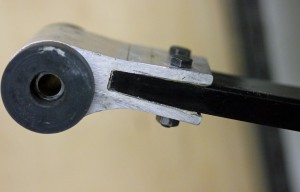
Looks easier than it is, they use a pretty aggressive glue to hold it on, making it some careful prying and chisel work to get the end off without hosing the fiberglass leaf. And the contours aren’t quite the same when upside-down so a bit of file work is required for it to fit right.
Once that’s done, I take a closer look at the Flex-A-Form leaf next to the Hypercoil, and realize that it is at least 2″ longer in the rear section. Ugg! So what do I do now, send them back? Will they take them back now that I’ve flipped the eyes? The more important question that came to mind was, what are the chances they even get it right the second time around, and what will continued messing about mean to the timeline? Instead, decided to modify them myself-
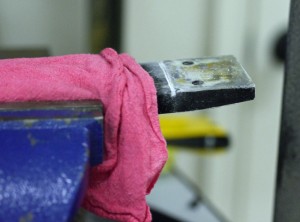
Marked and cut off the extra length; re-contoured the fiberglass to receive the spring eye; positioned eye (in the lowering upside-down orientation) and drilled holes for the mount bolts; cleaned it up, applied sealer/adhesive, and bolted it back together.
Then there’s the issue of bushings and bolt sleeves and washers and fasteners. John Coffey did a good job getting the Hypercoils mounted up way back when but had to custom-make a few pieces on his lathe to get it to go together. I don’t have a lathe or the raw materials, and thus had to improvise, cutting down and hogging out bushings to fit the larger sleeves John had made. *Nothing* about the springs just fit as delivered. Oh, and the subframe connectors have to be mostly removed to get the forward spring pockets out, which requires pulling apart a bunch of the interior.
What should have been a couple hours (swapping out rear springs for lower units) ended up taking at least 8, and only the first one is done! Other side should go faster but geez what a pain. Good news is, I should have all the info needed to get the next pair of Flex-A-Forms built right (I don’t expect the 250# spring rate I’m starting with, to be the one I stick with forever) so the work on the bushings and hardware should be re-usable on the next pair, making this swap only a couple hours, the sort of thing you might try between days at a multi-day race, with normal tools.
Road Draft Tube
Most people don’t even know what this is, and admittedly I didn’t either until recently.
In the old old days – like, before the Camaro – automakers had this thing called a “road draft tube”. They recognized that engines built up positive pressure in the crankcase, especially while the engine was working hard, and they had to figure out what to do with it. Without anywhere else to go, the pressure would cause oil to leak out past the seals, and make a mess of the car. So what they did, was run a tube from a port on the engine, down and back a ways, so liquid and mist oil escaping from the engine, would drip “harmlessly” on the road beneath the car. This was a significant contributor to the black stripe in the middle of our highway lanes; an intentional, built-in oil leak.
By the early 60’s people had begun realizing 1, this was bad for the environment, and 2, engines actually like a little bit of vacuum on this port – so what the heck, why don’t we just ingest this misty oily air and burn it in the combustion chamber? Thus the modern PCV system was born.
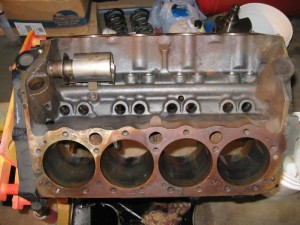
In the case of a ’67 Camaro V8, the road draft tube and PCV system are fairly basic. In the picture below (not my engine) you can see the “tomato can” – a very basic attempt at an air/oil separator – it is plumbed to the port on the block you see at the very top left.
From that port, a tube runs up and into the underside of the air cleaner lid. This provides a slight vacuum and causes oily badness to get sucked into the engine. This is actually not a good thing for combustion in a performance scenario, as it affects mixture in a negative way. Thus the benefit of catch cans, which are allowed in STX (even Stock) so long as the “original PCV function is retained”. Current plan is to run the road draft tube outlet to a catch can-slash-air/oil separator, which will then be plumbed back into the original place in the air cleaner. This should meet the rules while helping preserve healthy combustion.
So all of this ancient emission history is great, but what’s the problem? The problem is, the tube has this dome thing on it where it covers the port, where a single long bolt runs down through it, into female threads in the block. Since this probably makes for a common oil leak spot, somebody in the history of this block, must have overtightened the bolt, and it is now snapped off in that port, without enough meat protruding to get a tool on. The broken-off bolt has a nice dome shape to its top, making it tough to keep a drill bit centered, and it is recessed so far down there, normal bolt extractor bolts and tools can’t reach. Yay! As an added bonus, this is at the extreme rear of the block, so to even look at it, requires climbing into the engine bay and contorting one’s self, being careful not to mess up all the shiny, new, and sometimes delicate, engine parts.
I plan to give it a go with a traditional drill bit, and maybe see about extending the bolt extracting bit in some way, to get it down into the hole drilled. On a day when I’m feeling very patient and well rested… 🙂
Coolant Temp Sensor Port
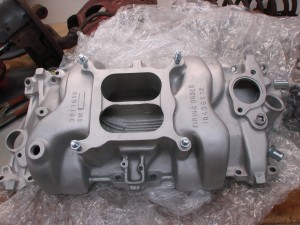
The pristine intake manifold I bought from Jerry MacNeish two years ago now-
came with a plug in the port next to the thermostat housing mount, there on the right side. That port is used in ’67 Camaros for the coolant temperature sensor. In later years it was moved directly to the cylinder head.
I’ve tried penetrating fluid, tried heat, and even tried extreme force (ended up breaking the 1/2″ -> 3/8″ adapter), and nothing has been able to make that plug move. At this point it likely needs divine intervention, but in the meantime, have emailed Jerry asking for advice. Might try drilling it out, though I’m not enamored by the idea of the inevitable loose aluminum shavings floating around the cooling system.
On a related note, recently bought a complete tap and die kit. Not sure how I ever got along without it before, it’s been tremendously valuable.
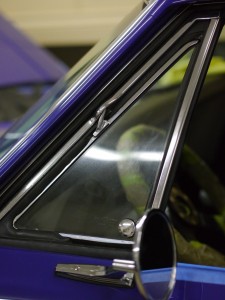
Vent Windows
1967 was the only year the Camaro came with vent windows and as such, this is one area where replacement parts are hard to come by. And there are a whole lot of parts to replace! While I’m a big fan of the vent windows and like their classical elegance, from a technical standpoint, they are probably the least elegant things on the car. It takes an atrocious number of oddly shaped metal parts, contorted gaskets, and strange hardware, to make one of these vent windows work. Since some of the key stuff isn’t remanufactured, you have to make the best of what you can find. When it’s all said and done, it is heavy and makes you wonder why they even tried doing these things in the first place.
It’s not all cleaned up here, and the gasket still needs some trimming, but the driver’s side vent window is IN!
Interesting dimensions
As the car gets further developed some of the interesting questions from early on are finding answers.
One of those had to do with the car’s width. It is spec’d at 72.3″, which is quite a bit wider than the competition:
- E36 BMW: 66.9″
- WRX: 66.7″
- RX8: 69.7″
Over 2.5″ wider than the closest car, a significant difference. The general pages on this site around Transition and Skidpad performance go into detail on the pros and cons of width. Unfortunately in autocross, width is mostly a con. However, the measurement of width is not an exact science – where do you measure? Do you include things like door mirrors – which are high enough to miss cones and therefore not matter for autocross? Were all those cars measured in the same way?
A commonly used measurement is the distance, on the ground, between the outermost edges of the rear tires. That number best represents how wide your car’s ass is, and how careful you’ll have to be in getting it through the course without knocking things over.
Super Stock C5 Z06 Corvettes are usually around 72-73″ in this measurement. The C6 Z06 is a bit wider, in the 77-78″ range. The Viper is also about 77.5″. I also remember performing this measurement on James Gunn-Wilkinson’s 996 GT2 the year it won ASP nationally – it was only about 69.5″ wide, even with 335 tires on wide wheels. That was a real advantage over the ASP C5 Z06s, which had swelled into the 77″+ range to fit their big SP tires. Some CP cars have been measured over 80″ wide! Perhaps that’s why sometimes their driving efforts look like Kim Kardashian trying to make it through the turnstyle on the Paris Metro without touching the sides…
Given the specified width for the Camaro, was expecting a number for the rear in the 71-73″ range. Delighted to find, the value was only 69.25″. I estimate between 1/8″ and 3/8″ per side the wheels could be spaced outward, if needed. That’d get the rear width measurement up close to 70″, but still, that’s really not that bad. Besides the width penalty in transitions, an additional downside of adding rear track, is it increases the wheel speed differential between the inside and outside rear tires in a corner, which can be troublesome to certain types of limited slip differential. Narrowing rear track is a common trick in trying to mitigate diff problems. On the plus side, additional rear track reduces total rear weight transfer at a given lateral acceleration, leaving a little more weight on the inside rear tire for acceleration.
Since the Sunken Battleship post from a couple weeks ago, have since procured various spacers for the front end. Good news, looks like a full 1″ of spacer in front passes. Can even turn to full lock at ride height!
This is a much better situation – both for appearance and for performance. It’s only a ~3% increase in front track, but that means 3% less weight moved across the axle, which could mean as much as 1-2% more potential front grip. Next set of STX wheels will probably be built with a lot less backspace. Advantage of these, is the tires could be stood straight up (zero camber) and still fit ok with the spacers removed. 18×9’s with only 4.5″ backspace (which these effectively have now) will only fit right with a ton of negative camber on front.
Raised the front a little bit too from last time. It looks a lot less tucked, but a big part of that is this tire is about 1.5″ shorter than the vintage-style Avon.
With the spacers, the equivalent measurement to the one quoted above for the rear – 71″. Very pleased by that – a front track wider than rear should really help the chronic understeer these chassis seem plagued with. Front width is more manageable too when driving, largely because it’s part of what you can see!
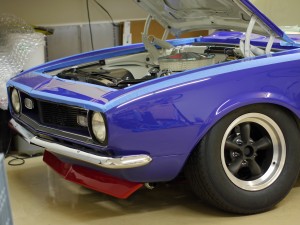
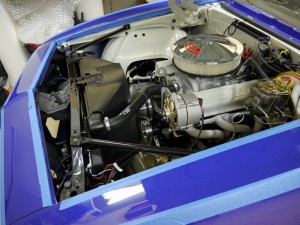
Some underhood shots
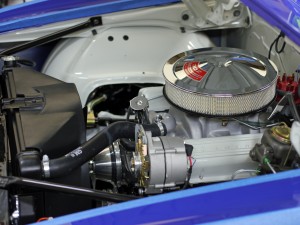
Have made some progress in the powerplant department. Cooling system pretty much fully installed – radiator, hoses, water pump, thermostat. Throttle, brake, and clutch linkages all in place. Still have some work to do with fuel lines, brake lines, PCV stuff, and all the electrical and ignition.
Decided to procure an OE-style air cleaner, just to have something to start with.
Changed lens between shots here. I really enjoyed seeing all the nice photos other people had taken of their cars in the various stages of construction, trying to repay my debt to the car-builder society with my high-res photos in this blog.
Main purpose of this camera is video actually, should have some better-than-GoPro stuff to share, once there is movement and audio to capture.
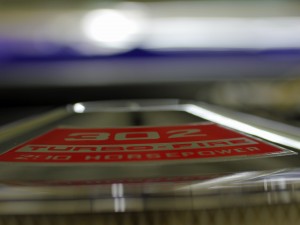
One benefit of running the OE air cleaner, is with the addition of a simple decal, you’re providing a pro-active answer for the dozens of inevitable “What kinda motor you got in there, how much horsepower does it make?” queries
It’s a stock 302 making 290, of course! 😉
Beautiful wheels, horrible ride heights
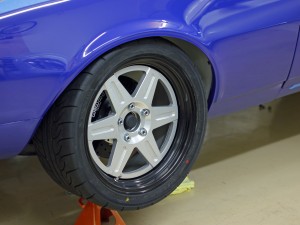
Yesterday the other two Vintage Engineering magnesium wheels showed up. There are the best replicas of the wheels used in the Trans-Am racing series you will find anywhere. I went with the American Racing Torq-Thrust 5-spoke design, though the Minilite design everyone had switched to by 1969, is also available.
Nobody really makes magnesium wheels any more, and there are a lot of interesting tidbits to know in the “care and feeding” of mags. Since they are cast, they have some fragility – you don’t want to use more than 25-30psi when seating the beads, as the explosive force of the tire seating, can actually damage the inner flange on the wheels, which is not generally repairable. Fortunately the Avons beaded up with under 20psi – these are no 30-series R compounds!
Second, you don’t want to use normal tire-mounting lubricants, because water and soap is bad for magnesium – especially so anything left inside the tire, as it will just sit and eat away at the metal over time. The barrels of these are painted, but it only provides so much protection. The tires were mounted today using a bunch of WD-40 as the lube.
Quick shout-out to the folks at the Discount Tire at Balboa & Genesee in San Diego. I have been going to those guys for years, and when other shops in town turned away me and my big and difficult-looking SM240 or Viper wheels and tires, the crew at this Discount always helped me out, getting things done quickly and without incident. If you’re in town I highly recommend them!
Third thing is that like Gremlins, you don’t want to let them get wet. Of course some moisture is inevitable, but if left on an unprotected surface, it causes magnesium to oxidize and eventually pit. Magnesium parts last a lot longer in dry climates – fortunately San Diego is arid/desert climate, and I’m far enough inland the ocean salt air is not a problem. The spokes and inner barrels of these wheels are protected with a “DOW 9” galvanic anozide – fancy chemical tech from WW2 which holds up and protects the magnesium better than paint can. Only the outer lips are left unprotected, which polish up beautifully, and can be protected with a corrosion-inhibiting oil like WD-40, though for these wheels I was recommended Gibbs by Ray Franklin at Vintage Engineering.
I really like these wheels. In looking at a million pictures of Camaros, it took me about 999,000 images before I realized why I prefer the looks of the classic Trans-Am cars over any of the megabuck modern Pro-Touring cars – it’s the tall sidewall on the modest-diameter wheel that does it. There are some nice modern designs out there in strong and light wheels from companies like Forgeline and CCW (remember I was originally considering CCW way back when) that are extremely popular with the restomod crowd – but unfortunately none of their designs really fit the vintage look. There are even a ton of manufacturers replicating the Torq-Thrust wheel design, but for one reason or another – spoke shape, colors, maybe even the grain texture in the aluminum used – nothing seemed to fit.
These Vintage Engineering wheels look exactly like what’s on the original vintage Trans-Am cars you’d see at the Monterey Historics – partially because a lot of those racers run these wheels too… 🙂
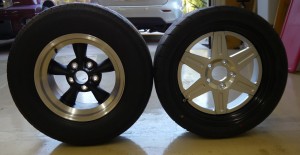
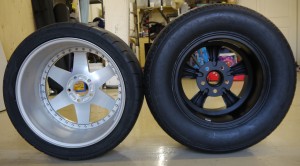
Since 18″ is today’s hot wheel diameter and all the good modern ST tires for the Camaro come in 18″ sizes, decided to attempt emulating the short-wheel, tall-sidewall look with the Jongbloed 214 wheels I had built for STX:
If you’re comparing these two wheels/tires from a distance, they don’t look much different. The one on the left has a silver lip with black center, the one on the right is silver from center to the lip…or is it?
A view from the back of the wheel tells the real story-
how state-of-the-art wheel & tire technology has changed a lot in 45 years. The Jongbloed here with a 265/35-18 Neova, has a sidewall that’s only about 3.5″ tall. The Vintage Engineering wheel with its 275/55-15 Avon CR6ZZ, has a sidewall that’s almost 6″ tall. This is just how modern when and tire design are going – larger and larger diameter wheels, with shorter and shorter tire sidewalls. There are benefits to this – more responsive tires, room for bigger brakes among them – but a lot of it seems to be to help make today’s huge cars appear smaller. Heck – the Infiniti JX35 you see peeking out in the photo below, comes with 20″ wheels from the factory!
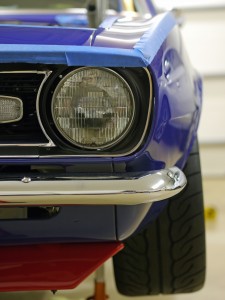
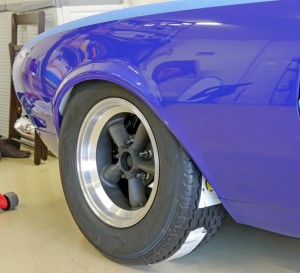
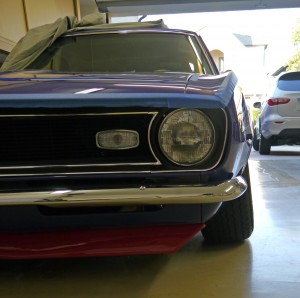
On the offset/backspace/sunken battleship front, the Vintage wheels are not nearly as bad off. The fronts are only 4.25″ backspace, and as you can see in the first picture, they have no room to go further outboard, even if the car was raised an inch or two. From the front it still looks a little weird but not too bad I suppose:
With their shorter height, I should be able to get the STX Jongbloed wheels out at least this far. Sort of a bummer the Camaro’s inner wheelhouse is all metal – there’s another inch to go outboard per side without changing the fender’s exterior contours one bit, but doing so would require re-shaping the inner wheelwell structure, which isn’t permitted due to it being metal. Another two inches of front track width would be of tremendous benefit to front grip. One could conceivably raise the car up enough to allow for the track width increase, but that would be something like a 10% increase in (worsening of) CG height, in exchange for about a 3% increase (betterment of) track width. Not a worthwhile tradeoff.
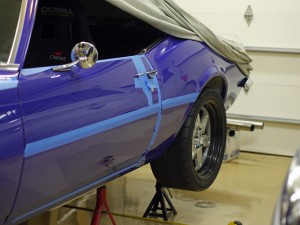
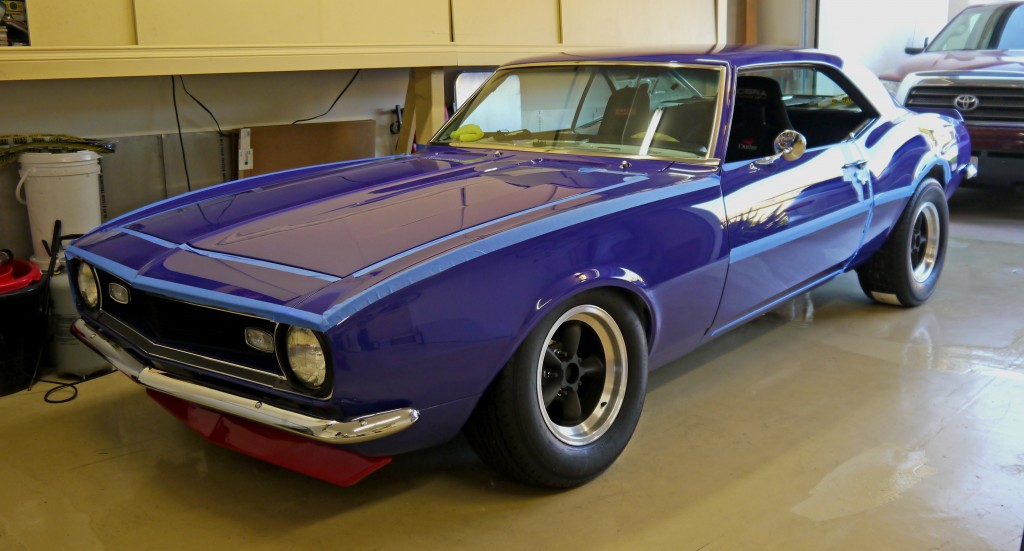
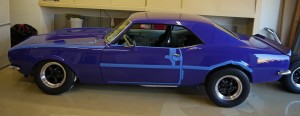
Speaking of raising and lowering, ride heights are all wrong, this picture illustrates it best:
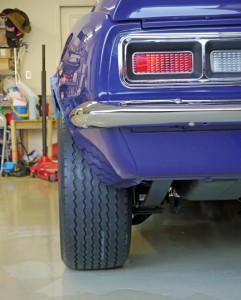
As mentioned in a recent post, the rear ride height is too high by about 3″, waiting on some new composite leafs to bring it down to earth. Front is too low, especially for these tires. They are 26.7″ tall front and rear, making the fronts about 1.5″ taller than the STX race wheels and tires.
Believe it or not, this looks a lot less bad than the car did on its 18″ Neovas. Partly because of the equal tire height here front to rear – the Neovas are 1″ shorter in the front than the rear, exacerbating the dragster-ish ride height weirdness. Next time the car’s in the air I’ll probably raise the front an inch or so, just to be conservative. Actually a little concerned I may not be able to make it through the gutter at the end of my driveway and onto the street, without damage.
Will be nice to get the rear lowered – at the moment it’s not doing a very good job of hiding its horse-and-buggy underpinnings!
Minor shifter update
While I’m still a ways away from driving and racing this thing, been making tweaks along the way.
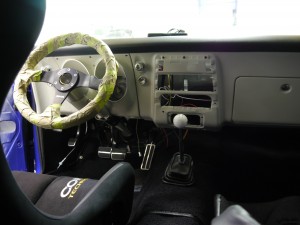
The new Hurst Competiton Plus shifter for the M21 Muncie came with its standard shift handle, which fits well and offers relatively short throws with its compact length. One thing I could tell I didn’t like though, was how far away it sits from the steering wheel-
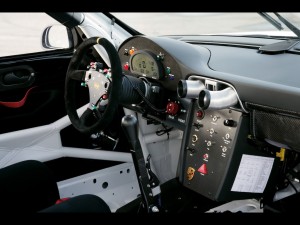
It is a ways to the right, further forward, and way below the height of the steering wheel. While there isn’t that much shifting in Solo, it is done from time to time, and having to reach that far, wasn’t something I wanted to do. A race car trend you see these days (at least in classes where steering-wheel paddle shifters are not allowed), is big tall shifters, so the driver doesn’t have to reach as far to shift, letting them keep more hands on the wheel. This Porsche is a good example:
Hurst sells several different handles for their shifter, for good fitment into all the different cars they sell shifters for – older and new musclecars, sports cars, even pickup trucks.
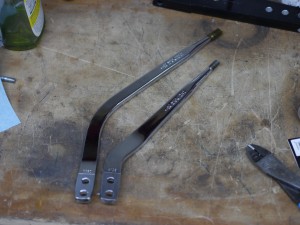
Supplied shifter stick on the right, round 2 shifter on the left. The new one places the shift knob 2″ higher up, about 1″ further back, and though it’s hard to see from the picture in this plane, about 1.5″ more to the left, closer to the driver. This is the shifter stick sold for Jeeps!
This sort of swap is a good quiet weeknight job while everyone’s asleep. Very happy with the result!
