Jump in Bump
Got a fresh shock dyno today, this is about the most bump Penske could get with its existing internals without risking shock cavitation, even with gas pressure pushed to the limit.
Apparently they have a lot of experience with very-high-rebound setups, as it’s what all the Nascar guys use to control their chassis that run around on bump stops most of the time. But nobody seems to be going after those crazy low-speed bump forces.
(orange is baselie valving, red is new at full stiff, purple at 3 clicks off full, as far as can go without cavitating)
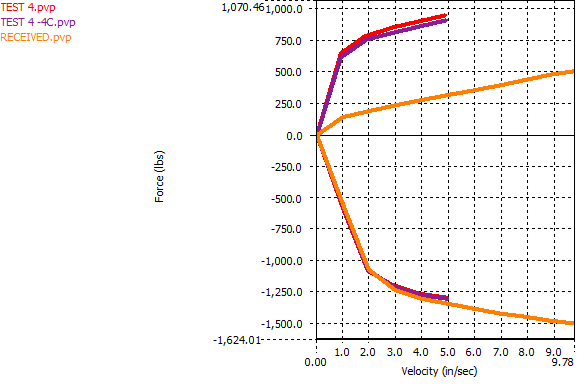
One must remember the Camaro shock is mounted about 9″ out on the 16″ long arm. You have to multiply x .316, and be looking at 2in/sec here, and compare that to the raw values at 3in/sec, you’d see on a strut car like a BMW. 240lbs. @3in/sec is maybe a bit high, but not out of bounds. Ditto 350lbs @3in/sec for rebound. But that is the horribleness of the Camaro suspension – it takes high-end modern shocks pushed to their limits, to achieve damping effectiveness on par with “normal” performance dampers on a better-suspended car. I can go a bit further with both bump and rebound with these shocks, but doing so would require changing out a lot of their guts, and I wanted to be sure to get them back and installed in advance of my next event May 19.
It’s possible this will be “too much”, and the car will want to push. I am ok with push in transitions (prefer it really), but if the car bulldozes in steady-state, I can reverse some of the other changes made (by softening the front swaybar and raising the rear roll center) to correct things in the other direction.
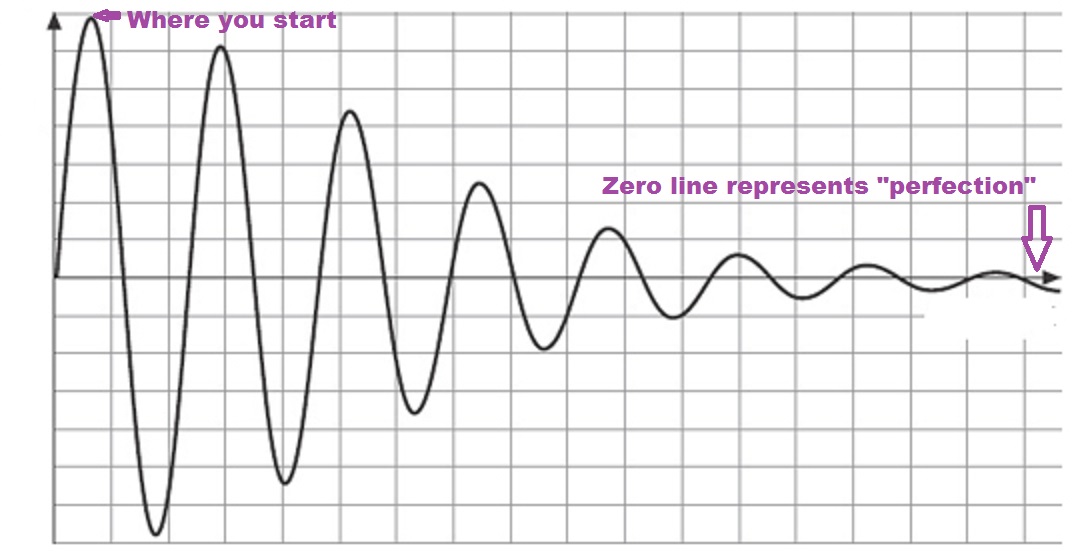
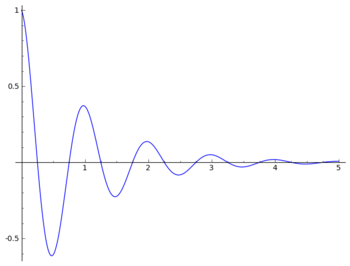
The subject of dampers has some parallels to my overall theory of car tuning. I think of tuning like a decaying, or damped, sine wave. In it, you start off at an amplitude or Y value very far from zero, which itself represents perfection. Over time, you make changes that you hope get you closer, knowing you’ll never land exactly on it – there are too many variables. But you keep making changes, and with experience and knowledge gained, begin to make smaller and smaller adjustments as you hone in on “perfection”, which is never actually achievable.
Tricky things come along like a new tire to test, or new preparation allowances, even a new surface, that move the perfection line around, and perhaps necessitate some big changes to get back to within the same distance of perfect.
It illustrates a little bit, how you have to know what changes and adjustments to make, and be able to evaluate whether you are getting closer to, or farther from, perfection. You also need to know if the change was too big and you overshot things, or if it wasn’t enough, and there is still more to do.
Really good tuners of cars can get closer to perfection more quickly – just like firm dampers don’t let your springs oscillate too much…
I certainly don’t think I’ll be anywhere close after only 4-5 tuning iterations or cycles given how radically far off the car was to start with, but it should continue to get better and better. The difficulty in wrangling this beast both from the tuning and driving angles, is part of what makes it so engaging.
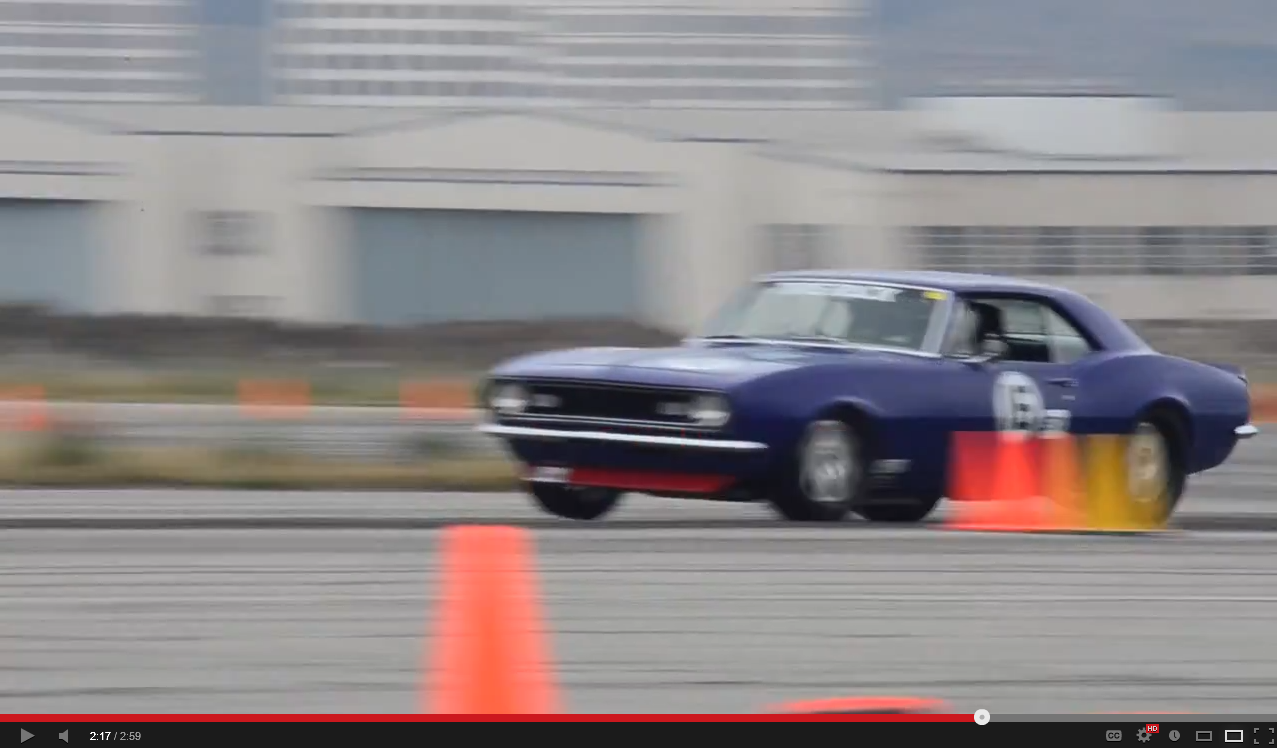
Rear brakes were definitely locking up
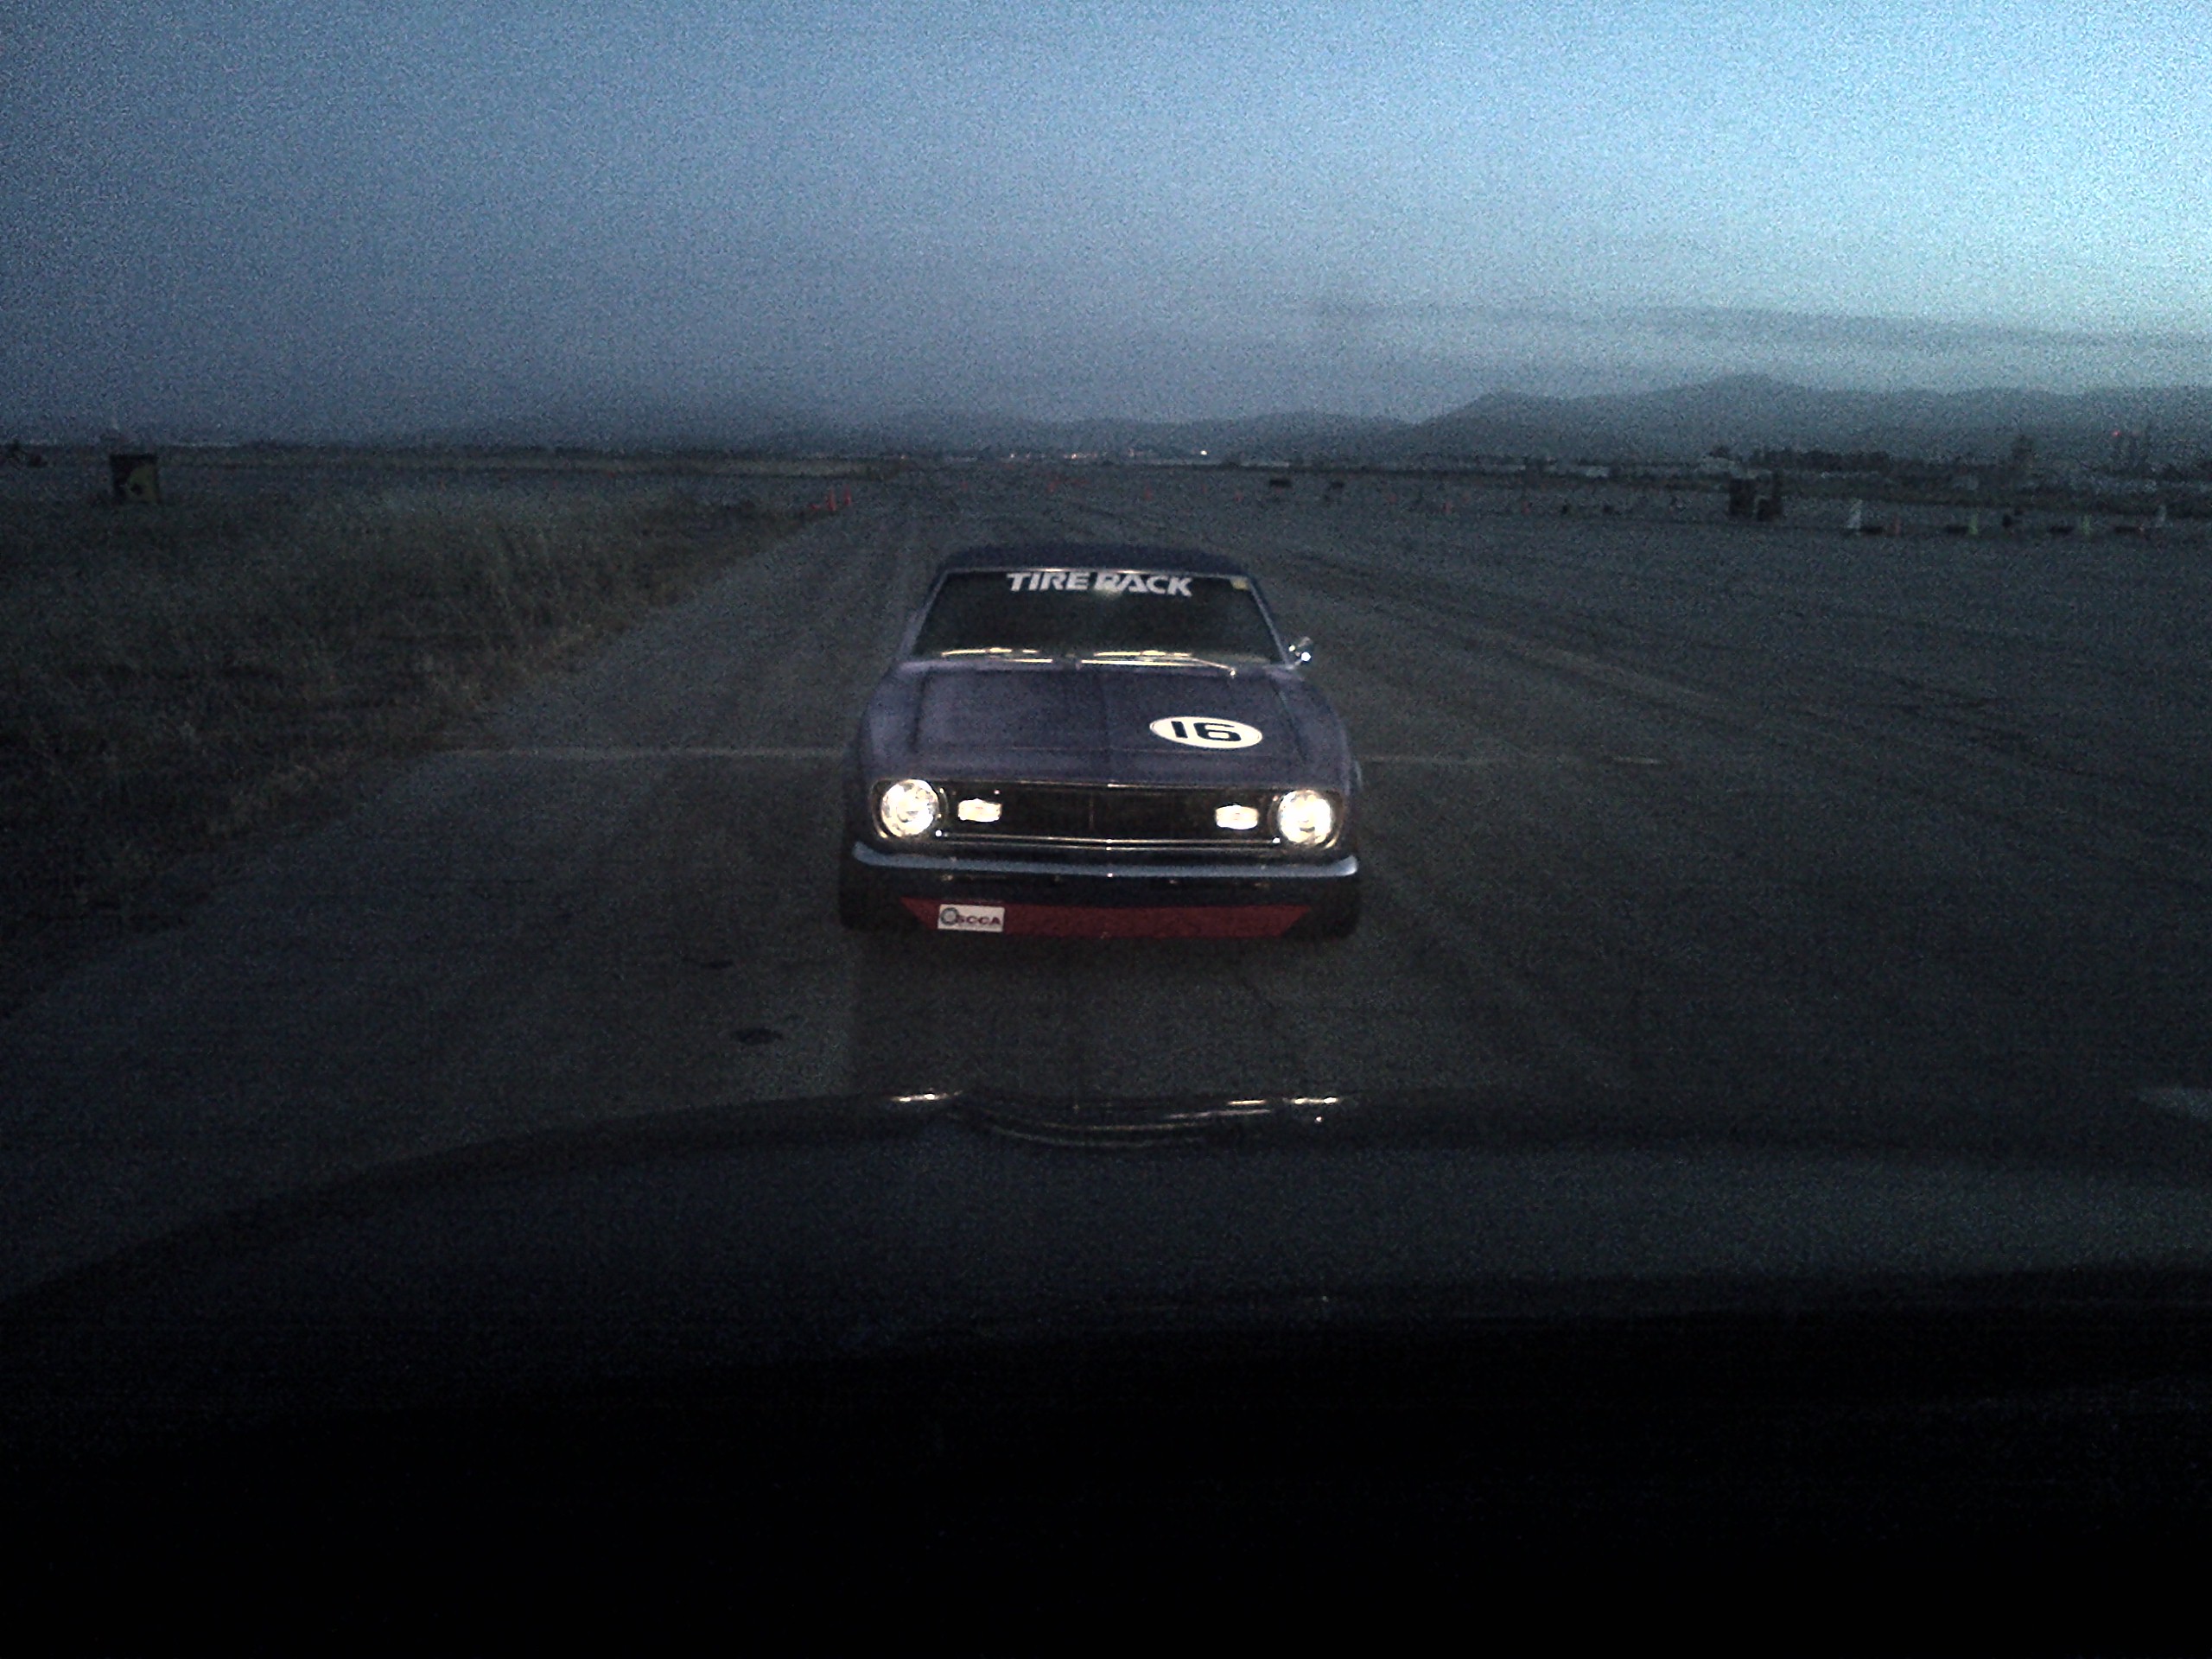
Found some new photos from the SD Tour, and this one:
http://www.pictage.com/client/eventPhotos.do?event=1416471&category=5&photo=2408
is especially illustrative. Note how the inside front is still blurry with rotational motion, but the inside rear is nice and sharp…
Looks pretty sharp in the next couple as well, as the car begins to pirouette. Barely caught it.
Looking forward to the lower-piston-area rear calipers. Feels good to have an in-car impression validated with external data.
p.s. I would have bought the digital copy and posted it here – but the photographer wants $40 per digital image? The nice image I used from Late Apex Photo in the last post was a reasonable-for-a-great-photo $7.50…
Tuning – Iteration #2 plans
It’s more like iteration #20 given how much changed before the car was first driven…but, more changes are in order after the El Toro Pro Solo.
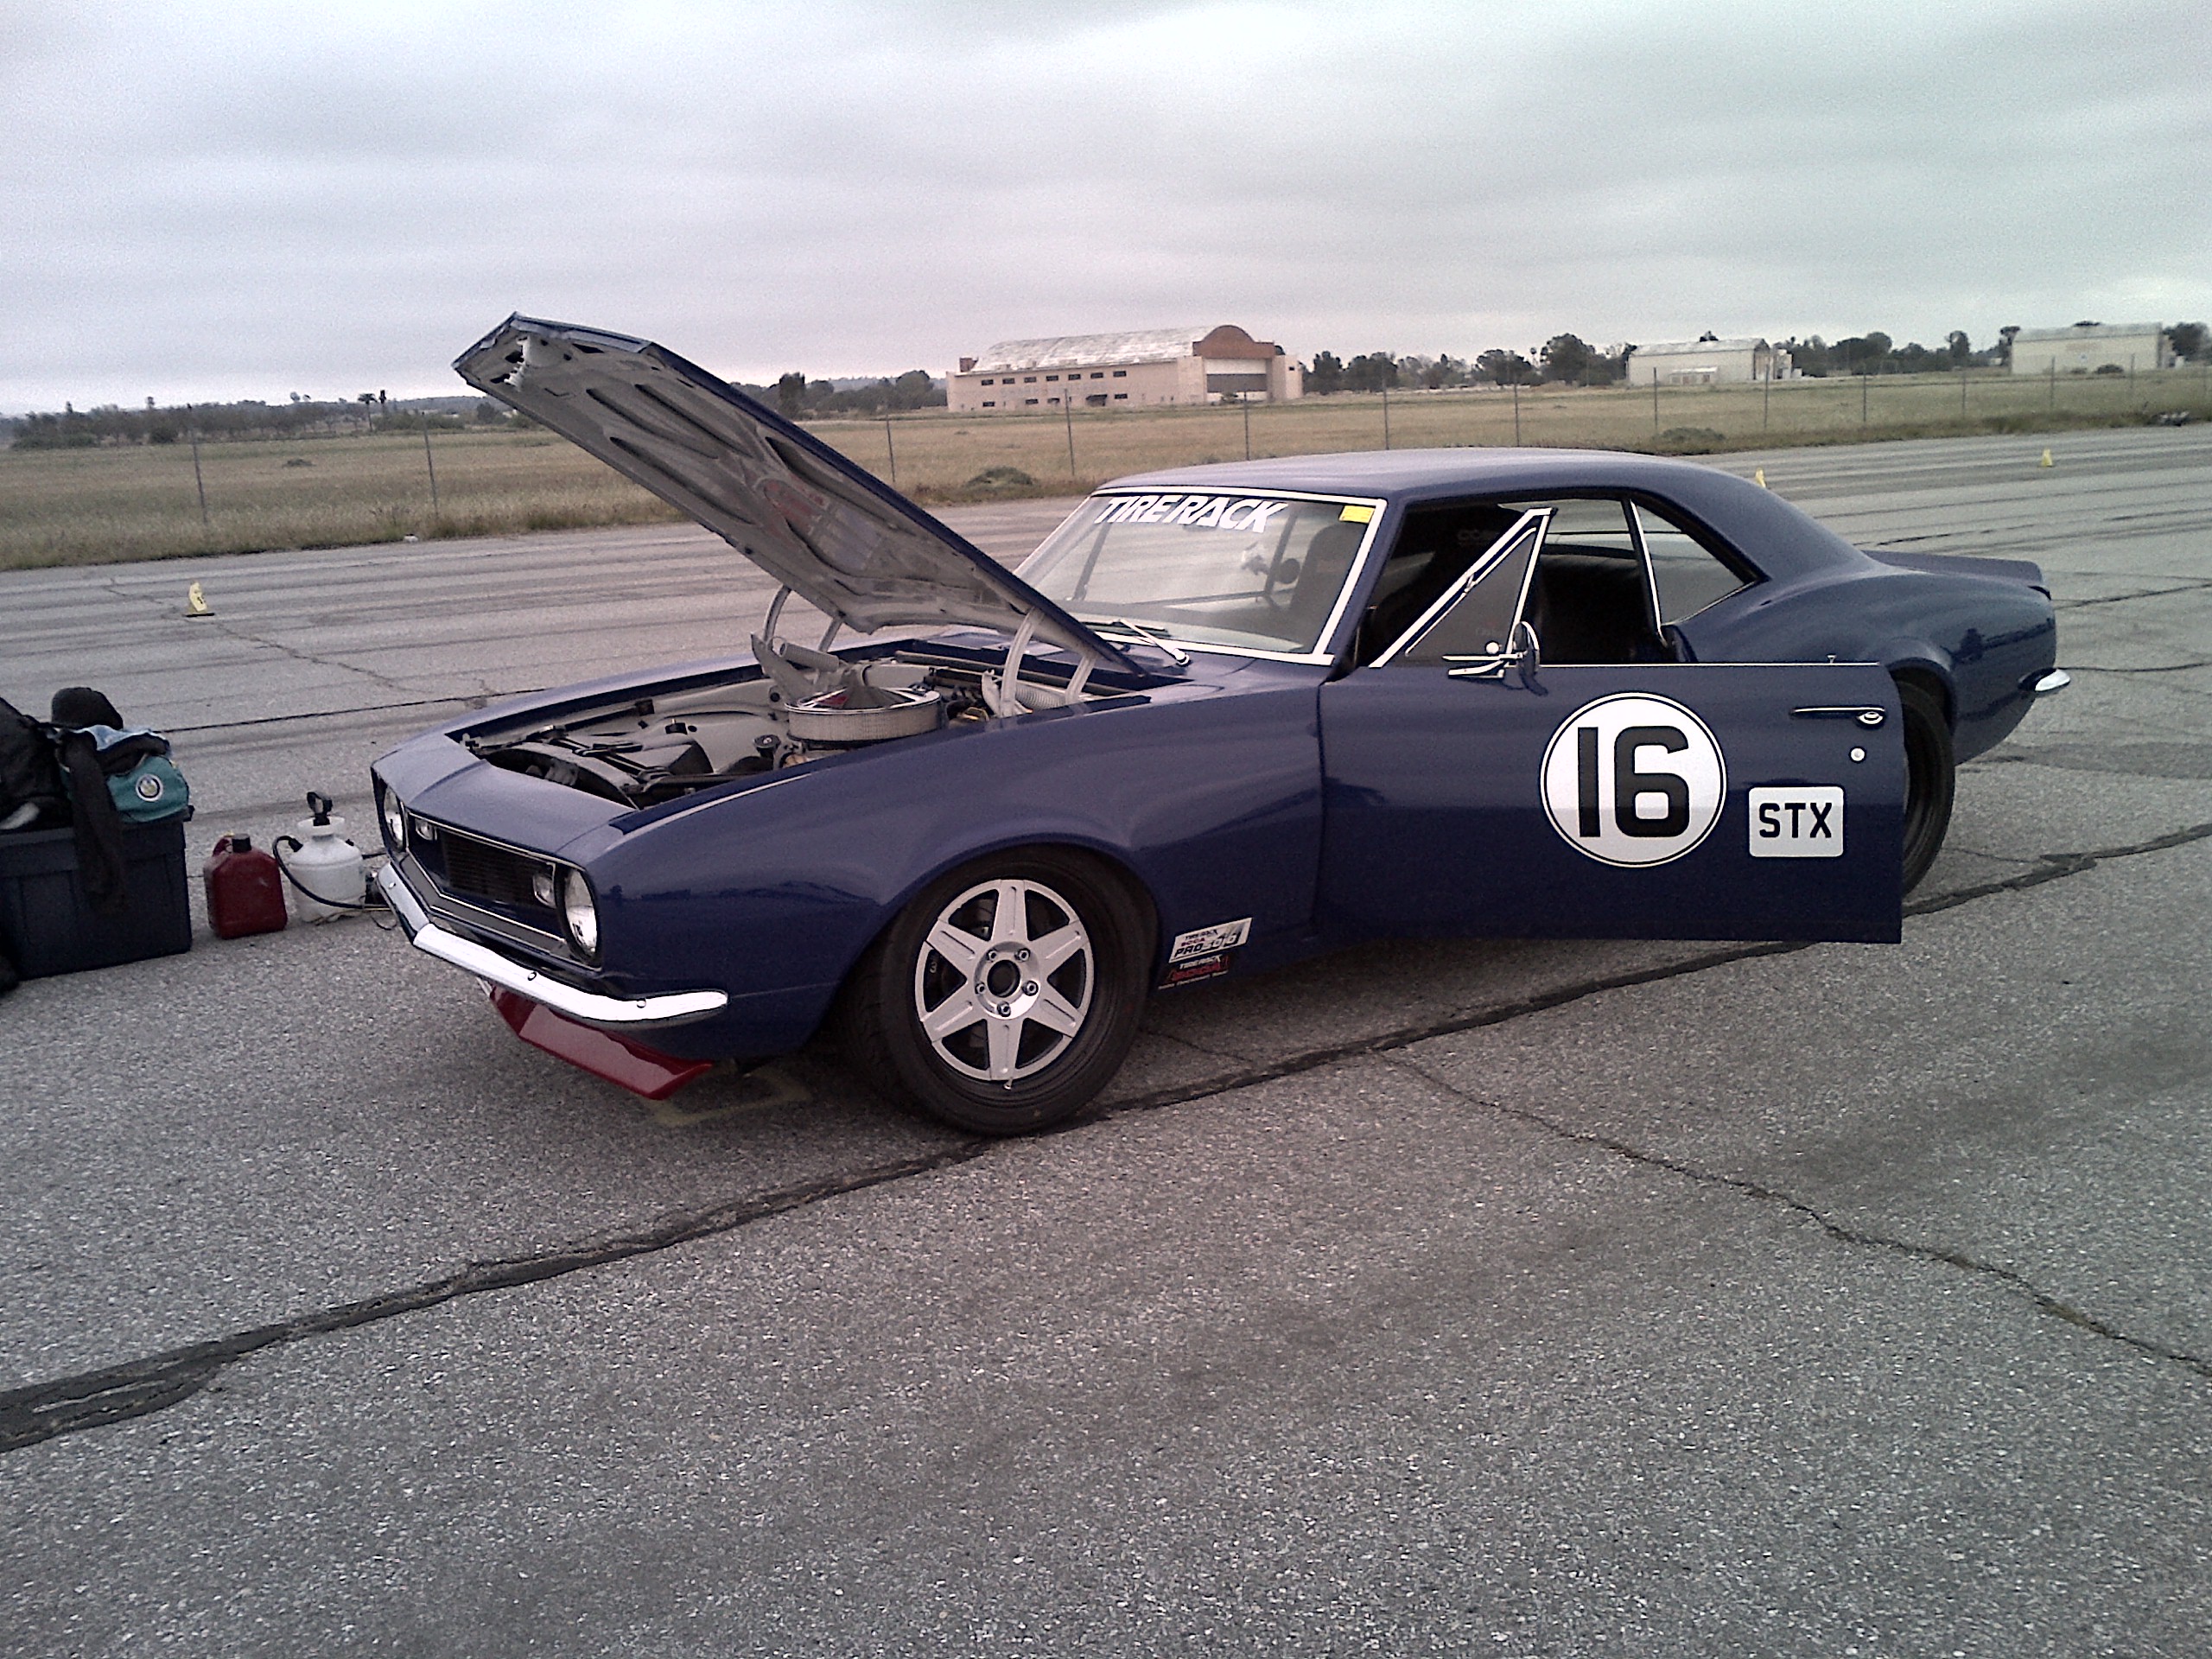
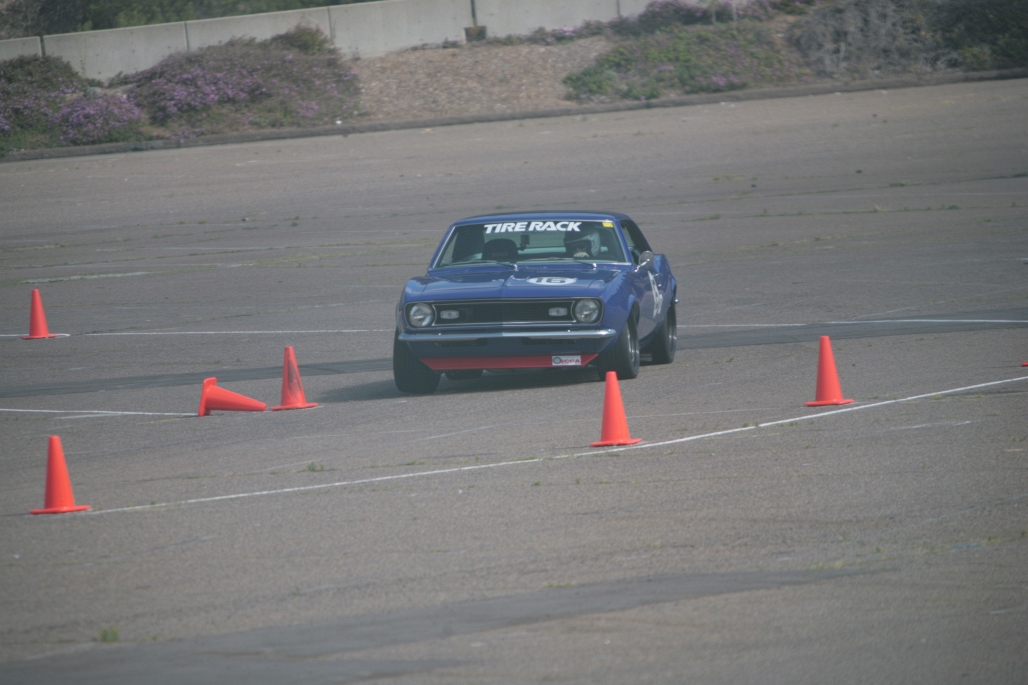
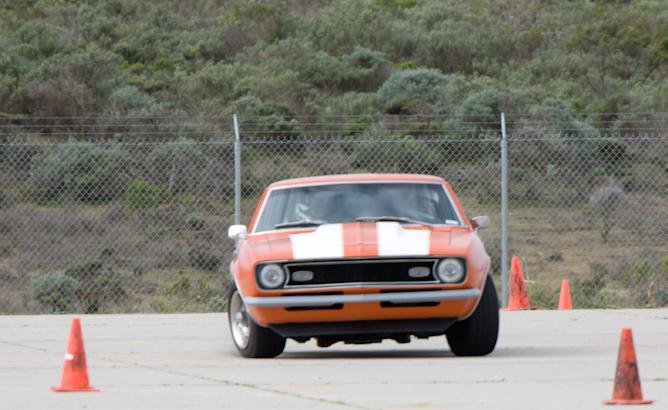
One thing that’s helpful is an external view of the car. Stills and video can tell you a lot. Take for example, the “crazy, it looks broken!” -6 degrees camber I started the car off with. Then look at this picture from the San Diego Tour:
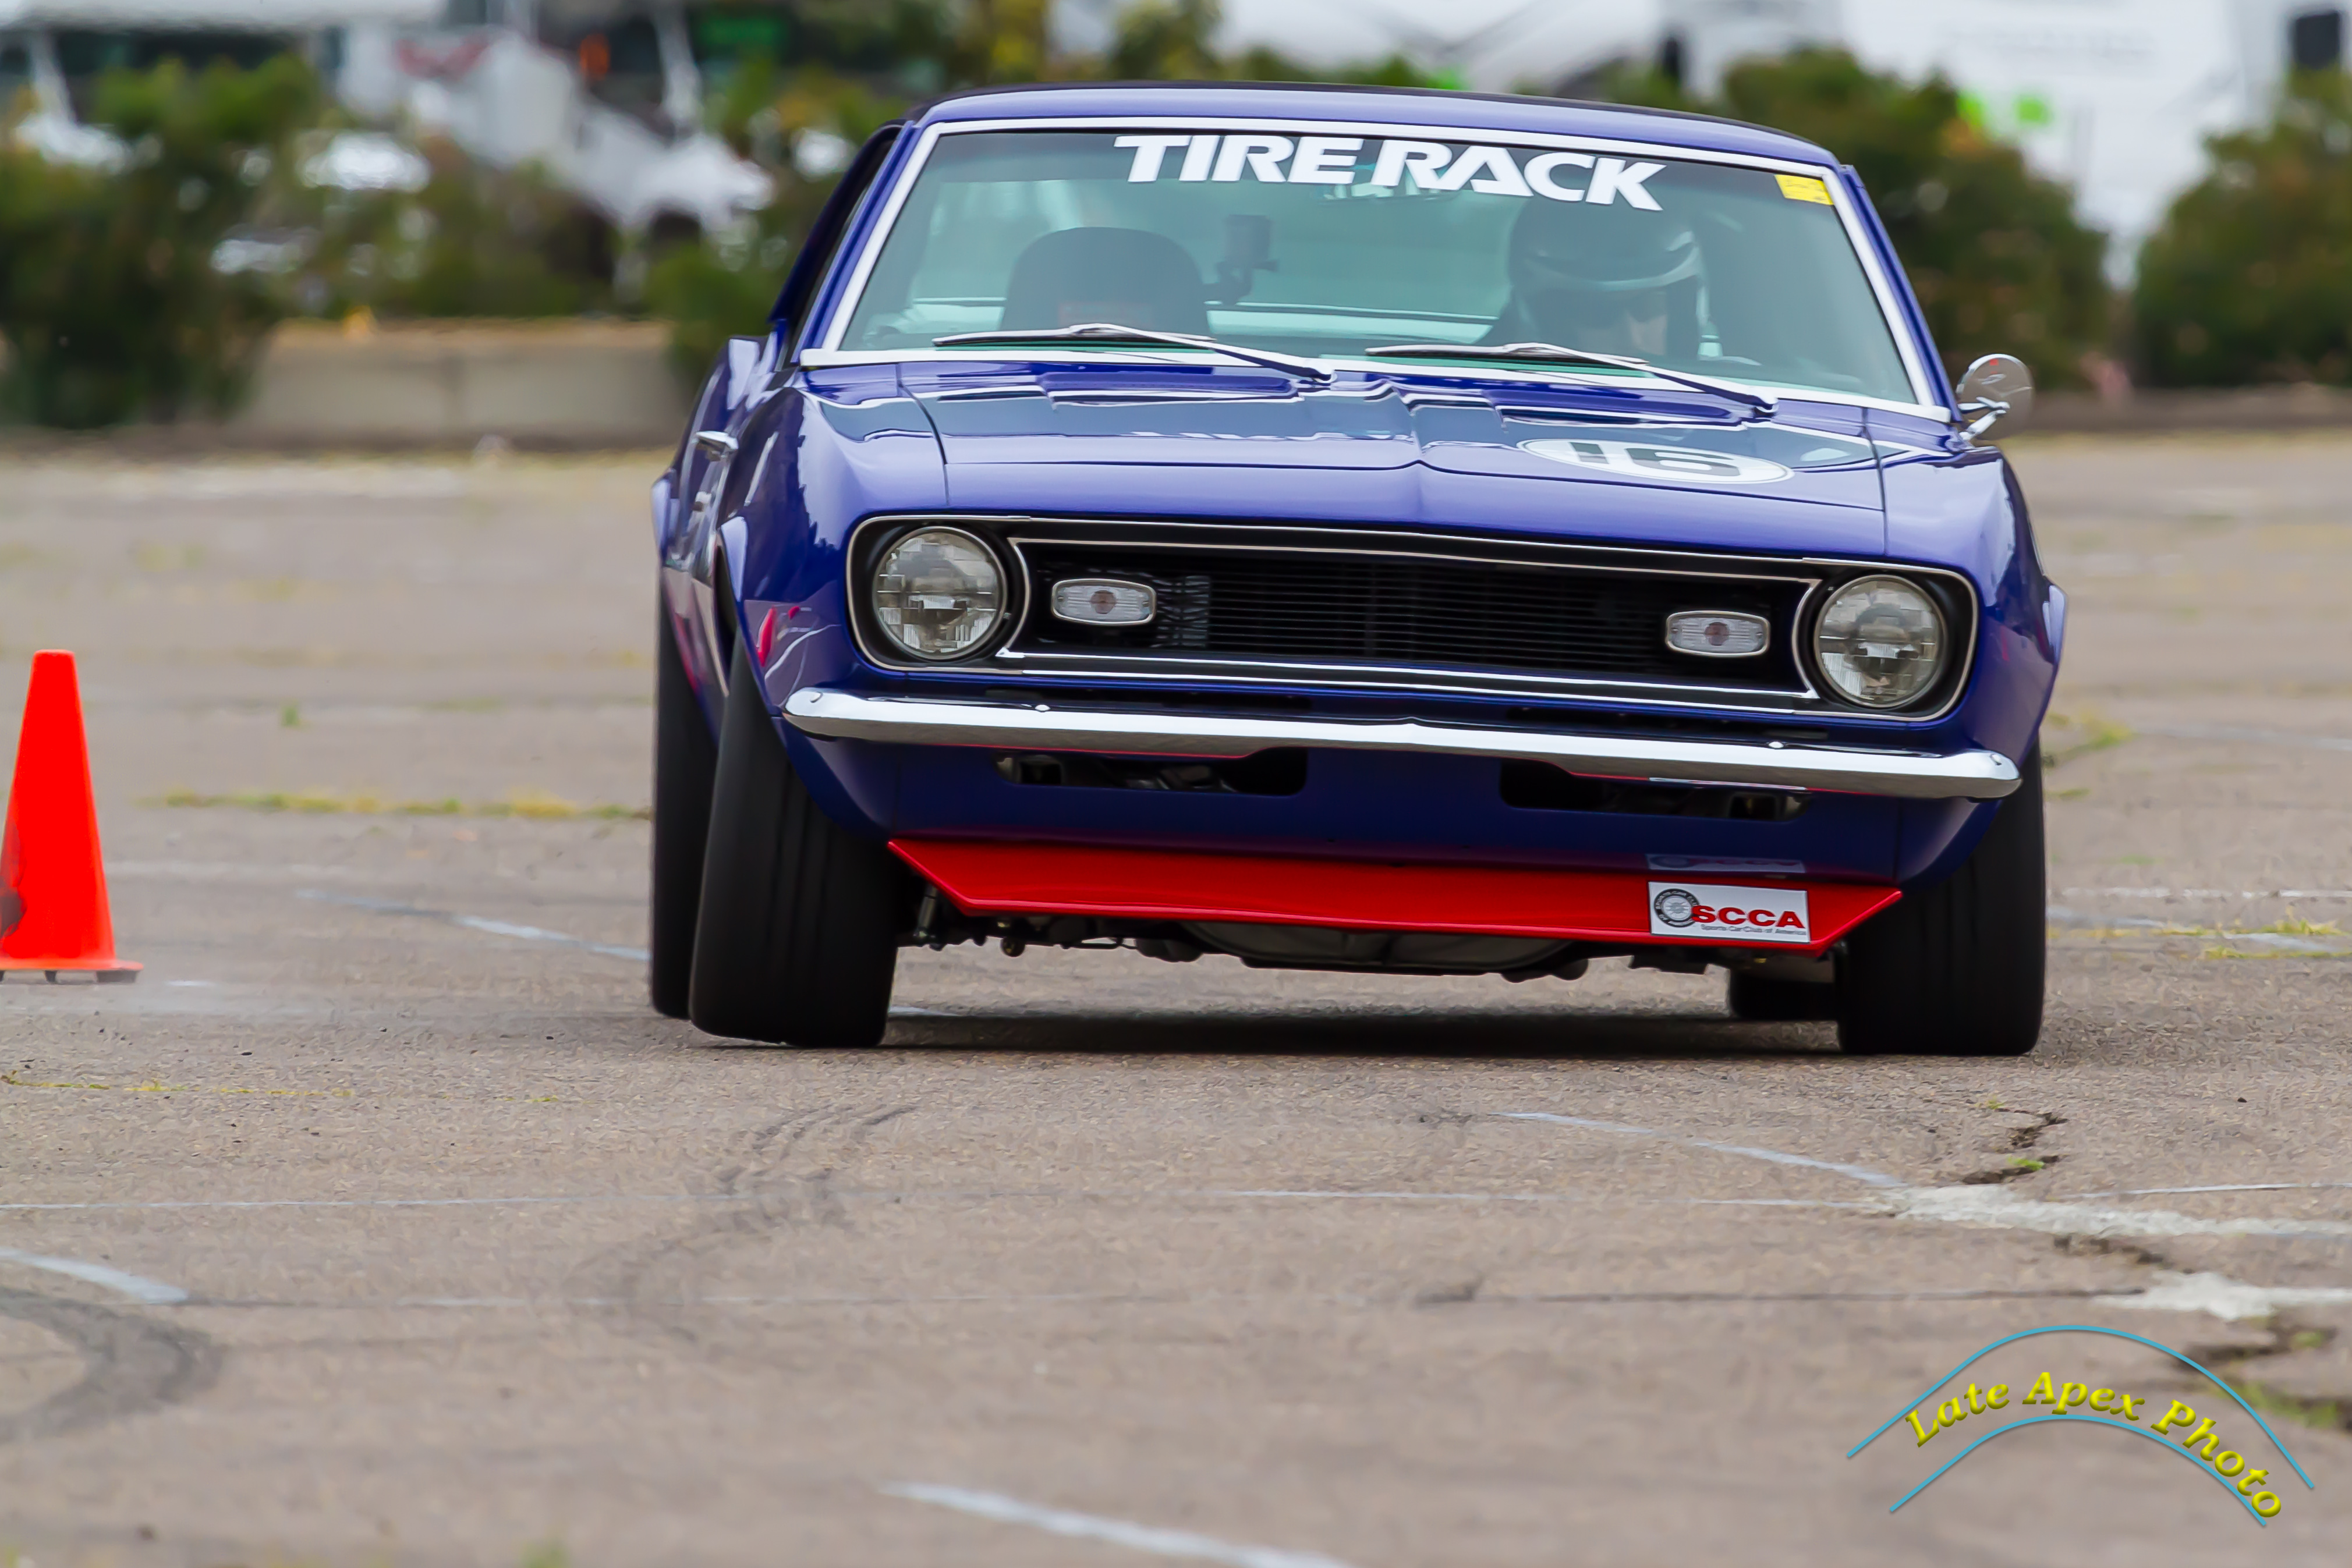
This is on the low-grip San Diego surface, and the car doesn’t appear to be that heavily side loaded – the outside front tire looks to have “enough” negative camber, but certainly not too much, from this angle. Sure the inside front is only halfway on the ground, but it’s so lightly loaded, it’s not doing much anyway.
So negative camber in the front will stay where it is for now.
Overall the car’s handling balance felt pretty good on Sunday morning at El Toro. Some of that may have been the higher grip, but in different situations I felt I could reach the limits of the front or rear tires at will.
At least, most of the time.
The car felt bad under braking, like it kept wanting to kill me. My first spin in the car was under braking, and that was after almost spinning once in San Diego, and once earlier that same run, on the brakes.
My initial guess at brakes was done a long long time ago – http://www.rhoadescamaro.com/build/?p=300 (October 2010). I went with 4-piston rear calipers with 3 square inches of piston area, and 6-piston fronts with 5.06 square inches of piston area.
This has proven to be too much rear bias. The next calipers I’ll try are smaller rears, still 4-piston but with only 1.6 square inches of piston area. That seems like a big change (and it is) but there are a few reasons stacking together-
- The car has too much rear bias now, so it needs some change
- The car at the moment has rear tires that are about 5% taller than the fronts, and if I want to try the newer tires, will need to run the same heights front and rear
- This is a big change (f:r bias ratio 1.6:1 -> 3:1) but that’s what you need in the early stages.
Fine tuning comes later – we are still squarely in the “coarse” tuning phase now.
The other planned change was assisted by another external source, this time video, the documentary embedded in the previous post (http://www.youtube.com/watch?v=meybtwmMxQY)
In it, at the 2:33-2:34 point, you see the car brake for a left-hand transitional type element. The front suspension very quickly goes from somewhat extended (on throttle) to hunkered down.
The speed at which the front suspension compresses there is a function of front damper bump forces. Spring rate comes into play to determine how *far* the suspension compresses, but not so much the rate at which it compresses.
If we recall the shock dyno for the front shocks-
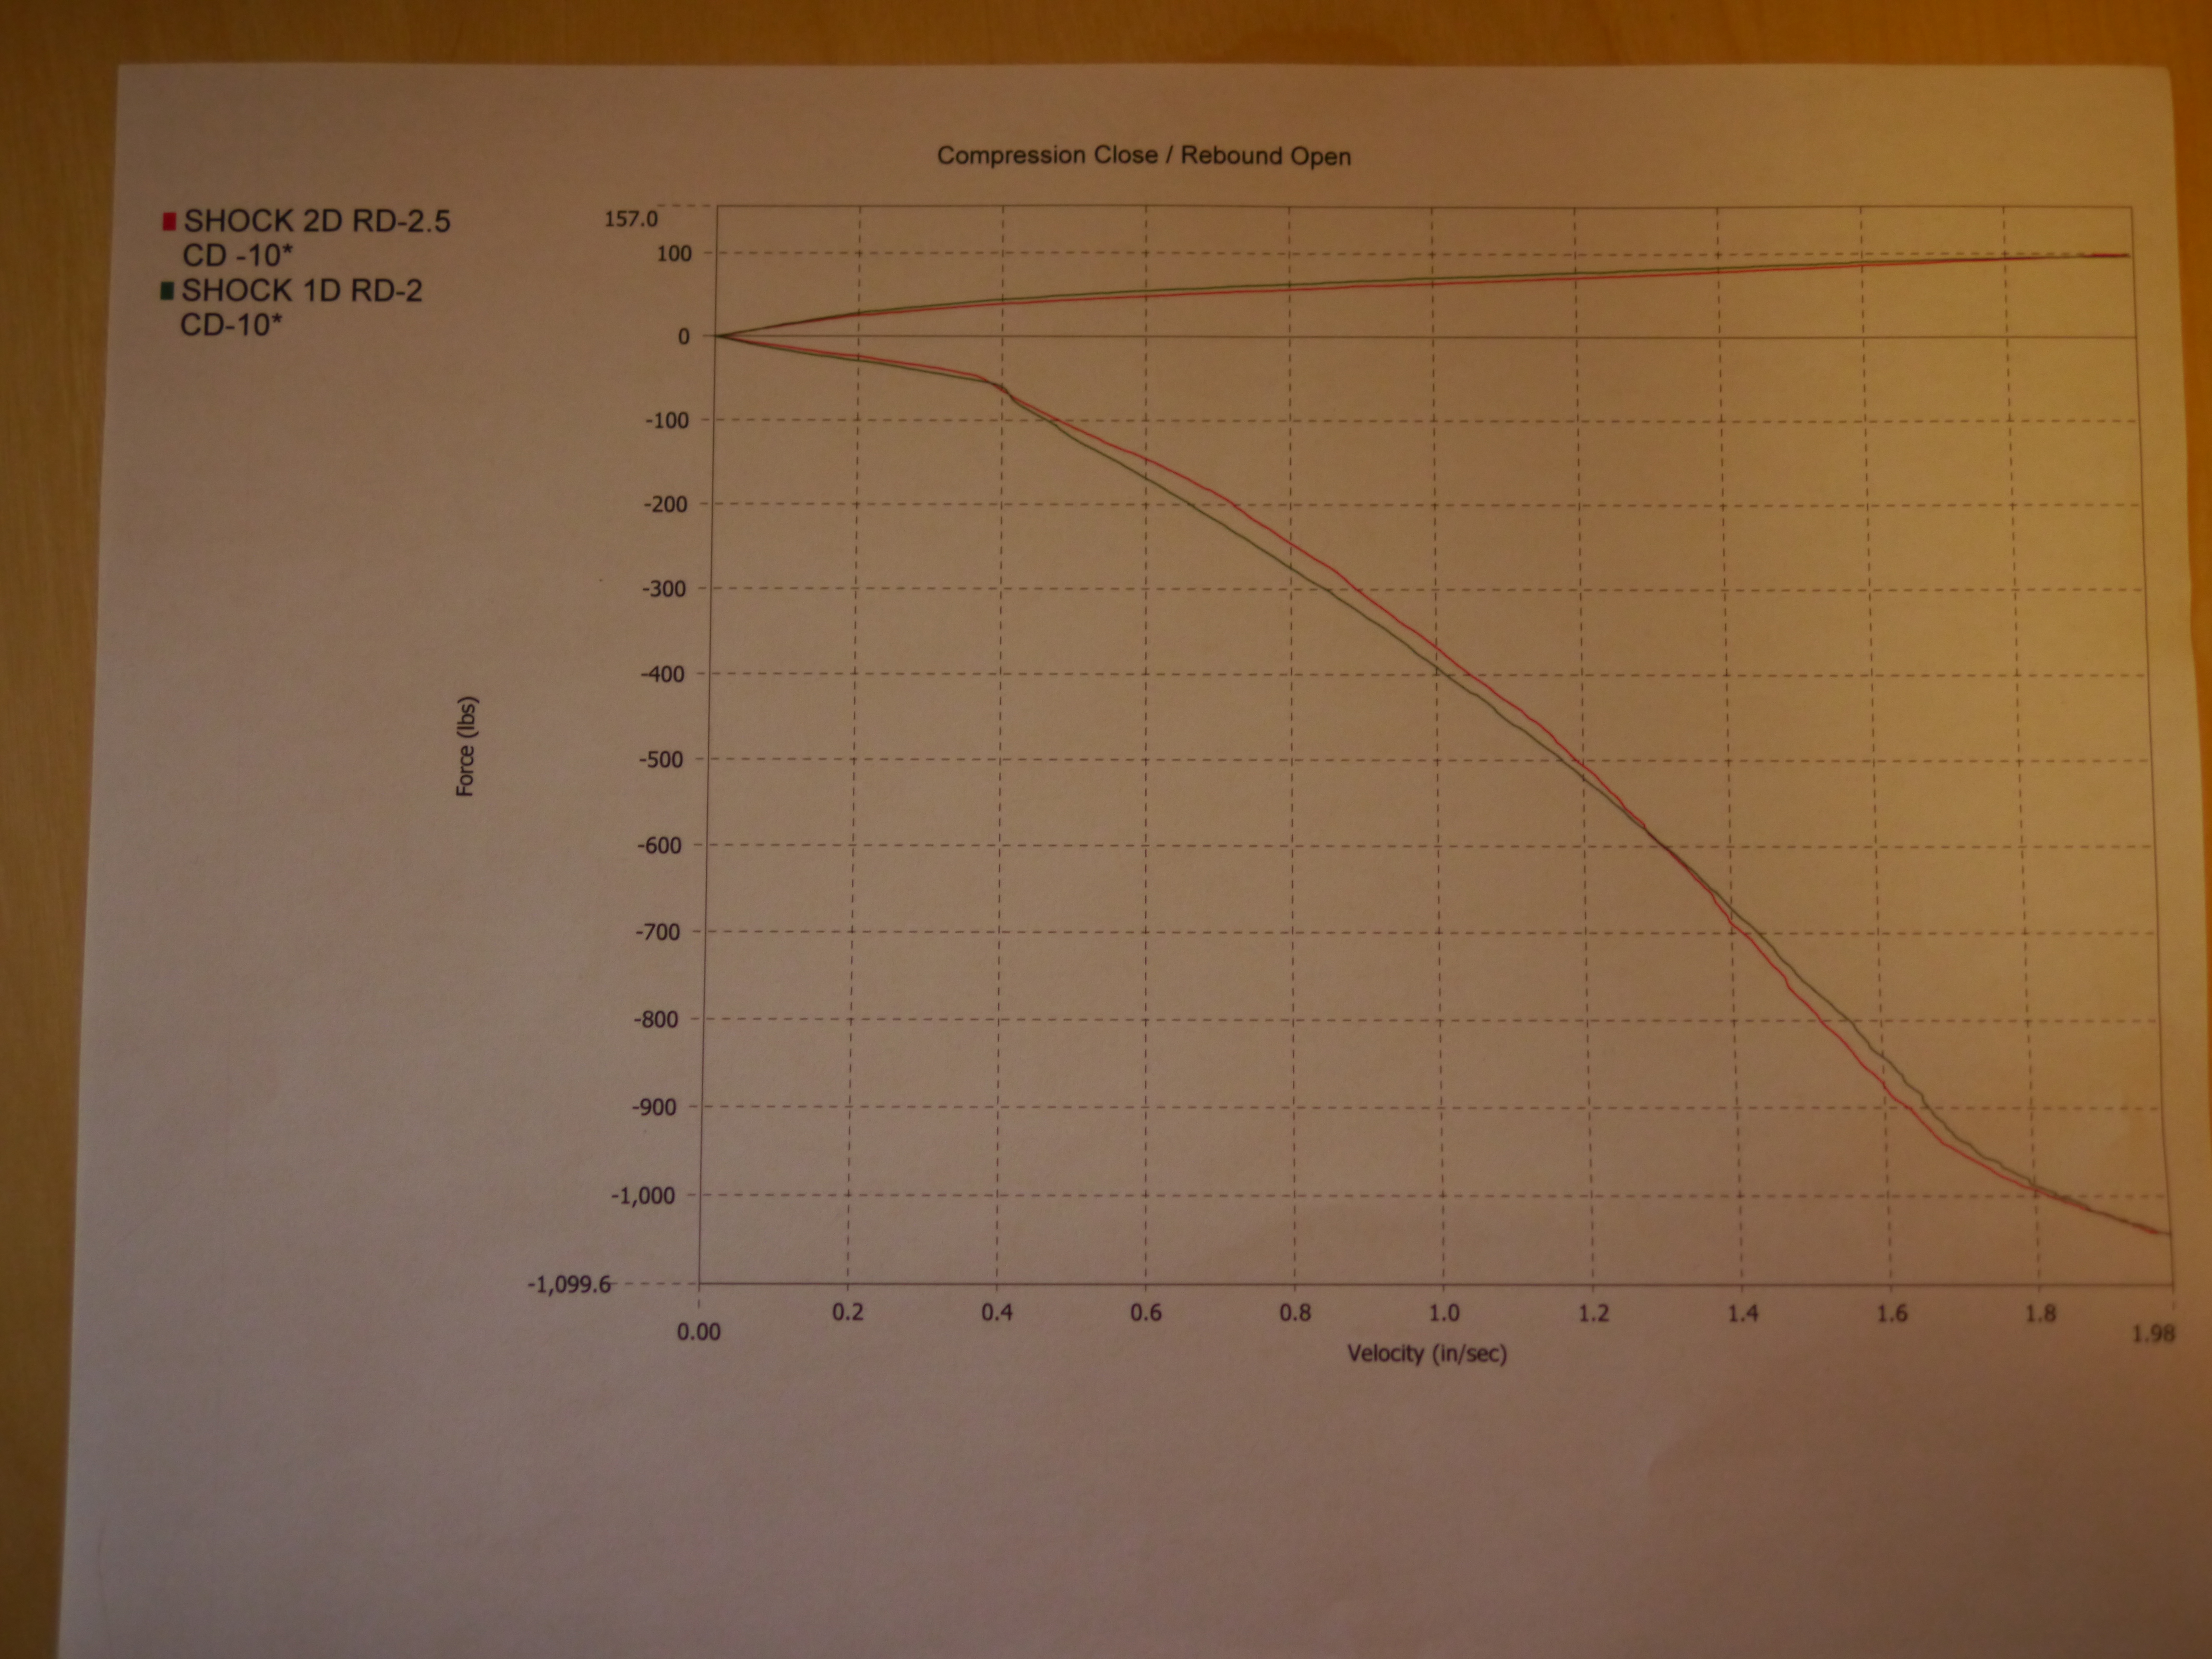
we’ll remember, they are extremely light on bump damping. The shocks are just as geometrically disadvantaged in bump as they are in rebound, where we have almost 1100lbs. @2in/sec.
The soft front bump was another dimension of the “I don’t want the car to push” sentiment that went into its initial setup.
In my experience, a car with too much front bump, won’t turn. This was mostly a problem in the old FWD Civic days (nothing FWD really likes to turn), but I found it could even be a problem on the 240sx if front bump was turned up too high on that car’s Koni 28’s.
This is maybe the first time I’ve experienced “too little” front bump. But I’m jumping ahead here – let’s look at it as a handling issue to solve:
- Even after getting the toe mostly corrected, the car feels vague at turn-in, and too loose in transitions.
- Turning under braking is deadly!
- Mid-corner (steady state) and in corner exit, the car feels great!
The mid-corner part makes me thing the spring/bar/roll center parts of the equation are *close*. Too soon to call anything perfect, but close, a lot closer than shocks.
Referencing again my favorite shock tuning guide: http://www.ozebiz.com.au/racetech/theory/shocktune1.html
The car is way too loose in phase 1 and 3 – and as rarely happens when looking to shocks, there is a change I can make there, that fixes both – more front bump! The no-free-lunch part is it should loosen the car a little in phase 3B, but maybe that’s ok, we’ll see.
The Camaro has been at full stiff for front bump since Sunday in San Diego, and could use a whole lot more. Again, part of my mantra is that no adjustment should ever be at its limit under normal circumstances, and because of the coarse nature of early tuning, I’ll be making a big change.
Front shocks will be going back to ProParts for a revalve. Rebound is good where it is, but with bump I’ll be looking for an adjustment range that puts 700lbs @2in/sec. at the midpoint. That’s about 7x the bump the front shocks have now. But keep in mind, as it relates to the actual chassis, with motion ratio accounted for, it’s about the same as having 250lbs. of bump at the rear shock, a more typical force level.
Last bit of tuning in regards to steady-state and the lateral load transfer distribution – to provide for maximum accelerative capability out of the corner, we want as much weight as possible on the inside rear tire at corner exit.
To do this, requires unloading the inside front tire completely. But you don’t want it lifting too high, or too often. This is a screen capture from the documentary video, showing the car crossing the finish line under power – it looks like it just barely for a millisecond, lifted the tire. Didn’t notice it doing it from the driver’s seat, and it only did it a tiny bit for a tiny moment, making this another indication that this combination of springs and bars is pretty close to how it should be.
Will probably be a while before I get the car back out again (also need to replace the ignition system – again) but it should be a lot better next time. Have a lot of time to make up on the rest of the STX field!
Brief documentary on the Camaro
Heyward Wagner, the SCCA’s communications director, was out at the El Toro Pro Solo last weekend. While there he put together a very nice little documentary piece on the Camaro.
Enjoy!
El Toro Pro – distributator issues but signs of promise
Didn’t have a chance to attend to the car in the week between the SD National Tour and the El Toro Pro Solo, but did manage to get the Friday off.
Arrived at El Toro around 10am Friday and got to work on the car.
The ignition system had been acting funny at the Tour, and I decided to replace all of it – the distributor, the coil, and the ignition switch, with new but identical components.
Since the car wasn’t yet running, replaced them all with it still in the trailer, which was fine for the stuff in the engine bay, but a pain to do the ignition switch – had to climb in then contort myself around and under the dash without opening the doors, to get the switch out.
Even with those replaced things weren’t quite right, and it wouldn’t be until late the next day, I’d realize it was because one of the main wiring harness plugs from the engine bay to the firewall, wasn’t snapped in all the way.
But Friday evening the car was starting and running, and while I missed out on practice starts, did get a chance to make a couple planned suspension adjustments to address the handling.
First was lowering the rear roll center.
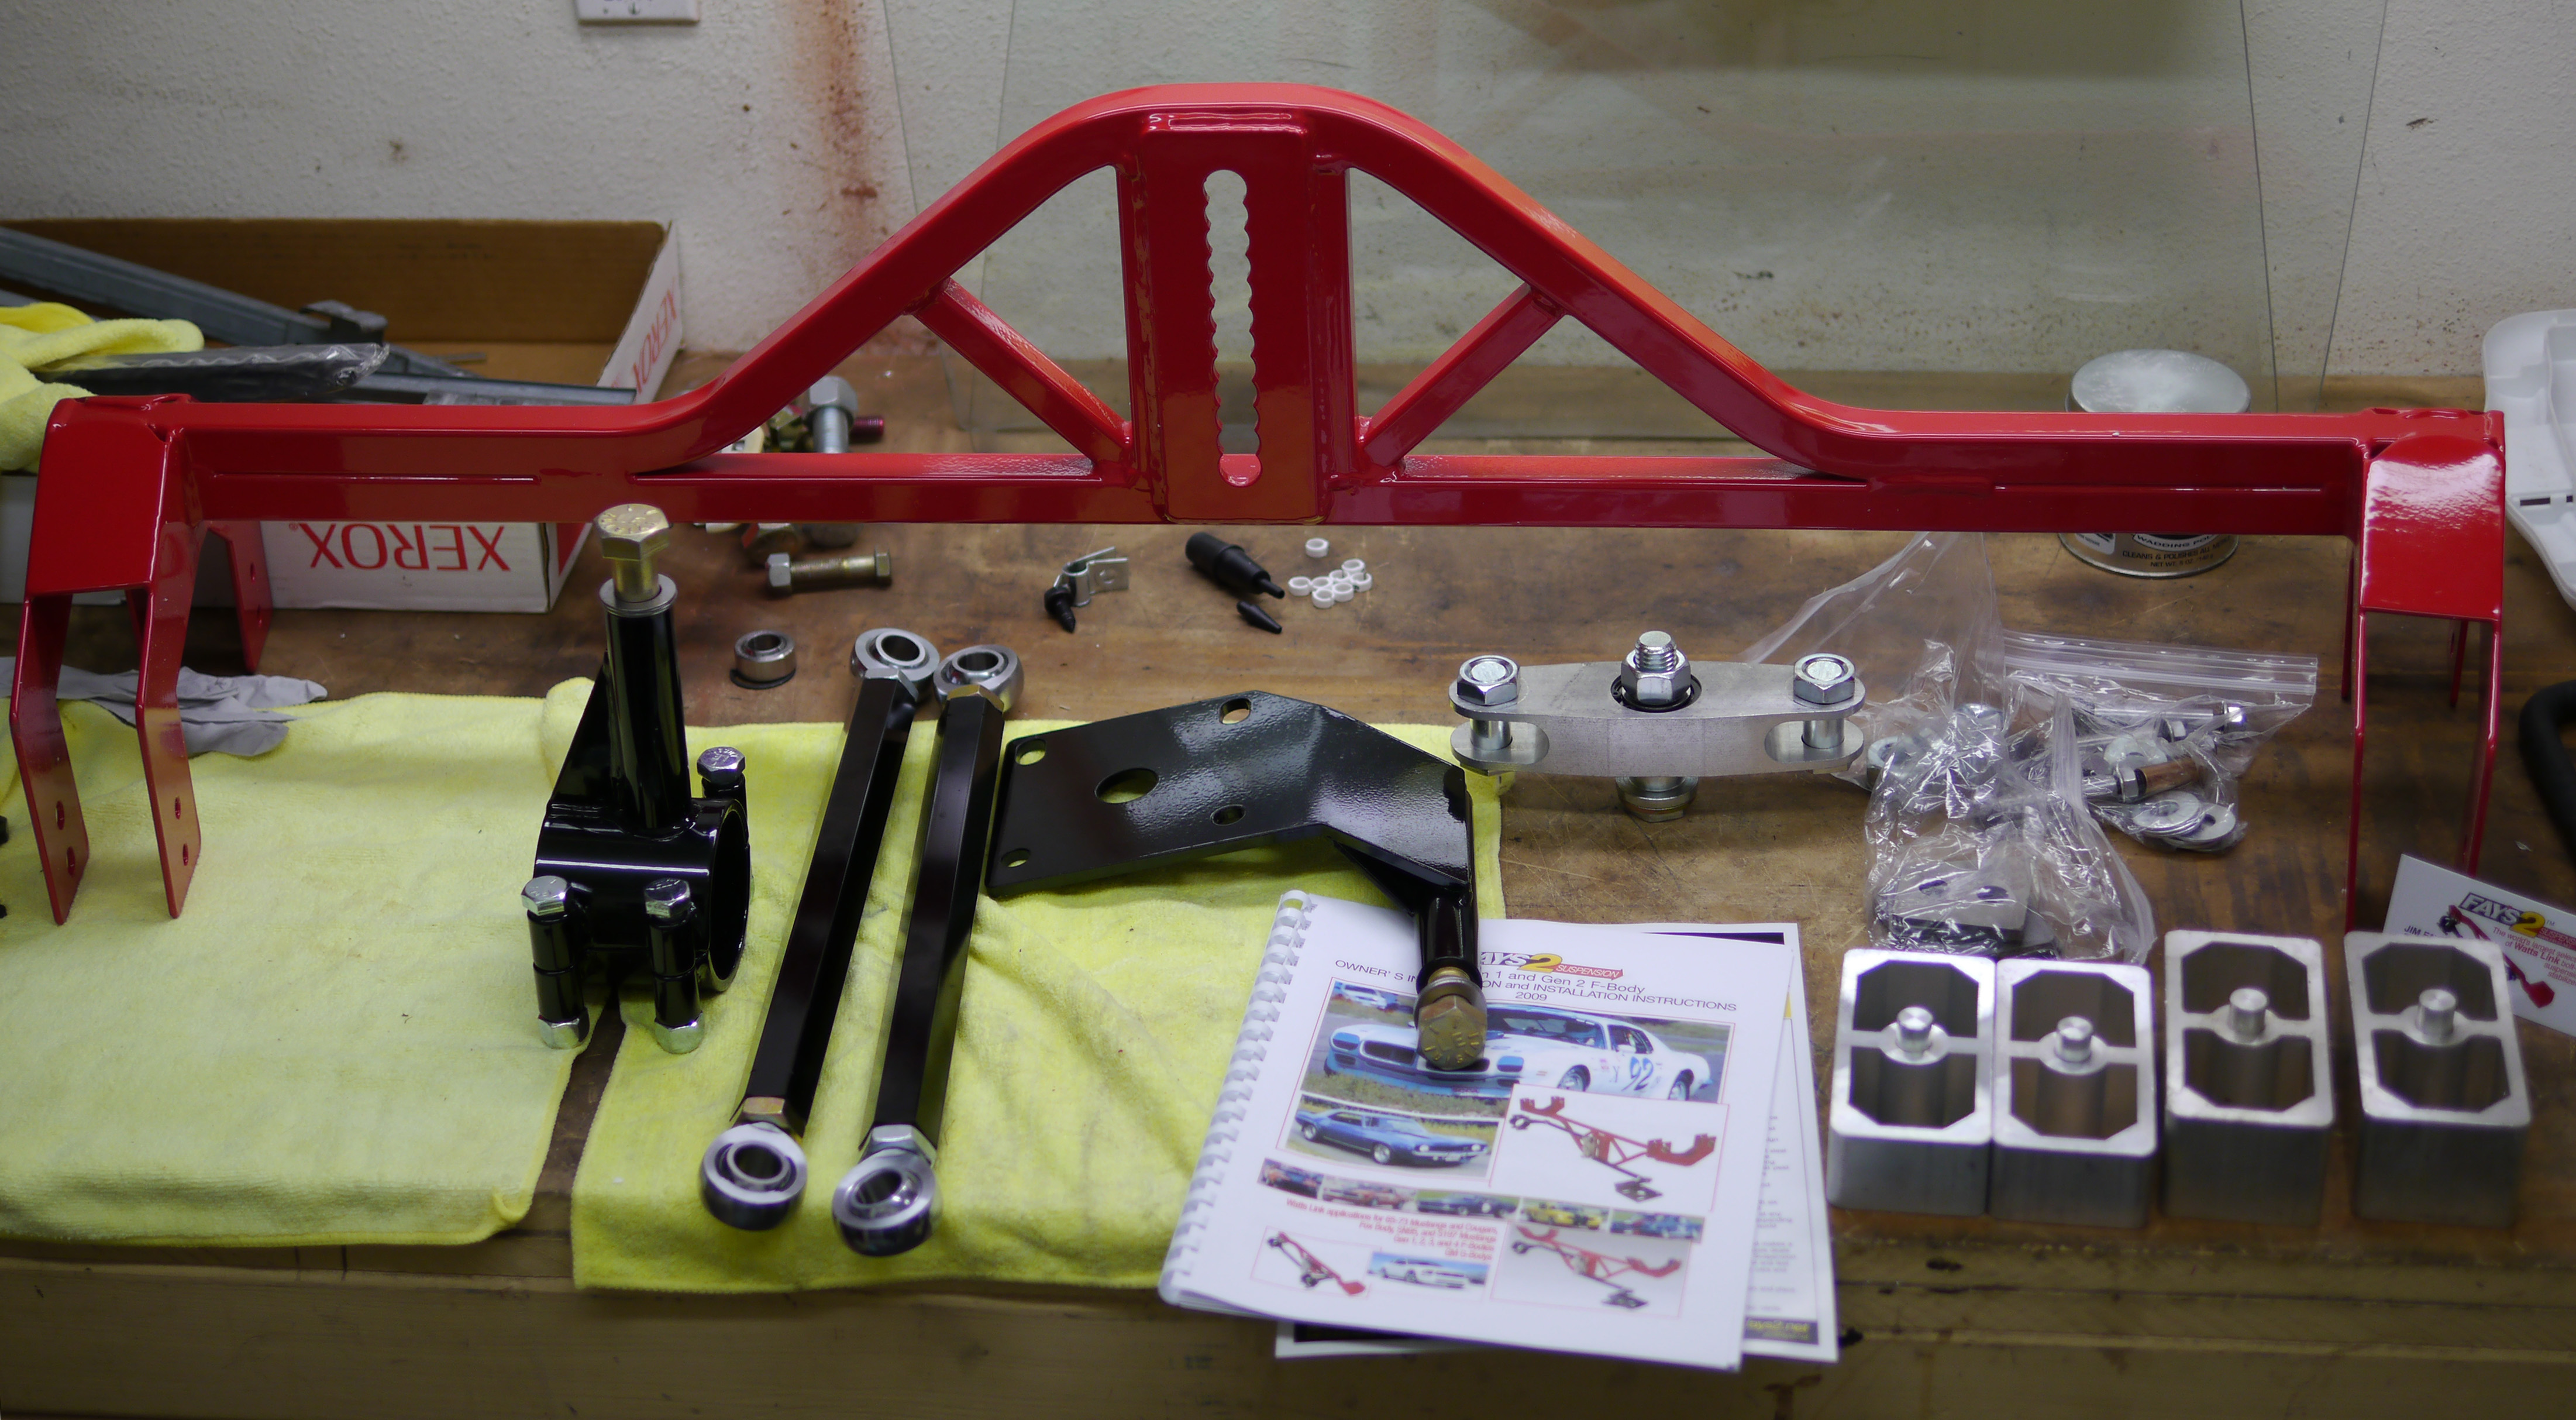
In the pic you can see there are 12 “holes” in which one can place the pivot bolt for the watts. In the interest of not having an understeering car, I’d started at hole #8 (bottom being #1, top being #12, keeping in mind this photo shows it upside-down). Not knowing how big a difference this would make, I lowered it as far as I could, to hole #2. Holes are 1/2″ apart, making that a change of rear roll center height from ~13″ to ~10″.
The second change was to a stiffer front swaybar-
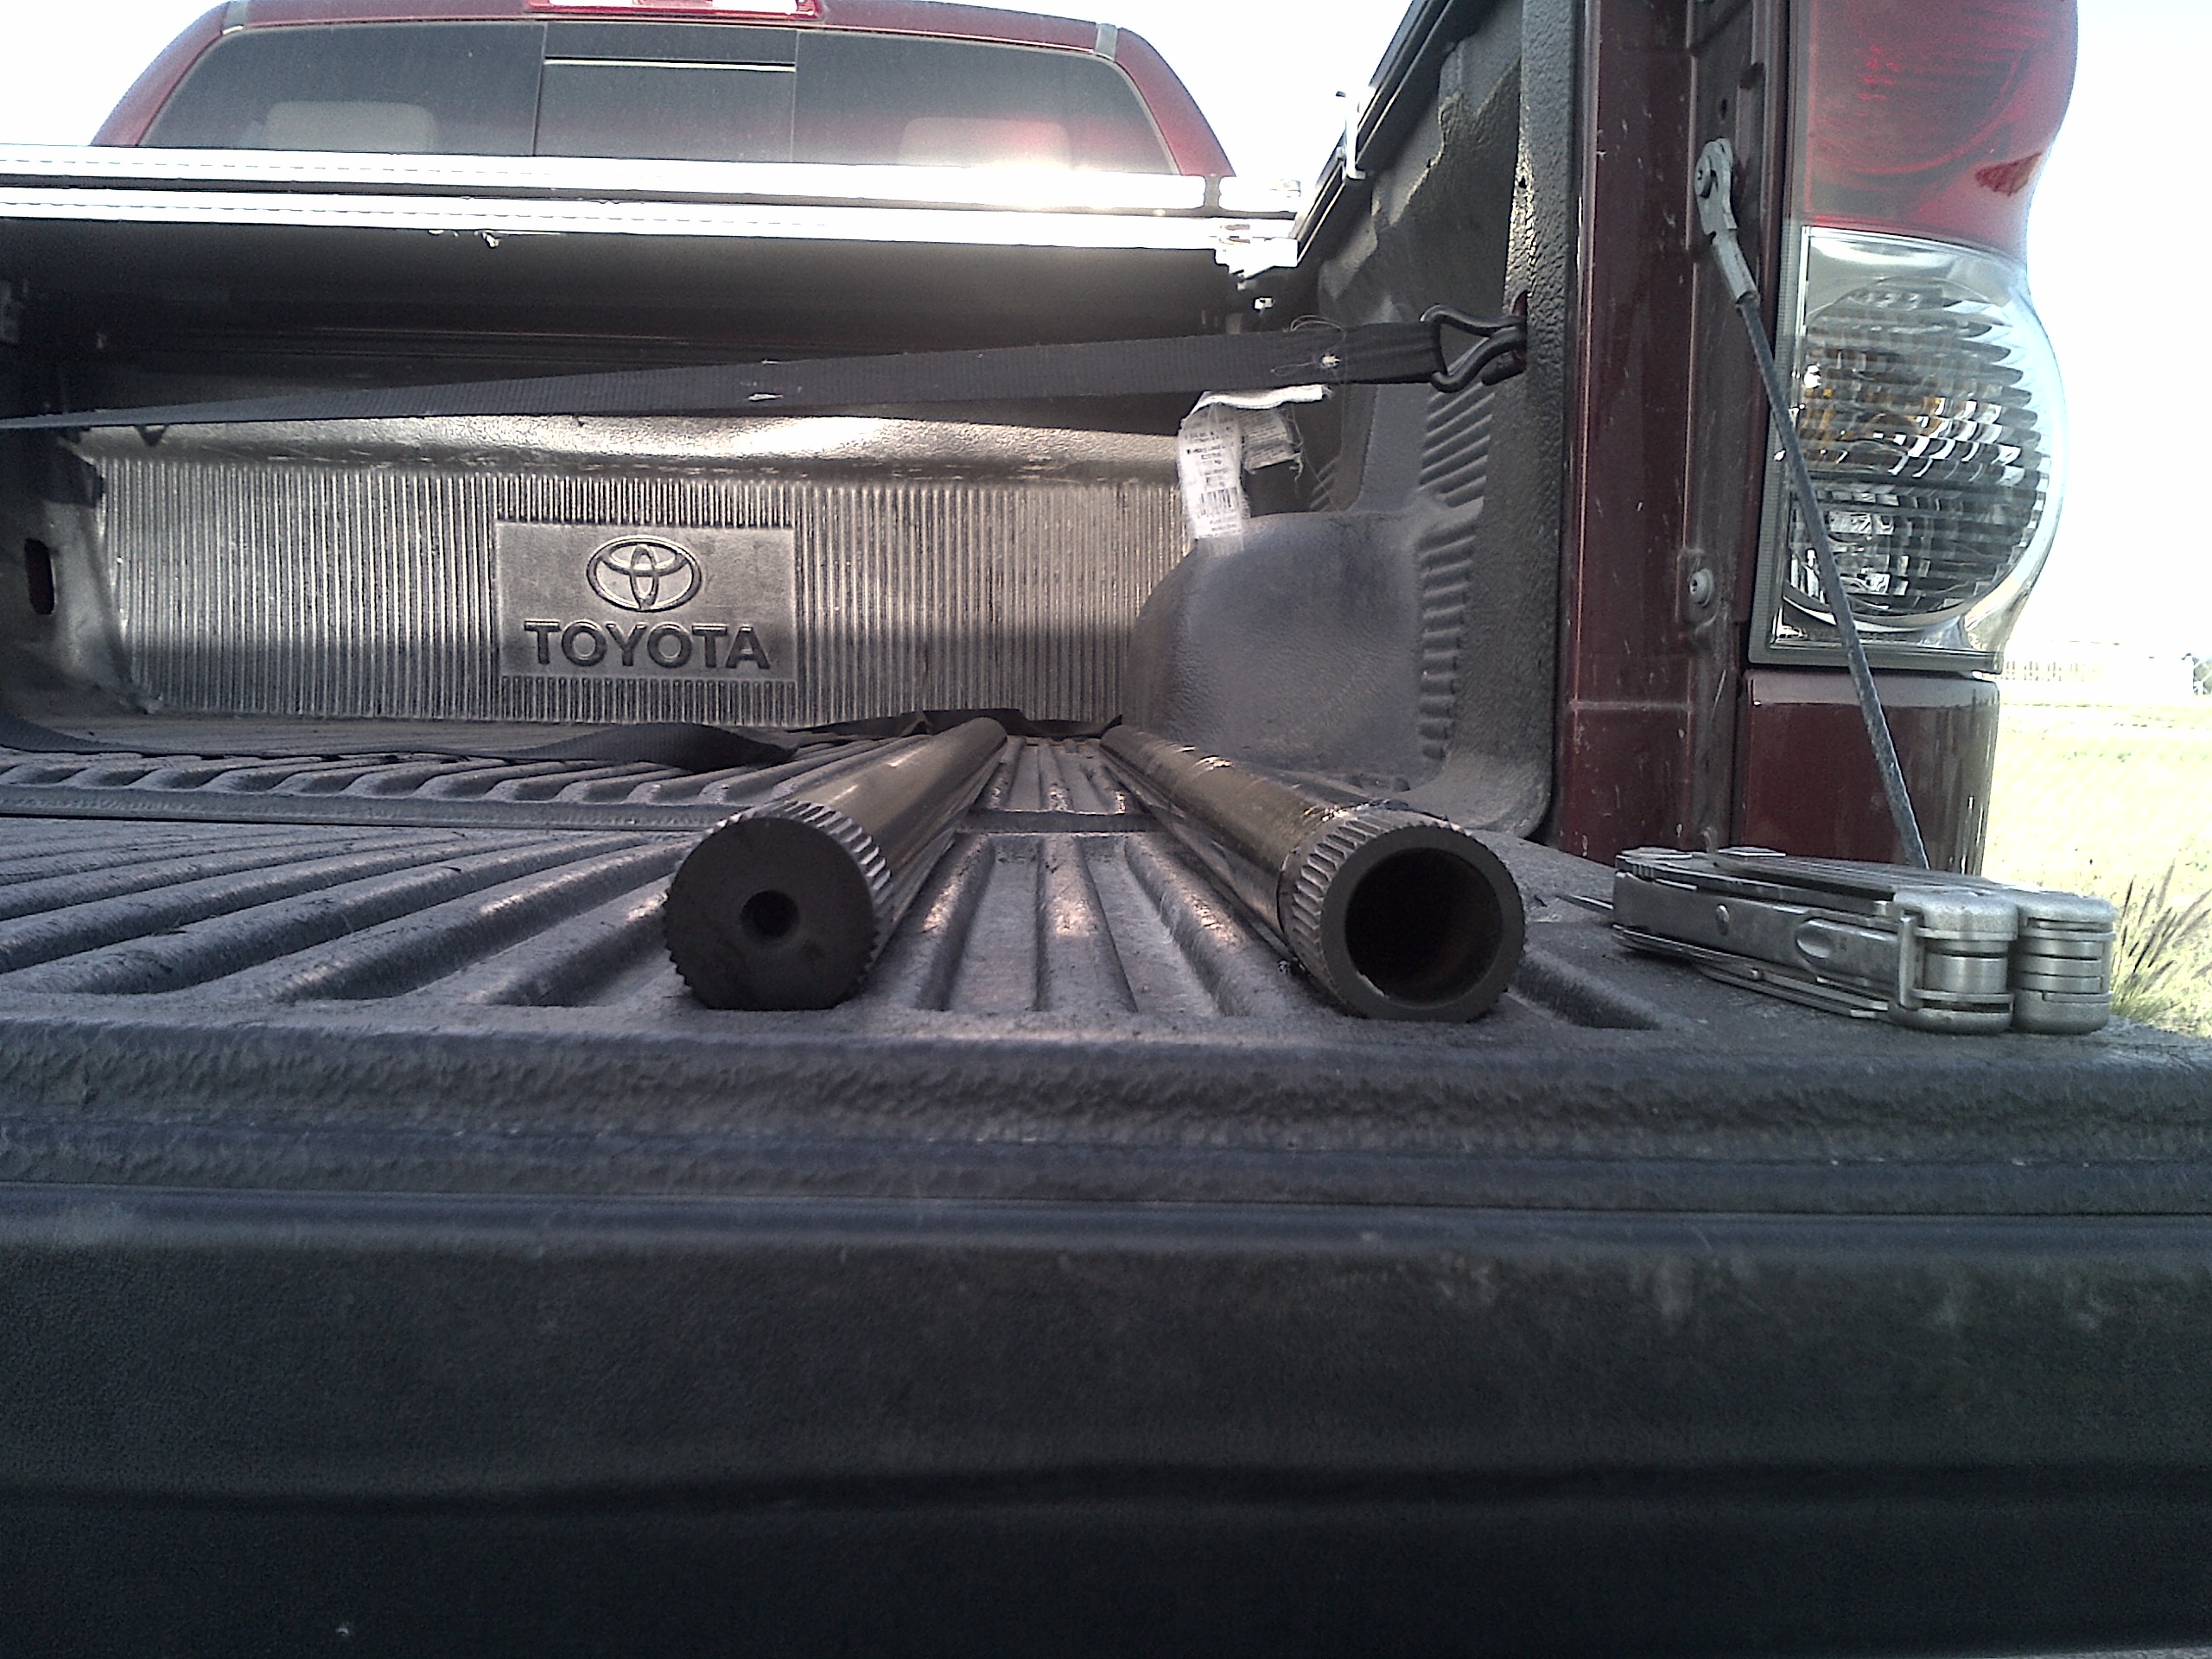
This is part of why I like modular sway bars so much – for not much $, can shift the adjustment range upwards. On the right is the old .188″ wall bar, on the left is the new solid unit, about 20% stiffer.
Saturday morning the car started fine, took off for my first run – handling felt much improved! Unfortunately, halfway through the run, the car cut out, then sputtered for a couple seconds, then shut off. Was able to coast most of the way to the finish, and some helpful folks assisted in getting it pushed to the broken car area near impound.
Hood went up and the work began, probably 11:30am.
The fuse for the ignition circuit had blown. I replaced it with a larger fuse, and it blew instantly. Hmmm.
Removed everything from the ignition circuit except for the wire to the distributor, and removed the wires from the distributor to the coil – instant blown fuse. Hmmm.
Multimeter shows near zero resistance in the distributor (the brand new one put in the day before) – fried/shorted distributor. D’oh!
Swap in the suspected bad distributor from the day before – it’s not working either. Try swapping to previous coil just in case, nope.
A kind fellow from C2 Motorsports has been helping me for hours but now has to go.
It’s now about 2:00pm.
Head to local Pep Boys, they have a couple decent high-performance distributors for a small block chevy. If it had been 1983 or 1993 instead of 2013 I probably would have had a lot more options but they had a decent looking Accel unit.
Get back to the site and work to get it put in. This one is HEI so the “head” of the distributor is bigger around – after a lot of effort I get it seated, but…it is so big, it only goes in one way, and there’s no way to “clock” it to get the initial timing where it needs to be. A little searching reveals the common mod done alongside an HEI distributor install “hammer the firewall” – not an option here.
Back to Pep Boys to return the Accel. The only other option now is OE replacement stuff. They don’t have a high-performance Z/28 dual-points distributor but they do have the single-point unit for a standard 327 or 350. It’ll have to do. I try to be thorough and be sure to leave with a new cap, rotor, and even an extra set of points.
Back at the site (probably 5:30 now), go about installing the OE stuff. Get the cap on and…duhhh, my spark plug wires aren’t going to work with this cap! The OE points-style cap is female, the wires I’d made were for a male HEI-style cap.
With the sun sinking lower in the sky, and even the worst possible ignition option still a long way off, this is probably the low point of the weekend.
At this point someone I don’t know approaches and jokes, in a great southern drawl, “I hear you got a prob’m with yer distributater?”
Just like the weekend before, the Solo community again helped me get through a tough spot, this time with a laugh.
In a desperate move to avoid the inevitable, gave the Mallory distributor used at the SD Tour another try – nope, it didn’t magically fix itself.
About 6:45pm now.
So back to Pep Boys yet again (this was actually trip #4 that day, since I stopped by on my way up for some detailing products) – this time for spark plug wires and a crimping tool. Had these things at home, but that was far away and it was still a little light out.
Back to the site before sundown, get the points distributor in and cap on. I notice there’s a little window on the side of the cap that can slide open – I ask Gary Thomason what it’s for – “it’s for adjusting the dwell”. DWELL?!?!?! Oh man, like I have the tools, much less the know-how, to adjust dwell. This junk is going to have to run as it came out of the box.
Around 8:30pm as I’m trying to make spark plug wires on the passenger seat of the truck by its crummy interior light, Thomason suggests it might be easier to make them at home. With the El Toro gate closing at 10pm, figure there’s no way I’m getting it running tonight, and decide he’s right.
Once at home, with a nice ratcheting crimper and good lights, I get the wires made and get to sleep by 11:30pm.
Up at 4:30 and back to the site by 6:05am-
Not happy about having left the car out overnight, but not much choice.
Get to work installing the newly made spark plug wires, which are all way too long. Then it’s time to get initial timing set, which takes a while. The distributor is geared off the crankshaft, but it is also keyed to the oil pump, but I eventually work out a technique, not having my oil pump rotation tool, to rotate it to allow for moving the distributor around till the timing is close. Along the way the car starts and runs (poorly) with 90 degrees of advance!
Steve O’Blenes comes by and saves my butt for the second weekend in a row, making the coil tower wire (which I forgot needed an HEI style plug at one end) and helps me get the engine idling and timed with his fancy test kit (since I now have no tach signal from this distributor).
Eventually I get it around to 20 degrees of initial advance which it likes a lot, and leave it there. Free-revving up high with the vacuum detatched and plugged, it looks to advance to 37 total, which should be ok.
So I drive it back to my regular paddock spot, probably 9:30am now, cars have started running.
Thomason is checking rear toe on his Viper…since he’s got the equipment handy we check front toe on the Camaro. I’d eyeballed it as “toed out” but never measured properly.
1″ out! Oops.
With some STX cars already headed to grid I jack up each front corner and toe them in a bit. Not very scientific in the amount but it should be closer. Steering link threads are very coarse.
Car is a little finicky to start but eventually it does, and make it to grid in time. On the way there, steering feels much more normal now with toe settings slightly less ridiculous.
Leave it idling, lest it be snotty and not want to restart. A few things combine to make starting difficult – some of it is all the ignition advance it wants. Another is when the car’s been run a while, the headers heat-soak the starter, making it more difficult to turn. When it’s really hot, the fuel in the carb and lines gets hot too.
Eventually we get our chance to run. Starting on the right side, and pretty much right away I experience the “natural rev limiter” brought on by the points ignition. It feels like it starts sputtering by 5000rpm (about 48mph) and wouldn’t rev at all over 55-5600. Can’t really tell without the tach. Low and midrange felt softer too.
At least I got a run in!
Left side went a little bit better – video here (158MB):
First left-side run at El Toro Pro Solo
I was going light on the throttle in the high rpm sections (which was most of the course), not sure what the ignition issue might be doing to the engine. With a little heat in the tires and the rubber-coated surface of a clean Sunday morning ProSolo course, the grip felt great. In the middle of the turnaround the thought, “Oh $#%! Hope that oil pan is doing its job!” popped in my head – the car was actually cornering well – and on exit it got even better! Could use practically full throttle on the way out. Granted I may have been down 50-100hp but it felt great! It was still loose on entry and a bit sloppy-loose in transitions, but wow, what an improvement!
Second right side run I tried going to third gear in two spots to keep the car accelerating above its sucky 55-ish terminal velocity. With the close-ratio 4 speed the car actually accelerated well in third, but with basically zero experience shifting this car in any situation and no good feel for where each gear is, the downshifts were awkward, and the car seemed extra-loose transitionally without the second gear engine braking. Still managed to drop time with an awful run.
Last run on the left side had a horrible light and launch, but I pushed the car a little harder and decided to keep it floored in second gear even as it kept popping and sputtering at high RPM. Stupid points would be coming out right after this anyway. The run was going really well – a little brake-induced oopsie into the turnaround, and a little hot into the slalom, but then it all went to pieces in the right-hander afterwards (142MB):
Second left-side run at El Toro Pro Solo
In looking at the data from that run, it would have been about a second faster than the first, taking away the horrible launch and up until the spin. I didn’t countersteer as far as I could in the spin’s initial slide, after damaging one of my upper control arms (which will necessitate replacement of one of the SPC arm’s segments) saving a spin at the SD Tour.
In impound the car drew quite a crowd. Why now?! I was so embarrassed by the ugly blue spark plug wires strewn all about, most 2′ too long, held in with ugly untrimmed zip ties. Oh well.
Since I worked so hard on the car I’m giving myself a temporary pardon from the crime of stacking excuses and woulda-coulda-shoulda’s, so – if you figure that could have been a mid-high 50.x run, and it was only my second complete lap on that side, things look pretty good. The leaders were mostly in the 50’s in their first couple runs on that side Saturday morning. I’m still quite a ways from having the handling sorted, and the car was *way* down on power, which actually did have a cost on this course, even if it did maybe make it easier to drive. Plus my own driving isn’t that good, still a bit rusty, and need time to adapt to a car.
I feel strongly that this car, at full power, with the handling better sorted, current-generation tires, and me driving well (not to mention getting all 6 tries at each course!), would have been competitive at this event.
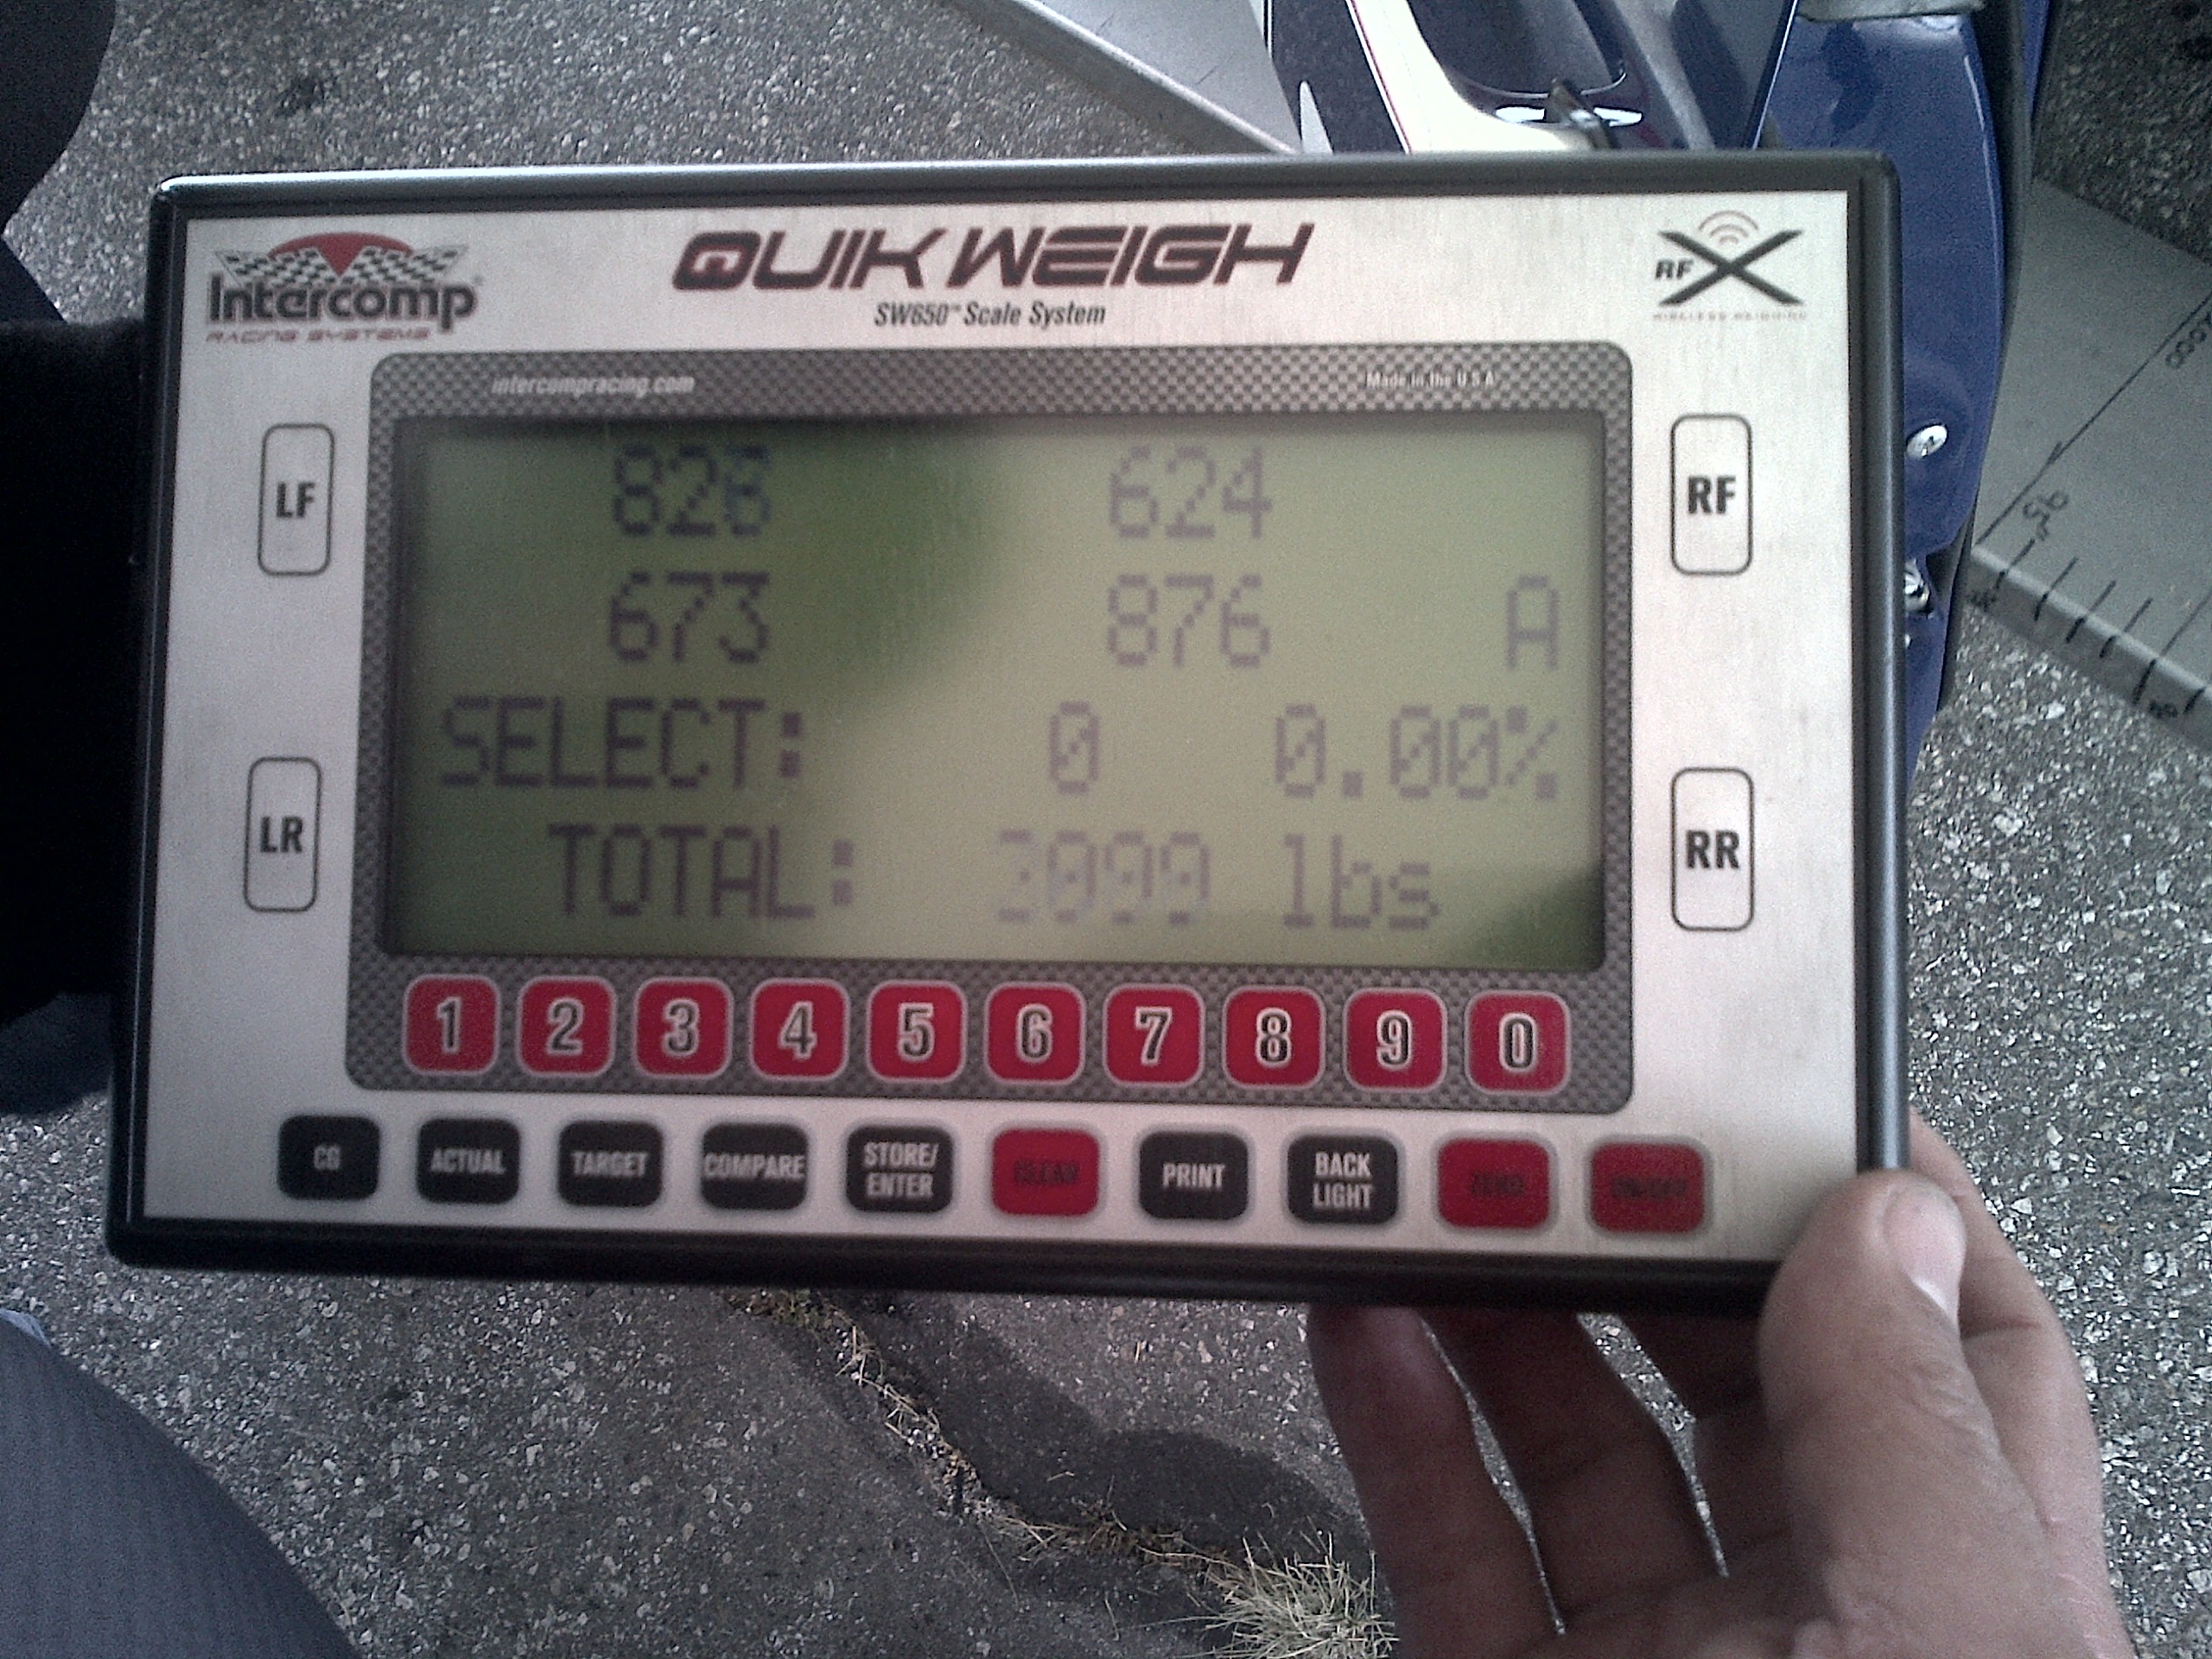
Oh, one final bit of optimism – got the car on the scales after my runs. While the below looks like a corner-balancing shop’s dream, in reality the scales had just come back from being under the Berry’s broken SM Evo, and weren’t put back in the right places – so, the 8xx weights are fronts, 6xxs are rears. The scale location isn’t leveled so corner weights would be way off anyway, but f/r and total should be right.
Total was flickering between 2999 and 3000 – yay! That is 9-10 pounds lighter than I’d estimated (3009) based on published curb weights and component part weight deltas. More nose-heavy than I’d like but I’ll take that over being heavy everywhere.
Pretty much the only weight the car could lose from here is in the back – the lighter battery could be about 35lbs. saved, and if the car can be run lower on fuel, that could be a lot, depending on how much lower. It was completely full for Saturday morning (18 gallon tank) so it probably still had 15-16 gallons in it at time of measure. If it were like a Viper or Corvette that could run down to just a few drops in the tank, this thing could see a potential Nationals race weight of 3000 – 35 (battery) – (14 gal x 6.25 lb/gal = 87.5lbs) = 2877lbs. Of course it isn’t, and conventional wisdom says you have to run a full tank in these things, so it’s not likely to ever get anywhere near 2900 in competition.
Compared to my old STS 240sx, this is about 130lbs. heavier at each front corner, but only about 40lbs. heavier on each rear corner.
Still, I’m pleased with the result, and this answers one of the big questions from early on in the build. Seen staunch estimates from people convinced it would weigh 2700lbs, and others convinced there’s no way it could get below 3300. As often happens, the truth lied somewhere in the middle… 🙂
2013 San Diego National Tour / Test & Tune
An SCCA National Tour is a big event, lots of people from all over come out, usually on fresh tires and stuff, bringing their best to see how they stack up against some of the competition they’re likely to see at the National Championships later that year.
Tours are a 2-day events, 3 runs per day. Not a place to get some extra runs in for practice. Generally not the best place to debut a car.
So of course, that’s what I did. They kindly have a sort of test-and-tune the Friday before, but I didn’t make that either, working on the car up until 4pm or so that Friday.
Thankfully, it held together.
At least, mostly…will get to that later….
First things last – results were terrible. Myself and the car were extremely slow…much slower than I thought. Averaged about 5 seconds per day off the pace.
When I first built the 240sx for STS, ran it once stock, with just some used Falkens (then an ok tire) and was about 4 seconds off the pace. Granted, the 240sx was a rather well-balanced and neutral car from the factory, whereas the Camaro is awful, but in this case, I am an extra second back, and the car already has everything done to it!
There are a few explanations (excuses, perhaps) that might help make the outlook appear less awful than it otherwise might-
- The car really only had about 20 miles on it going into the event. The engine had been broken in on the dyno but everything else – rear end, transmission, steering, brakes – were all either rebuilt or new. This had me being a little more conservative than otherwise.
- The car was too loud for SD so sound meter shenanigan-erry impacted the times somewhat.
- I am on a previous-generation tire, the Yokohama AD08, the competition was on Dunlop Z2. Not sure how much difference that makes, possibly only a tenth or two, possibly more.
- I have not driven competitively on street tires in a long long time. Last year at the El Toro ProSolo I ran Michael Heinitz’s car on street tires, and ended up running about a second off his times (on a shorter ProSolo course) – which means I was probably giving up 1.5-2 seconds just not driving well (more on that later too). I take a while to adapt to a car and get fast in it. Took me 3 years in the Viper!
- The initial setup was way off (let’s get to that now!)
Almost every picture I’ve EVER seen of a first gen Camaro going around a corner, the outside front tire is unhappy at terminal roll. Remember these?

I wasn’t going to let that be me!
Taking it further, people think “wheel perpendicular to the surface” is an ideal, but in my experience it’s not, especially with street tires, due to carcass (and even wheel) deformation under load. So I gave the car a lot of negative camber up front – minus six degrees. Now, the tables were turned, and instead of me thinking everybody has too little negative camber, now everybody approached me to remark on how much negative camber I had. They couldn’t believe minus 6!
Another thing I’ve heard, is the cars always understeer. This makes sense too, because of how bad the geometry is, and how people tend to run so little front tire. Easy to fit a lot of rear tire, and while a leaf sprung live axle isn’t winning any engineering awards these days (or even in the 60’s), at least it doesn’t put the outside tire on its outer sidewall in a corner. Guys have to sell their souls to make the cars turn.
Not gonna let that be me!
Car got relatively stiff rear springs, and I’d set initial position of the watts link center pivot rather high. The pivot point determines the rear roll center, and having a high rear roll center means the linkages are taking a lot of the roll moment instead of the springs, which makes it roll less, and shifts the balance towards oversteer.
So, the good news is, I was able to put together a first-gen Camaro that doesn’t understeer! 🙂 The bad news is it was extremely “loose” as we say, wanting to kill me with just about every (admittedly not as smooth as they could be) steering input.
It didn’t really occur to me while running, how loose the car was. It wasn’t until I saw my in-car video on Saturday that it became clear how bad it was. Between days I softened the rear shocks considerably (which were set where they were when shipped – full stiff on all 4 settings) – taking them from basically 30/30 to 3/30 on each of the adjustments. The reduced axle control did produce some axle tramp on Sunday so I’ll have to get some of it put back in, especially for the ProSolo launch.
Below is a link to a Sunday run video – the file is rather large, but I don’t feel like giving Youtube the rights to it, so you’ll have to download from me (~183MB):
Video: Jason Rhoades STX Camaro sdTourDay2Run2
The quality isn’t bad, but not perfect either – the camera is mounted to the passenger seat which shakes a little – ran the video through some stabilization software that makes it less dizzying, but also makes the video appear a bit foggy IMO. Will work on better securing that seat.
Very happy with camera position though. I feel it is extremely important to be able to see the driver’s input in a car video, and this spot picks up not just wheel (most crucial) but also pedals, which is neat. If the camera had been in one of the traditionally useless places like on the roof or the hood, it would be much less obvious from the video, how loose the car was.
All this said, a good pile of excuses that adds up to three, maybe four seconds. Finding that fifth second is going to take some kind of real breakthrough, hope I can find it at some point.
###
Continuing the story of the weekend, the car made it through Saturday fine. Jonathan Lugod brought a serious big nylock nut after first or second runs that day, saying someone thinks this fell off your car while on course – it didn’t occur to me at the time but it did later, I had dropped that nut inside the front crossmember while fastening the rear bolts for the front lower control arms. I fell into an impossible chasm there (at which point I just went and got another one), and the motions of autocross must have worked it loose!
Saturday night I didn’t disconnect the battery, and something in the system drained it down to 11 volts. This was bad, was barely able to get it started, then kept it running through first two runs Sunday.
Coming in from my second run, discovered the passenger side header bolts had worked their way loose. Apparently this is a common problem with new header installs. I have some fancy “Stage 8” fasteners on there with locking tabs that keep the bolts from rotating, but unfortunately hadn’t had a chance to put the tabs in yet, so they were all quite loose. Shut the car off to tighten them…and then couldn’t get it restarted. Some of that is heat soak – especially with headers, these cars are notoriously hard to start once the starter solenoid gets hot. It was really disappointing, as I was starting to get a feel for the car, loose as it was (download the video above if you haven’t already).
This is where I start thanking a long list of folks – several tried to help get it bump-started – Jeff Cawthorne, Steve O’Blenes, Charlie Davis, and probably a few others I didn’t see. It was fruitless, so Charlie let me run his BMW (huge thanks Charlie!!) as his co-driver Bryan Heitkotter couldn’t make it today.
Hadn’t driven an STX 325 before, and this was a huge opportunity – to experience the car that the leader from day 1 was in, the same car that won Nationals the year before, and was my main competition. It was also a lot of fun! The car was very well balanced, power was “okay”, overall it didn’t have any faults. Made me realize even more, how badly the Camaro had been trying to kill me with ridiculous oversteer…
Dropped almost three seconds with that one run in Charlie’s car. Still 1.5 seconds back from the day’s (and overall) leader Jeff Stuart’s time…which shows again how much I am leaving on the table as a driver at this point. Jeff was a ways back from Bryan on day 1 but felt day 2 would have been much closer.
After the run group finished several people helped me work on diagnosing an ignition issue that seemed to develop somewhere that day – this just goes to show you how awesome and helpful the SCCA autocross community is!
- KJ Christopher, who lent me electrical tools and wires, not to mention many electrons charging up the car’s battery, and my now-depleted jump pack
- Eric Clements, who help the voltmeter on some potentially zappy things while I turned the engine over in troubleshooting
- Fred and his wife Alexandra Zust, who helped me push and ratchet the very heavy car up into the trailer on a warm day. Also to the other fellow helping whose name I didn’t catch.
Thanks to all of you, you guys all rock!!
Have a lot of planned changes in mind to implement for next weekend, the El Toro ProSolo. The increased grip provided by the surface there should make the car tend towards understeer a touch, but I’ll be lowering the rear roll center and increasing front swaybar stiffness anyway. Need to put some more rear shock damping in to tame the axle tramp, which you can hear in a couple places in the video.
Last thought here is just on how much fun this thing is to drive. It is going to teach me throttle (and brake!) control like I haven’t needed since running Gary Thomason’s SM2 Corvette in 2005. There are some similarities – obviously this is a lot less powerful, but the power:grip ratios feel somewhat similar in that overaggressive application of throttle (the sort of move that would be perfectly fine in any other ST category car) zings the back tires in a way that makes you think you’re either out of gear or have a badly slipping clutch. If we ever get a good ProSolo launch surface the thing will be an ANIMAL! 🙂