STR partial progress
The Z is still several weeks away from being road-worthy but some progress has been made.
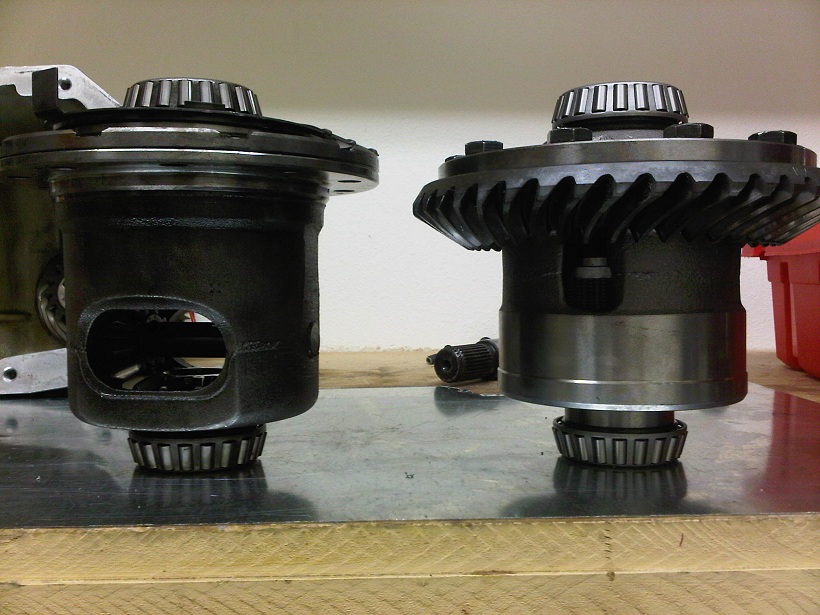
Started work at the rear of the car – got the diff carrier out and on the workbench. Here it is with the factory viscous freshly popped out, alongside the new Quaife.
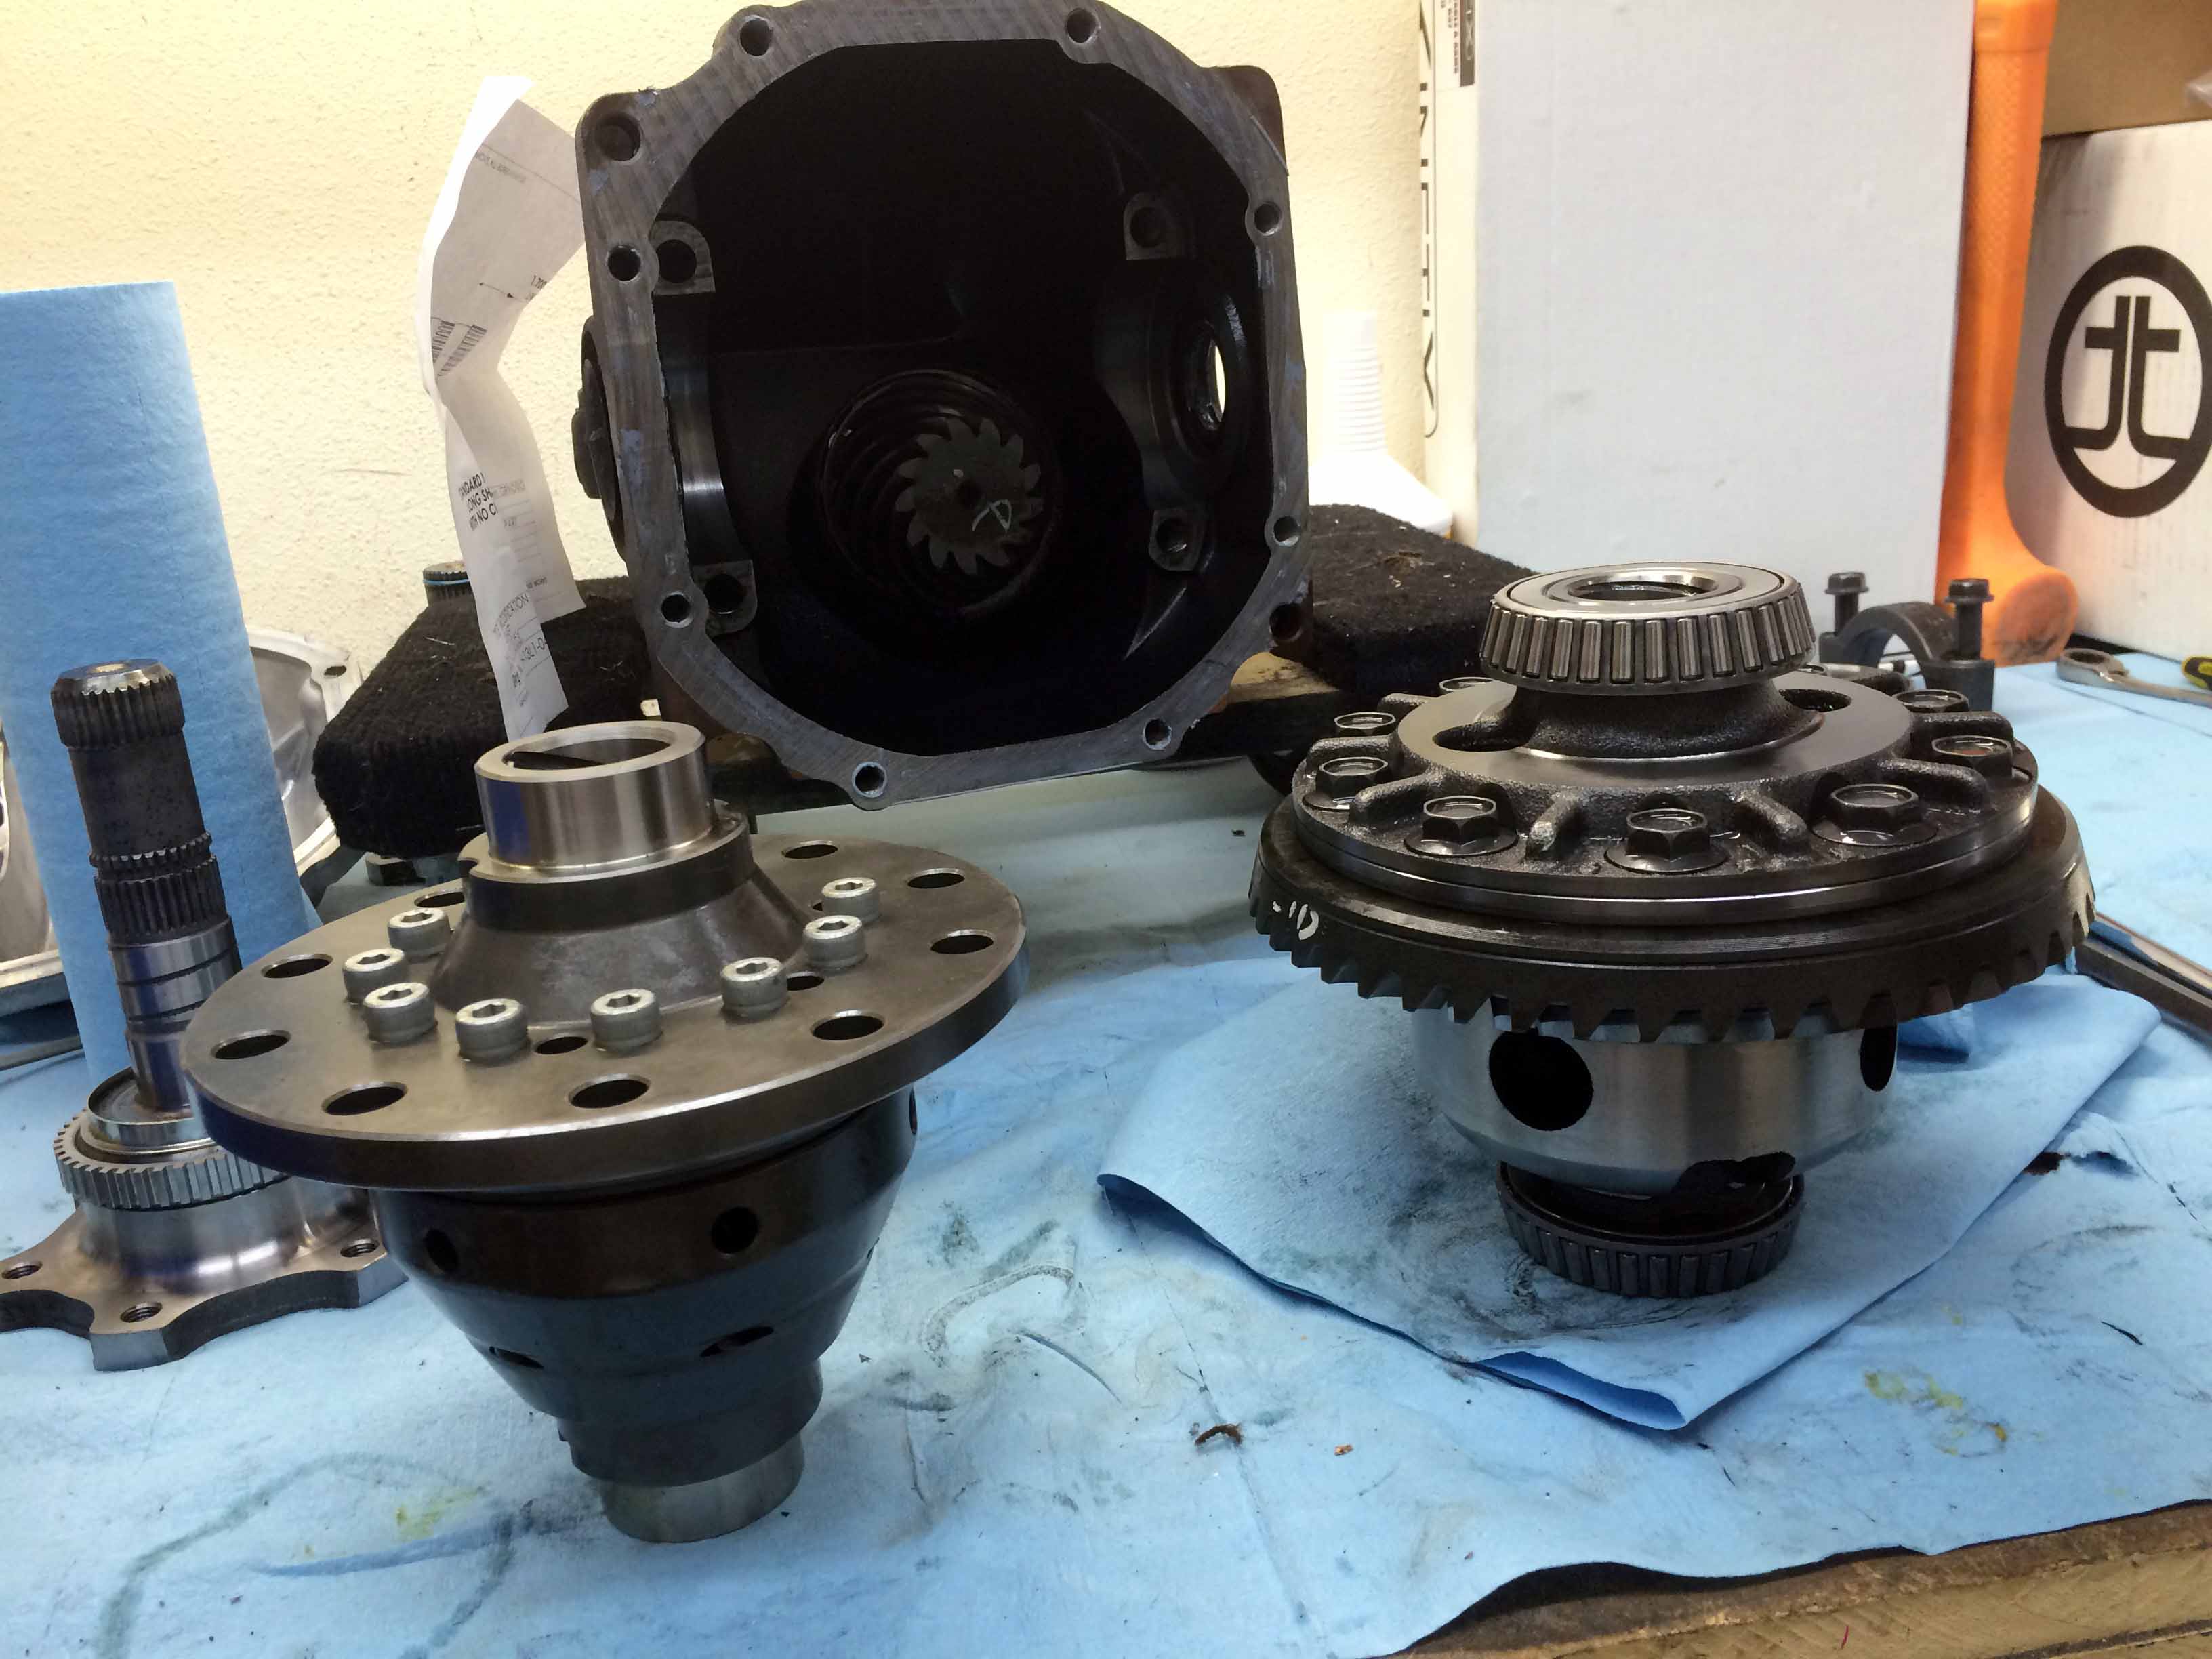
I must be getting weak, that thing felt a lot heavier than I remember the R200 in the 240 being. 🙁 The Viper’s rear (which I had in and out many times) was aluminum, definitely not as heavy as this thing despite having to handle 2x the torque.
Oh well, maybe a sign it’s time to get back to the gym!
From there, work continued with removal of half the rear suspension:
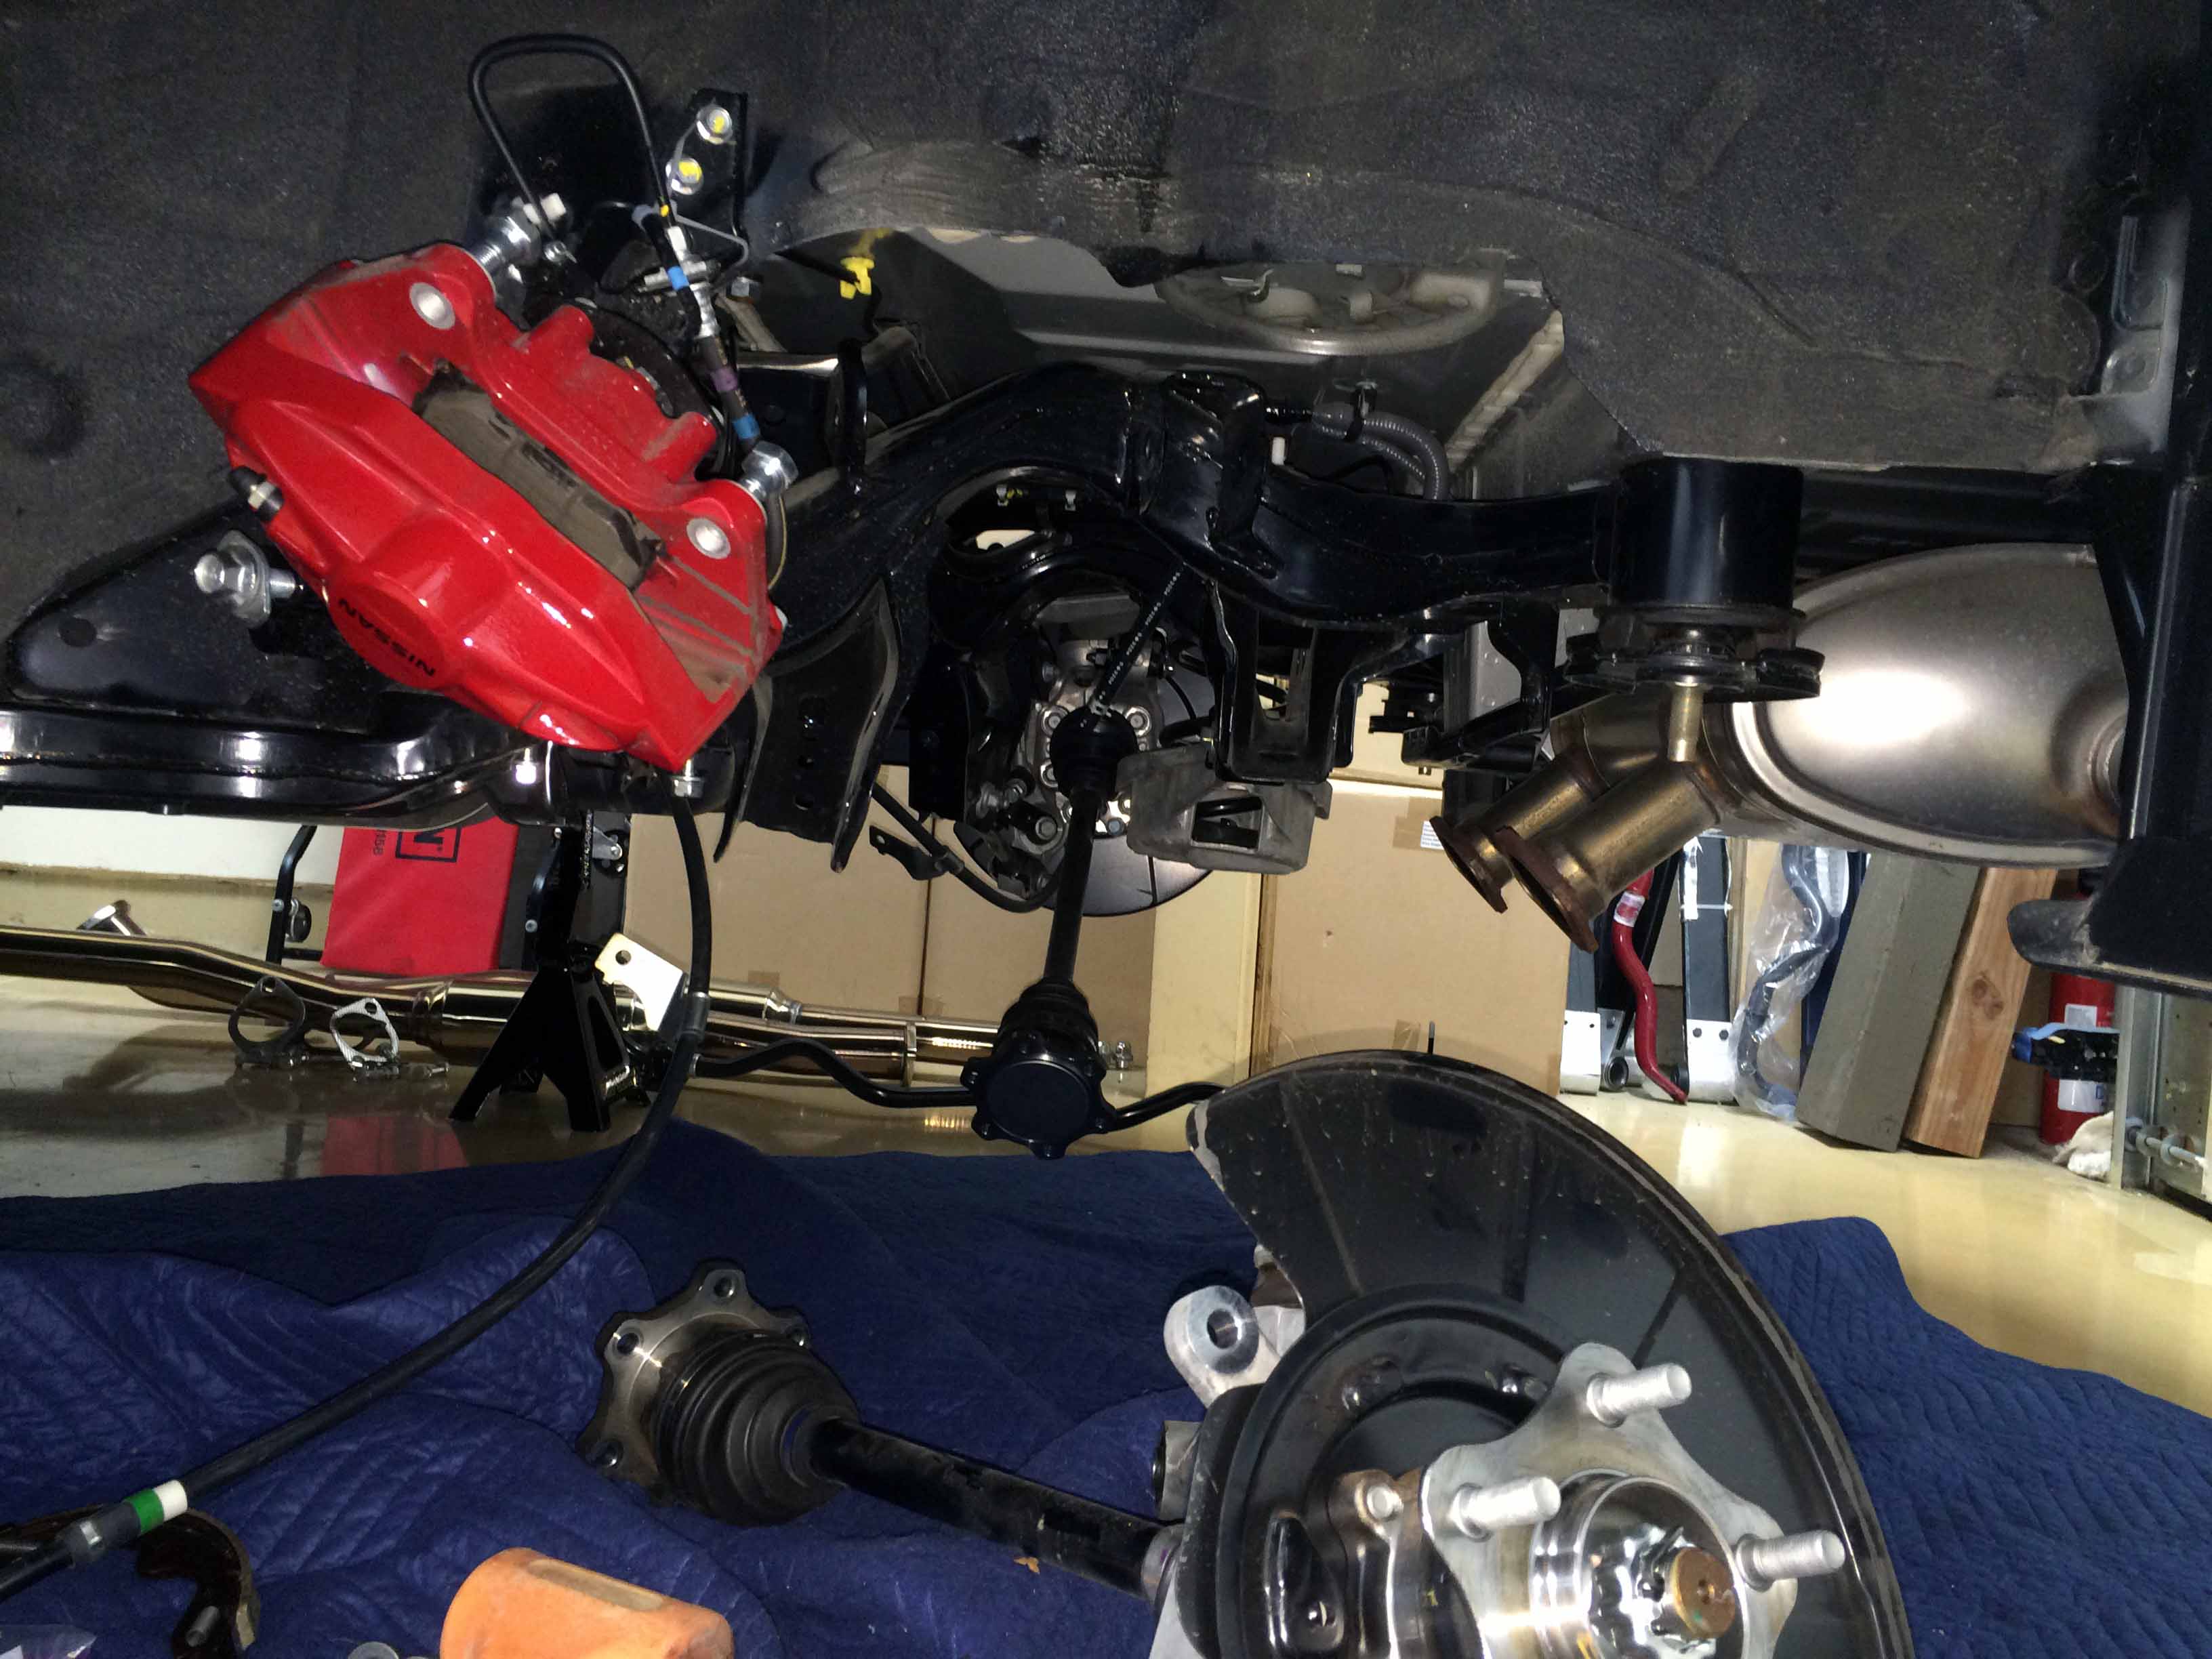
And then the rest of it from the other side:
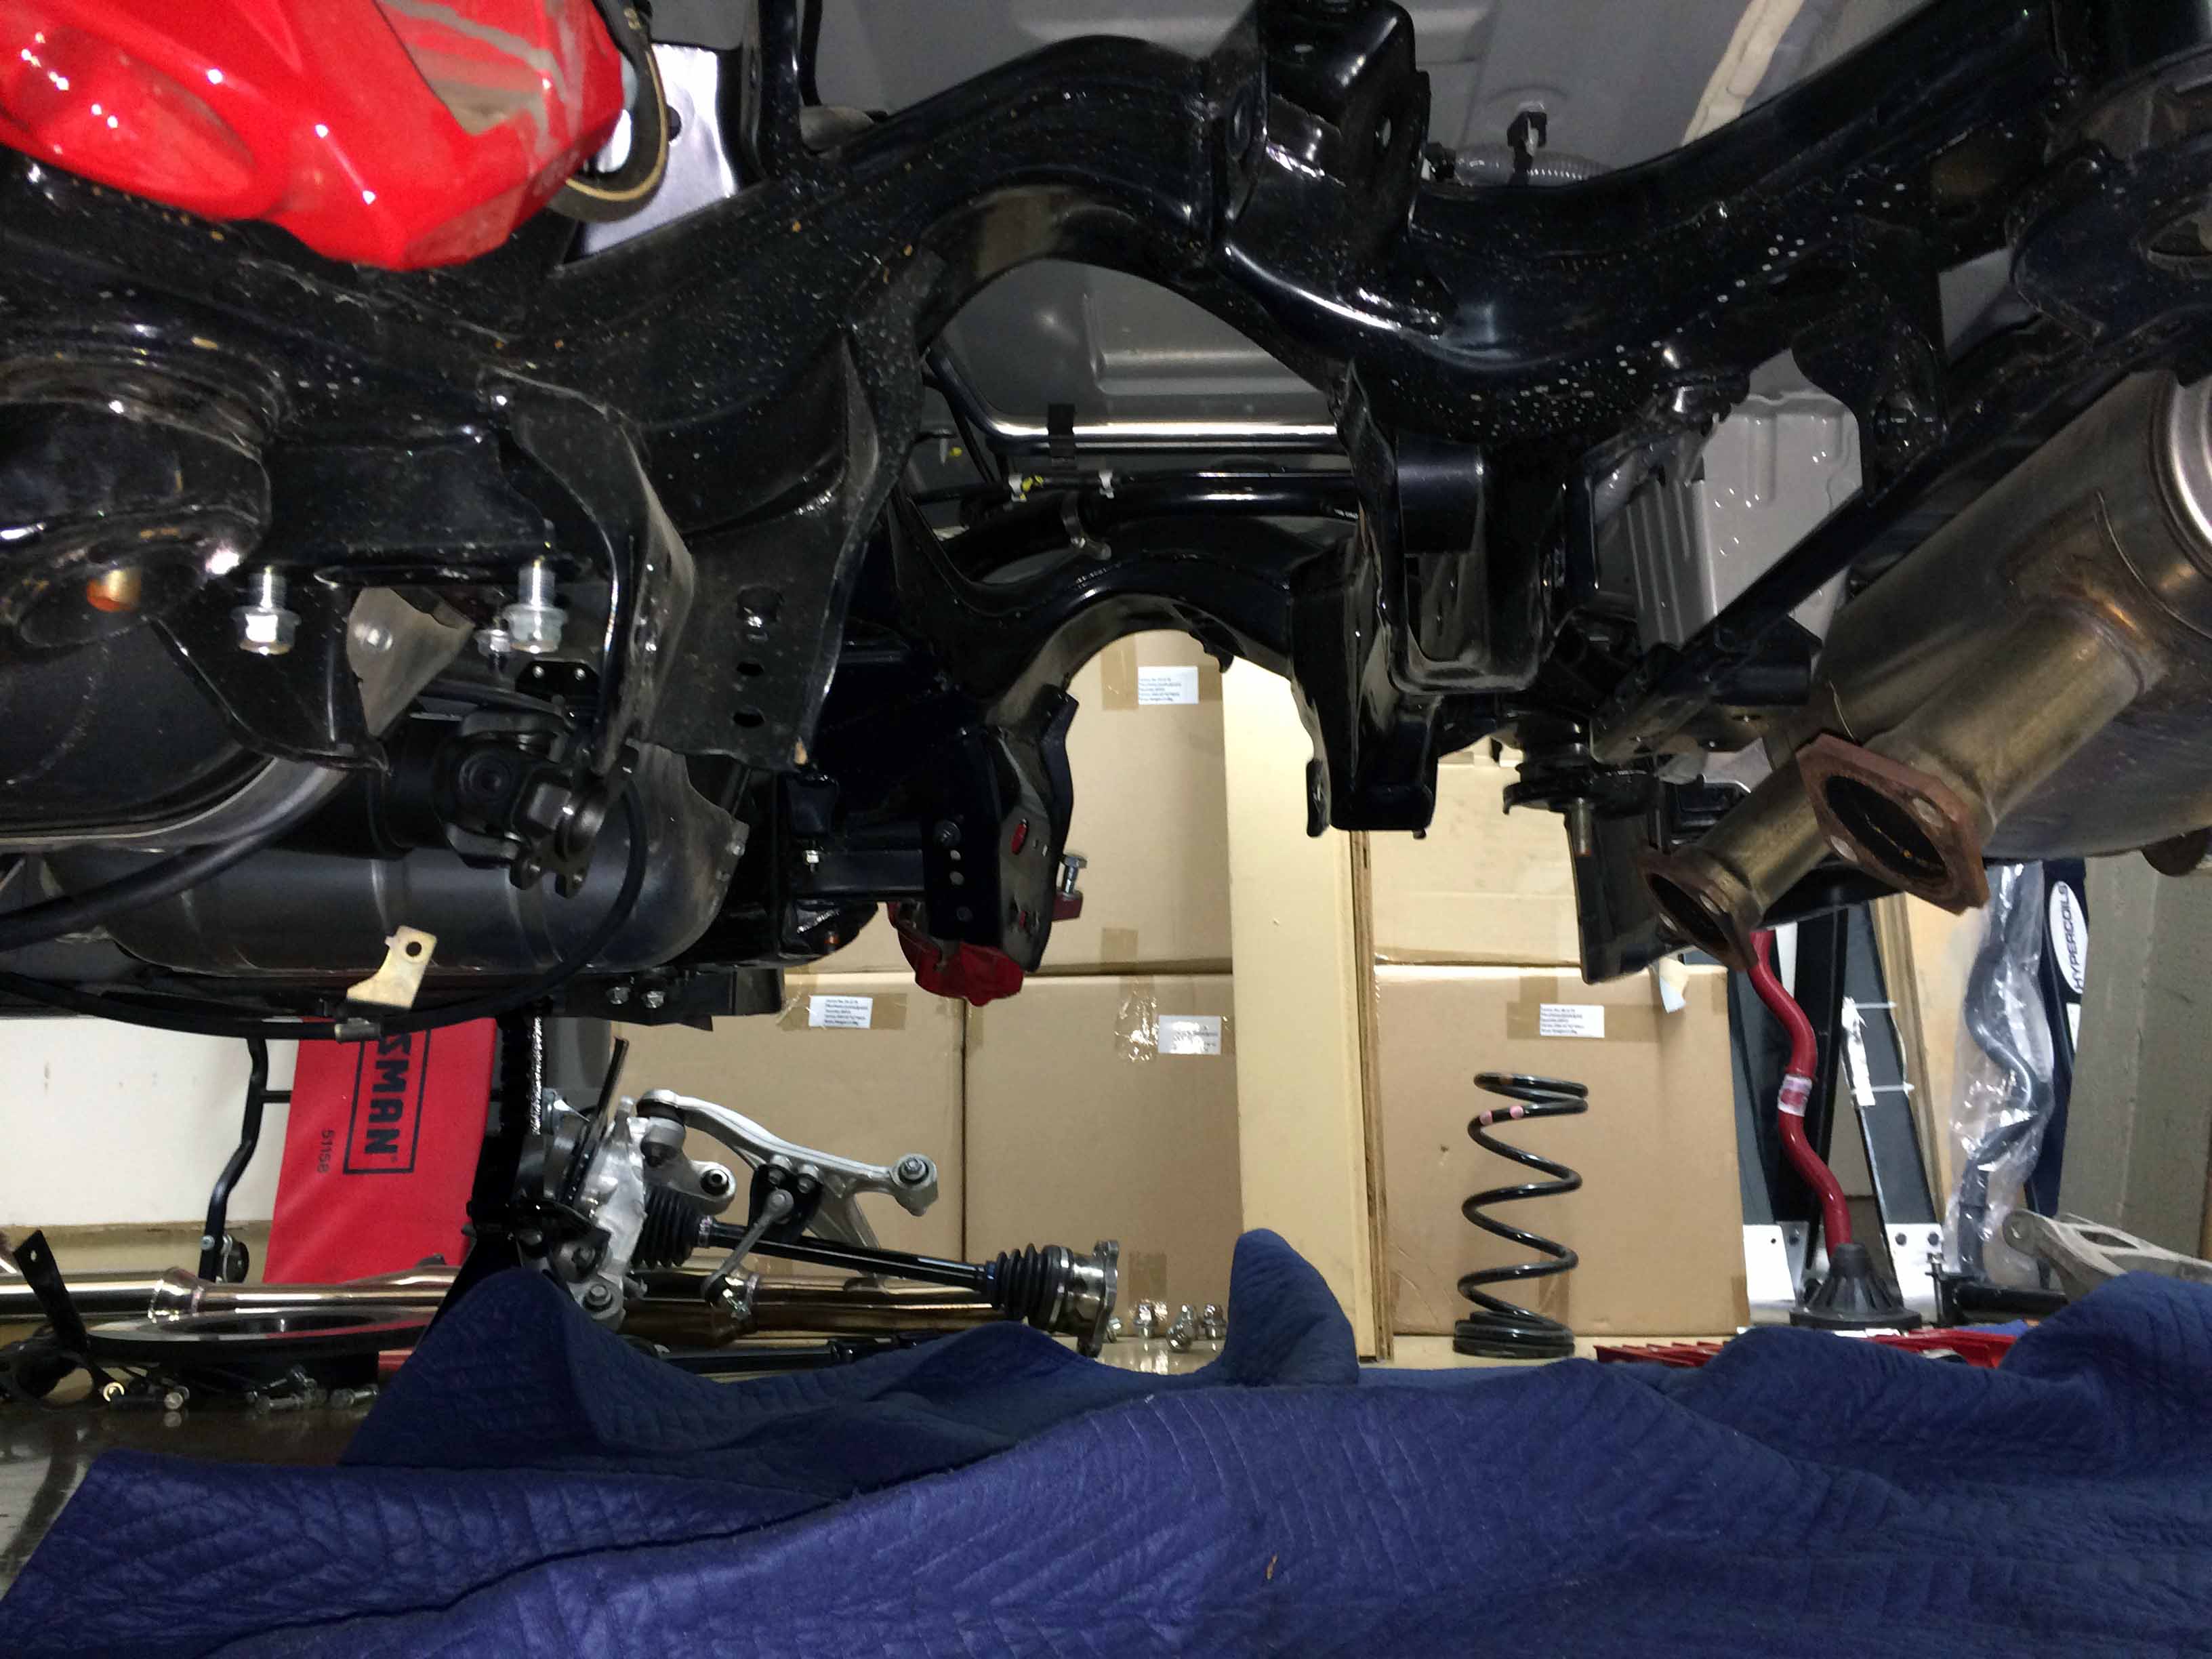
With the suspension all out, removal of the rear subframe is pretty straightforward. Just have to undo a few plastic connectors for the rear ABS sensors and it comes out with 4 bolts.
Although it is steel, there’s not much to it, bet it doesn’t weigh more than 30-40 pounds.
Here’s the subframe and a few other bits on their way out for “processing”:
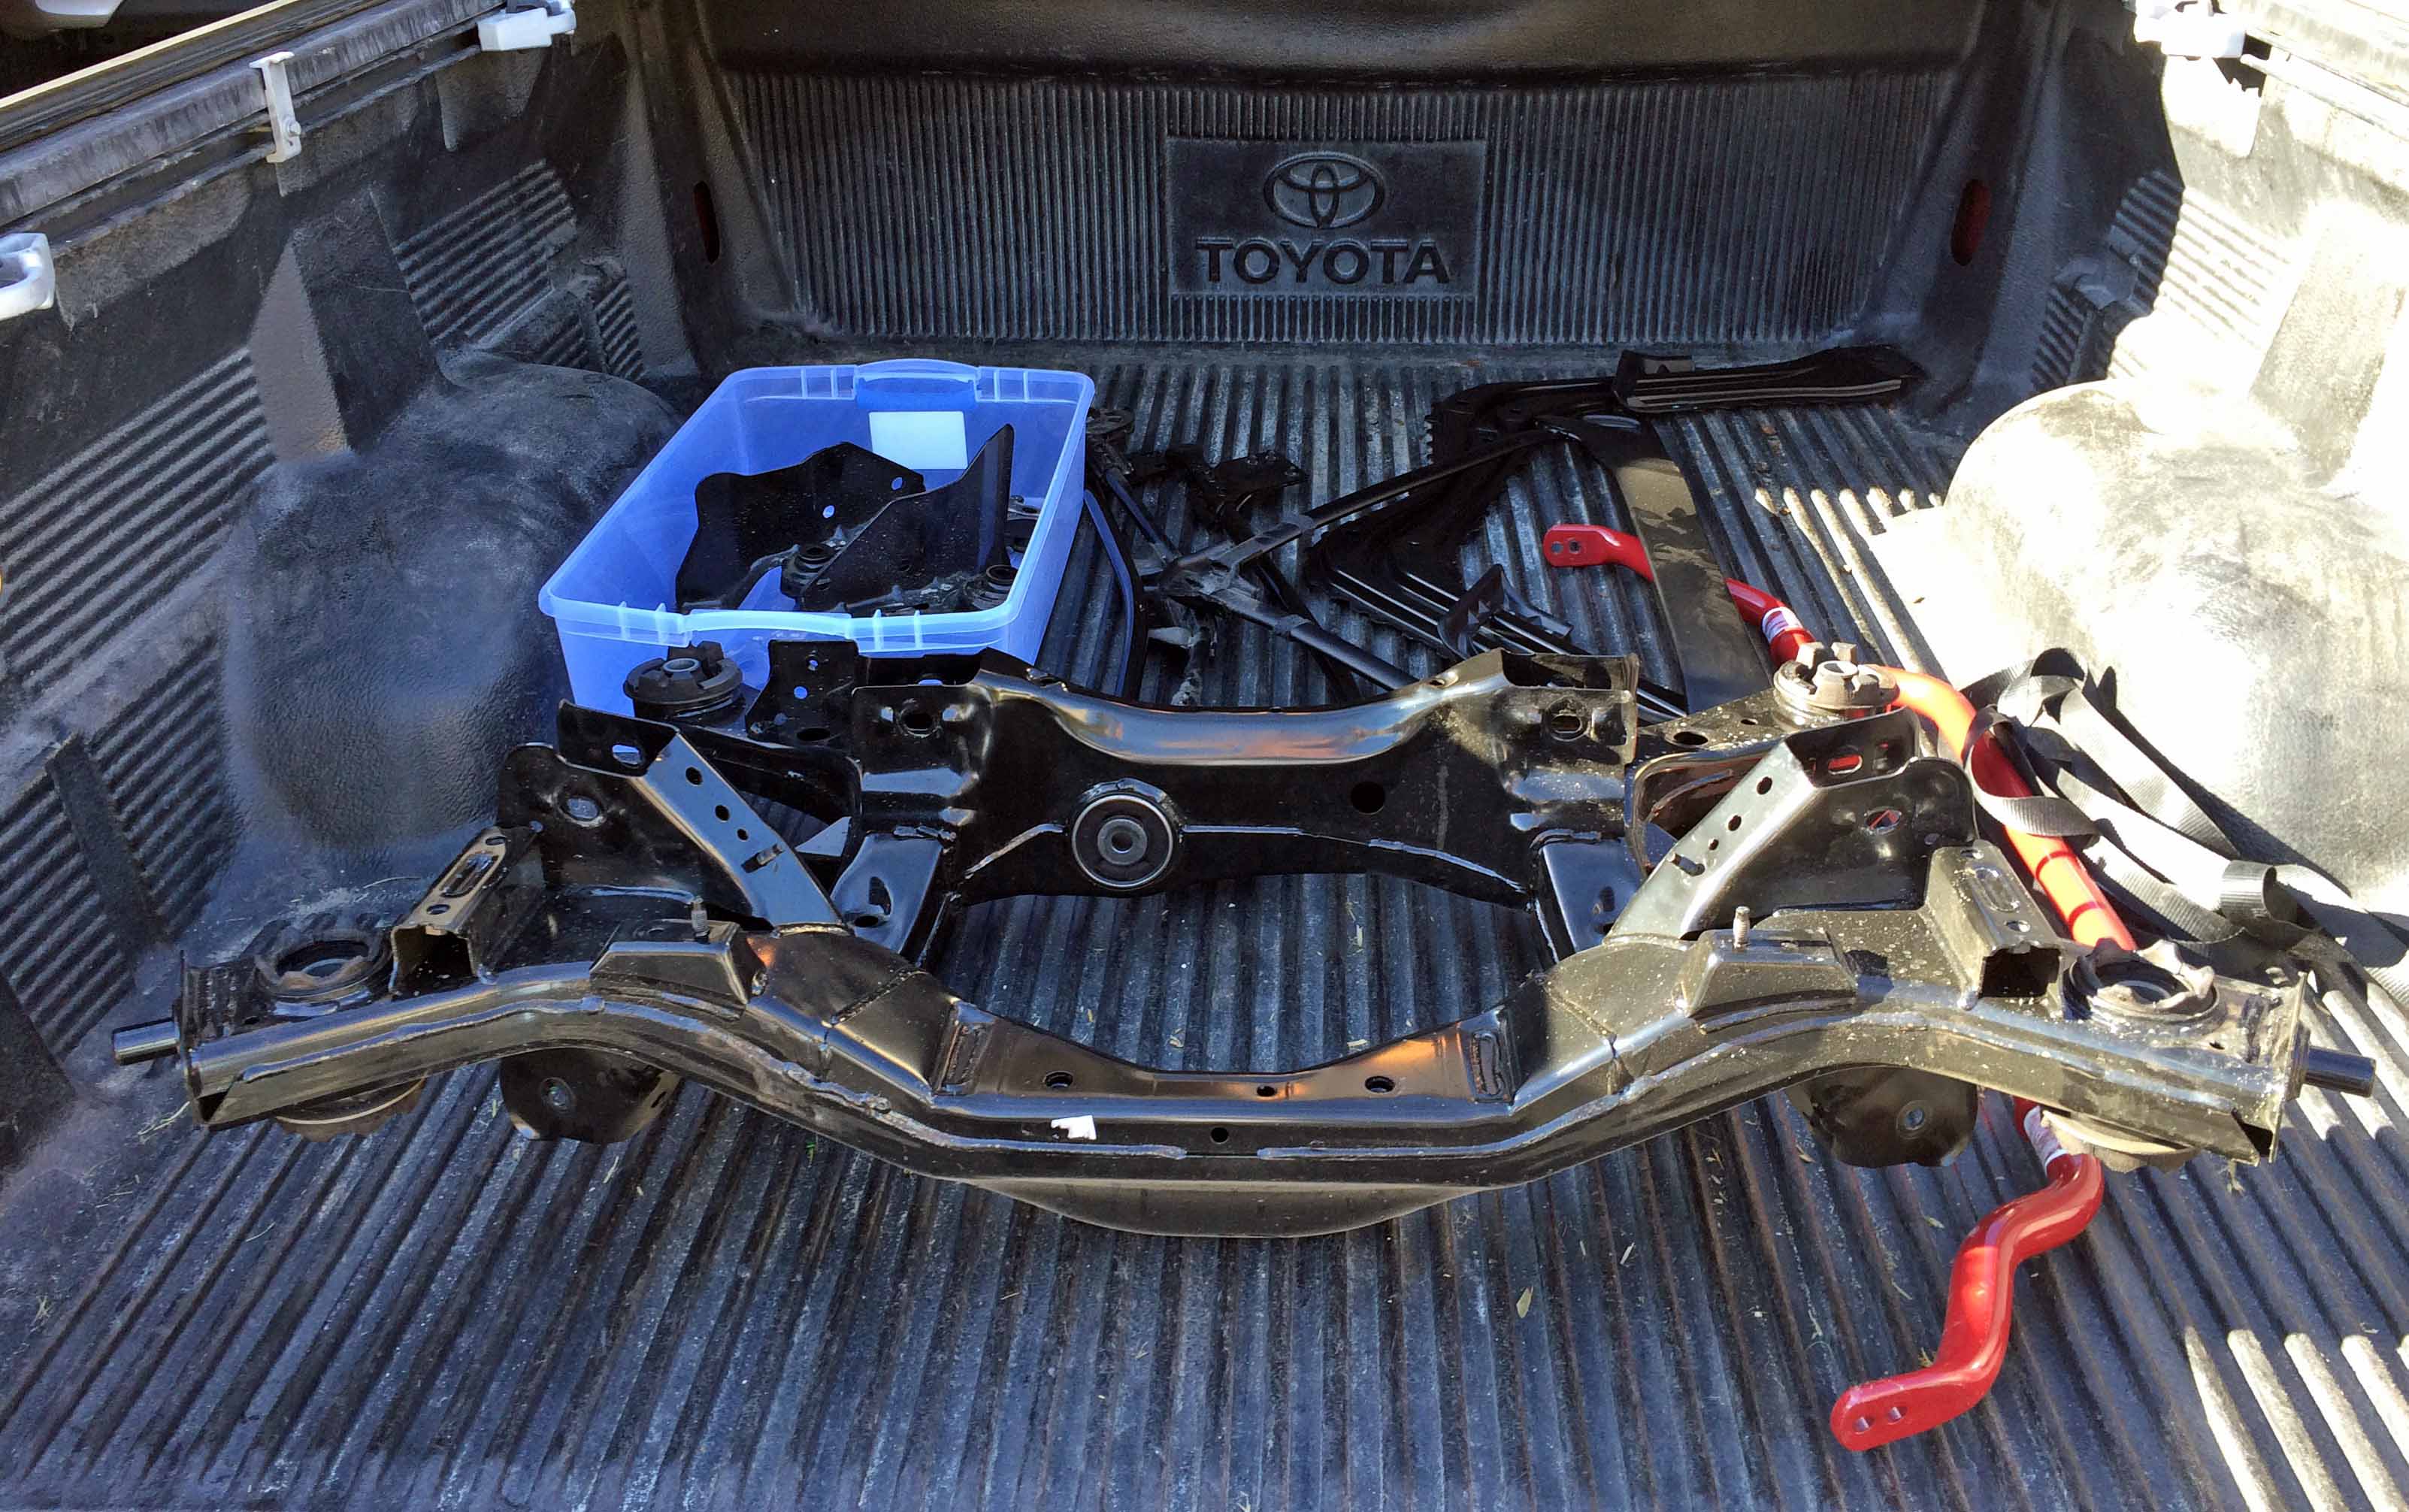
The five subframe bushings are a painful mess to remove, so I had someone do that part. From there, all these parts – the rear subframe, 5 rear brace pieces, the front strut brace, a swaybar, and a few pieces of the Takeda intake not pictured, went to the powdercoater. They’re a bit backed up so with the holidays, may not have them back for a few weeks.
Lots to do in the meantime!
Put the diff back together with the Quaife.

Of note, its front bushings have been replaced with the new Whiteline poly pieces. There’s only one more bushing it gets, which will go in to the freshened up subframe.
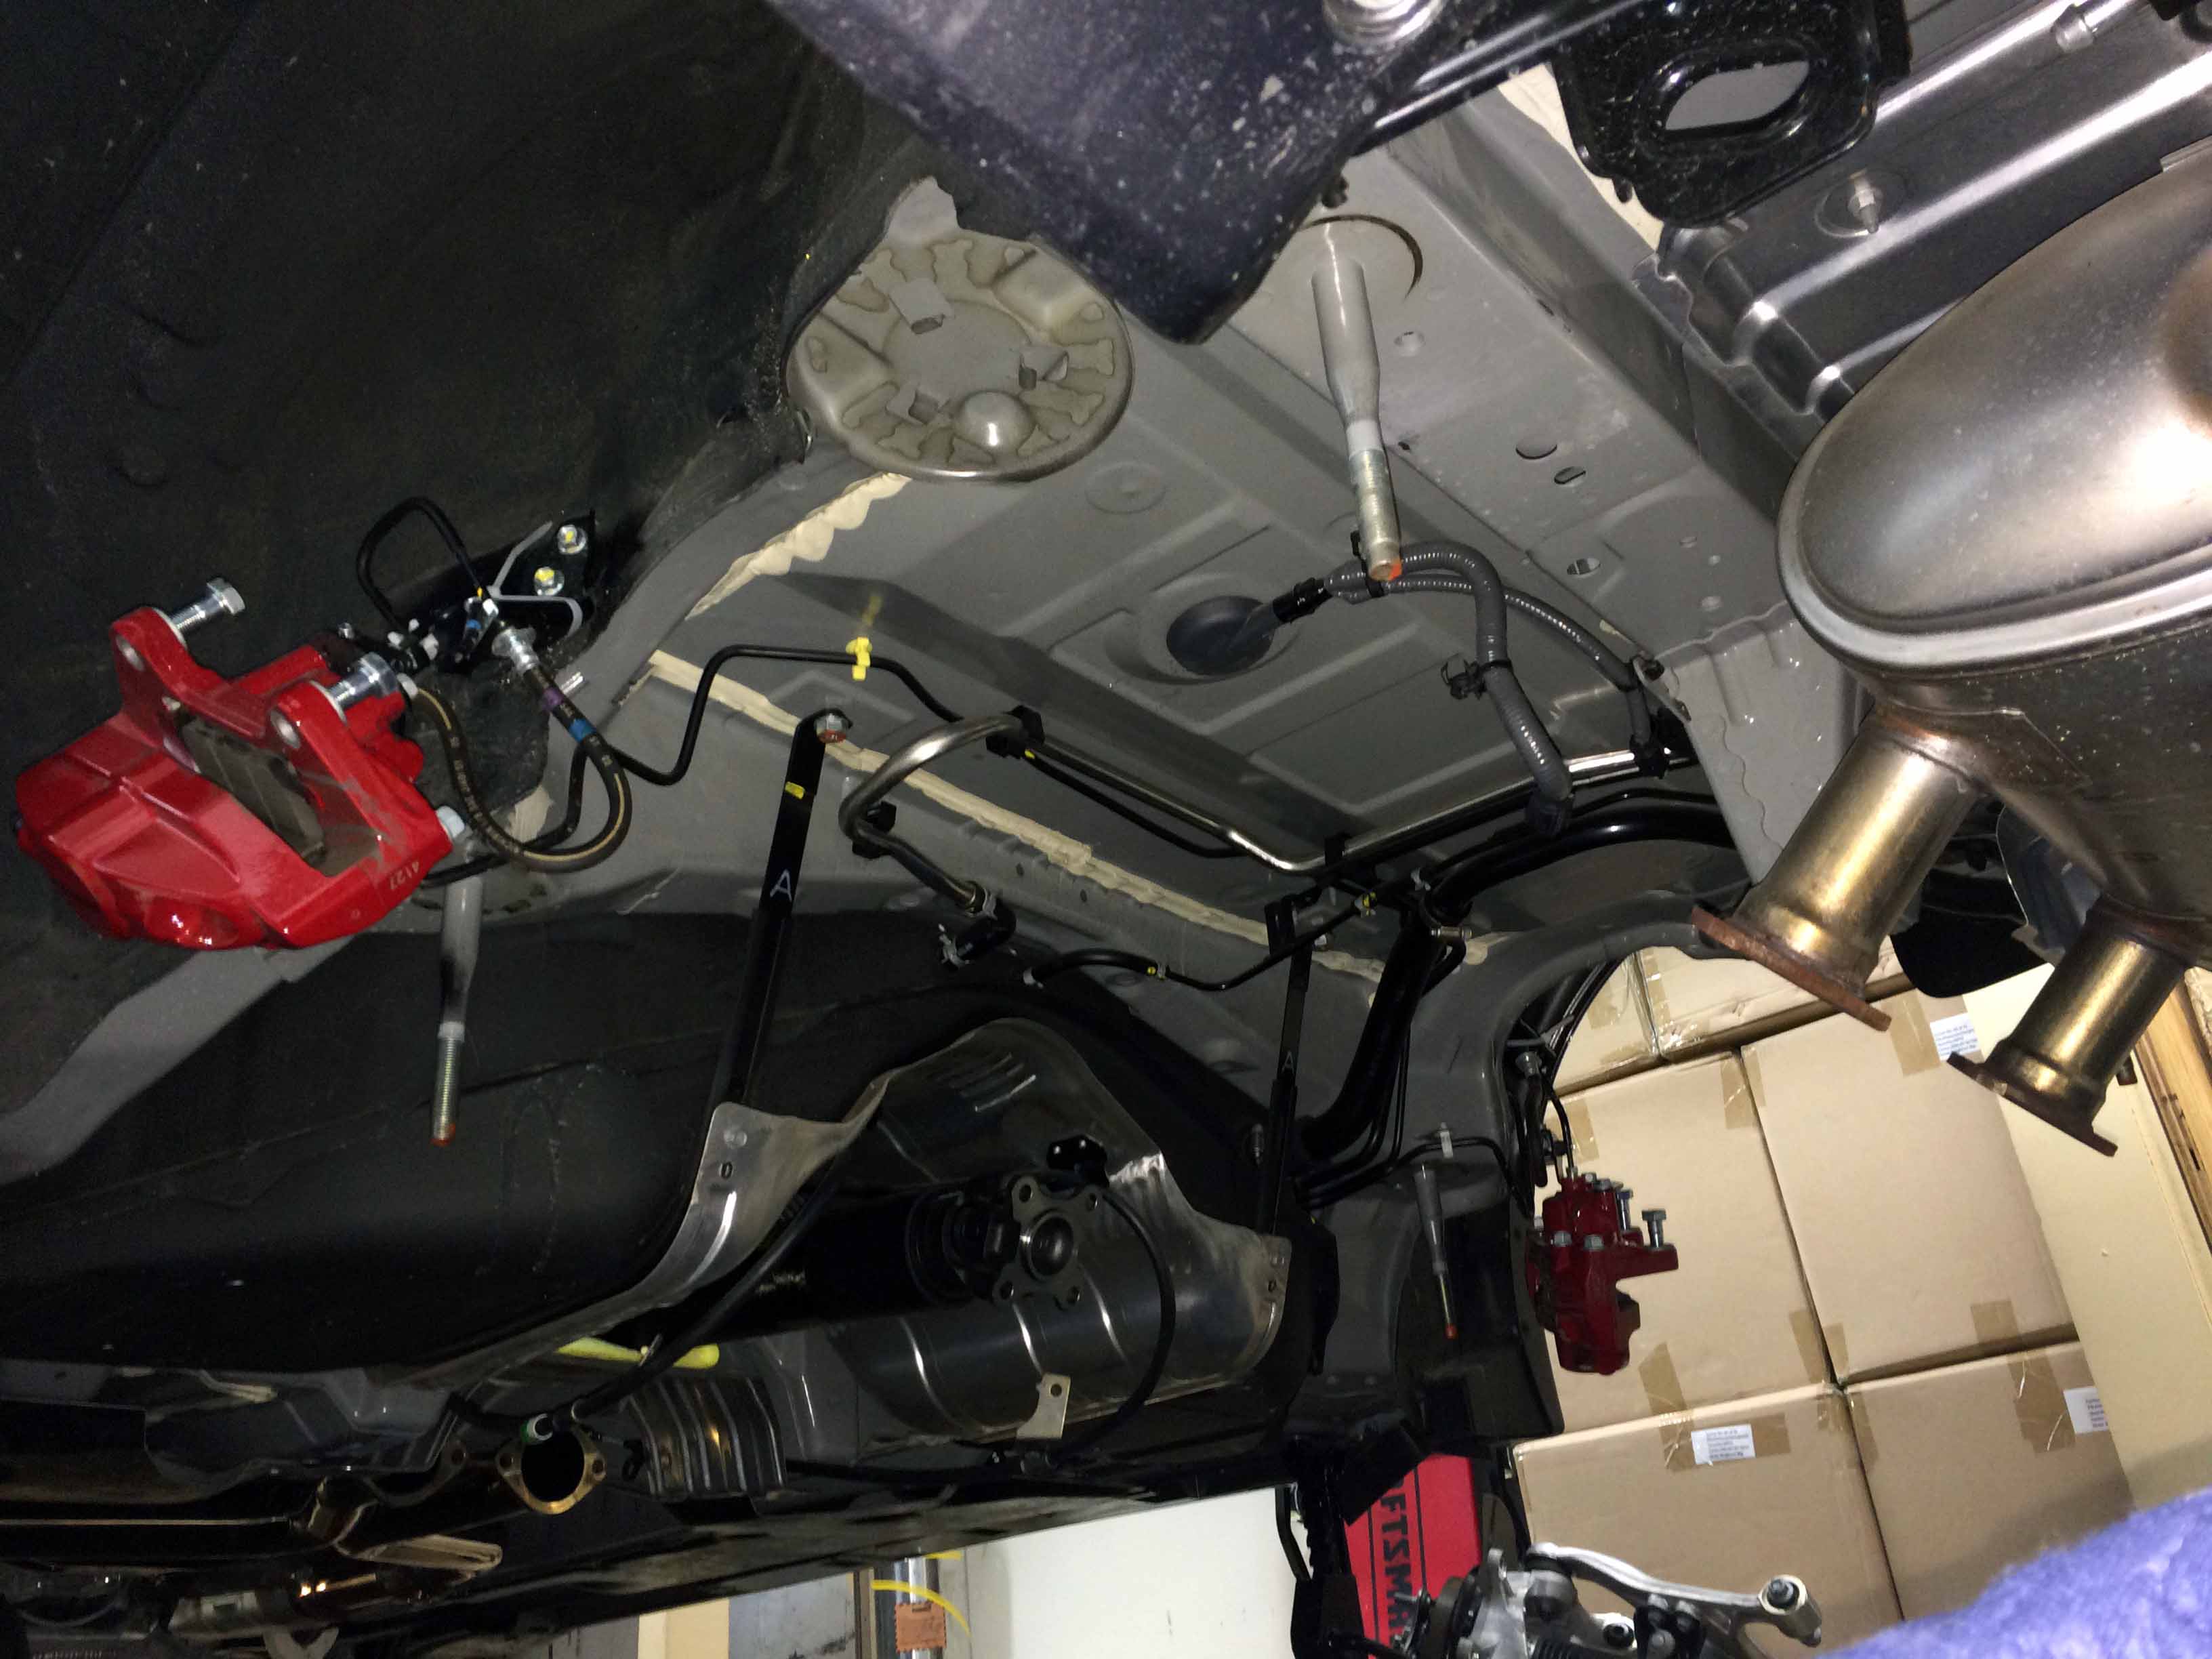
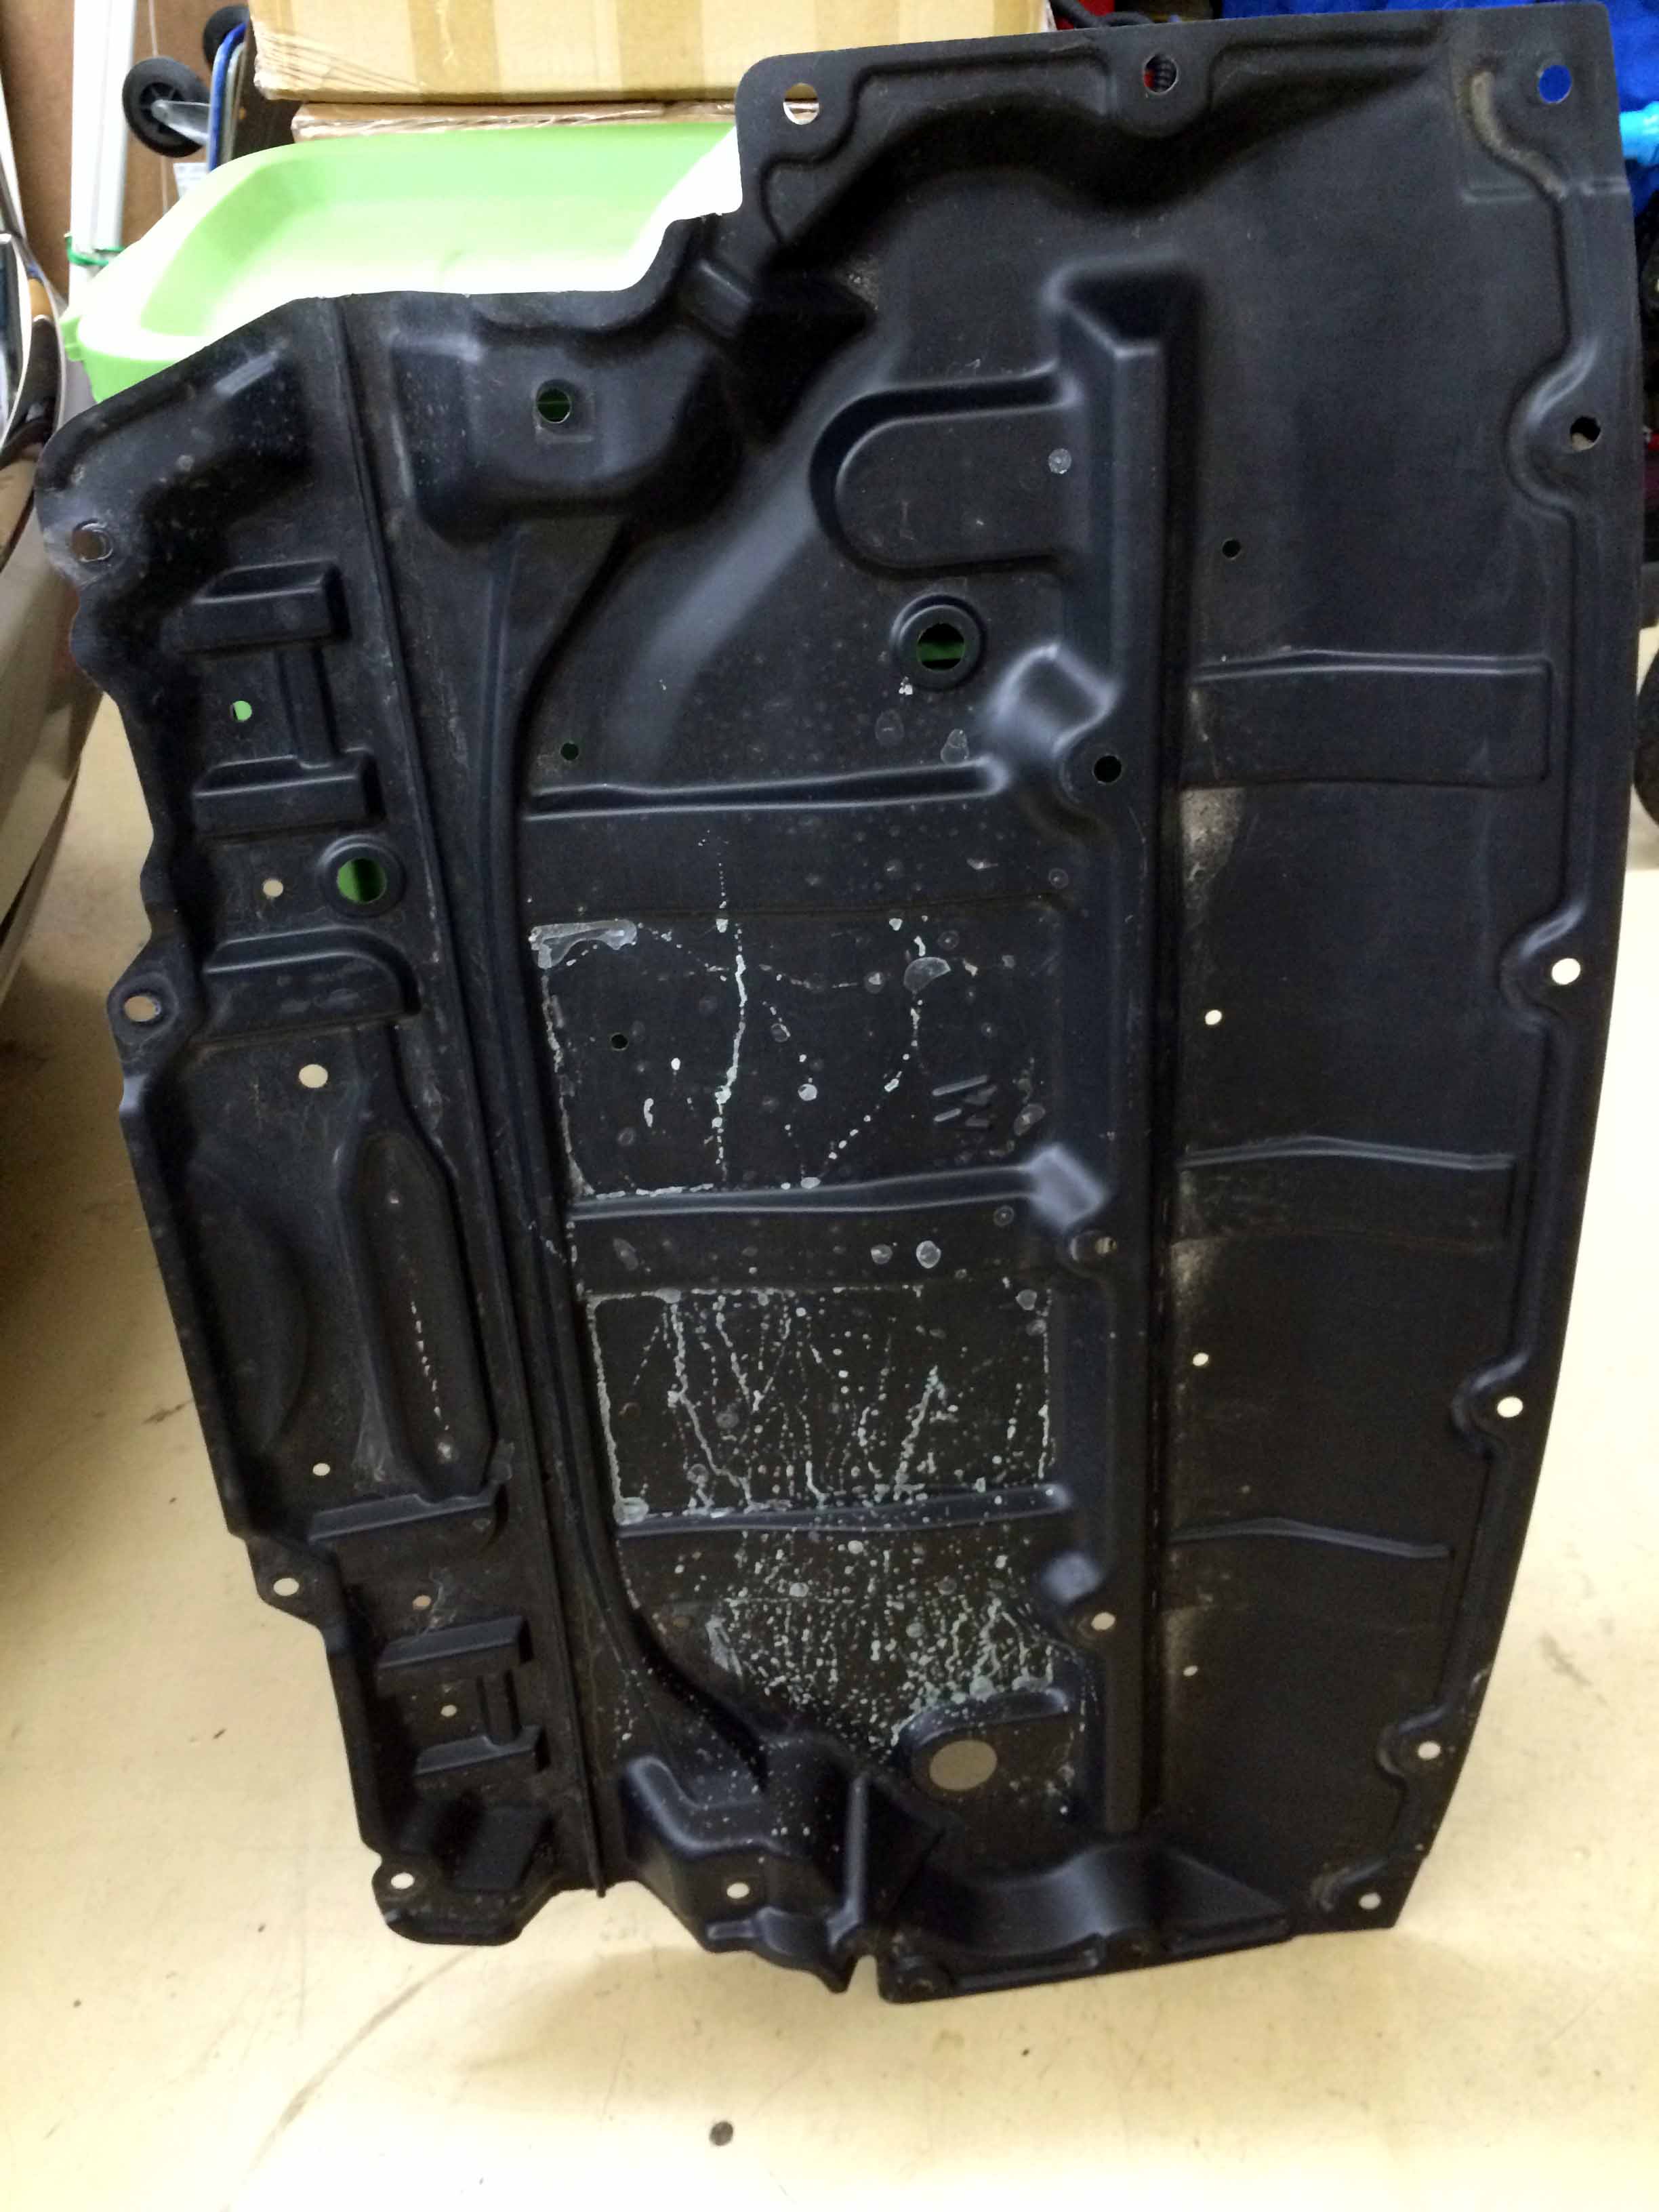
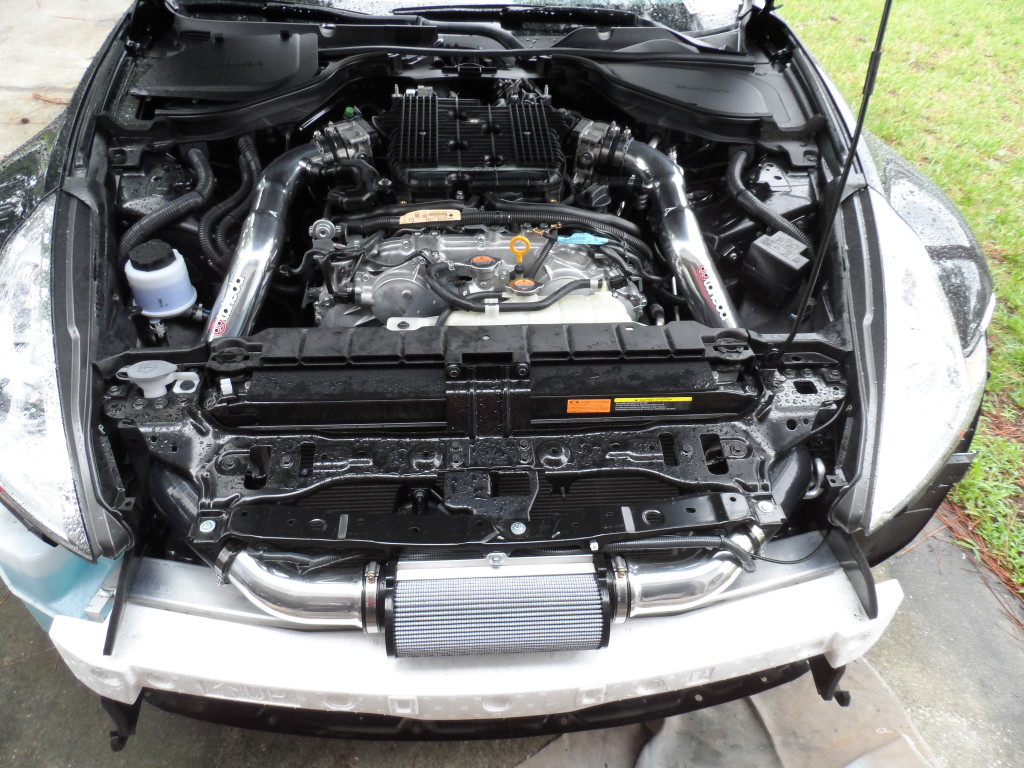
Moved my attention forward. Not surprisingly, the car spilled some more liquified Smurf entrails (coolant) onto its undertray at some time in Nebraska. Makes me feel even better about getting the oil cooler, these cars really can’t take the heat. And I am as mechanically sympathetic/careful as any racer out there.
Things start to look more like an engine in there as the layers of plastic trim pieces are removed. In this pic the front strut (yes I know the car doesn’t have struts but this is what all the kids call them) brace is off, along with some engine trim parts. At the back the little XS Power battery is in position
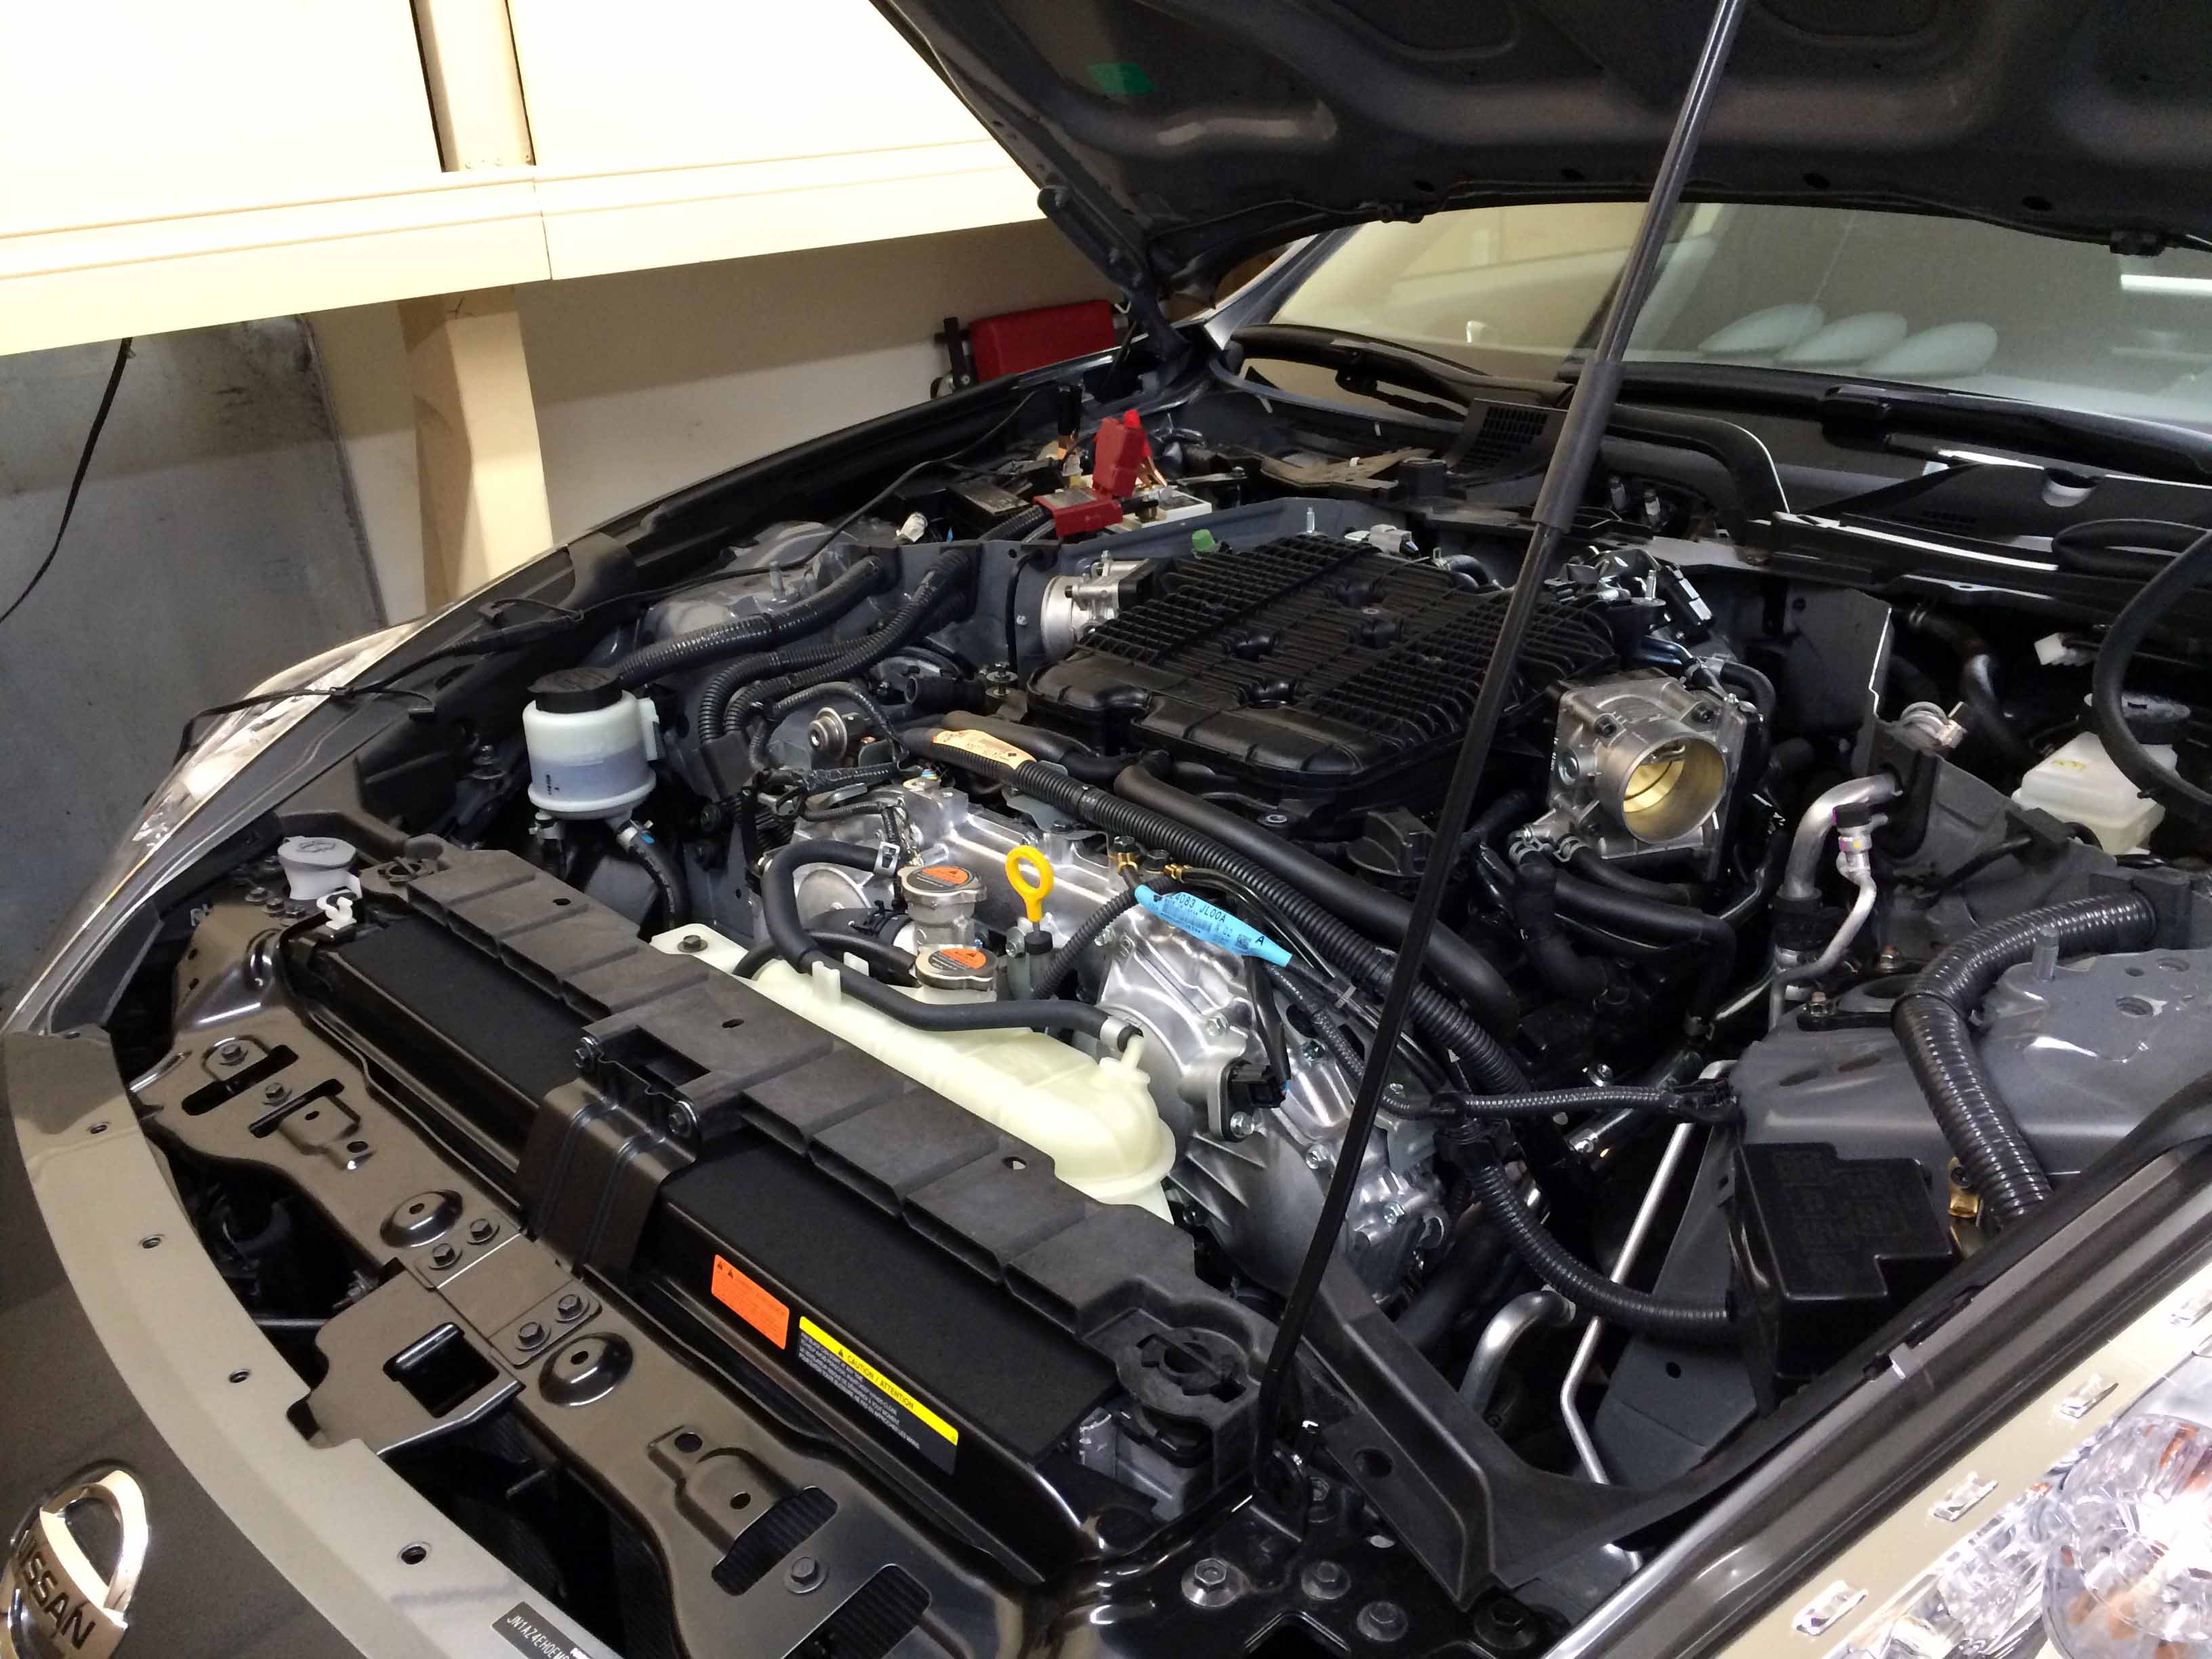
The intakes are out, as they are being replaced, but also because their removal makes it easier to get to a few key bolts on the next mod, the Berk high flow cats.
Here is a stock cat pictured alongside a high flow unit.
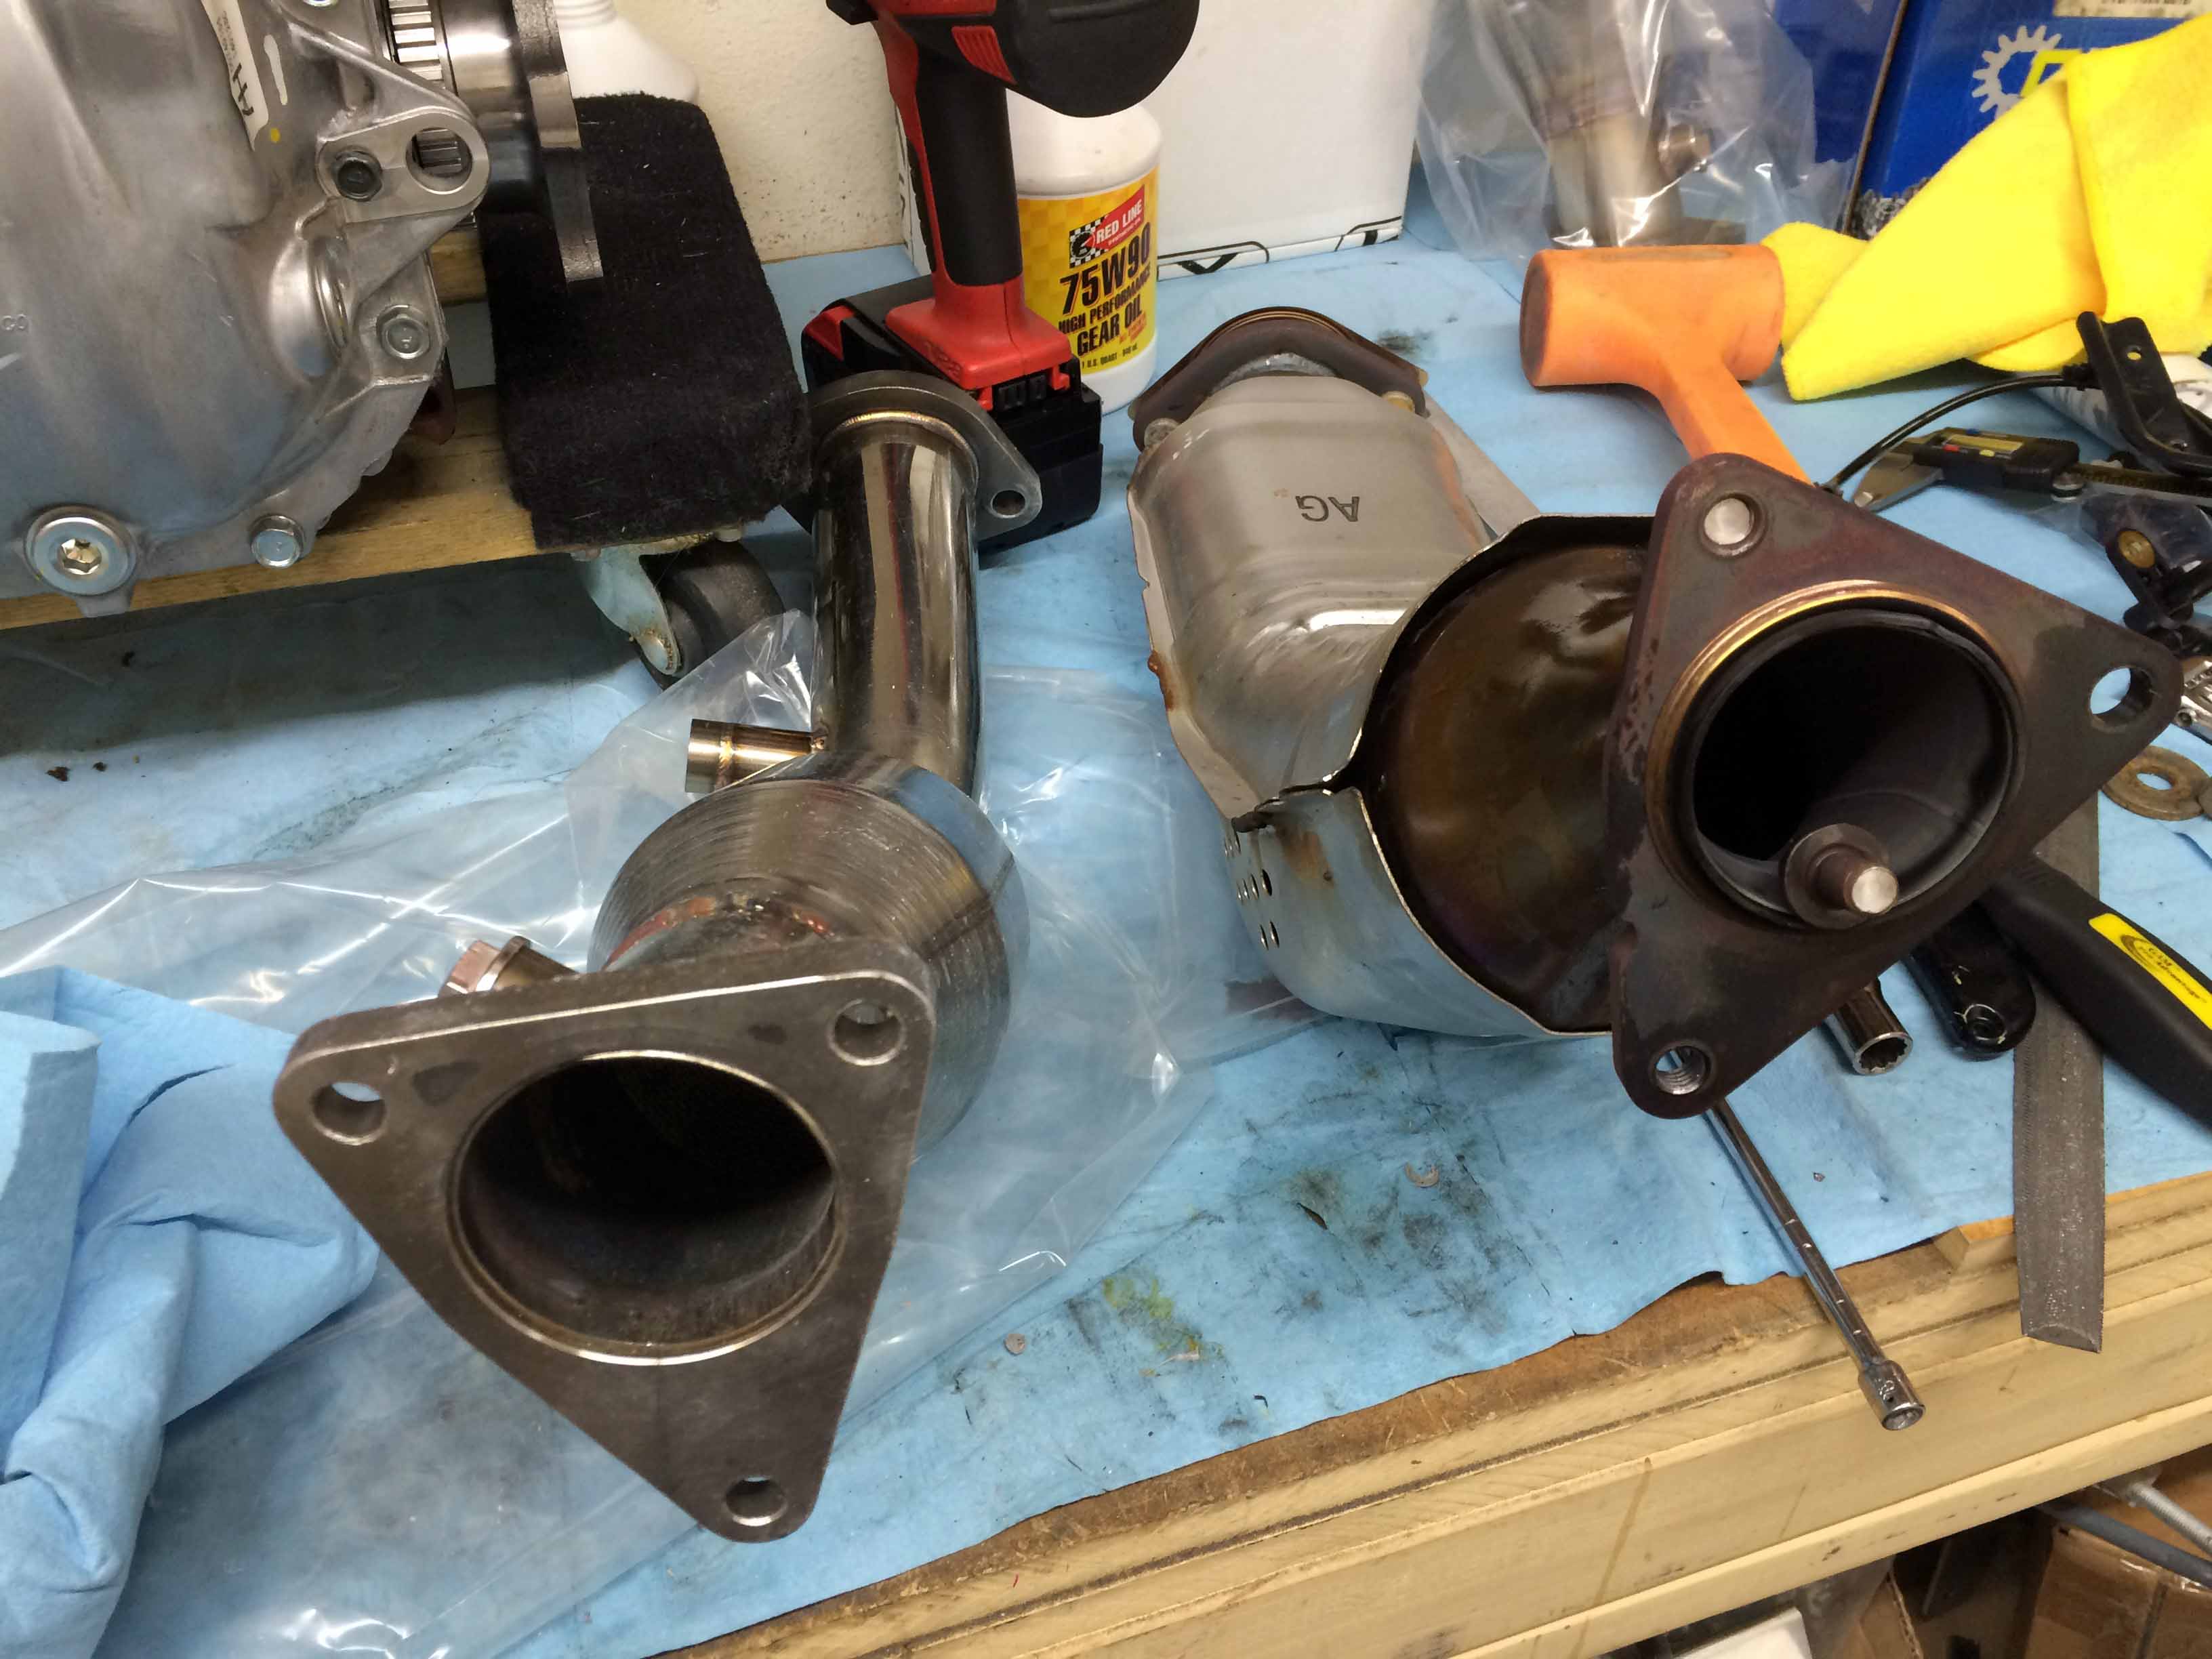
The performance unit offers a significant weight savings, and in the case of this motor, will add significantly to the power level.
Replacing the cats or headers on these cars is famously difficult and I’m beginning to see why. The passenger side one wasn’t that bad, but one bolt didn’t survive the egress.
The other two took a lot of effort to break loose but then came out fine. This one took huge effort, and then snapped right off! The thing is, this car only has 600 miles, and already this portion of the exhaust is completely unserviceable. So, all the folks out there with higher-mileage Z’s that’ve had trouble with this bolt – don’t feel bad, it’s still a problem on an essentially new car. I know exhausts are hot stressful places but this seems like a case of 1960’s British automotive metallurgy 😉
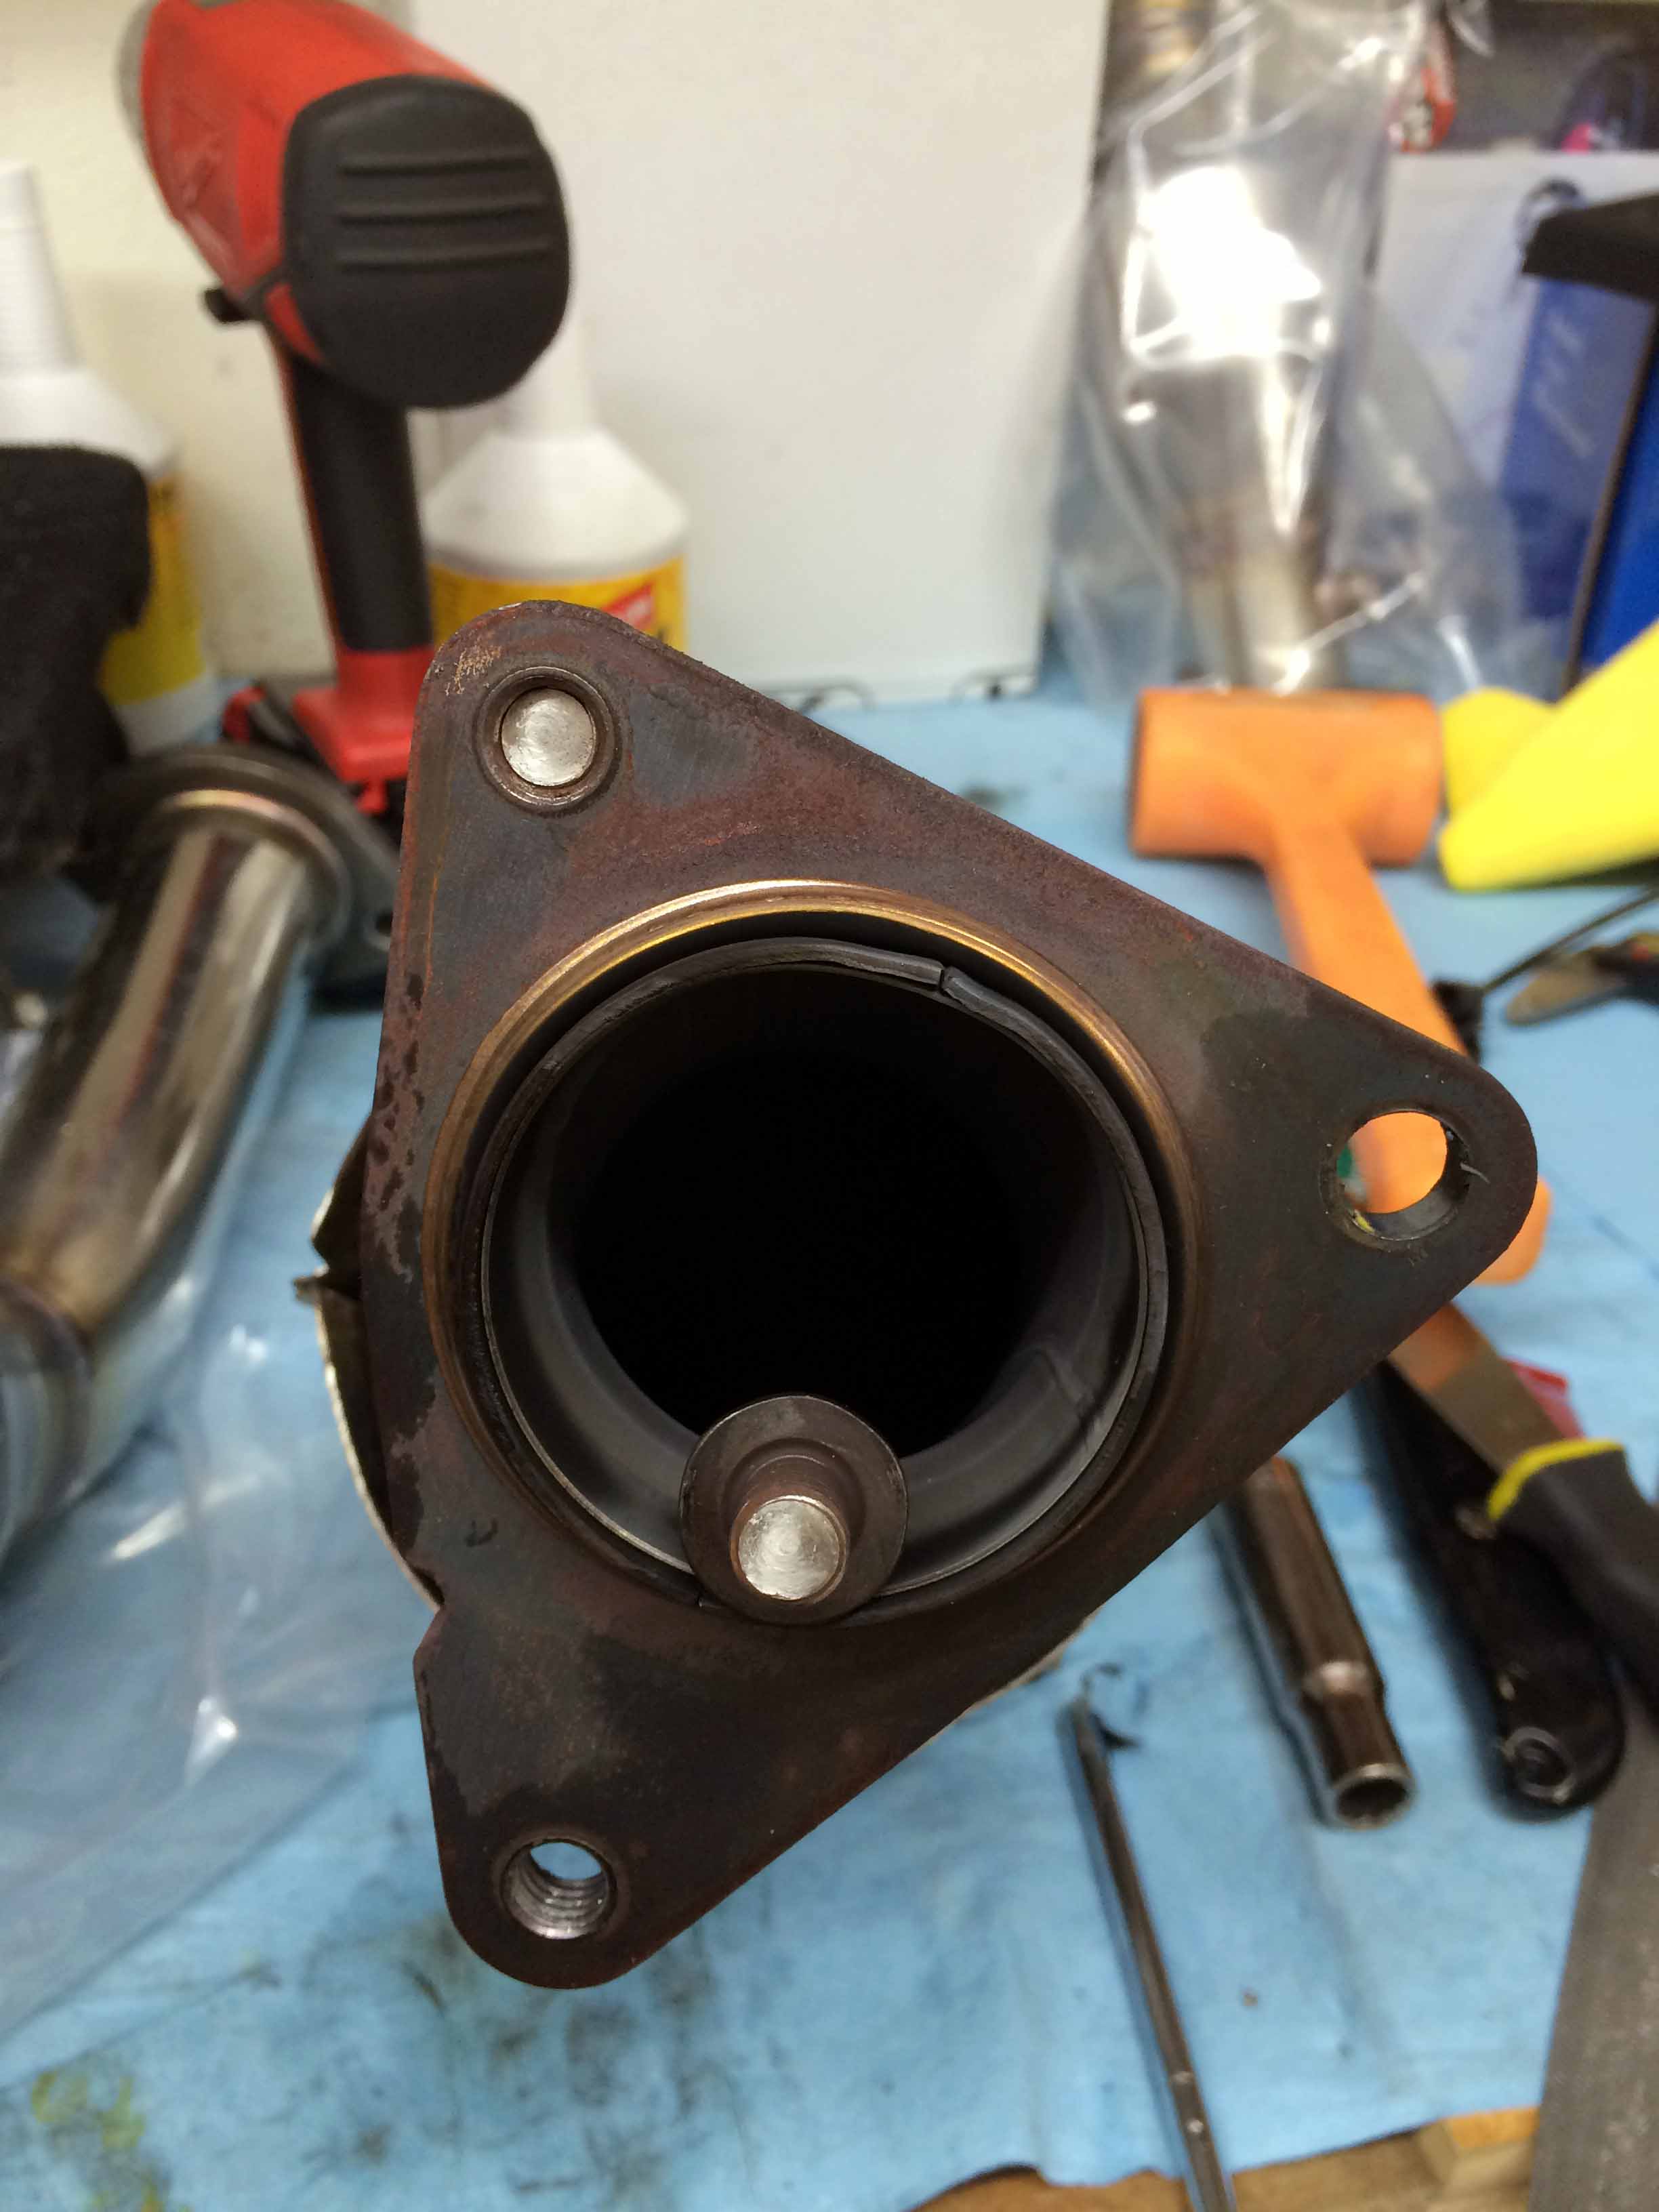
Included the pic above just to show the clean cross-section of the broken bolt. Kinda dreading attacking the driver side cat next. The passenger side has two of the three bolts accessible from above (with suitably long – ~3′ – extensions) but the driver’s side looks much harder from above and below. Hopefully an extra day to soak with some Liquid Wrench will help…
Once that’s done, will move on to an oil change and oil cooler install, the latter requiring pulling the front fascia off the car. Sounds gnarly but with the car this far along it’s supposedly not too bad. Having it apart will also aid in the CAI install.
Need to pull the stock front coilovers off, modify the new Kinetix front upper control arms to allow for additional negative camber, and get them installed. New shocks and springs are still a couple weeks out.
Still lots to do but cats aside, it sure is nice working on a clean new car!
Ingredients for the STR recipe
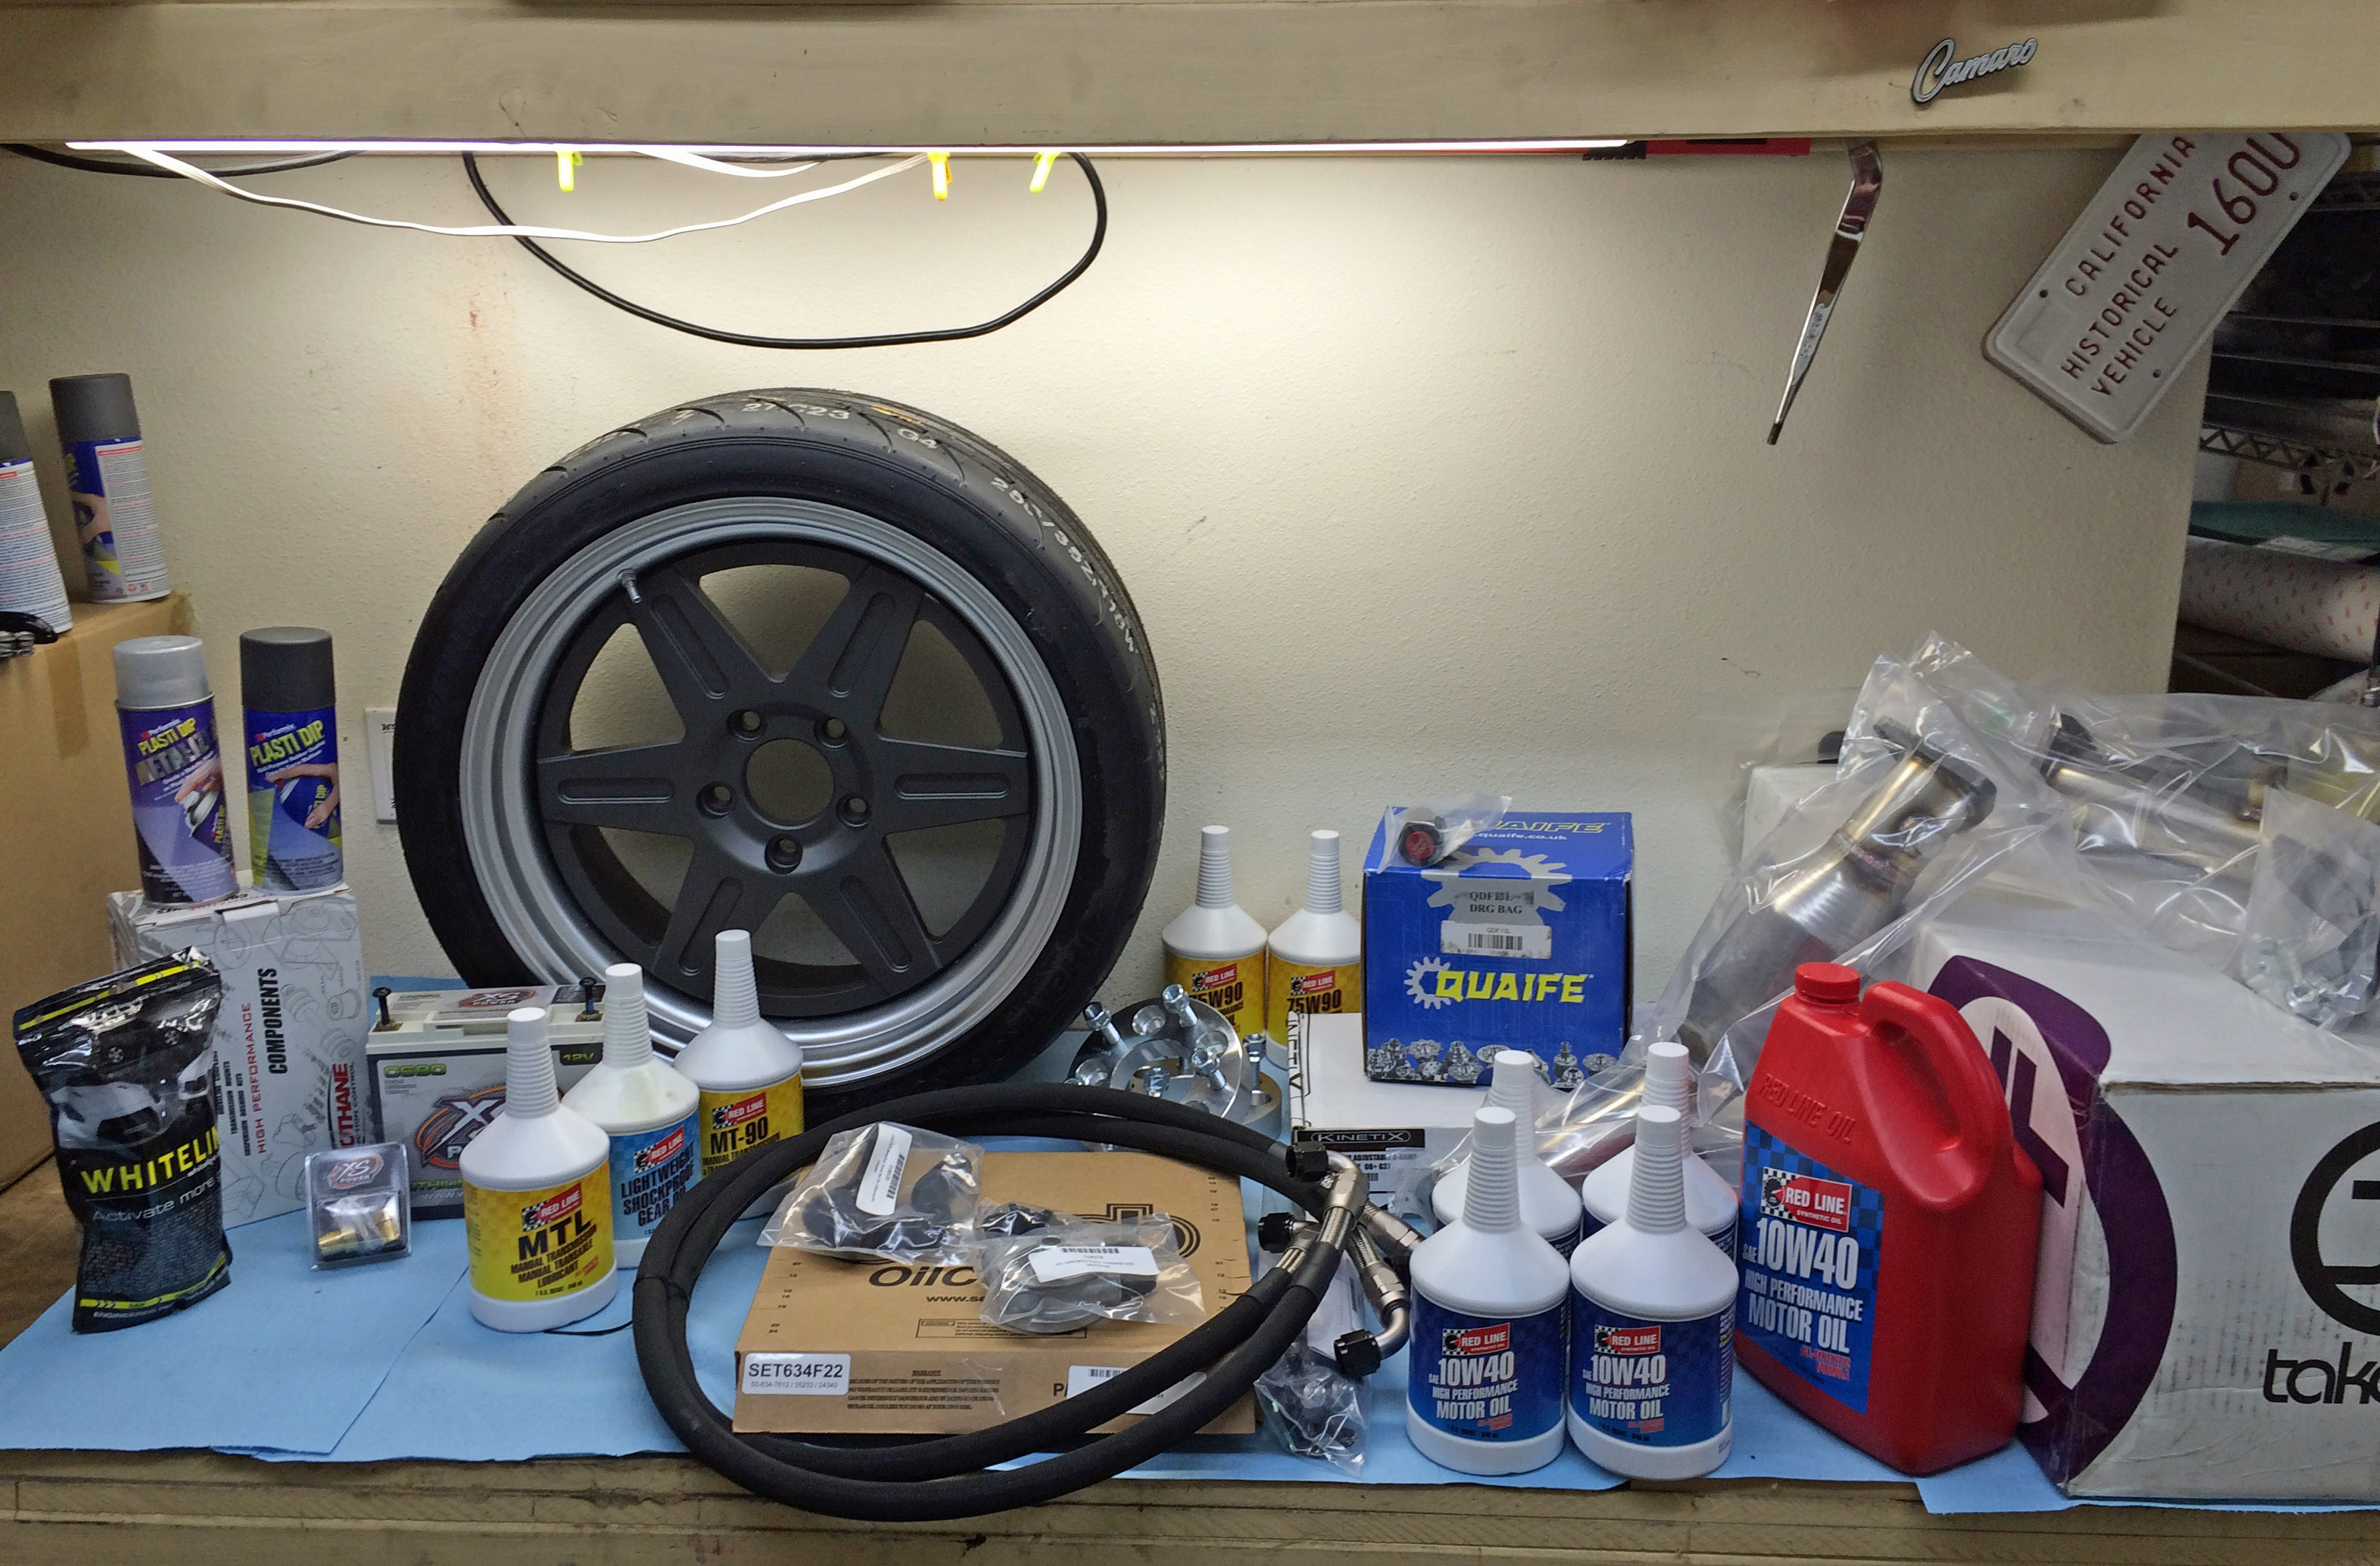
Took advantage of some Black Friday sales to grow the STR parts pile for the 370Z. This is most of what will put the car into its initial state of STR tune.
First thing is what isn’t there – springs and shocks. They’re due in a week or two from ProParts USA – will go into detail on them when they’re here. Will also talk about swaybars then, have a few from the purchases made for Street/Stock-class prep, including an adjustable rear bar I haven’t used yet.
So, going something like left to right-
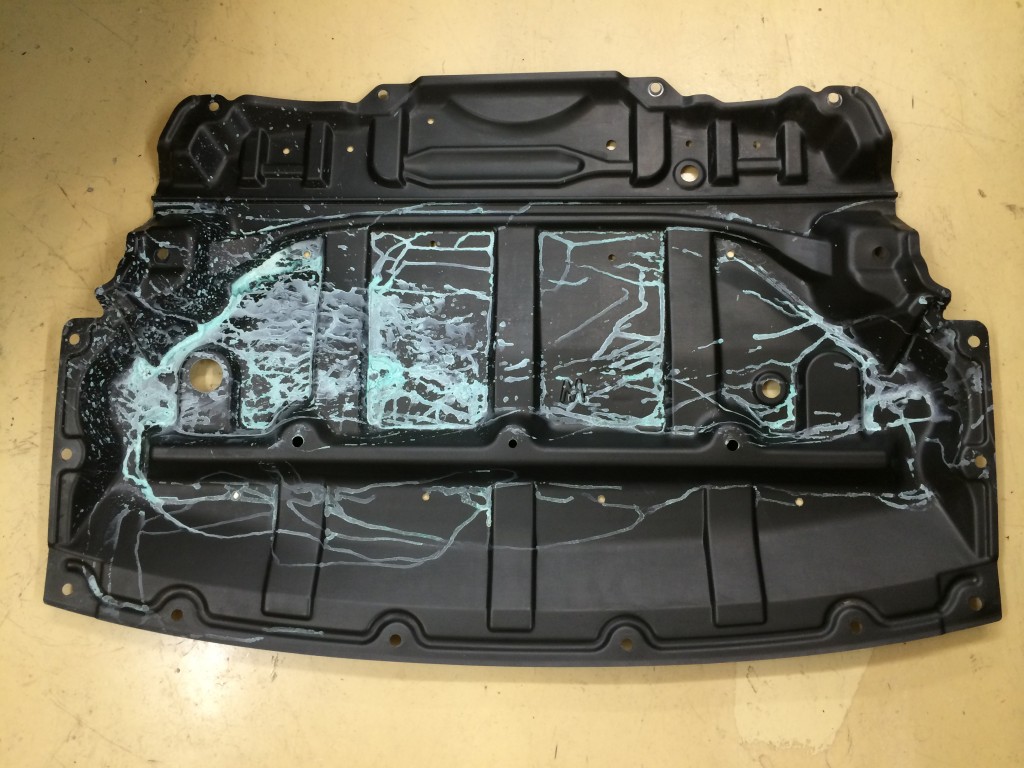
Black bag is a set of Whiteline poly bushings for the differential. One of the 370z’s most common failures is its jelly-donut of a primary diff bushing. Under hard launches, the bushing quickly croaks and oozes is sticky filling all over the diff and the rear underside of the car:
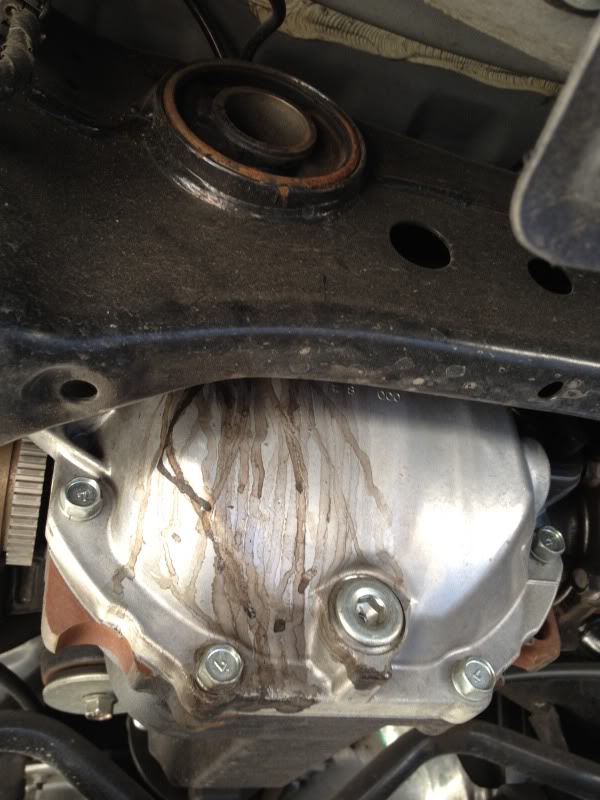
The diff is held in with three bushings, and this replaces them all with solid poly, no more failures to worry about. This may impact NVH a little on the street, but since the diff is attached to a subframe with bushings, and the subframe is attached to the chassis with bushings, there are still two layers of isolation.
The white box behind the black bag are a set of Prothane poly bushings for the rear subframe. The stock unit is held in with some soft-ish rubber pieces – which help keep NVH to a minimum, but also allow the rear of the car to flop around a little in relation to the rest of the chassis. This leads to inconsistent behavior and response, not what you want in a “race car”. In my experience locking in the subframe doesn’t impact streetability much, but does a lot to make the car feel like it’s “one piece”. Biggest downside of these parts is how they require dropping the whole subframe, which is a bit of work.
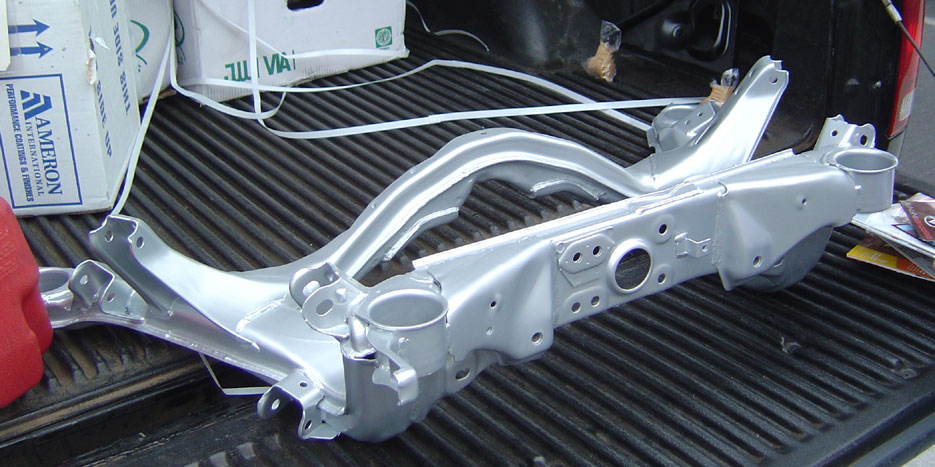
That’s the subframe from my STS 240sx from eons ago, had it powdercoated while it was out. It’s remarkable how similar the subframe in the 370 appears. Thinking about giving the 370 a similar treatment, haven’t decided yet.
On top of the Prothane box are a couple cans of Plasti-Dip. Plasti-dip is a somewhat new product (new to me anyway) – it’s basically a rubbery plastic material in a spray can. By applying multiple coats, you form a soft plastic layer over the target part – which can later be peeled off without any change to the underlying part. It has become popular for painting wheels, and some people have even painted their whole cars with it. It’s best when you’re after a matte finish, as it’s hard to get the surface smooth enough for a good shine.
To the right of the cans, you can see a wheel that’s been Plasti-Dip’d. From the previous post, you can see those wheels originally had aluminum centers with black lips:
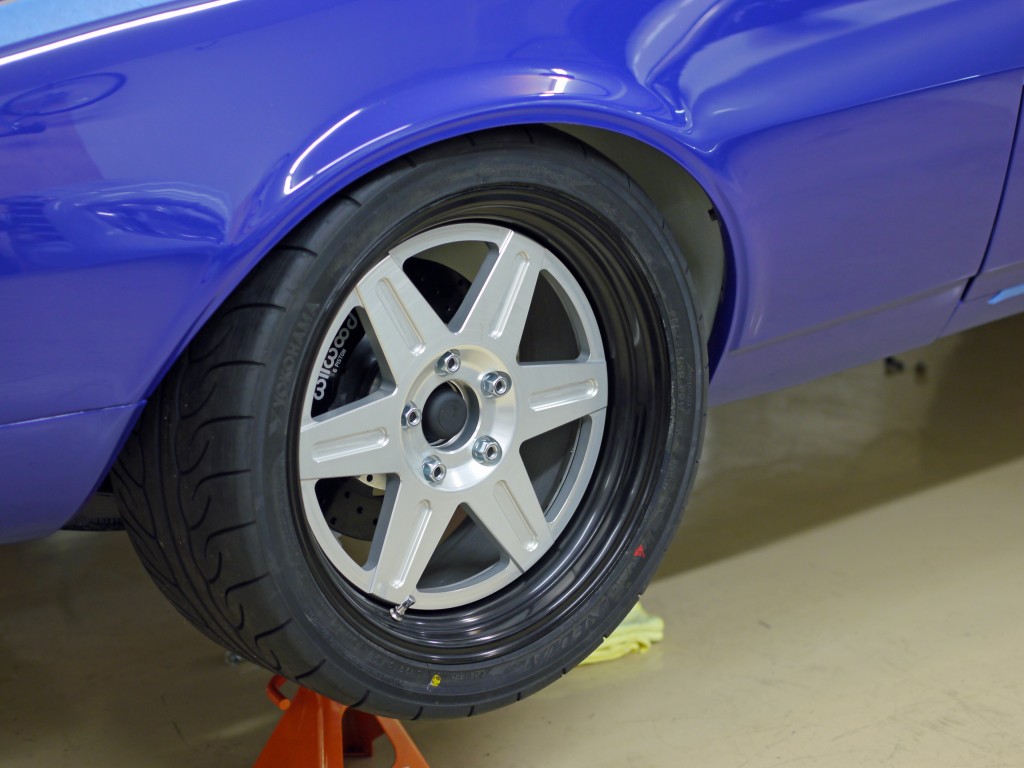
I used the Plasti-Dip to reverse that setup – the centers are now dark (their “anthracite” color) and the lips are aluminum look. To get that look, you plasti-dip the whole wheel with 5-6 coats of the anthracite, then mask off the center and spray the lips with their aluminum-colored “Metalizer”. Partly because I’m not very good with anything resembling art, they don’t look that great up close. Fine from 5-10 feet though.
Just a recap on the wheels – they are Jongbloed racing 214 model. Very light-weight 3 piece 18×9’s, right at 18 pounds each. They were the first set of wheels I bought for the Camaro. It’s handy how the class-limit width for both STX and STR is 9″, it helps allow for wheel re-use.
The wheels are wrapped in some new tires, the Hankook RS3 “v2″ (200TW version) in 255/35-18. The STR class only allows up to a 255 width tire, while STX allows for a 265. The 255 is of course small, but it technically fits a little bit better on a 9″ wheel (would be better on a 10”) so it should be about the same, if I ever want to run Z take-offs, on the Camaro.
Stock 370Z wheels are great for a factory wheel – made by Ray’s, 19×9 front, 19×10 rear:
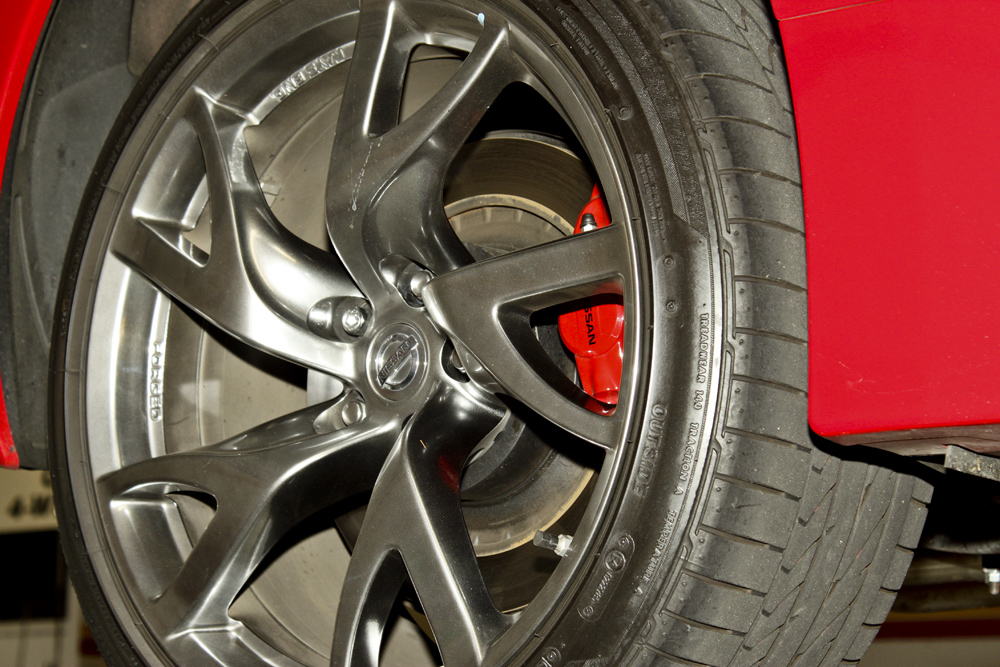
Still, being an OEM-spec wheel, and in a big size, there’s weight to lose. These front wheel/tire units will be each be 7 pounds lighter than what I ran in street (2lb. tire, 5lb. wheel) and rears 12lb. lighter each (6lb. tire, 6lb. wheel) for a total wheel/tire weight savings of 38 pounds. Pretty significant amount of rotating unsprung mass. Between that and the significant gearing benefit – these are 1.5″ (!) shorter than stock – the car should feel much lighter on its feet and pick up a lot of acceleration.
Speaking of acceleration – plugged some numbers into my master spreadsheet to see where the 370 would fall. You can ignore the other cars presented, with the exception of the 911 they aren’t STR cars-
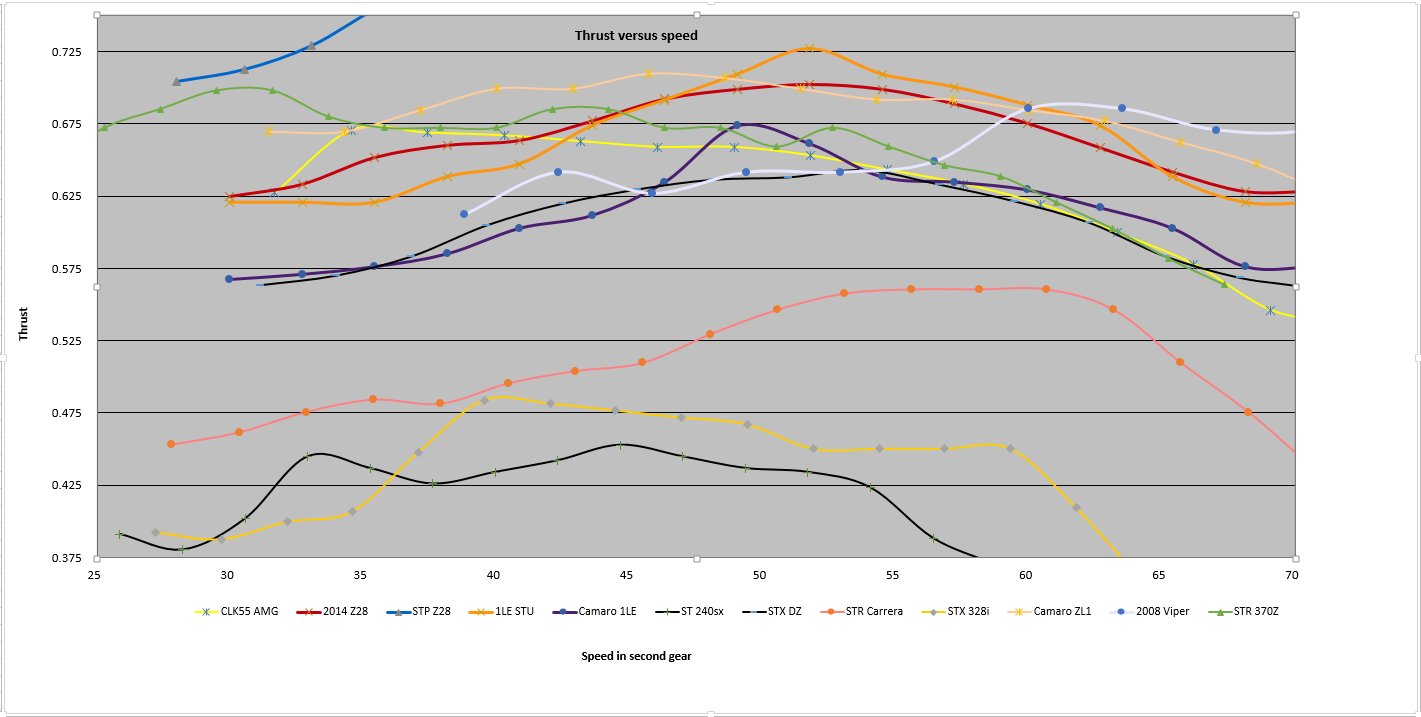
I’ll look to get some other STR cars (S2000, NC Miata, Spyder) added at some point, but based on the raw values, thrust looks good. I imagine it’ll be more than the little 255’s can handle most of the time. The humps at low speed are encouraging, car should dig well out of the slow stuff. Didn’t know much about how the 370’s engine worked until recently, some pretty neat stuff there.
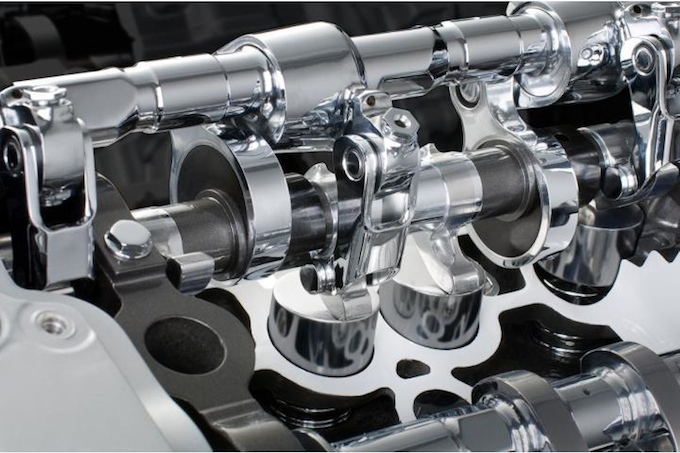
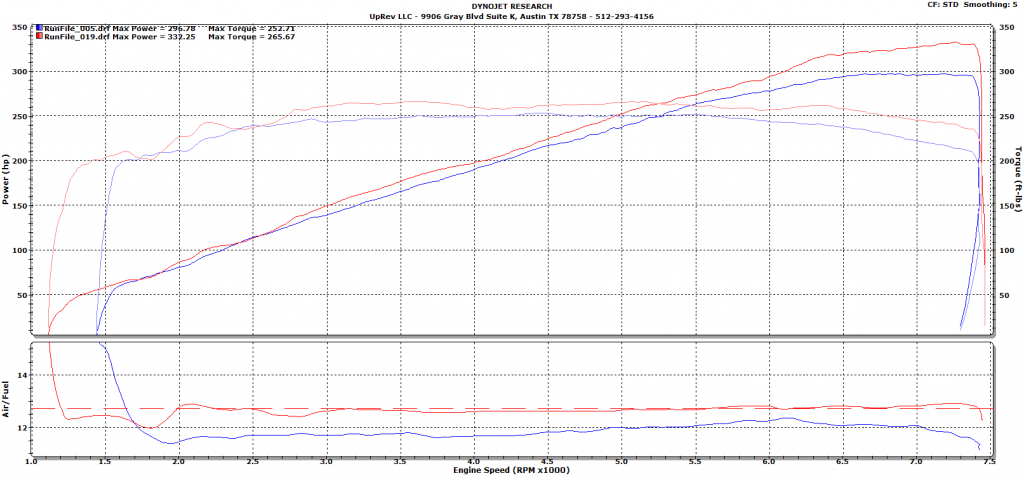
The VVEL system means the engine is throttled not by the throttle butterflies, but by how much the ECU lets the intake valves open through its wacky multi-fulcrum monkey motion. The throttle is fully open most of the time, which aids efficiency. Put it all together, Nissan has been able to produce a remarkably flat torque curve out of the motor, and it still responds well to tuning – here’s an example of one going from stock to a quality set of ST-style mods-
Back to the parts – in front of the wheel is a small XS Power lithium-ion battery. This is another leftover from the Camaro project, its “Nationals” battery:
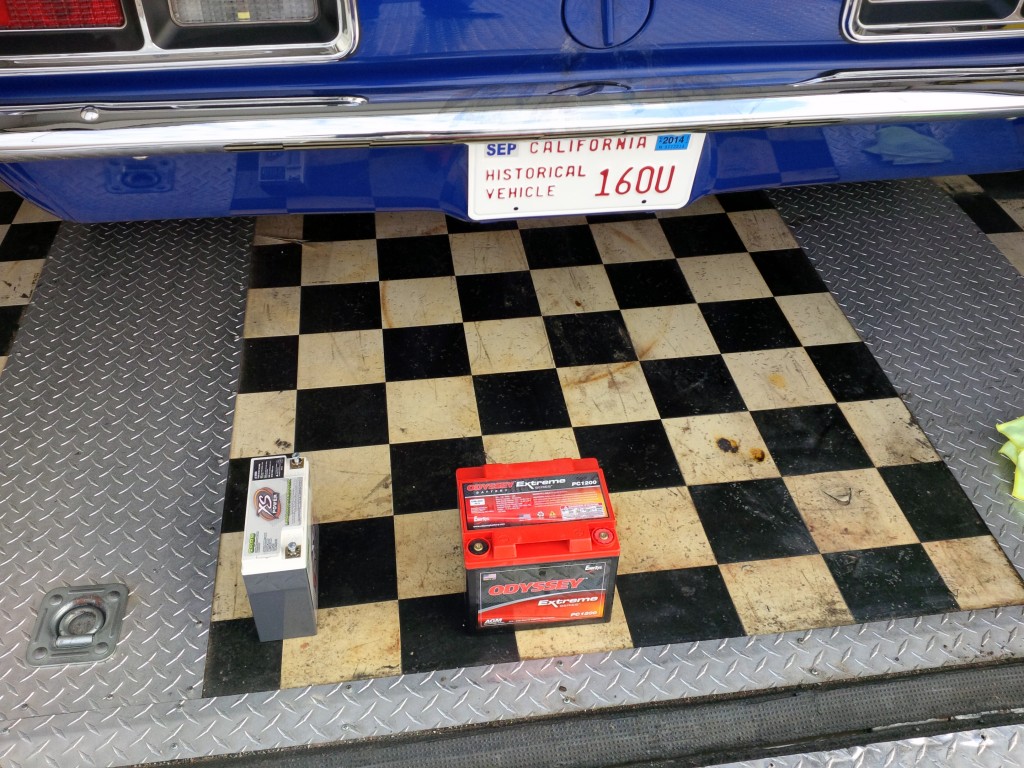
It’s about 4 pounds, feels like an empty casing when you pick it up. The Z should have reliable enough electronics, there shouldn’t be a problem leaving this one in here full time. I leave the car on a tender anyway when not in use.
Leaning in front of the battery are a pair of terminal adapters so the stock power cables can attach. Not going to hassle with relocation. The stock battery is over 35 pounds, so this will mean 31 pounds off the nose, big win.
Next to the battery are a cocktail of Redline gear oils. These will be going in the transmission. One theme with the Z, is that everything tends to run hot. The factory provides an oil temp gauge which gets too high too quick. But trans fluid overheats, diff fluid overheats, power steering overheats. My car’s transmission has been a little notchy on 1-2 from new, especially when cold. One of the quarts is a little thin which should help when it’s cold – one is “normal”, and one is a little heavy to help protect things when it gets too hot. Hopefully this mix, all based on Redline’s quality synthetic bases, means the trans will work well and be protected from what it encounters.
My first event was a practice with the car, about 70 second runs on a warm (~95) degree day. I started a run with oil temp at 180 degrees. Came in, it was at 220. Cranked on the fans coming in, but went back out about 2 minutes later – coming in from that run, oil temp was over 240! Things start to get really bad for most oils around 250 degrees, and the car will go into “limp mode” (killing power and max RPM) by 260. Even though I let the car idle for a while with all the fans on to get it down to 205 before shutting off, it still spewed coolant all over its undertray-
Looks like a handful of Smurfs got sent through the fan blades…
Next to the gear oils – the brown cardboard box contains a 34-row Setrab oil cooler, which I believe is the biggest one available on the market. I’m hoping this helps keep things well under control for all autocross situations (including if I ever have a codriver at a ProSolo) and should make the car a bit more stable if I decide to try a track day in it.
On top of the box are the braided and sheathed oil cooler lines, and the baggies contain the various adapters and brackets to make it fit.
Behind the oil cooler are a pair of wheel spacers/adapters. I mentioned these in the last post, they’re what allows the 5×114.3 bolt pattern Z, to fit a 5×4.75 bolt pattern Camaro wheel. Pretty neat stuff, they were inexpensive too.
Behind those against the wall – a couple quarts of Redline gear oil for the diff. Need to replace the fluid when I change out the limited slip – with the part ahead of them in the blue box.
Quaife has been making robust torsen/gear-type limited slip differentials for a long time. They are great for cars that see regular street and track use, because on the street they don’t really make awful groans and chirps, and are low maintenance – while working great on the track/autocross in most applications. Their biggest downside is they don’t work well when one of the drive wheels gets unloaded – in that situation, it becomes like an open diff. Fortunately I don’t think the Z will have that problem.
The en vogue Street Touring diff these days is the OS Giken clutch-type. I’ve driven a few of them, as well as various other clutch-types, and when setup and tuned right, they are great. I think in an inherently neutral and well-balanced car like an S2000 or Miata, they make a lot of sense. However in the Z, which tends up push a lot, I’m not sure their characteristics are as desired. Plus the Quaife was on special, about half the price of the popular clutch-types.
On top of the Quaife box is a little red button. It’s a red engine start button from a GTR, a popular mod to replace the white button stock on the Z. My S2000 and Viper both had red start buttons, just keeping with that trend 🙂
Under the Quaife are a box of Kinetic adjustable front upper control arms. These have a bunch of adjustability – and can be modified for even more – to fix the Z’s biggest problem in street: lack of sufficient negative camber in front.
Forward of those things, are eight quarts of Redline motor oil. Will do an oil change as part of the cooler install. Went with a slightly heavier-than-stock viscosity – like most modern engines, factory fill is quite thin (0W20) – as the car won’t be driven often, it’s not going to see a ton of cold starts. Even with the cooler, the oil is bound to get hot when the car does get used, so the 40 part of 10W40 should protect it a bit better when things do get hot.
Behind the oil in bags, a pair of Berk high-flow cats for the car. The Z responds really well to this mod; probably half the power it picks up in ST trim comes from this one mod. The high flow cats also save a bunch of weight – will have to measure, but should be over 10 pounds.
There is an alternative path here – use of long tube headers, with the cats relocated back into the “y-pipe” behind the factory cat section. In this photo, you can see the heat shielding on the factory cat, and the flange to the y-pipe, on the passenger side. This photo is actually my car, was taken after it was loaded on the transporter for Nats earlier this year. The shiny stuff is the Garageline “midpipe” section – from the cats back to the stock muffler. Astounding value at like $300 – great sound (not too loud), nice x-pipe, and it de-restricts the worst part of the factory cat-back.
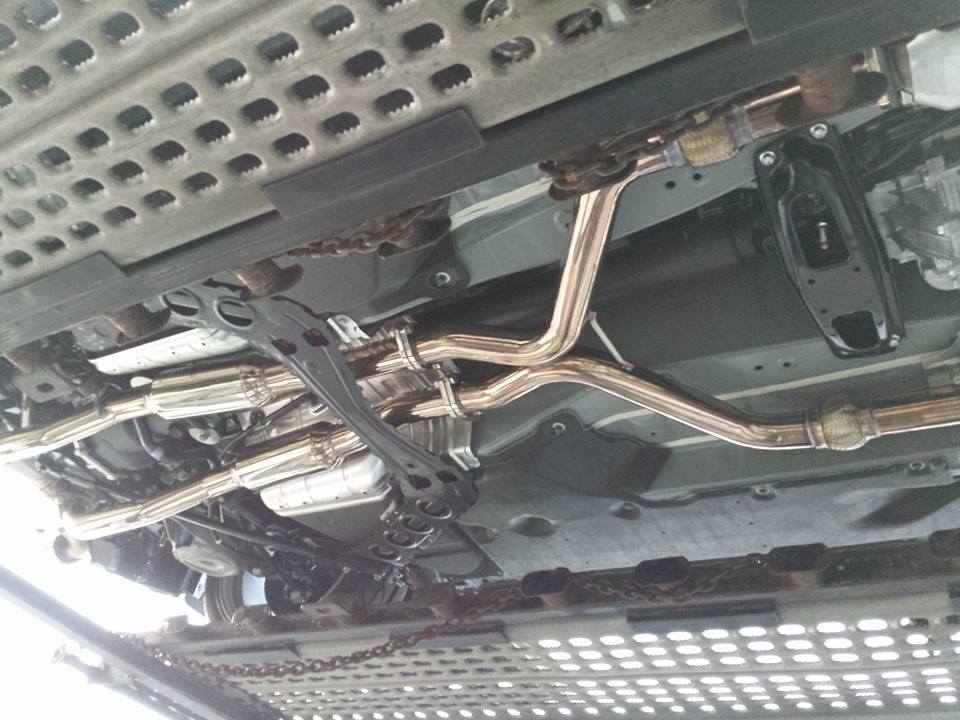
In ST we are allowed to relocate the cat up to 6″ downstream. This means one could conceivably use off-the shelf “longtube” headers, and put cats ahead of the flex pipe section in the above photo.
There’s a few things I’m leaving as considerations for future phases, and that’s one of them. At this point I’m not convinced the ones out there make any more midrange than stock manifolds + test pipes (or HFC). Top end, yes, but for a ton more $ ($1500+) and a ton of work – a header install on a 370 is supposed to be one of the most awful experiences ever – I’m ok putting that off for phase 2.
Last part is the box at far right – the Takeda cold air intake. This is similar in design to the Stillen G3 CAI that is super popular for this car – but in contrast, it doesn’t require cutting or modification of the car for installation.
Going to have to pull the nose off to do the oil cooler anyway, so can take care of this at the same time. I also like how Takeda played a part in sponsoring the No. 33 CA Sport/Skullcandy/Team Nissan 370Z run at the 25hr of Thunderhill endurance race, which ended today (the team finished third in class – in a car they just started on a couple weeks ago). Congrats to Bryan Heitkotter and the Skullcandy team!

So, those are the parts for now.
In addition to considering longtube headers for a future phase, there are also brake rotors (10lb/corner front, 5lb/corner rear, all for $1300) to get, and seats. The stock sport seats are all manual and weigh 42 pounds, so there’s only 17lb/side to save there. Even without these, the car should be around 3100lbs. with about 53% front weight.
With this car the idea is to keep the approach a bit more budget oriented, but also to make it a bit more of a street/race compromise. Want it to be something I wouldn’t dread hopping in and driving a great distance to an event. That’s what Street Touring is supposed to be about, especially with a newer car. Still only 600 miles on this one! This means I’ll be keeping the stock muffler (which doesn’t rob power but is ~20lbs. dead weight), stock motor and trans mounts, and going a little more gentle in rear spring rate than I otherwise might. When it’s time to do a race seat, will be looking for something with easier ingress/egress than a Cobra Suzuka.
Now it all just needs to get installed eh? 🙂