Many obstacles overcome, still more to go.
About a month ago I posted a list of stuck-points on the project – fortunately since then, with a lot of effort and tool purchases, progress has been made! Have put more time into the car this past month, than in any month so far. First, an update on each of the old sticking points-
Power steering leakage
New pump was purchased and super-carefully installed. All lines cinched up, and no leaks after a couple weeks, yay! Still have to see how it holds up under the pressure of real use with the pump cranking away, but so far so good.
Brake line fitting leakage
This was due to an incorrect flex line in the rear – correct part ordered and installed, and the brakes were bled, no leaks! My brake bleeding assistant, who’s never driven a manual car, had some trouble with my instructions to “push the pedal in the middle” – since the throttle pedal was sunken to the floor, the clutch appeared in the middle of the e-brake, clutch, and brake pedals. I’m going from corner to corner, wondering why fluid is barely eking out as I hear her pumping away! 🙂 A little revised instruction and it’s good to go.
Still had some air after a couple passes, at which point I realized the multi-piston Wilwoods need to be bled at the top of both caliper halves (inner and outer) to get all the air out. Last few bubbles gone and the brake pedal feels very firm inside.
Leaf Springs
This was a rather labor intensive process. In typical easier-said-than-done fashion they were cut down 2.25″ in length; bushings were trimmed or hogged out to fit appropriate sleeves for mount bolts; the front spring eyes were flipped and ground for clearance; initially the rears were flipped also but it looked like clearance would be an even bigger problem, so they were left upright, but still got some grinding.
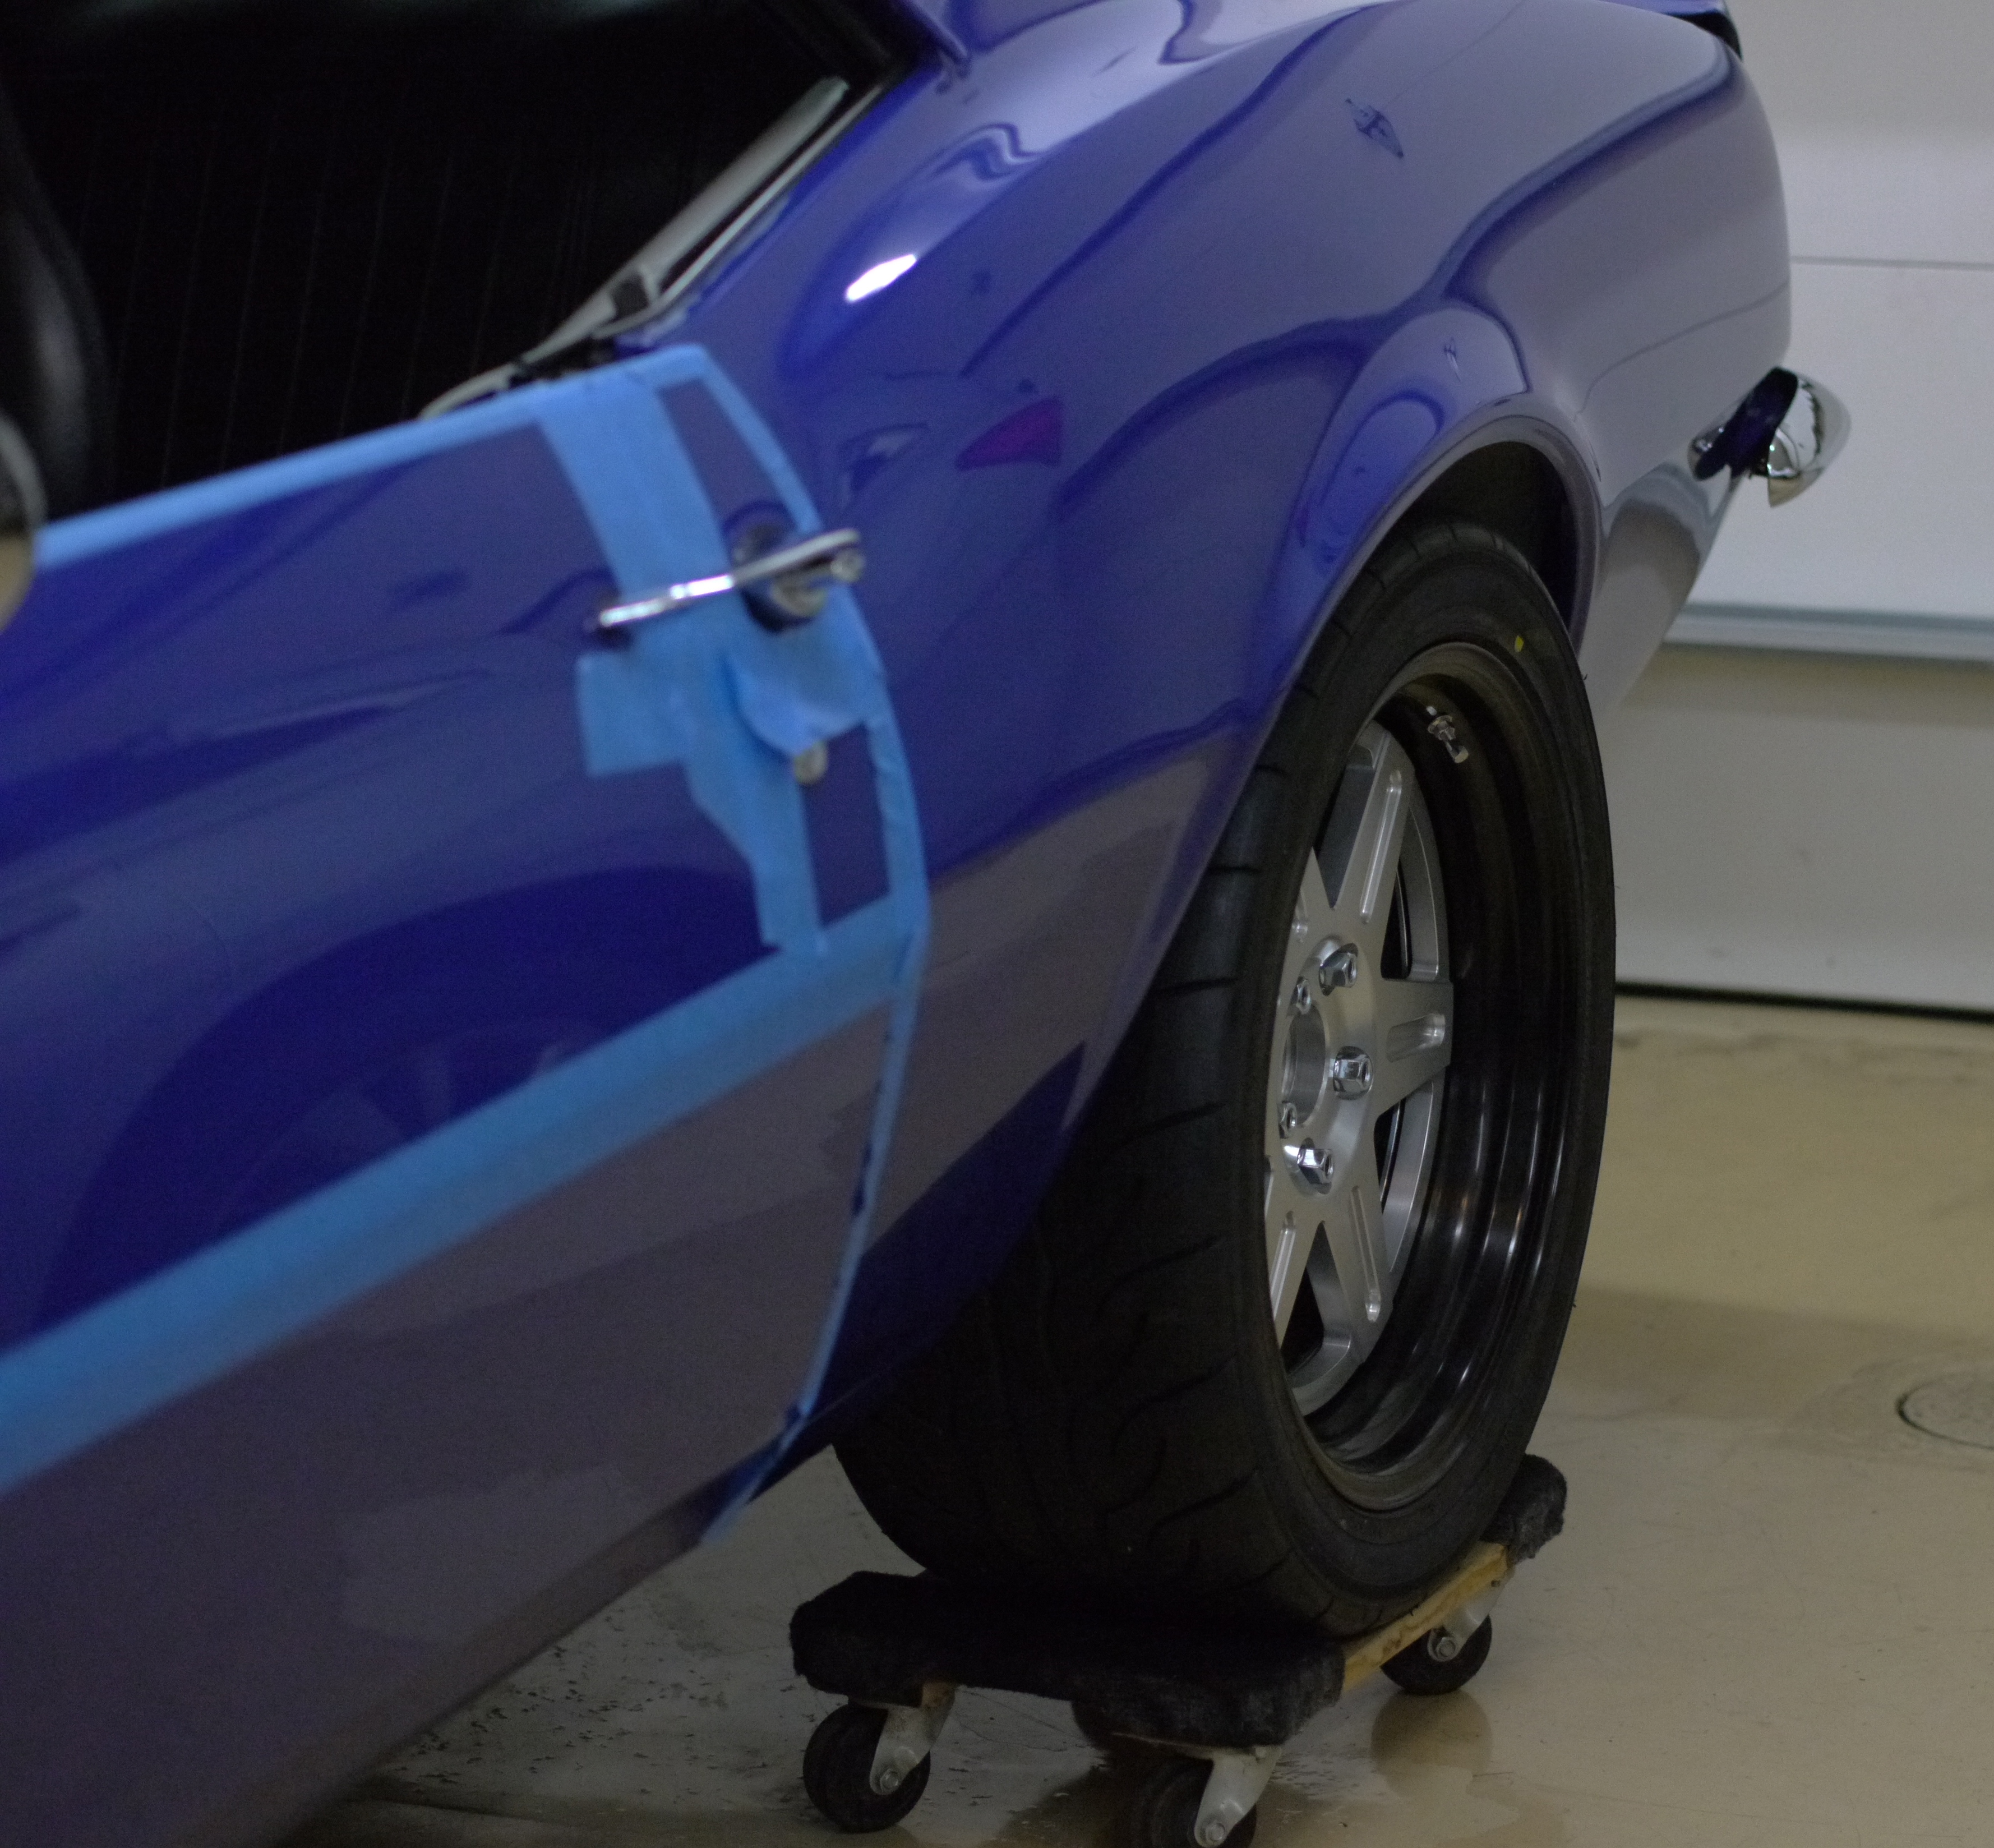
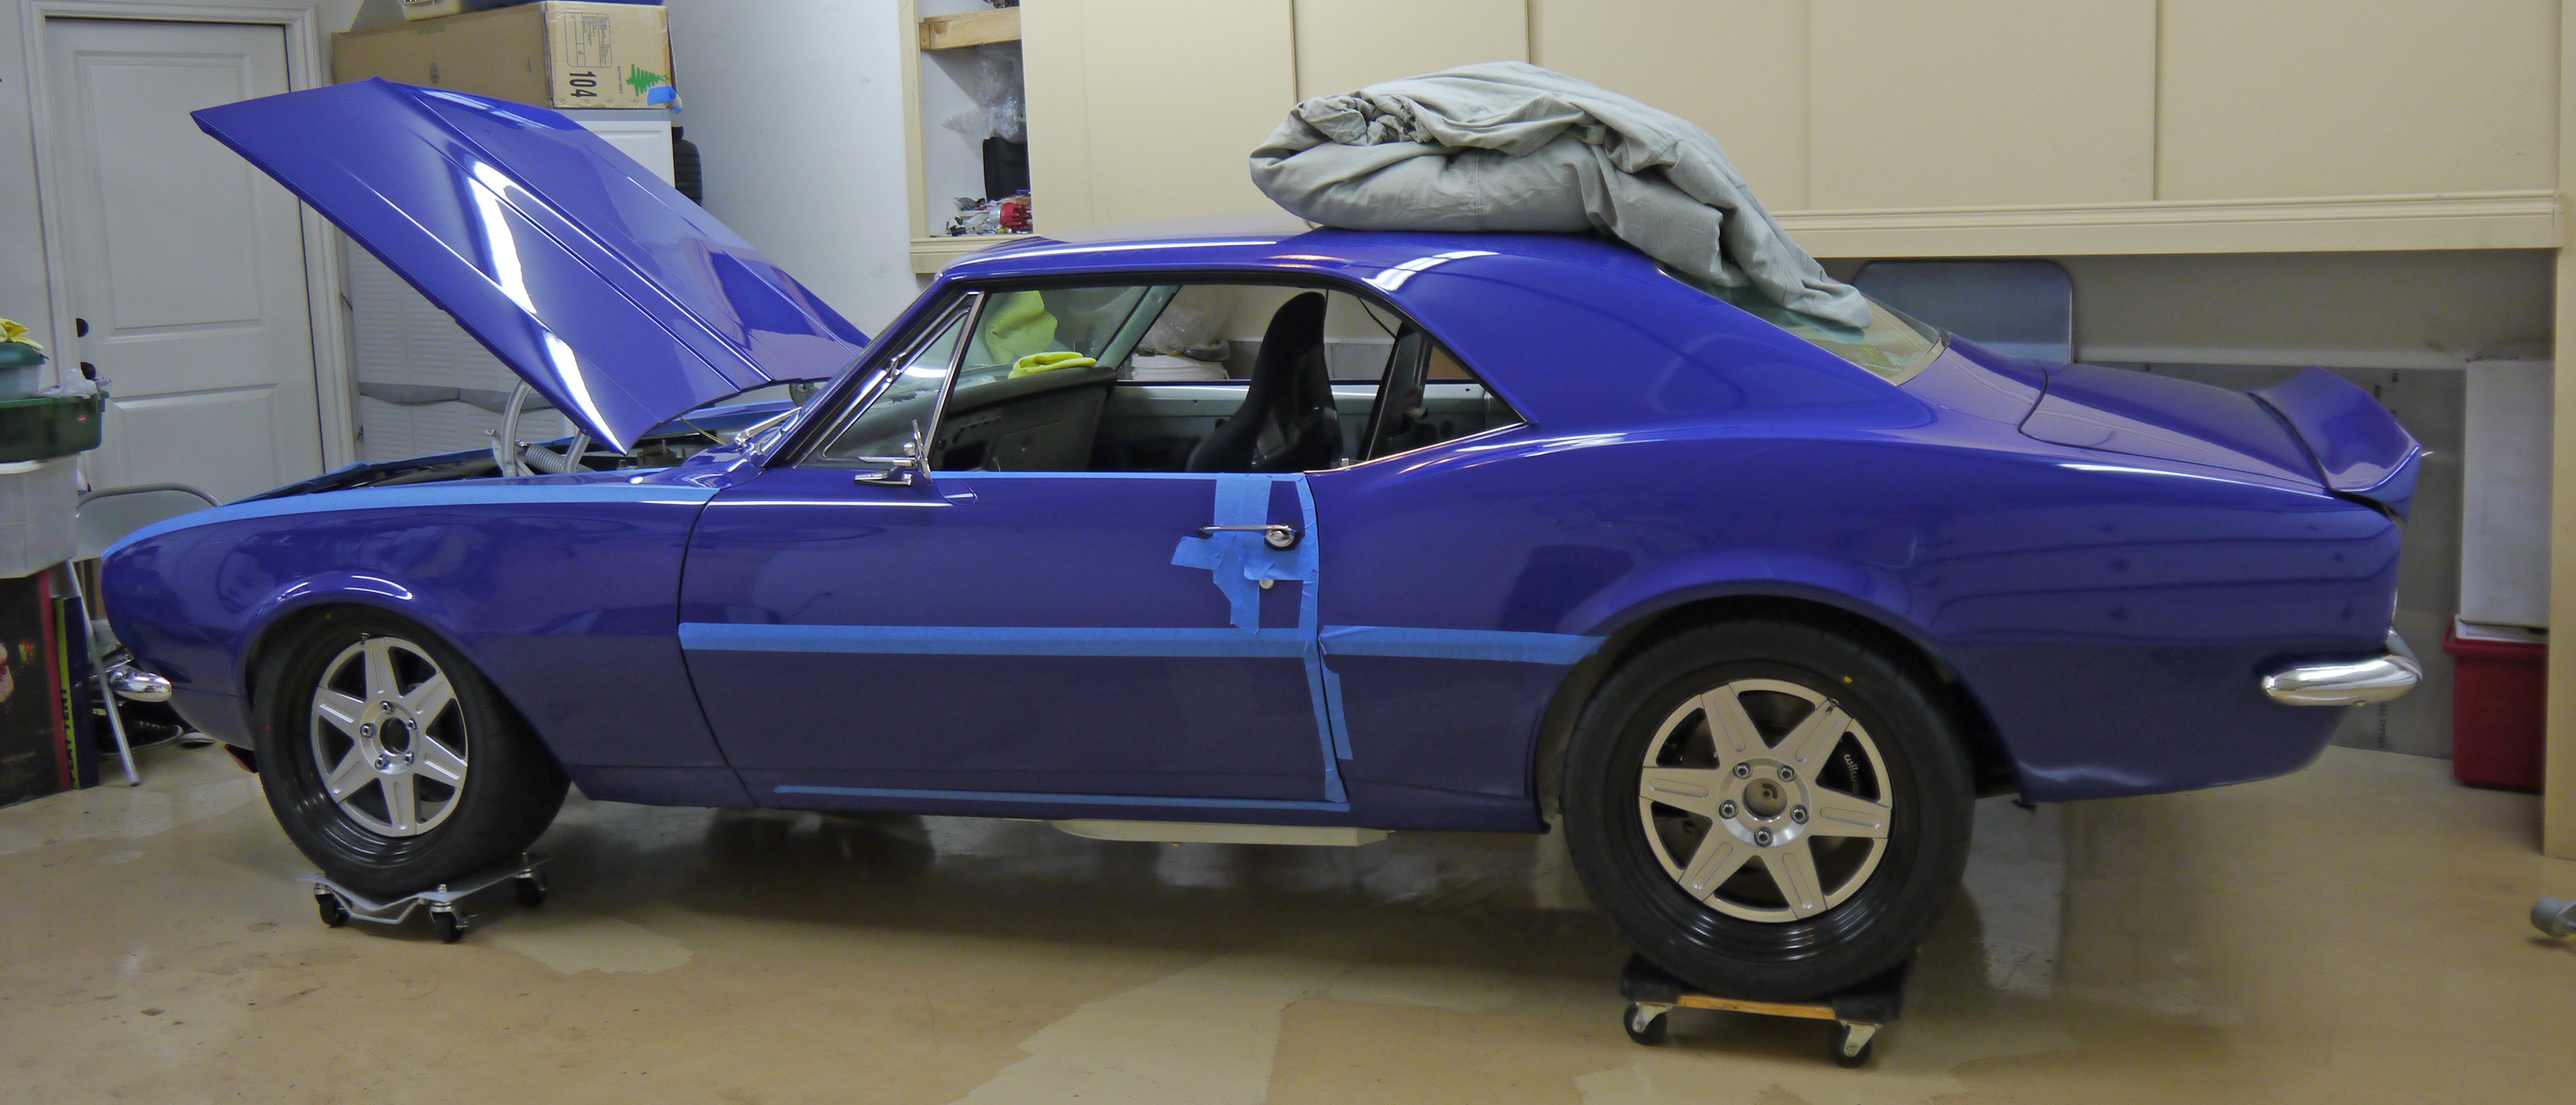
This has an ultra-scientific “one to two finger gap” in the rear. Added about 65 lbs. of fuel (more on that later) which only brought it down about 1/8″. Only weight left to go in is the headliner and door glass, so this is where it’ll be for now. It’s not likely this spring rate will be the one I wish to keep forever, so for the next pair of springs, it should be easy enough to request an additional ride height decrease, in addition to the spring length decrease. Bushing work will swap over.
Oh, and in the picture above, the rear wheel has 3/4″ of spacer. There’s room to go inboard or outboard bit if needed, but this provided a more athletic appearing stance, while still providing for tons of wheelwell clearance in all directions. At this setting rear track width is 70.75″, which still, isn’t *that* wide. It’s about 4″ wider than my 240sx was, and about 7″ narrower than the Viper.
Road Draft Tube
Have to thank my buddy John Coffey for talking me through this one. Tried several different things and took a long time with this, and ultimately found a solution. This item was holding up permanent installation for a lot of simple things in the engine bay, so once it was out of the way a lots fell quickly into place – carburetor, fuel lines, distributor, throttle and choke linkages, etc. The tube coming off the road draft vent hole is the black one fuzzily visible in the passenger side carb photo below-
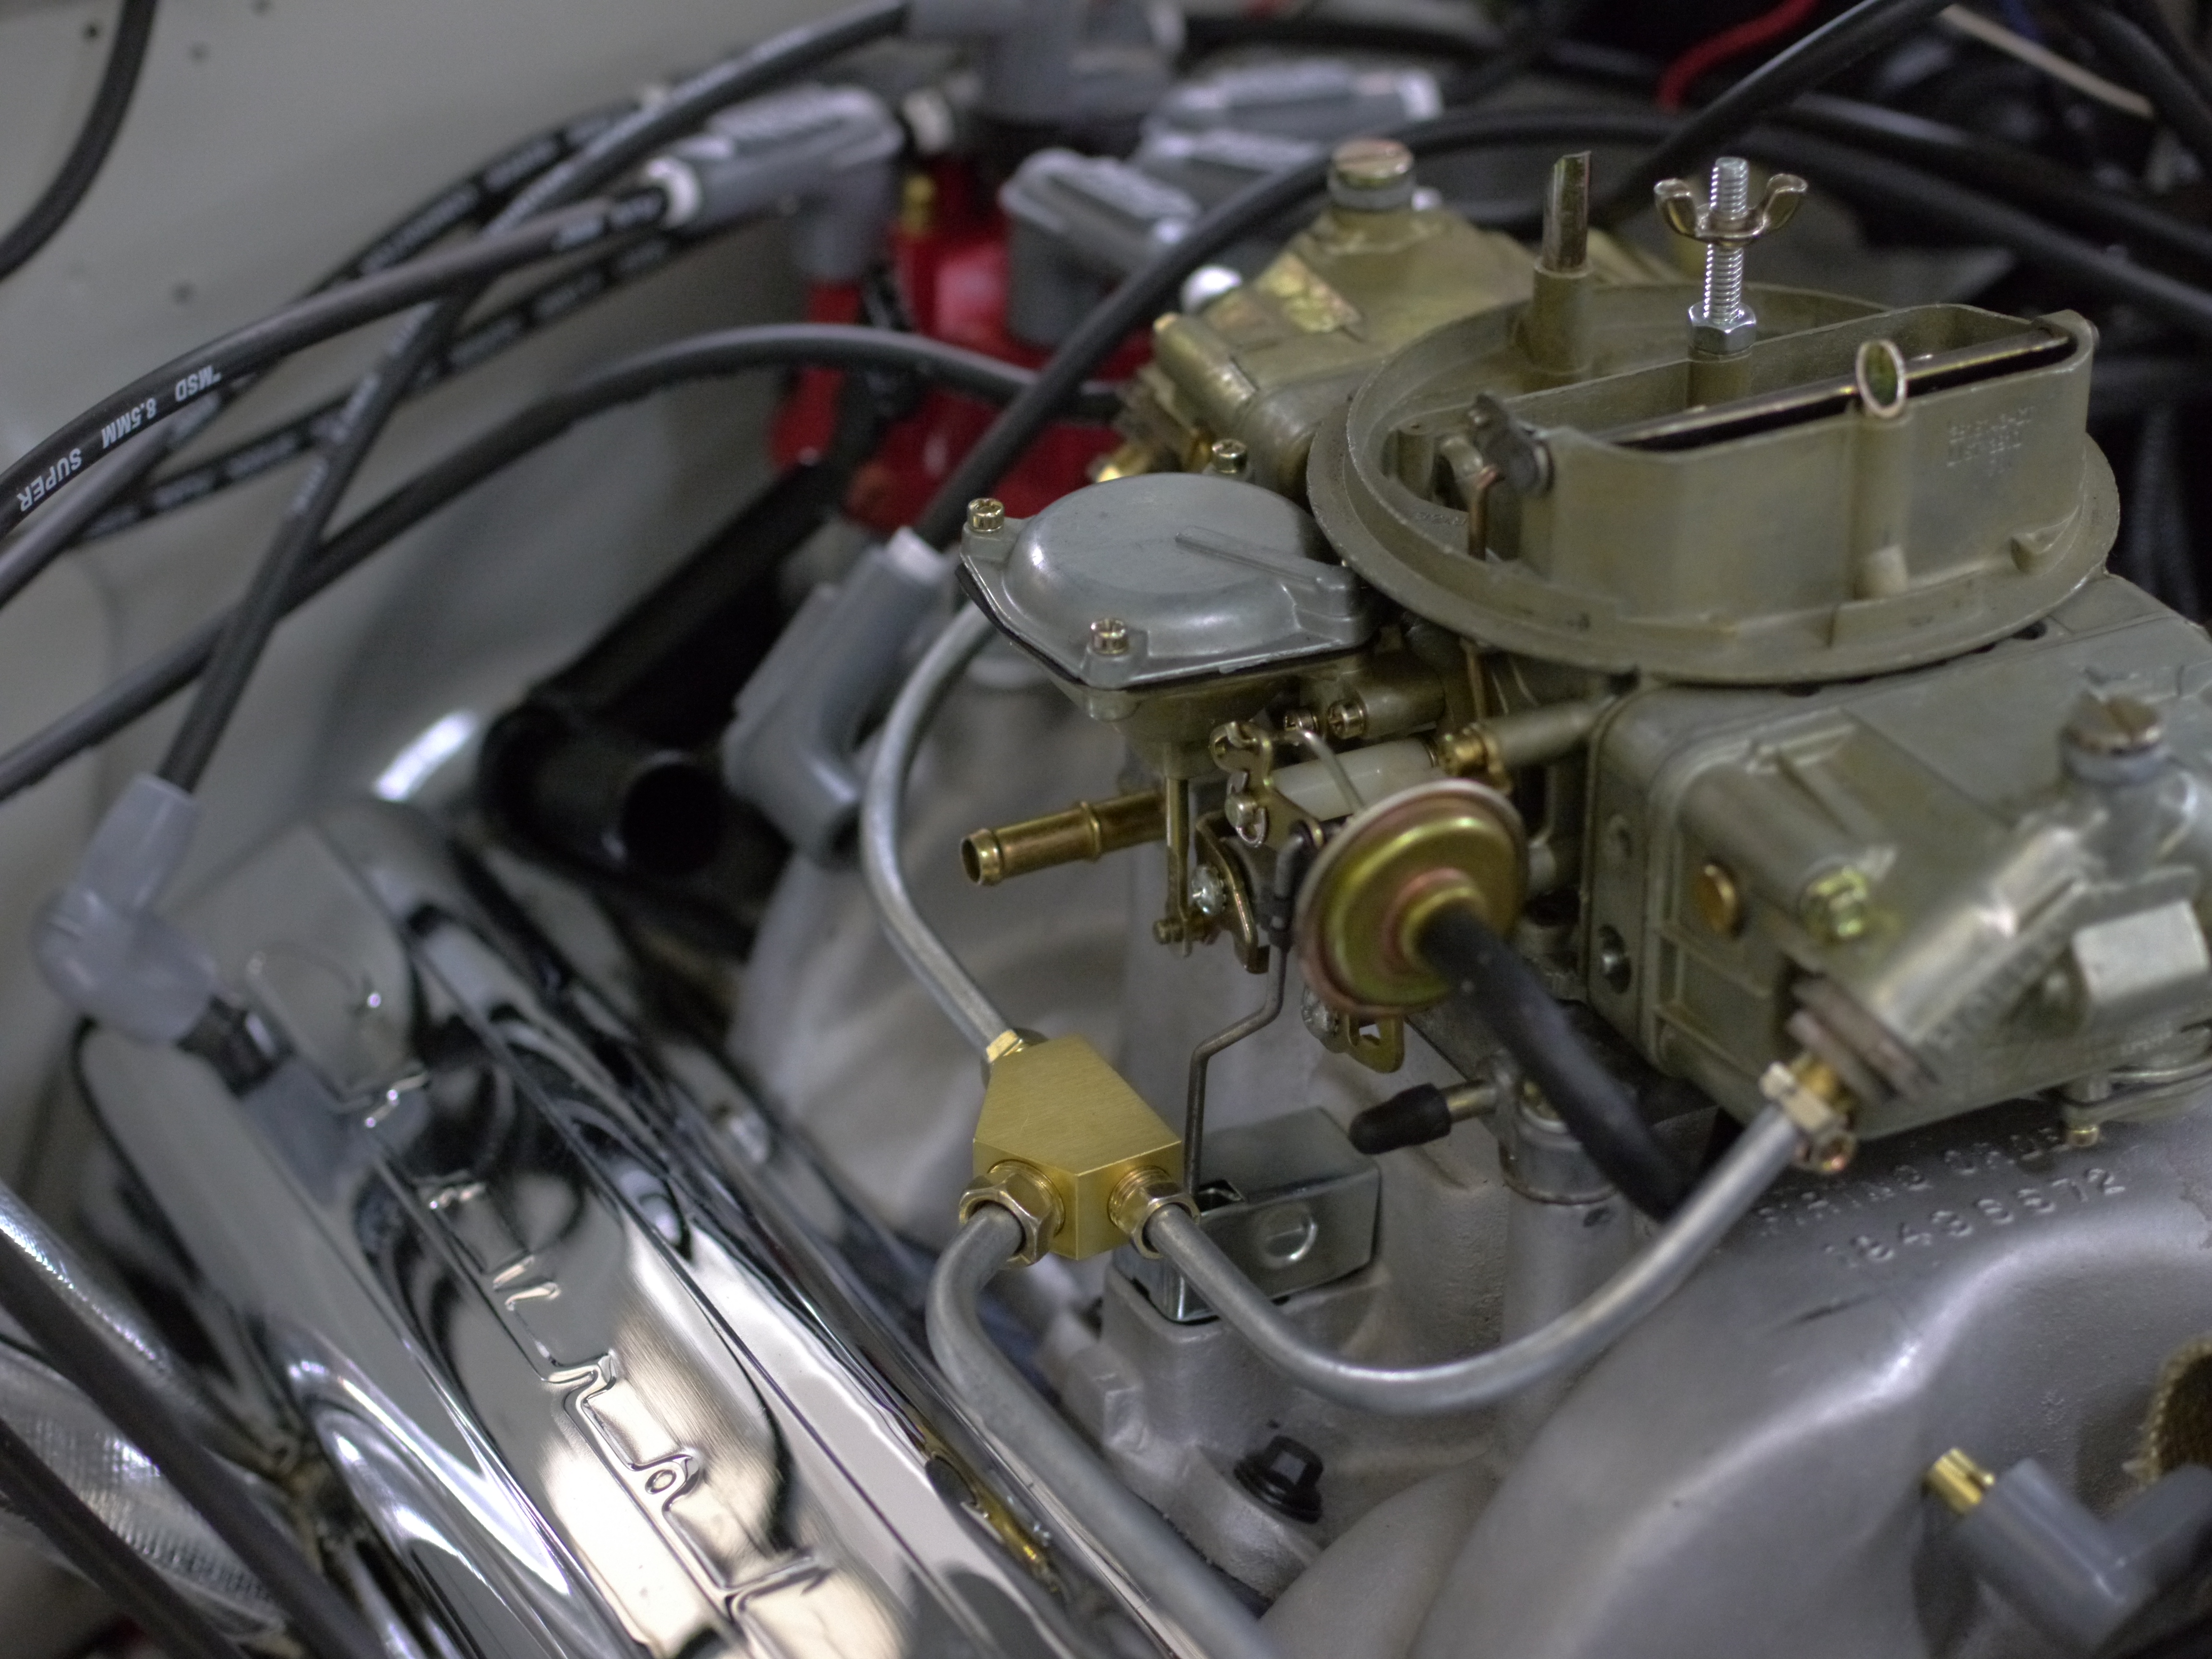
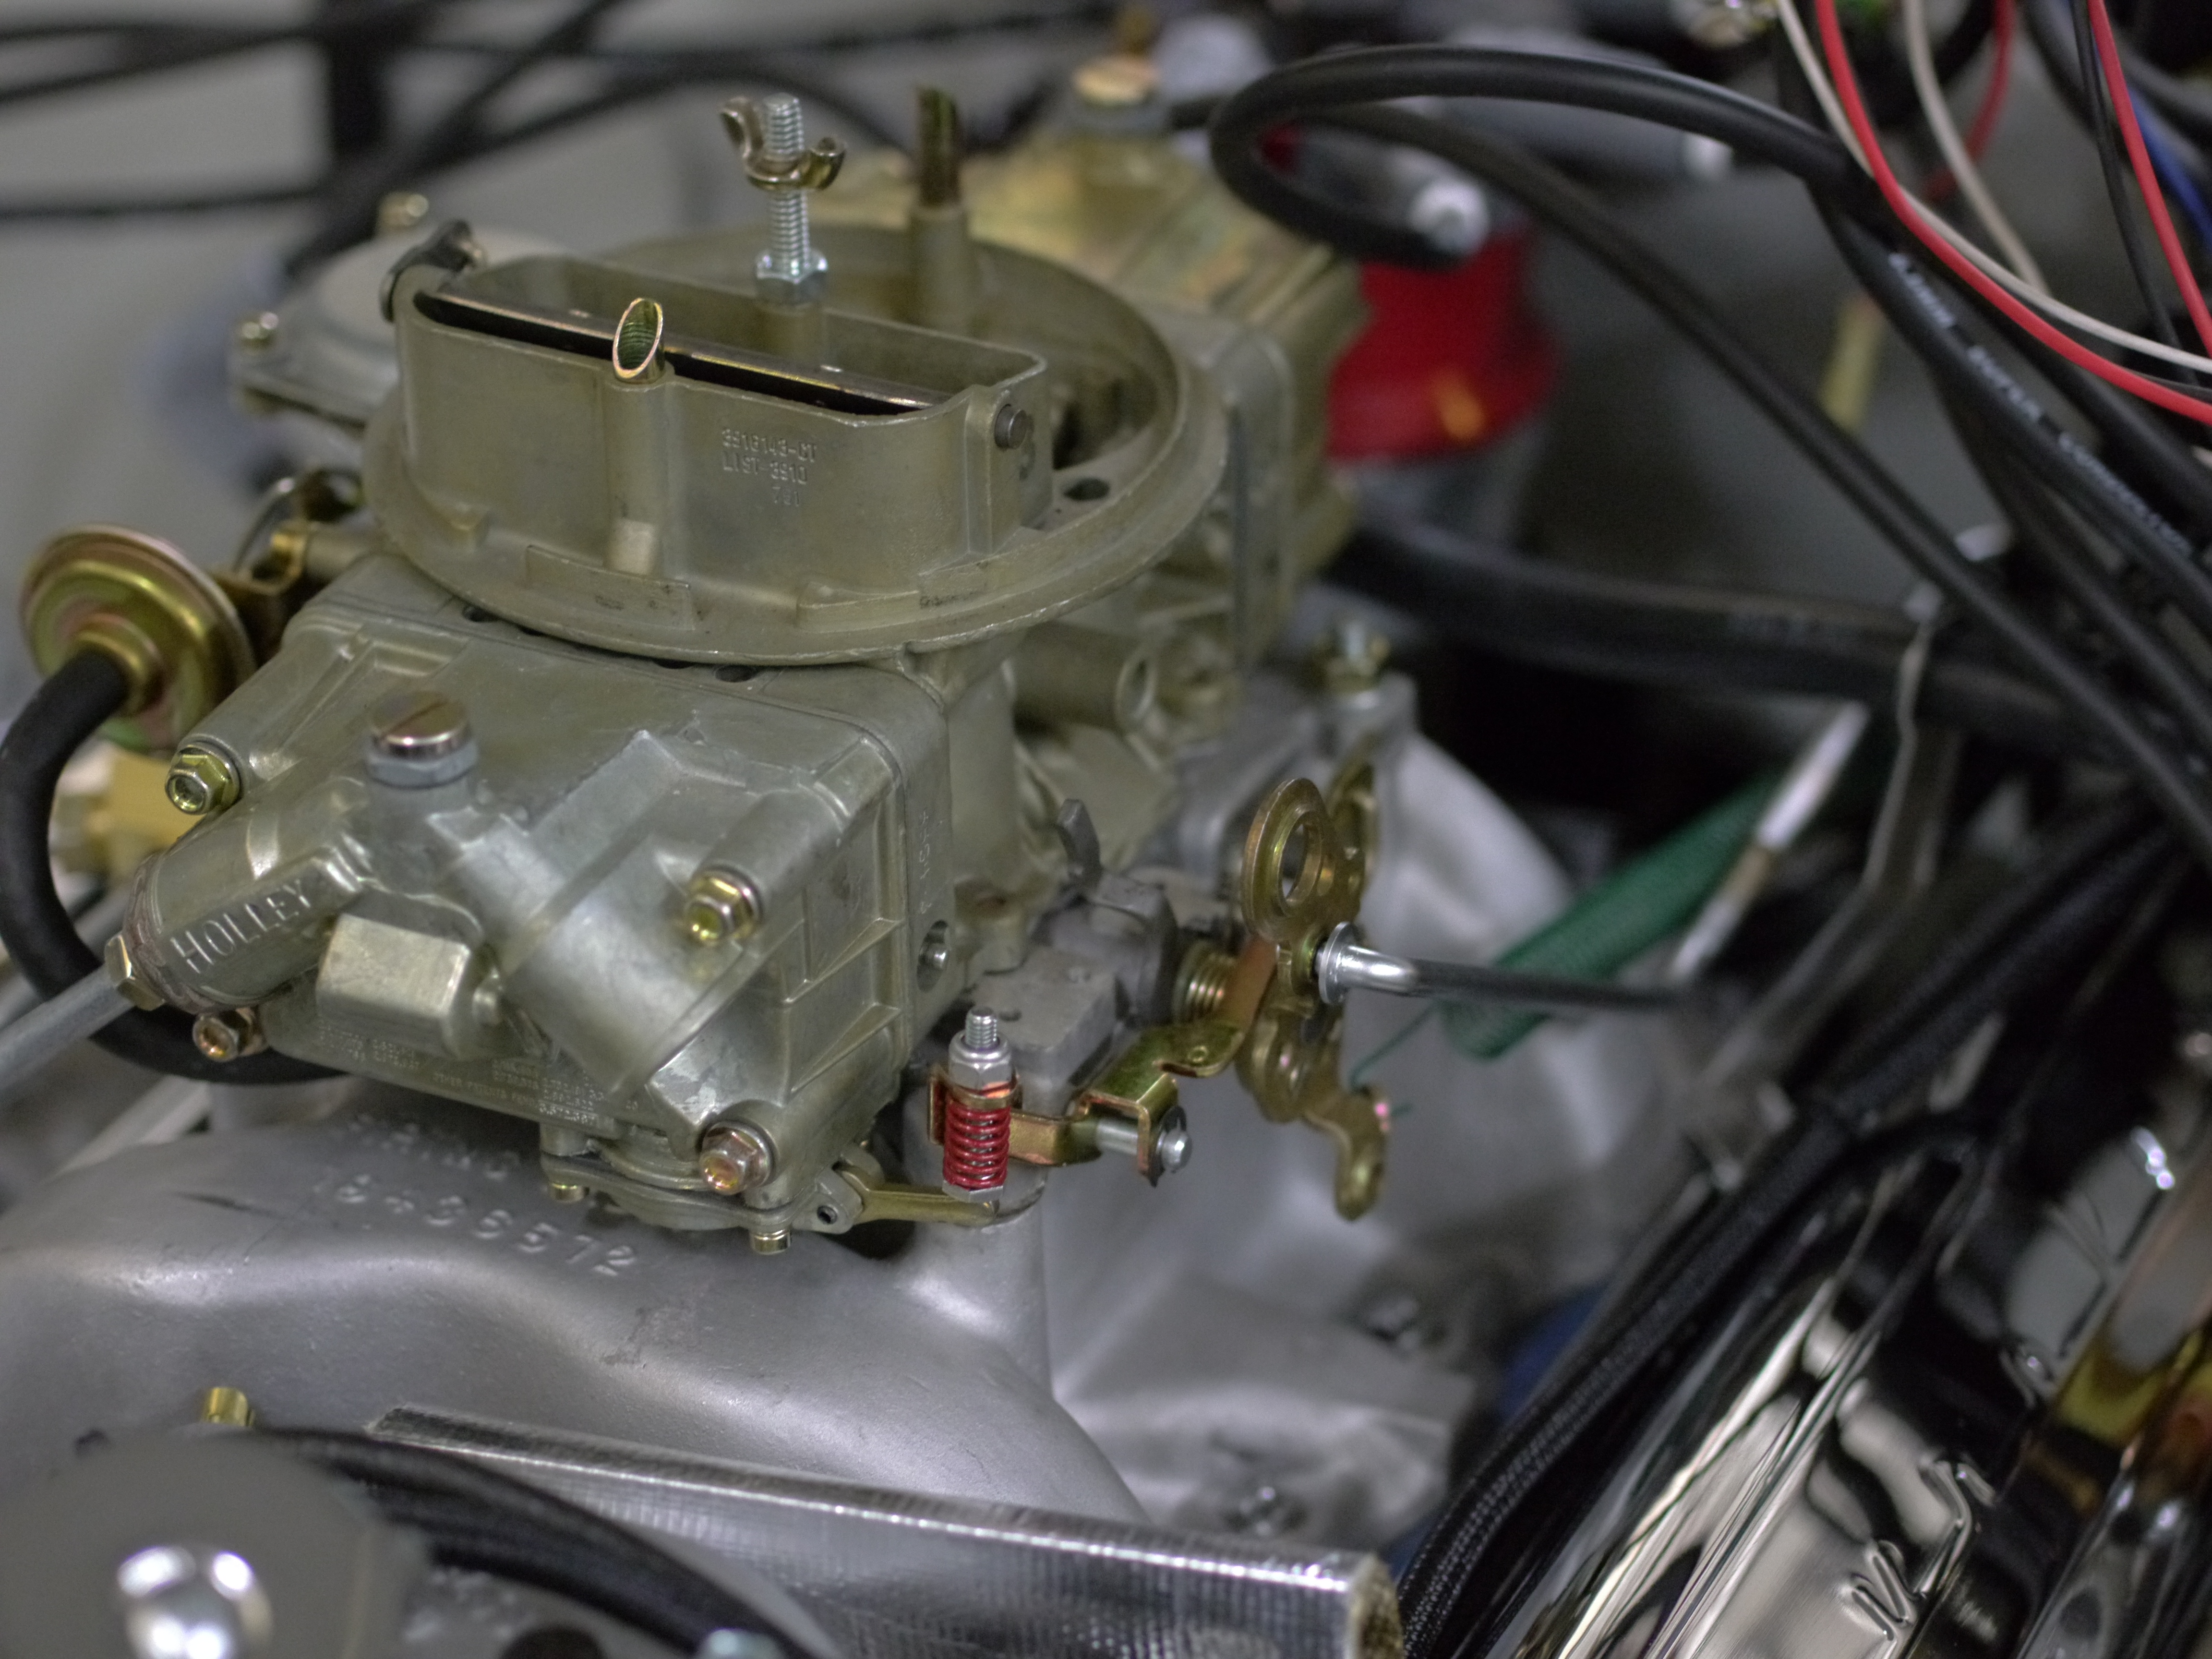
You may note, the stock-style valve covers. These are actually the third set of valve covers I have for this thing – the first set didn’t fit the bolt pattern (they’re for an even older small block) and the second set were a bit bigger and made of thicker material. They *look* nice and original, but caused all kinds of interference problems with things like the fuel line and the bracket for the power brake booster vacuum line, visible above. While in general I’m not a fan of extra chrome, these are at least very lightweight, and totally stock.
Coolant Temp Sensor Port
This problem begat a bevy of tool purchases. After nothing could convince the old plug to come out, began drilling with ever-larger holes. The largest thing I had on hand for going through metal was 3/8″ (bits and chucks), so it was time for some upgraded hardware. Now have a new 1/2″ chuck drill, and an array of drill bits up to 1″ in size.
Also bought a 1/2″ NPT tap to repair the threads, and a special 45/64″ bit as the final pass before using the tap. After using the 45/64″ bit, all that was left of the plug was like foil and I could pull it out with needle-nose pliers.
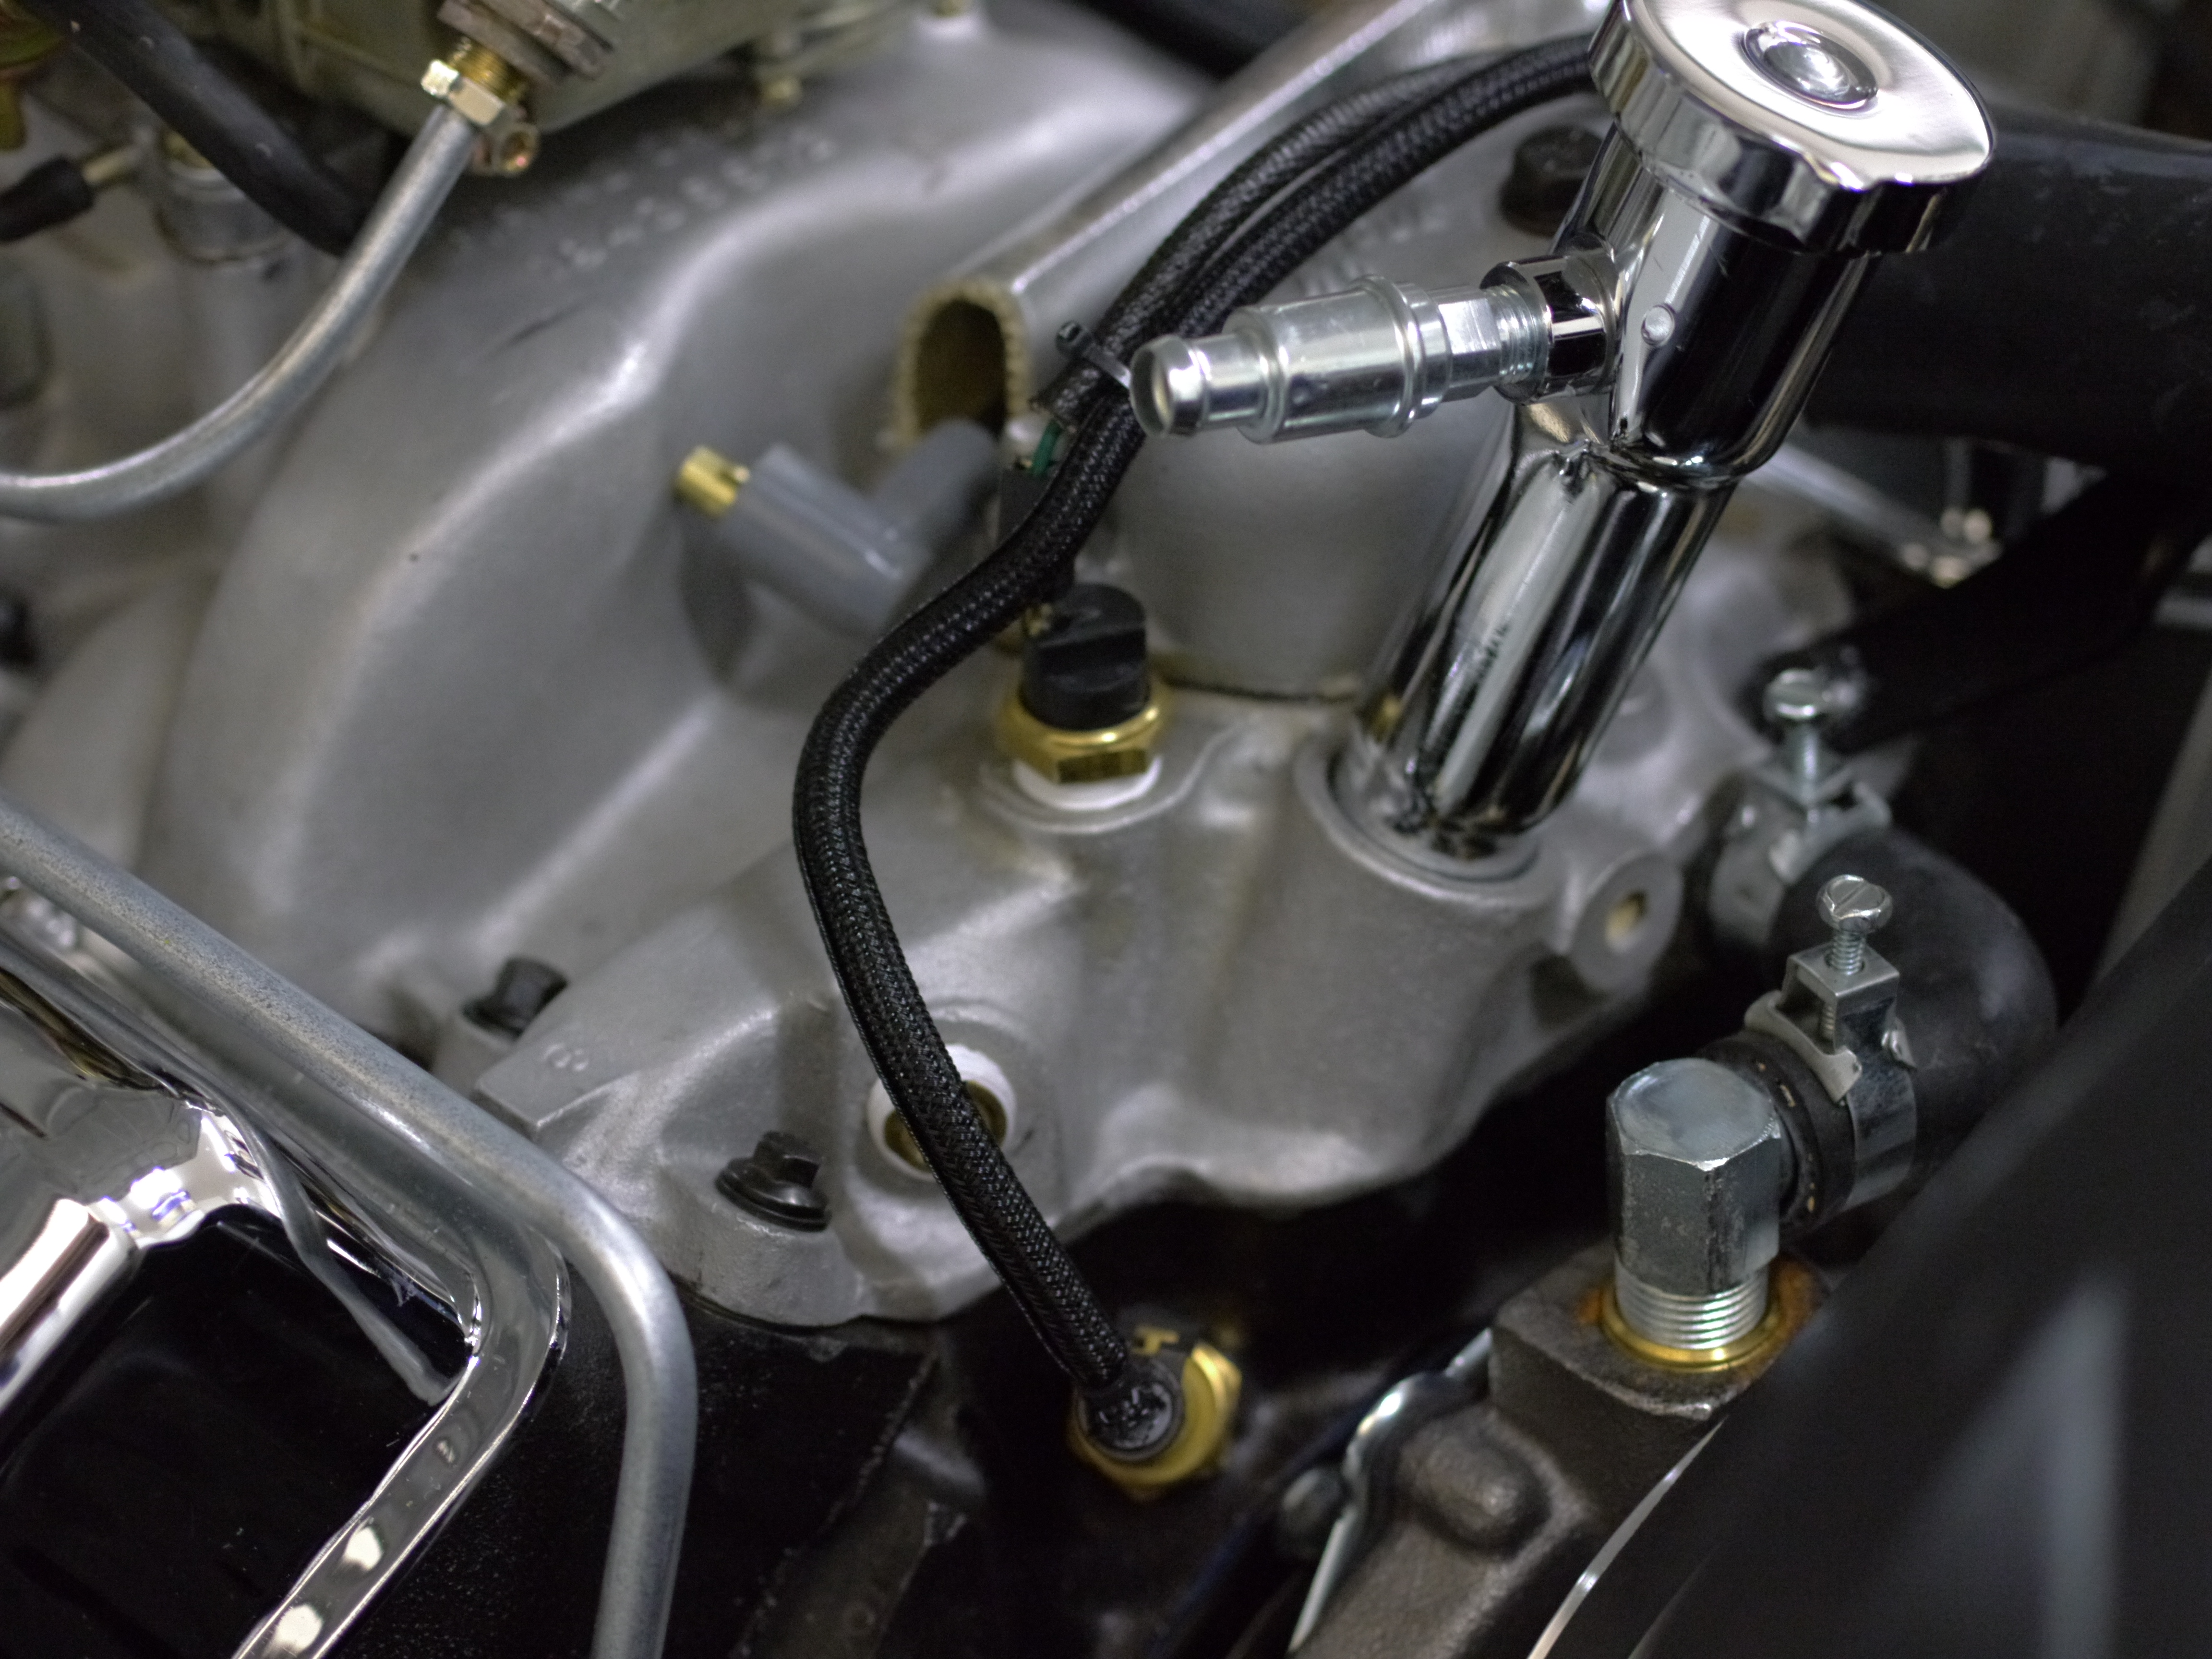
Hooray! Coolant temp sensor in its appropriate location!
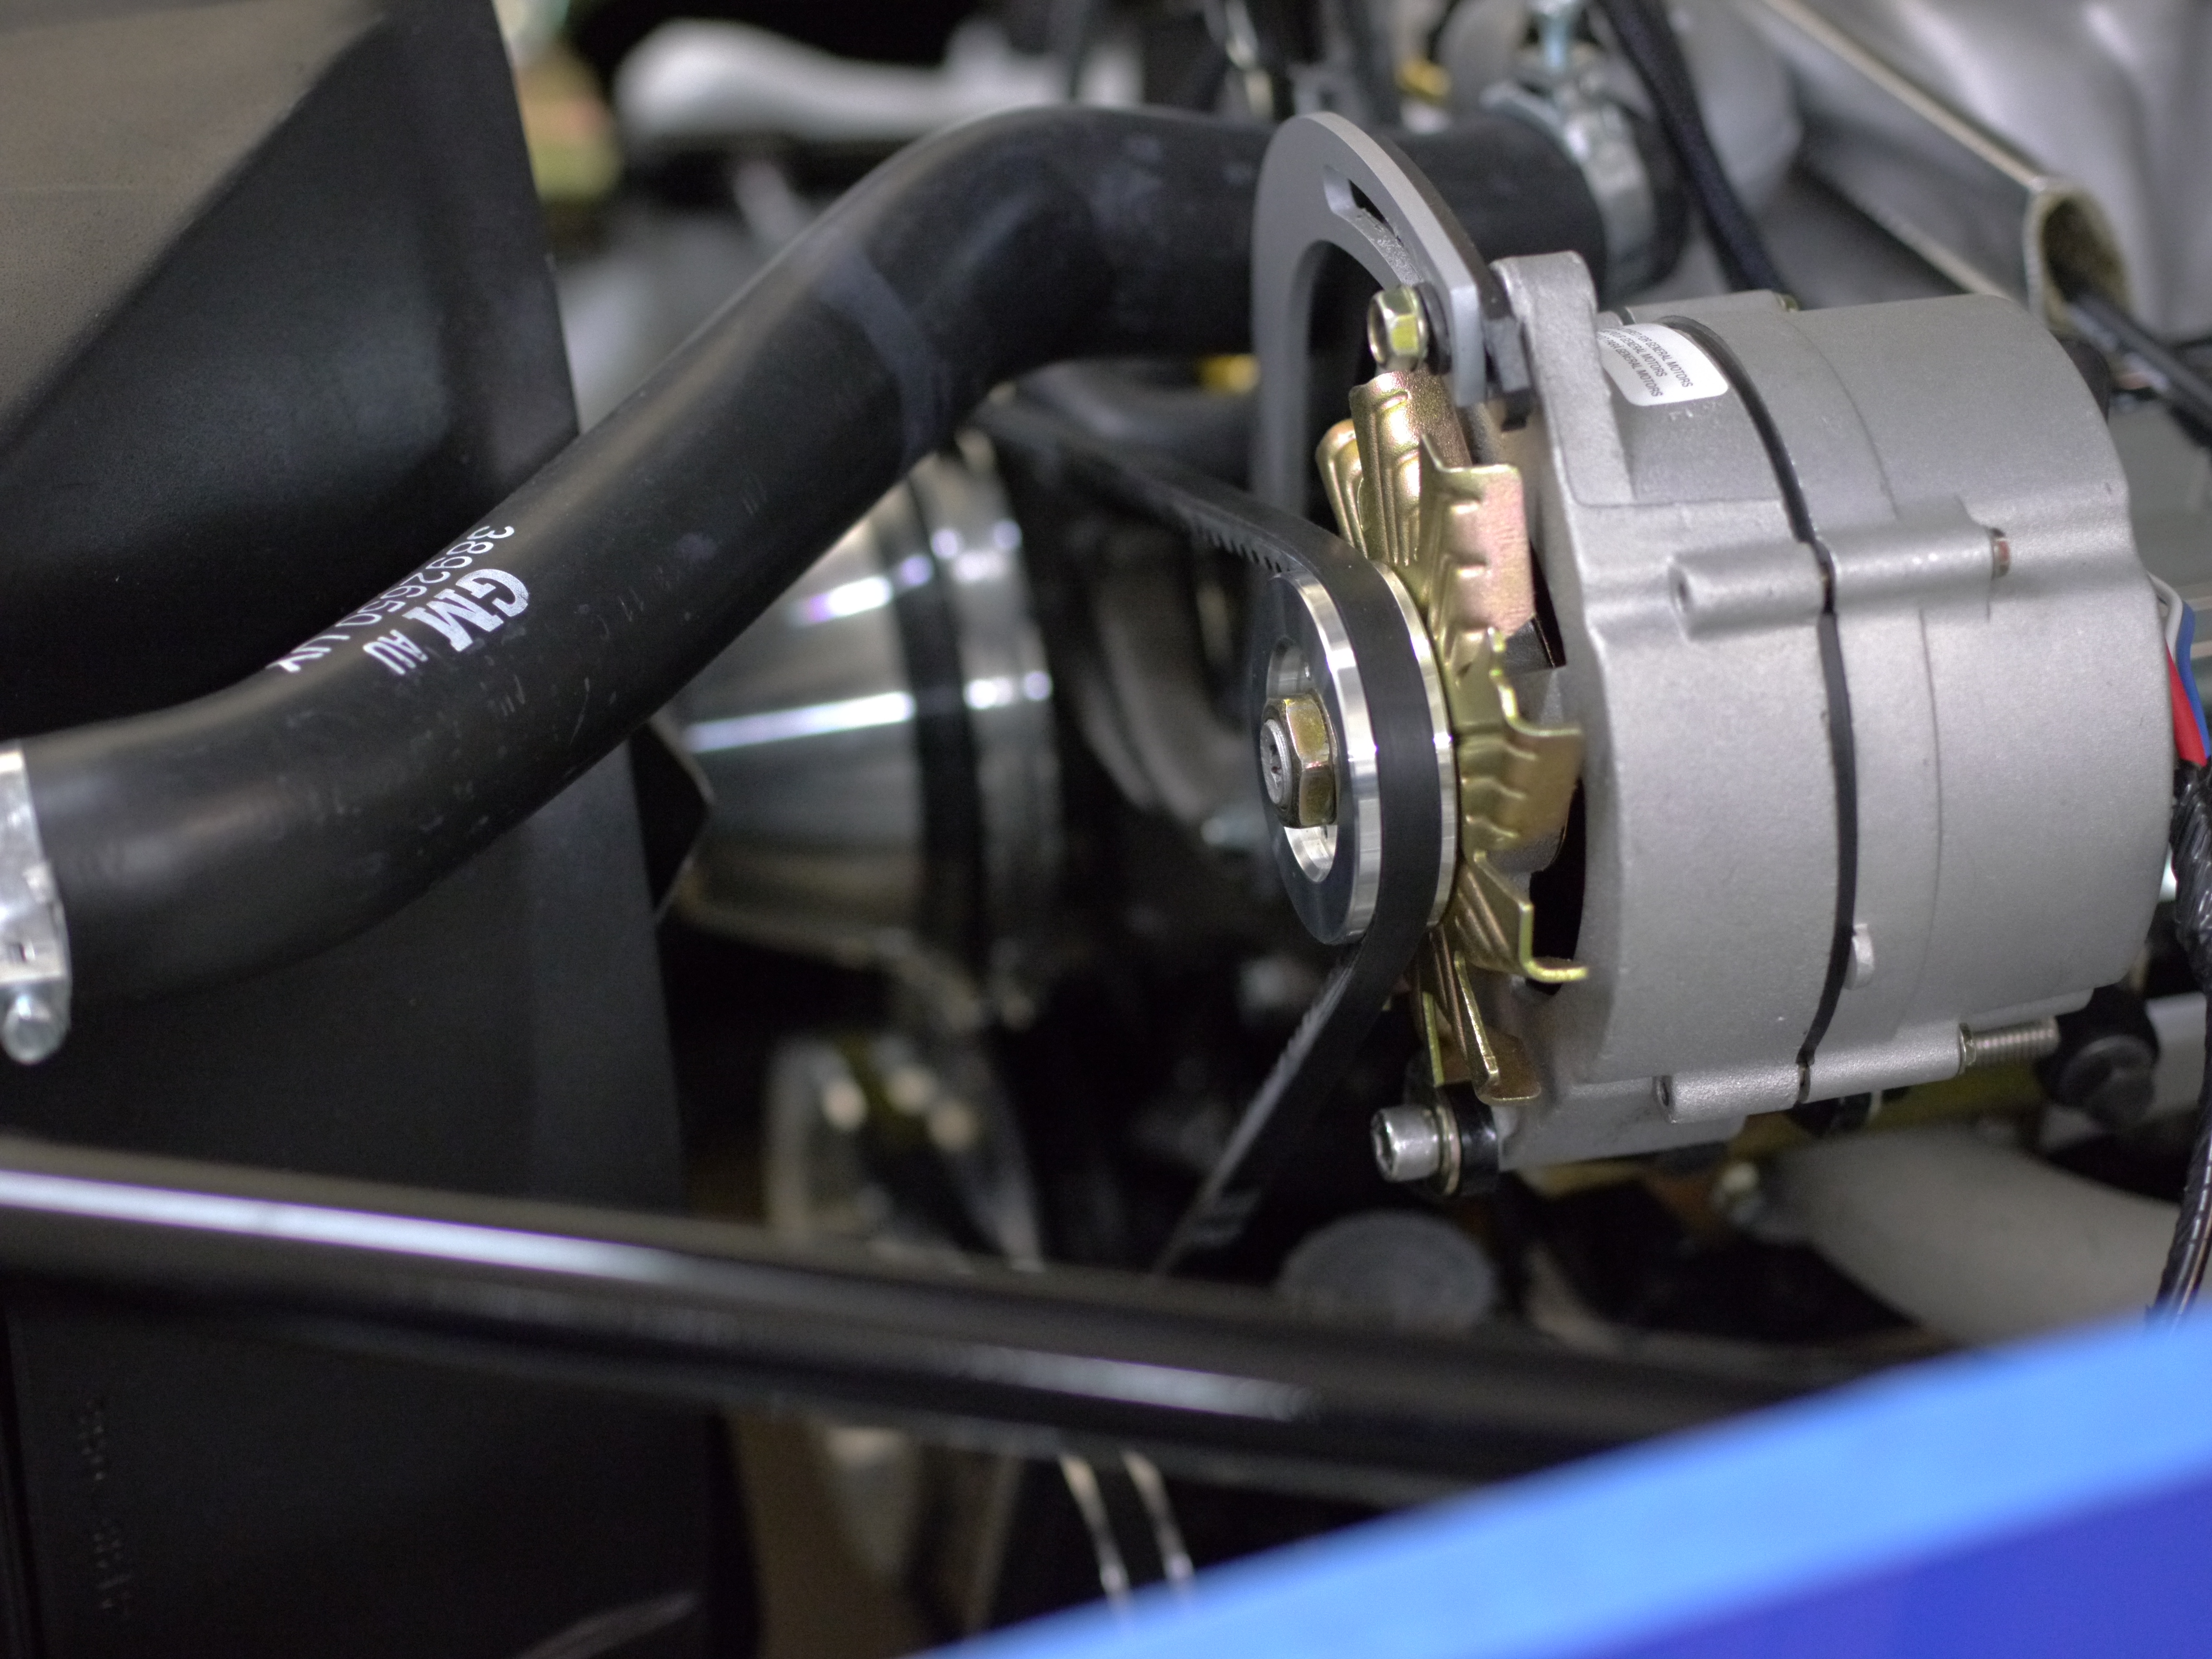
Also visible in this pic, is the new oil pressure sensor. This is a 1/8″ NPT sensor occupying a small port in the block previously filled with a small square plug. This too necessitated some tool purchases since it was a 7mm square plug, so none of my 6-point sockets would fit it, and the only way to fit a wrench on it, would be to pull off the water pump; no thanks. Ended up buying one of these universal socket things, advertised to work on 1/4″ – 3/4″ bolt heads of all shapes and sizes. After some monkeying, it got a grip on the thing and got it out. The tool earned its keep in that one action!
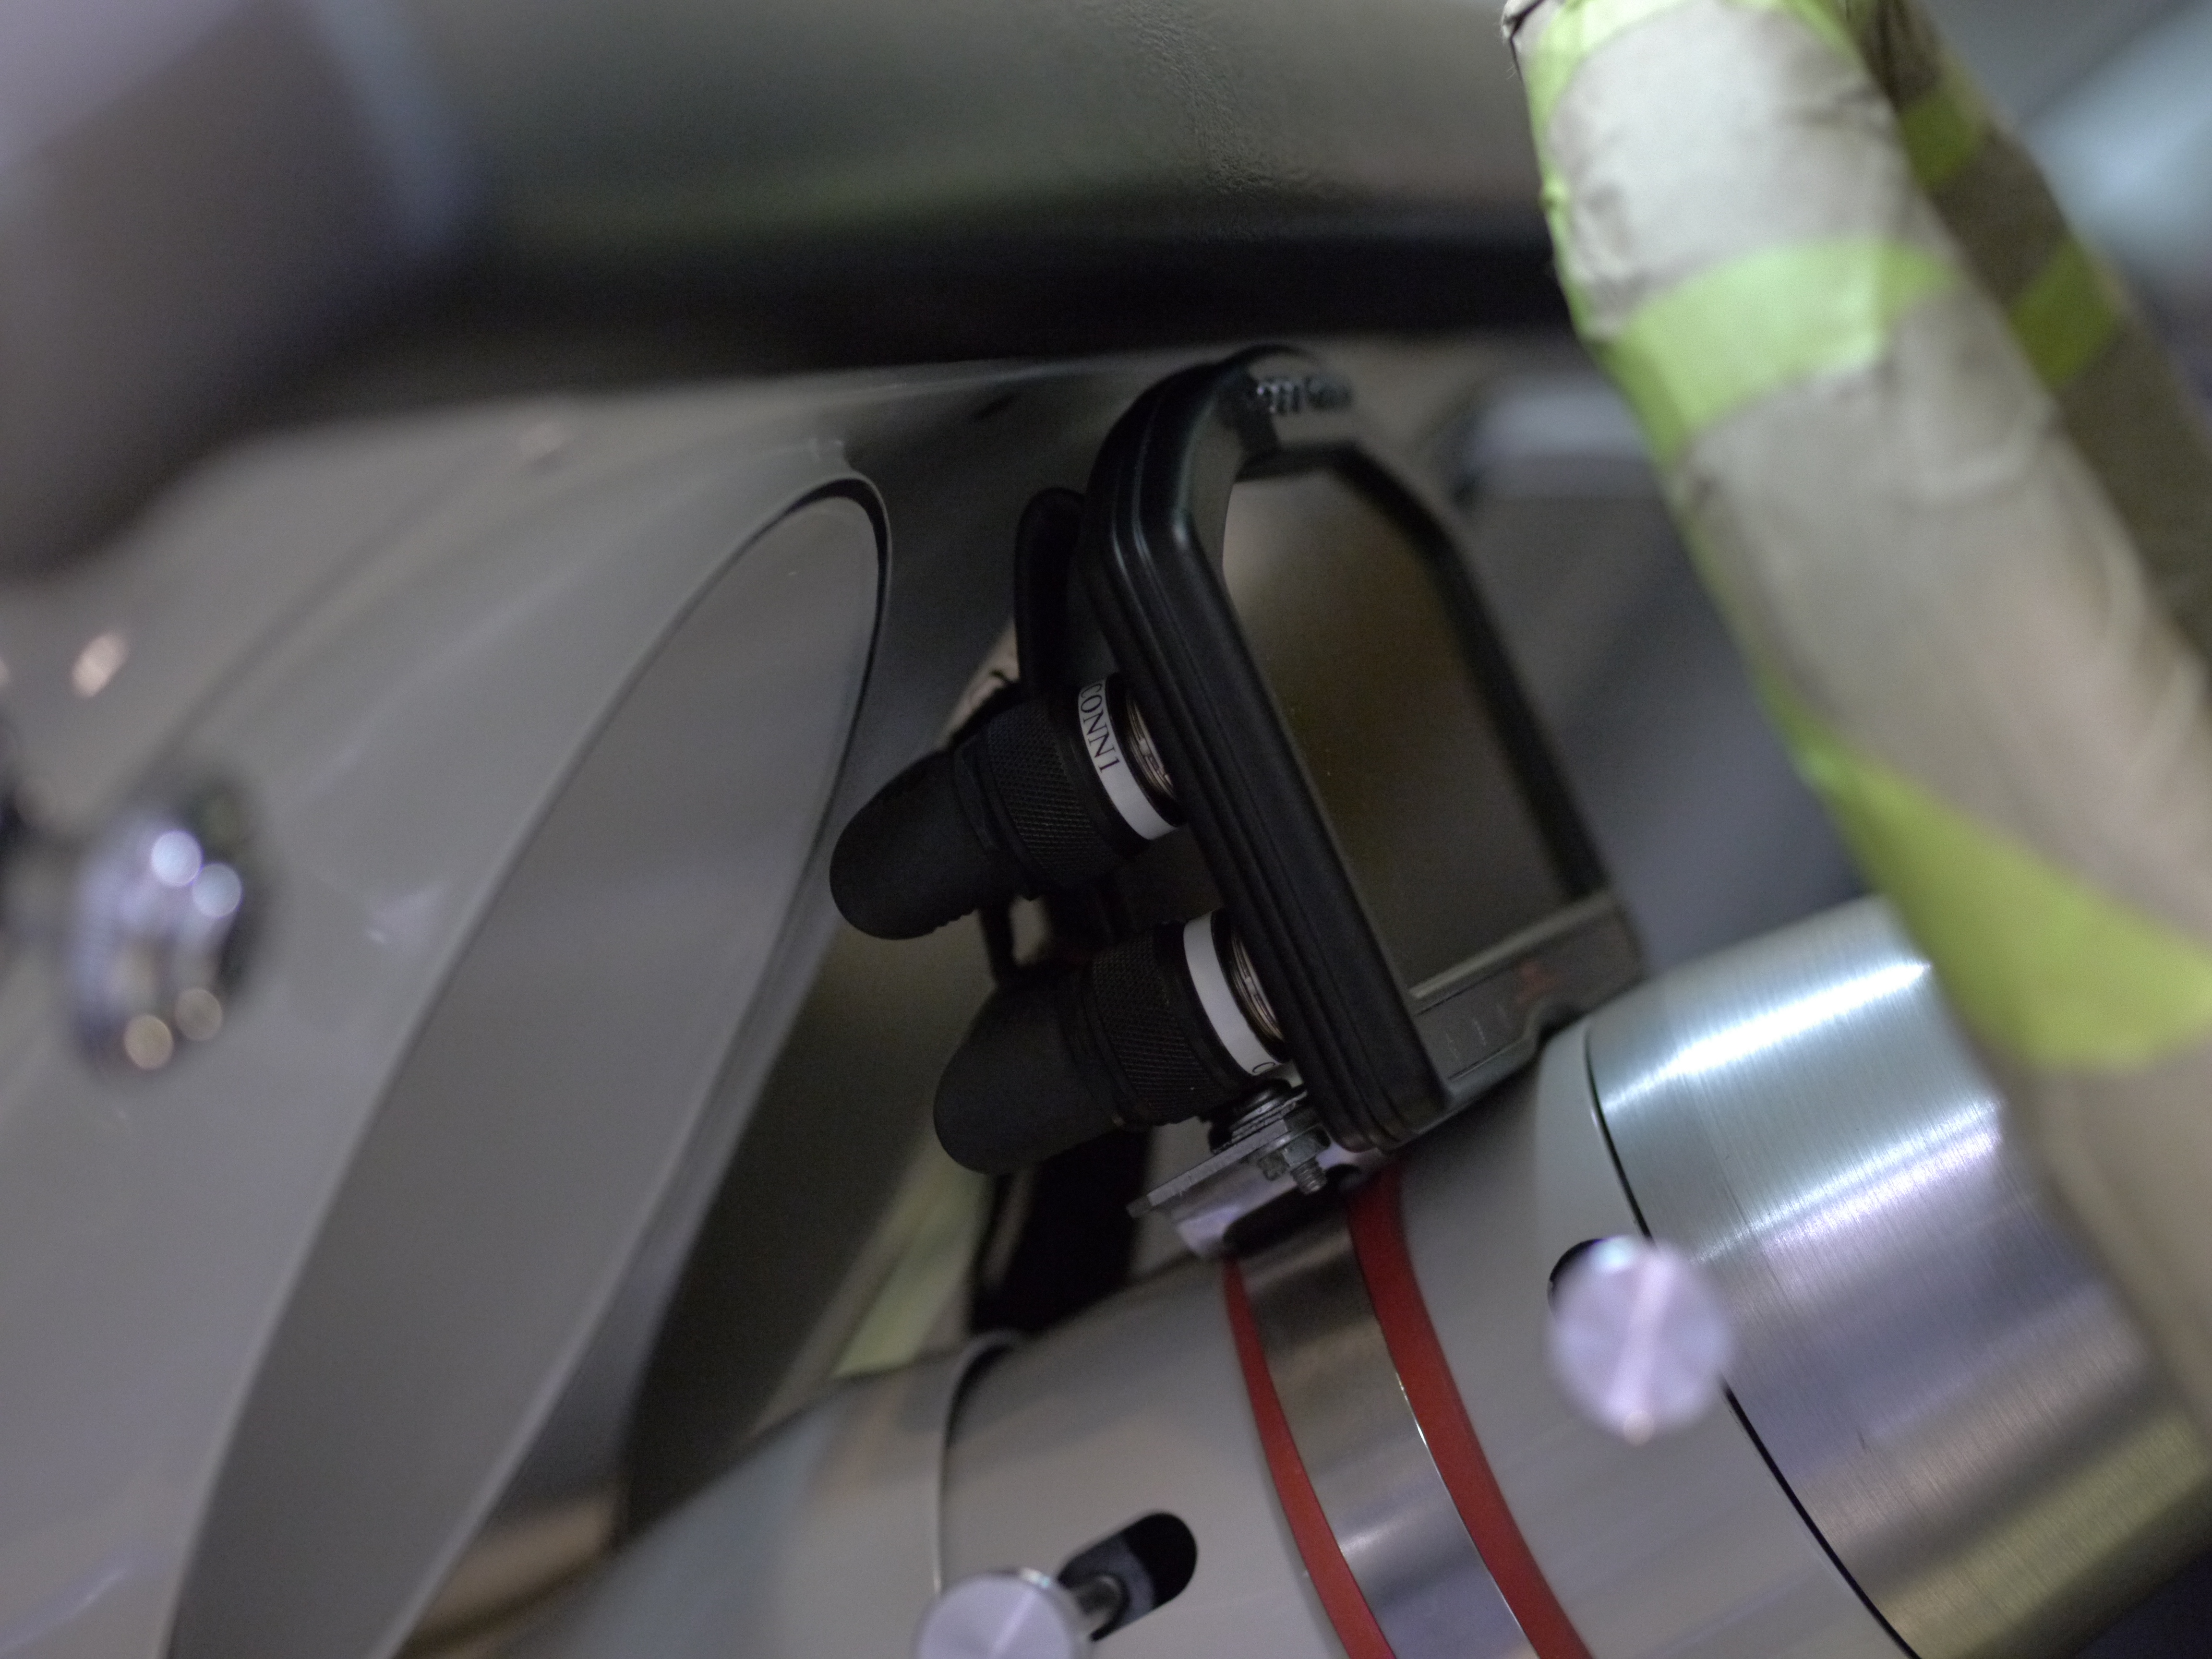
Perhaps apparent from the way the wires for the oil pressure sensor have been run, am making a big effort to keep the wiring tidy and professional in the car. Bought a ton of heat shrink tubing and overlay sheathing, in an attempt to keep everything clean, bundled, and protected.
Vent Windows
No progress on here from last time. The passenger vent window is just about ready to go in, been focused on what’s needed to get it running.
New Progress
Lots of other progress has been made in addition to getting the above accomplished.
First Fuel Purchase
One of the simpler ones – the fuel line installation was completed, so it made sense to get some gas. We happen to have a very neat retro gas station just a few miles from the house, that sells all sorts of good gas right at the pump, and comes complete with a smiling young man offering to clean your windows or check your oil. It’s mostly frequented by the well-to-do’ers of RSF, topping off their Range Rovers and exotic sports cars. I felt out of place with two crummy 5 gallon plastic jugs in the pickup, but the Camaro will look right at home there.
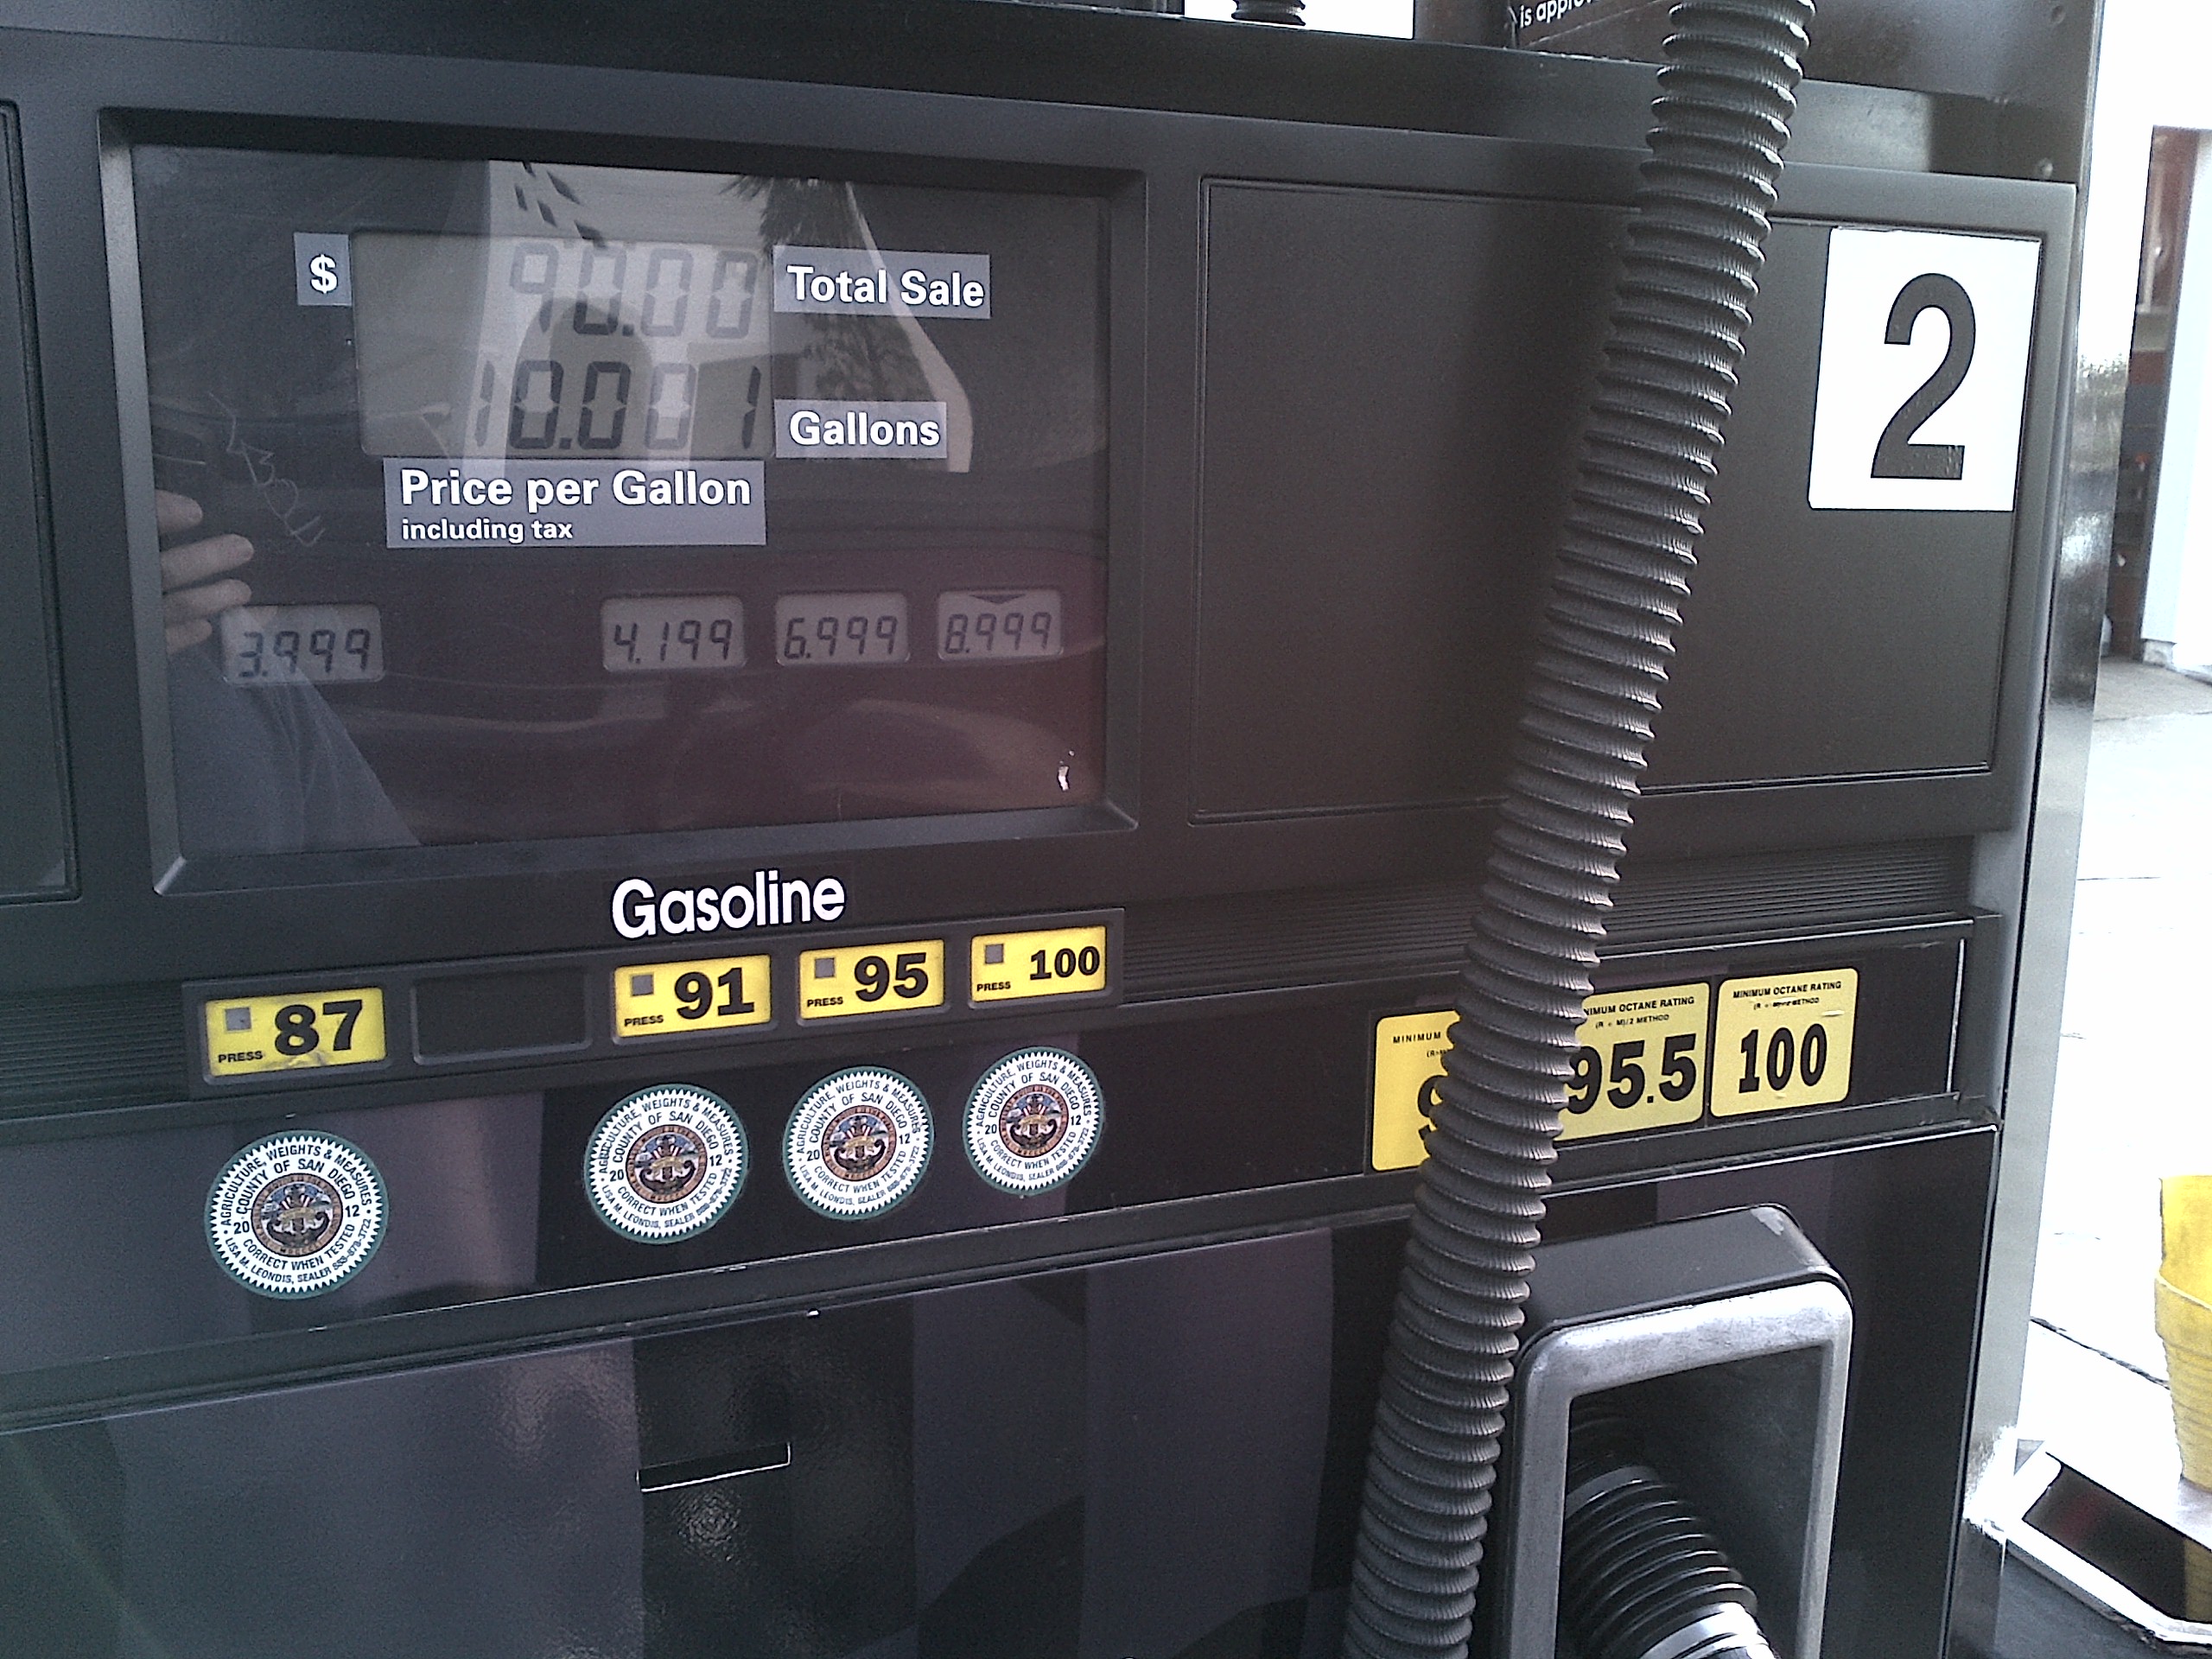
Oh, and this is the only station I’ve bought gas in, in the last 10 years, where you don’t have to pre-pay. Got a lucky click-off of the pump, no coins! Hopefully a sign of good ProSolo reaction times to come. 🙂
Windshield Wipers
This is another that seems like a no-brainer…which of course wasn’t.
Had the body shop install the wiper motor and attach to the wiper arms at the body shop, as doing so requires having the cowl panel off, and installation or removal of a body panel, is a big opportunity to scratch up the paint on said panel.
Unfortunately the wiper arms were not “clocked” to the motor correctly, causing the wiper blade to want to swing down initially, instead of up. So off came the cowl panel, some time spent futzing with the mechanism orientation, but ultimately, the wipers made it in, and I managed to get the cowl back on without messing anything up too badly.

The car had no wipers when I got it, now it has working ones, ha!
Pedals and Header-back Exhaust
The car has four functional pedals at last! Well, the gas pedal may not make it go yet, but it does open the throttle, now that the road draft tube shenanigans were handled.
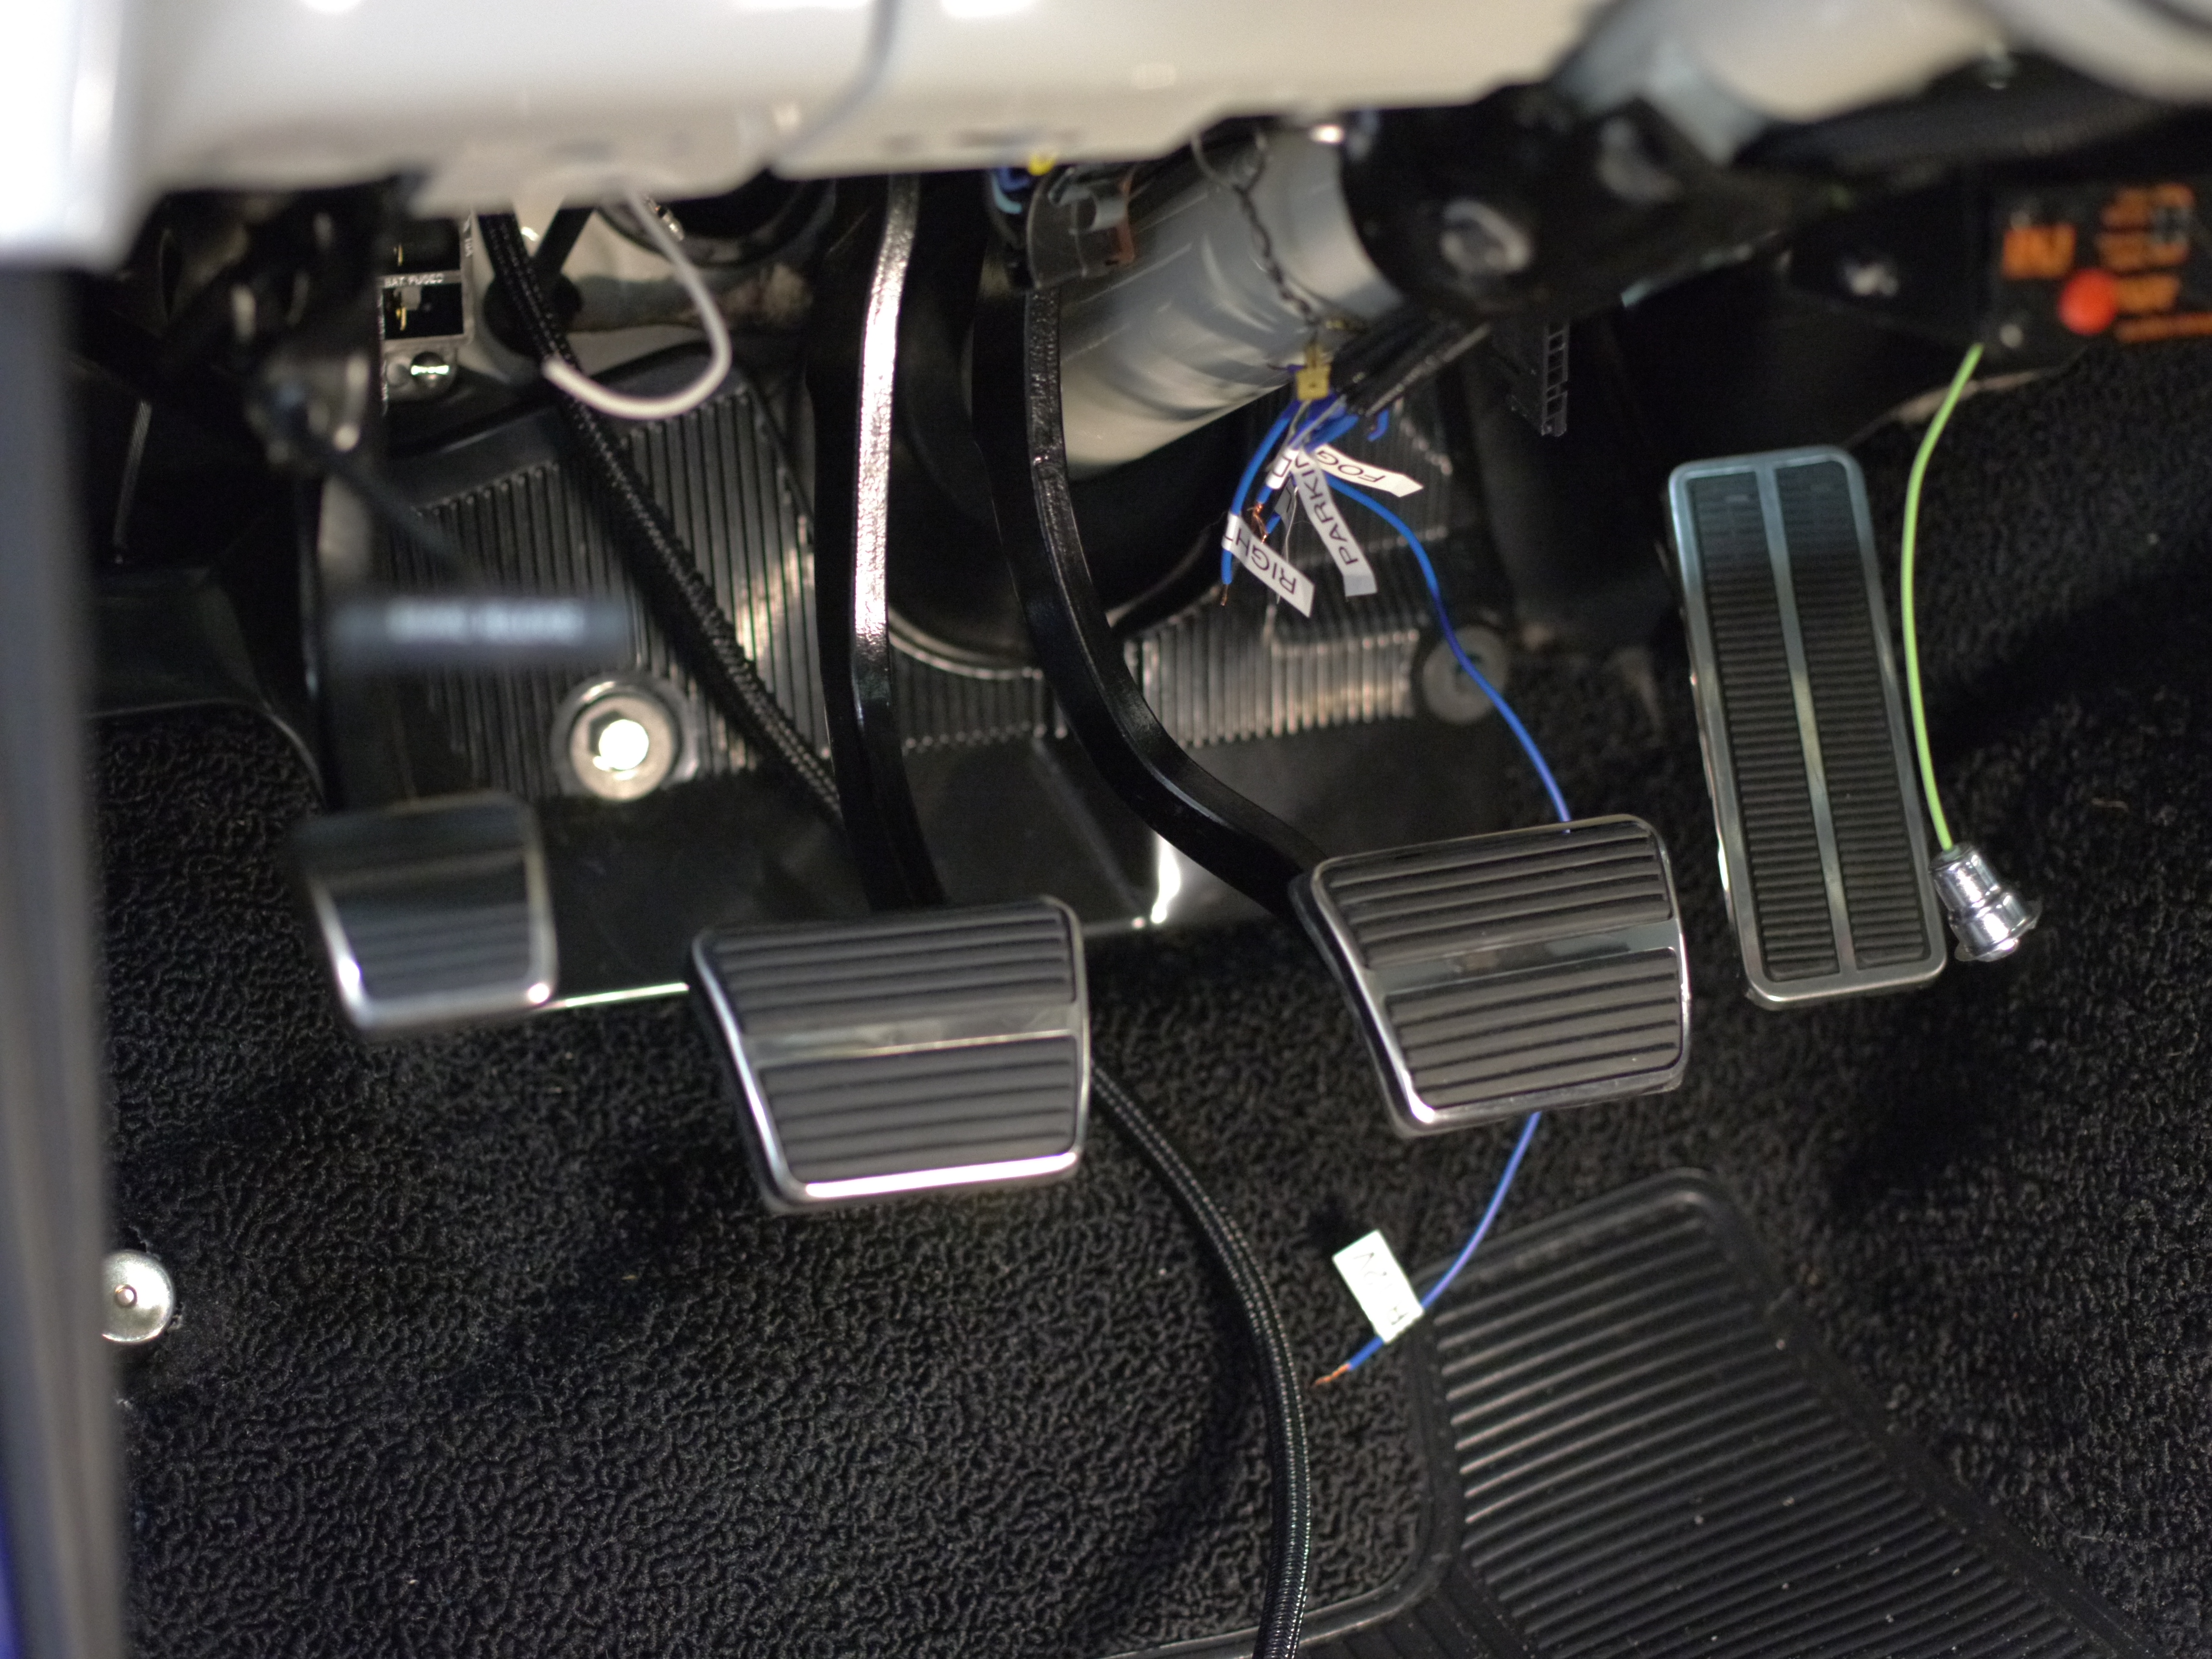
Brakes were made ok with the bleeding a little while back, and the clutch was okay, as the pressure plate provides most of the springing, but the complementary clutch return spring that keeps the pedal up against the stop, has also been installed.
The parking brake pedal was the last to be made functional. The Wilwood rear disc brake setup on the car has a complete functional parking brake, but comes without a means of adapting it to the factory cable system. Fortunately the solution was pretty simple, with a pair of Lokar “Explorer style” clevises, drilled out to accept the factory parking brake cable. The entire parking brake system is not entirely new, from the rubber of the pedal pad, to the drum lining at each rear wheel.
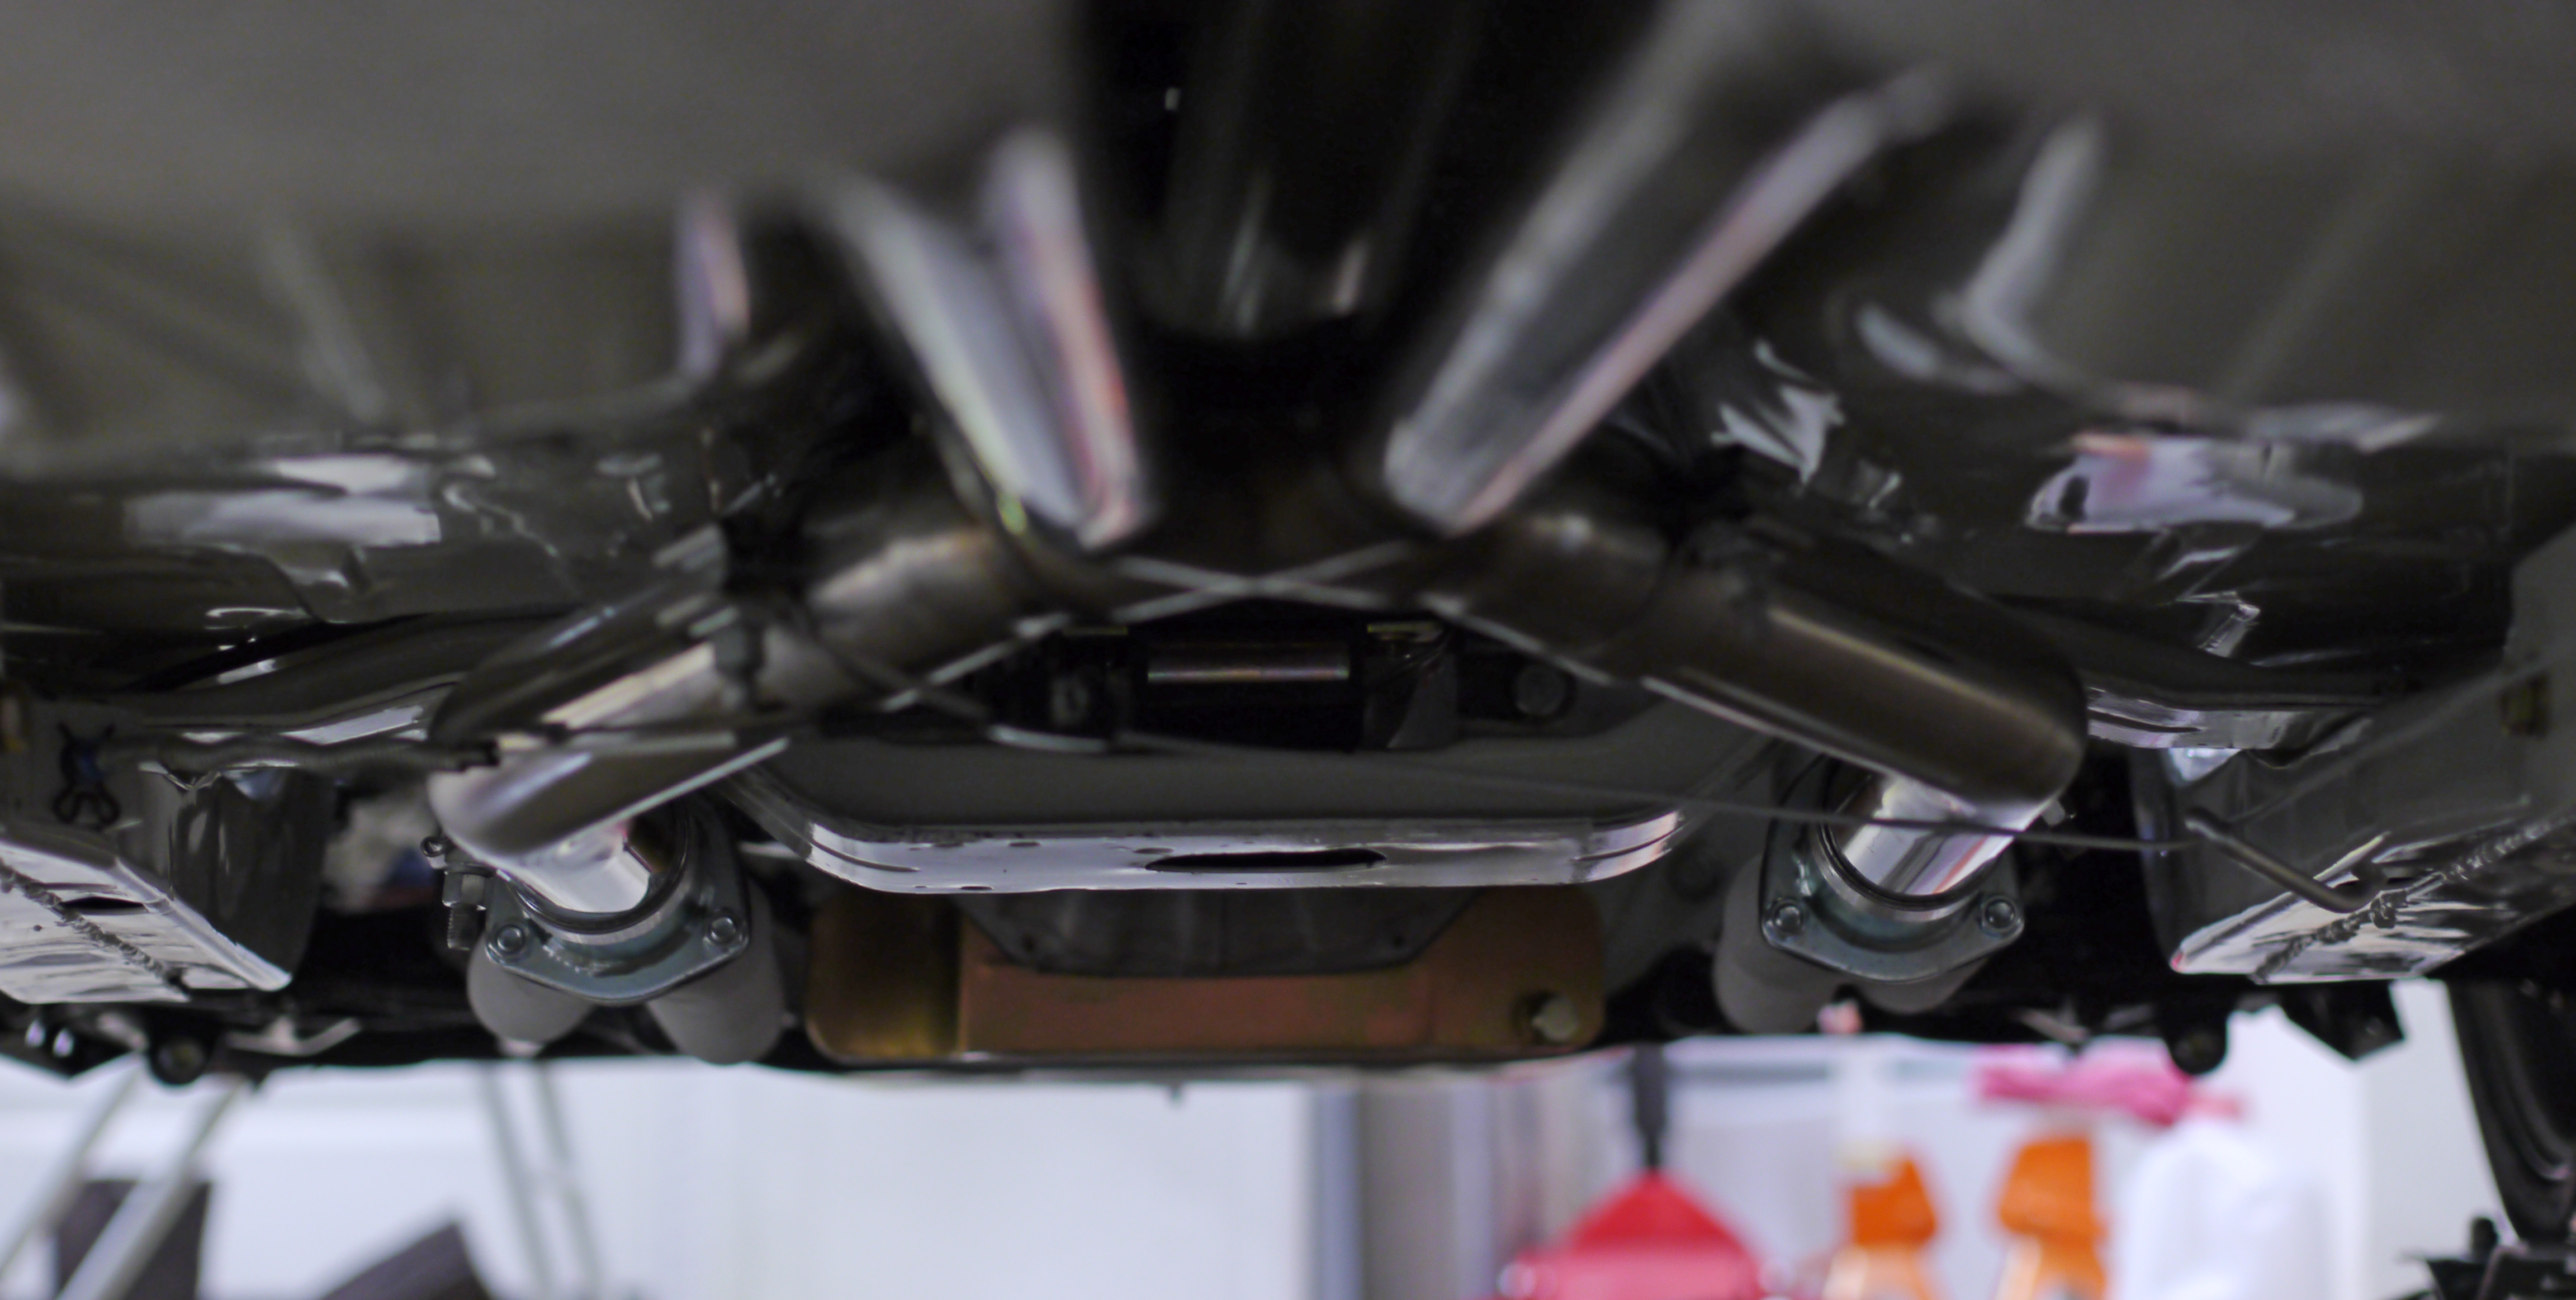
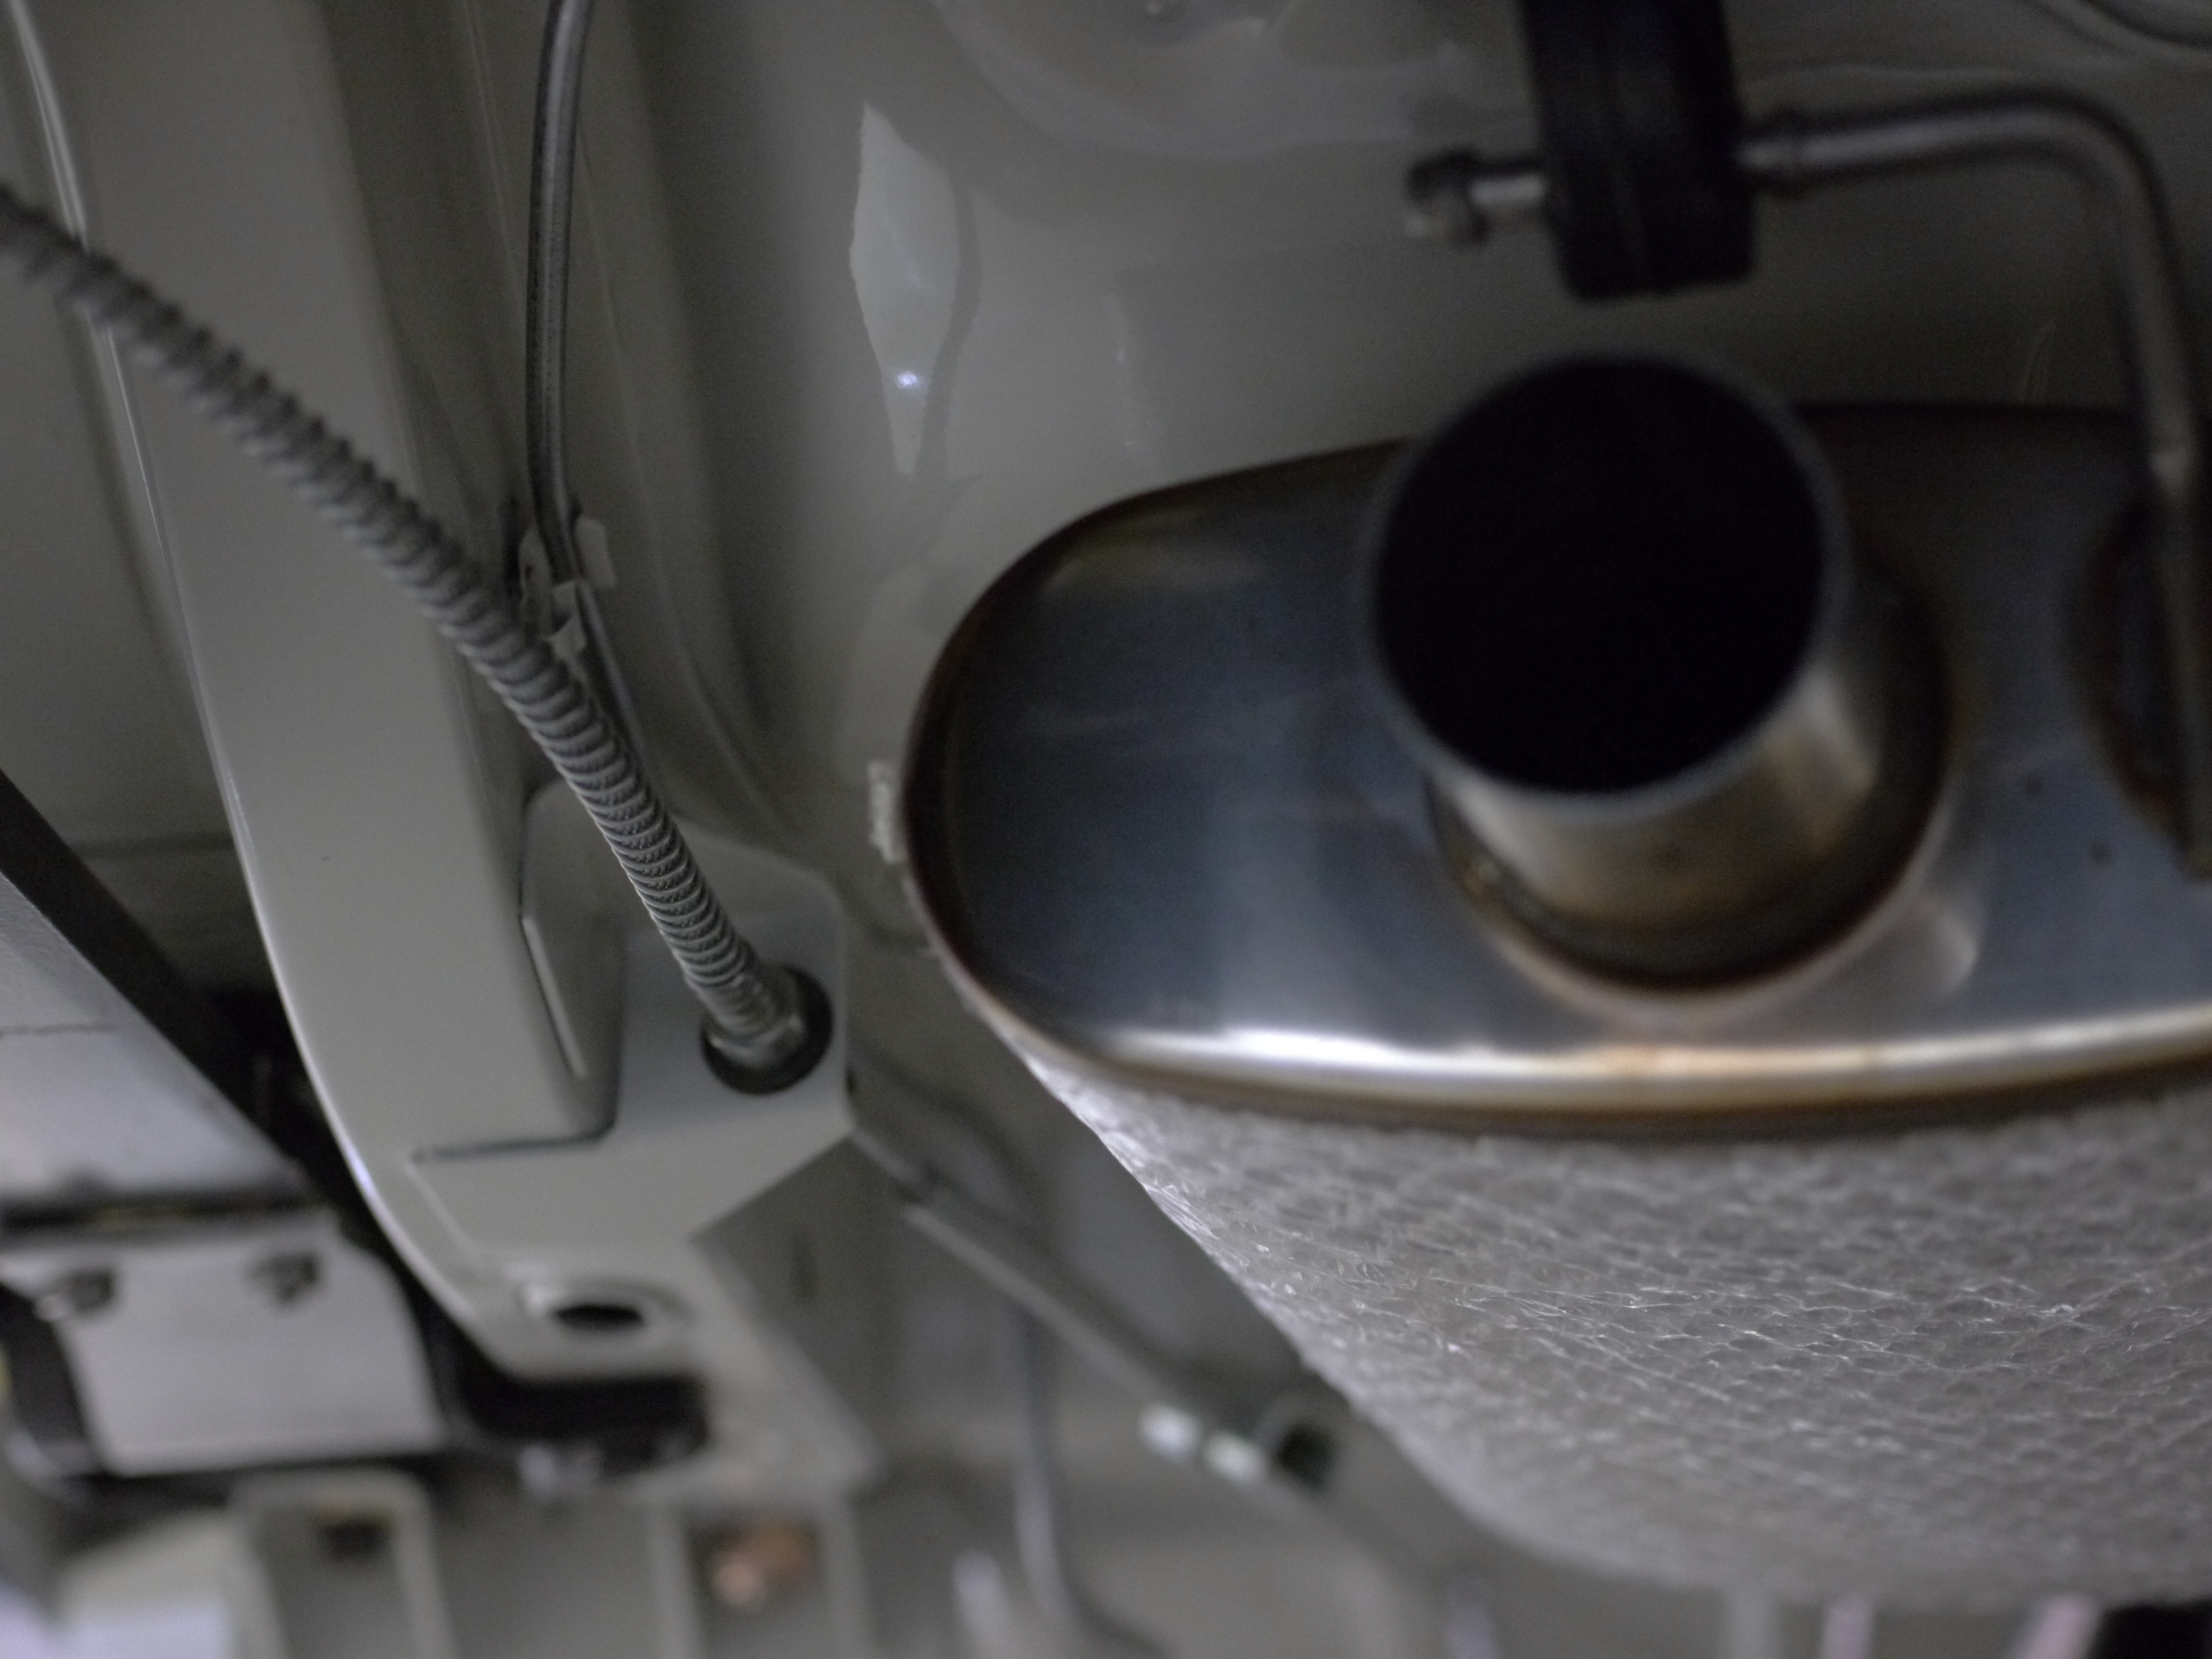
As you can tell from the second picture, at this point, the exhaust ends at the mufflers. When I get the car to an exhaust shop, will have to see what can be done to extend the exit either to the traditional location, or out the sides. The panhard rod in the rear suspension complicates things.
Ride Heights
They still aren’t right. Rear is too high, as discussed above. I’ve raised the front “2 turns” (haven’t done the math to figure how that equates to inches), but it probably needs to come up more.
This picture was taken a few days ago, before fuel and coolant were added, so both front and rear have since come down a little bit.
You’d think moving the car around a garage floor on dollies like this would be easy – nope, big effort required!
Before trying to drive it anywhere, I’ll probably raise the front another 2 turns.
The Vintage mags with 27+” tall tires will fill the wheelwells better than the Jongbloeds and AD08 rubber. The shorter /35 series front tire vs. the /40 series on the rear, exaggerates the ride height difference.
No problem turning to full lock, even at this ride height-
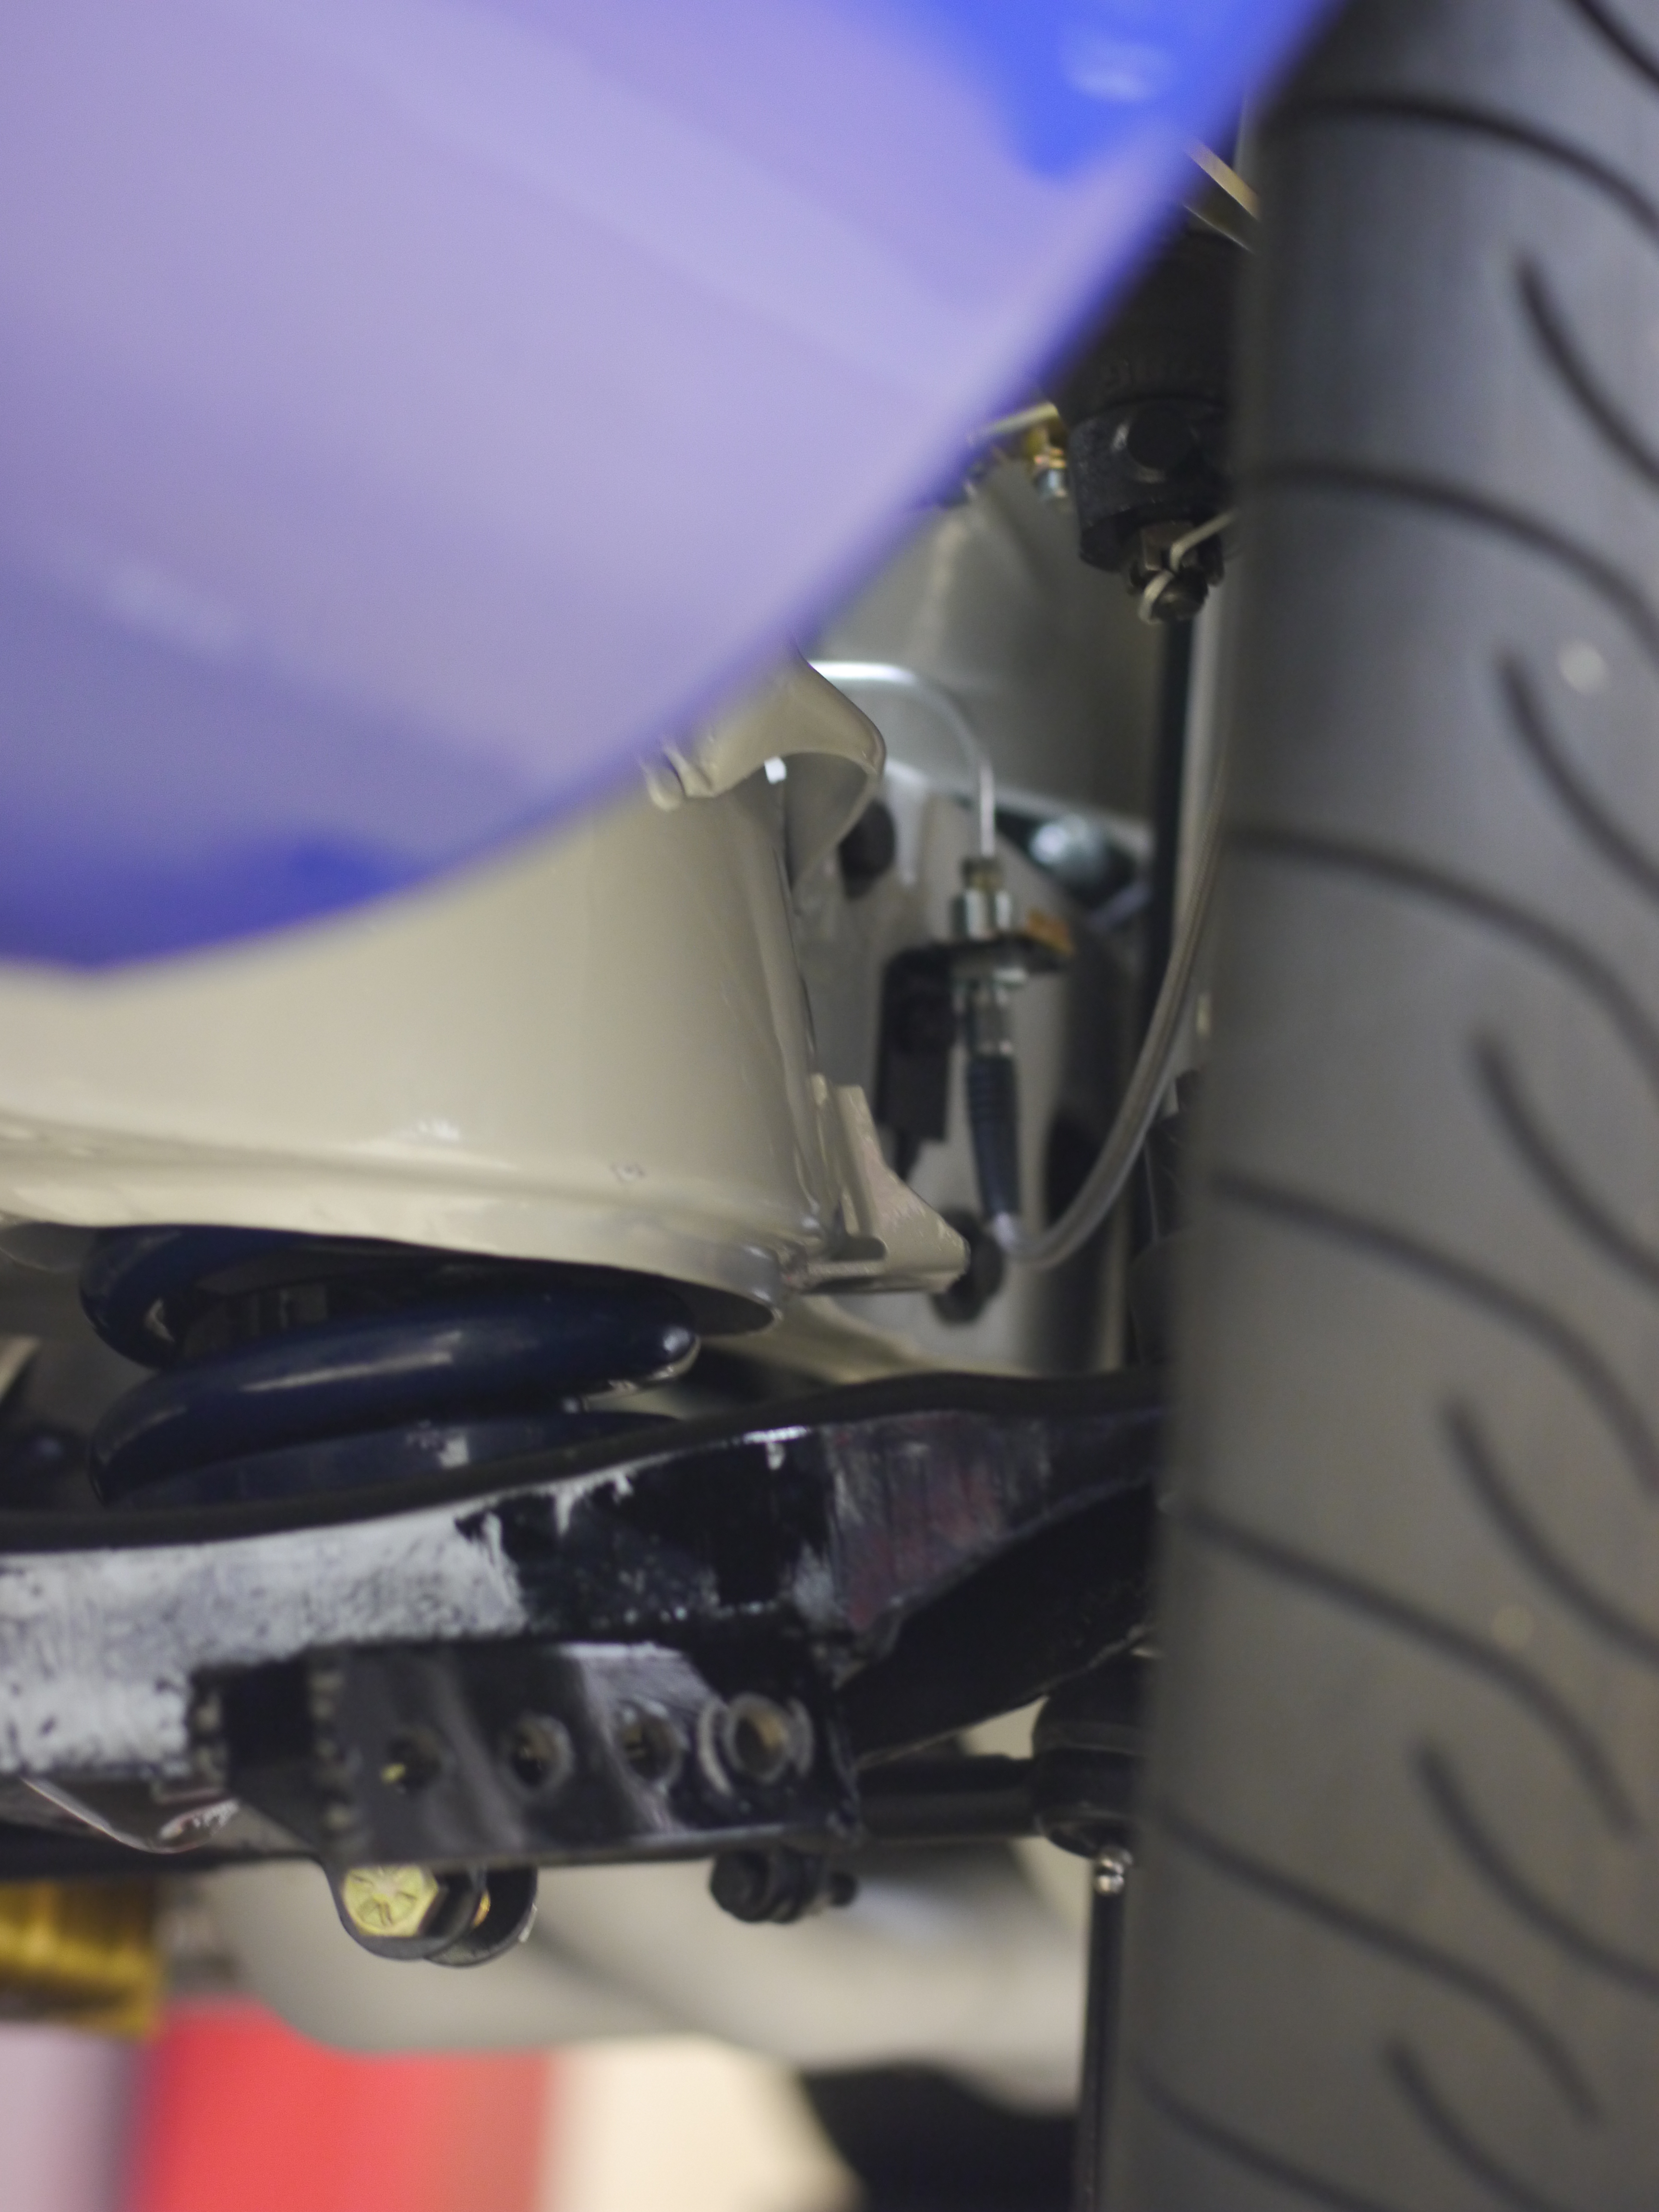
Pic inside of the front suspension with the wheel turned- contact point at extreme bump, is the lower control arm to the factory bump stop bracket, welded on the frame. At this ride height, it has about 1.25-1.5″ of travel there, equating to about 2″ of travel out at the tire.
Oh, and a funny one-
The family car had to go in for service (Infiniti is paranoid after the Toyota/Lexus unintended acceleration debacle, and is issuing recalls on the new JX35 like crazy. The car needed 5 recalls done, which necessitated an overnight stay) – and since they were busy and out of branded loaners, we got a crummy rental – the Chevy Sonic. The Sonic is one of these economical small cars – not micro like the Smart or Scion IQ, but subcompact like the Toyota Yaris, Mazda 2, or Honda Fit. When my Tundra was serviced I got a Yaris SE loaner, which was actually decent, but this Sonic LT was crap! Anyway, it got to park next to the Camaro one night.
What amazed me was how TALL the Sonic is! Check out this picture-
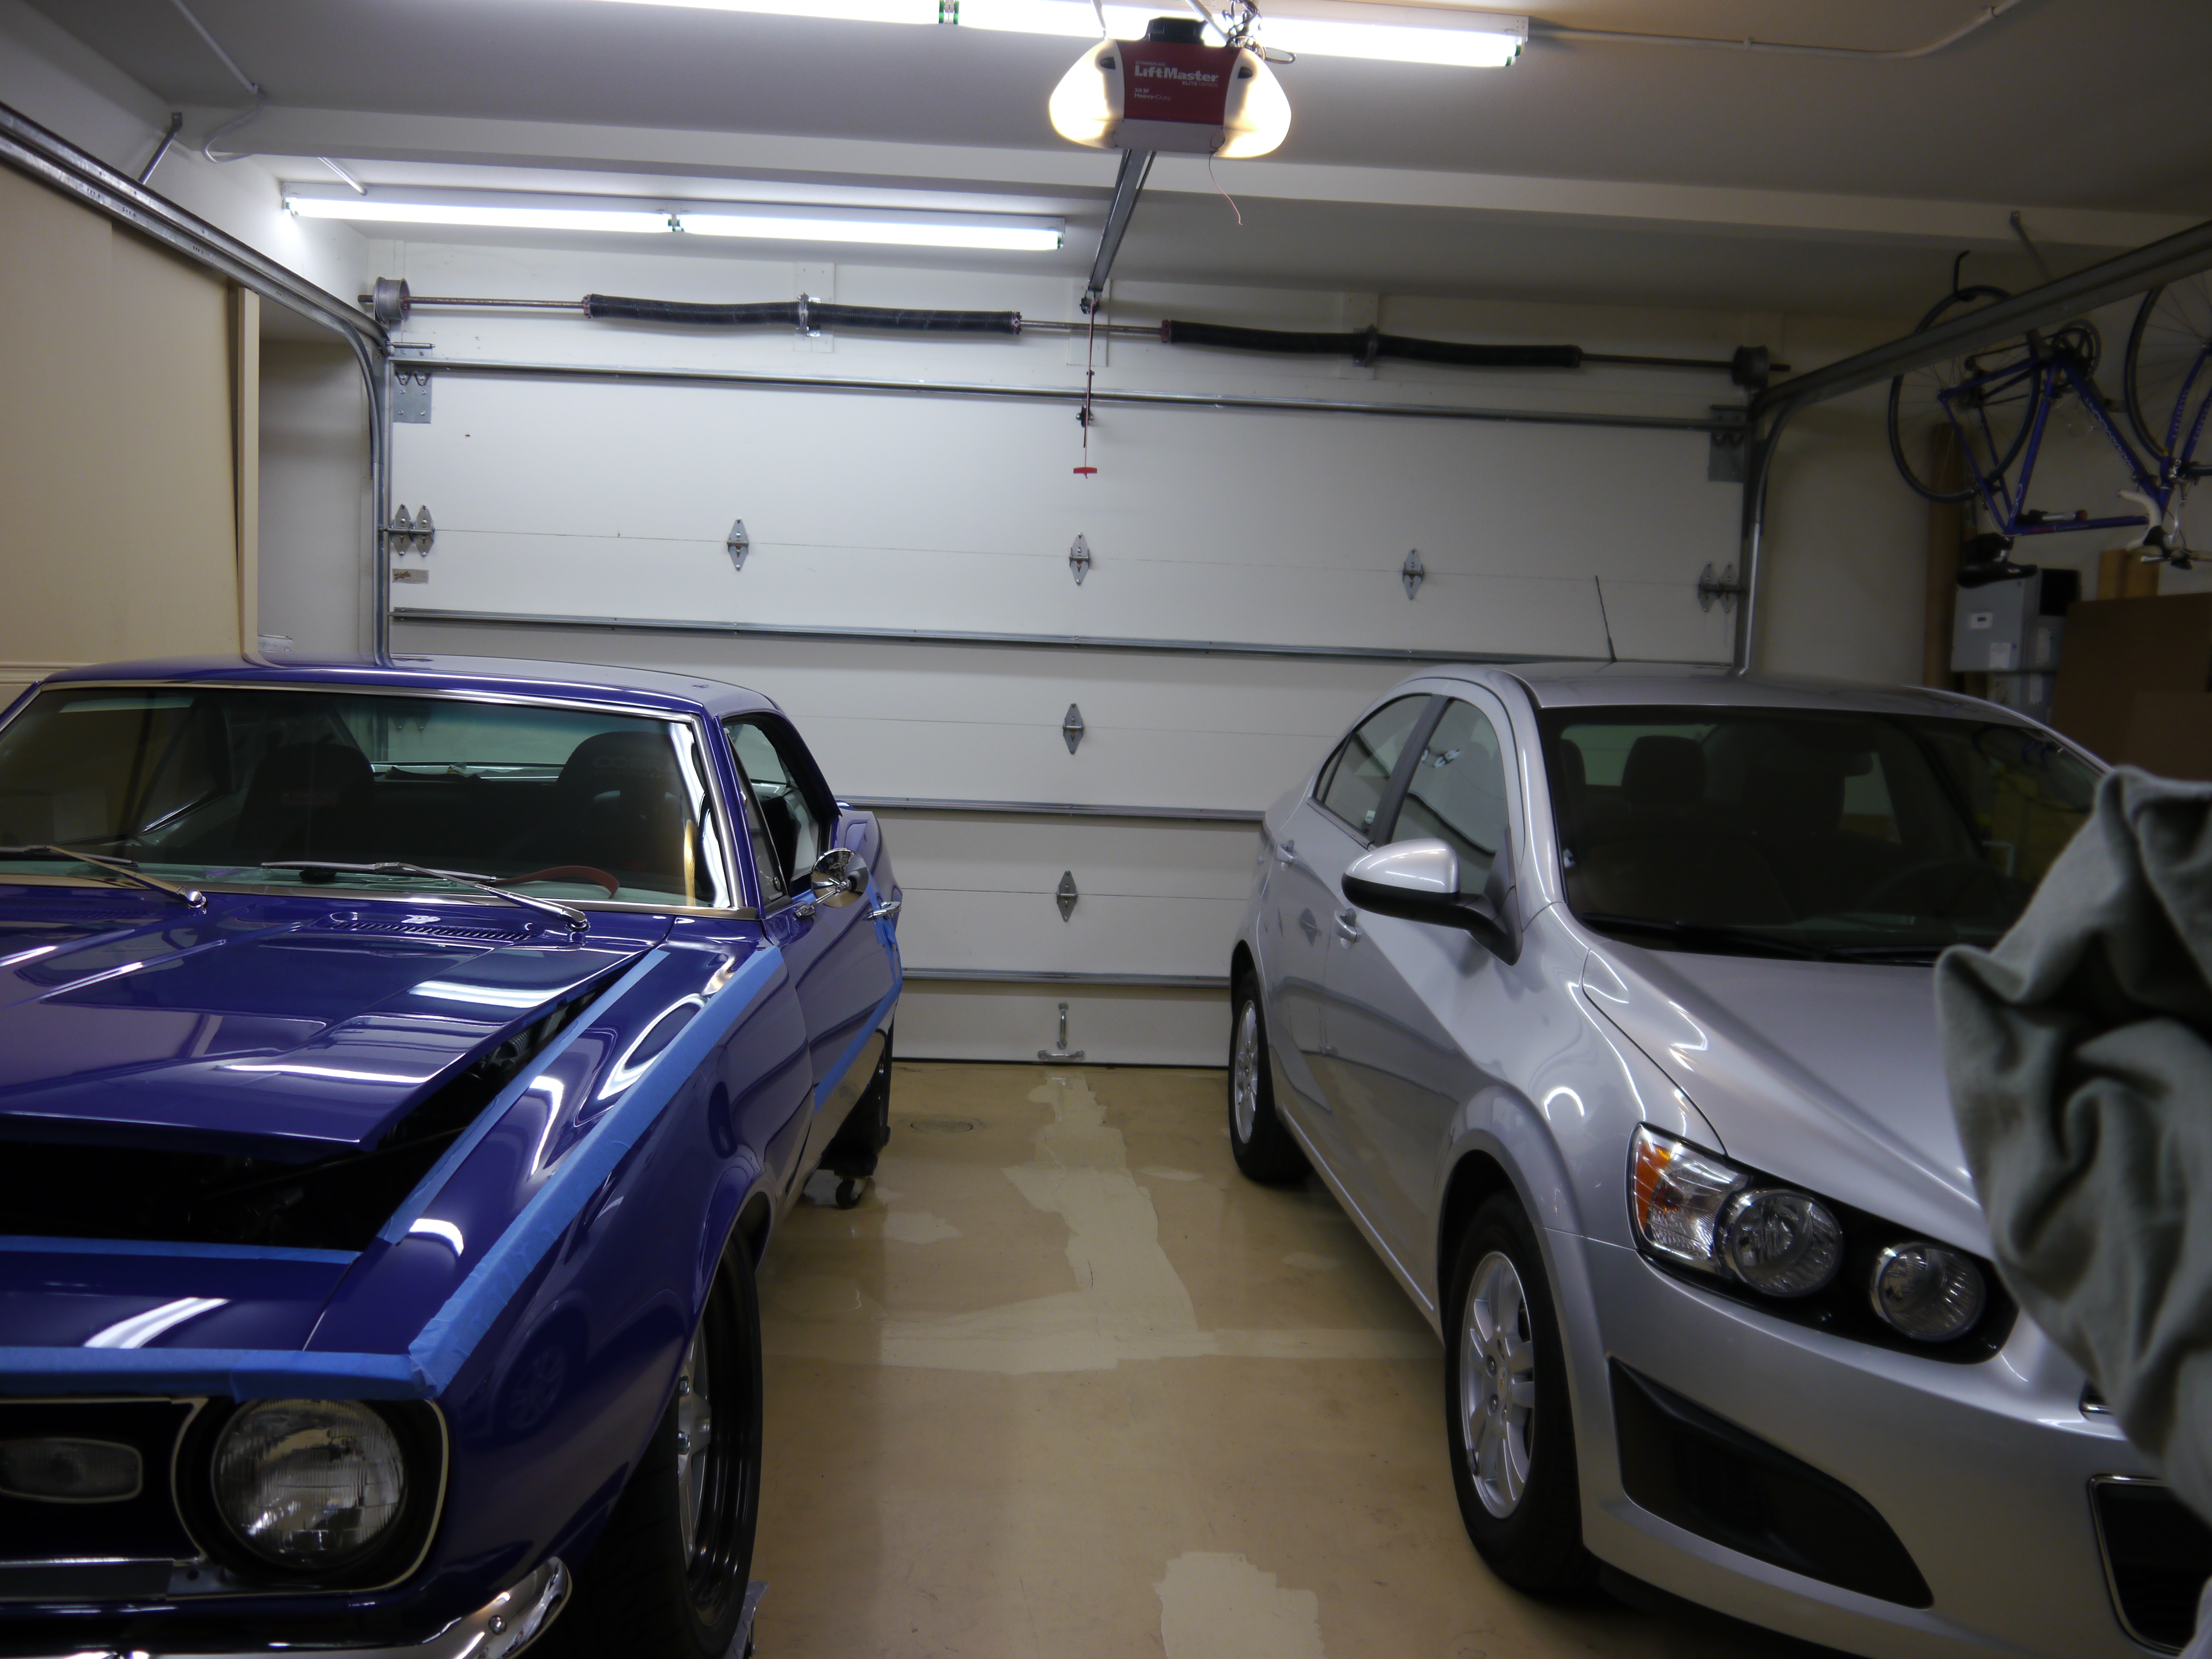
It only looks a few inches taller than the Camaro…until we see the Camaro is sitting on 5″ tall dollies! Will have to measure the Camaro once it’s back on the ground, but I’m pretty sure its roofline is around 48″, the Sonic (and lots of other cars like it) have rooflines about 60″. Wow.
Battery
Ok, so I put it in the trunk, not very exciting. This is an Odyessy PC680, common in the aftermarket. It’s 13-14lbs., vs the 35+ of the stock battery, hanging way out past the nose. Here’s it’s mounted fairly high, but more or less at the rear axle centerline.
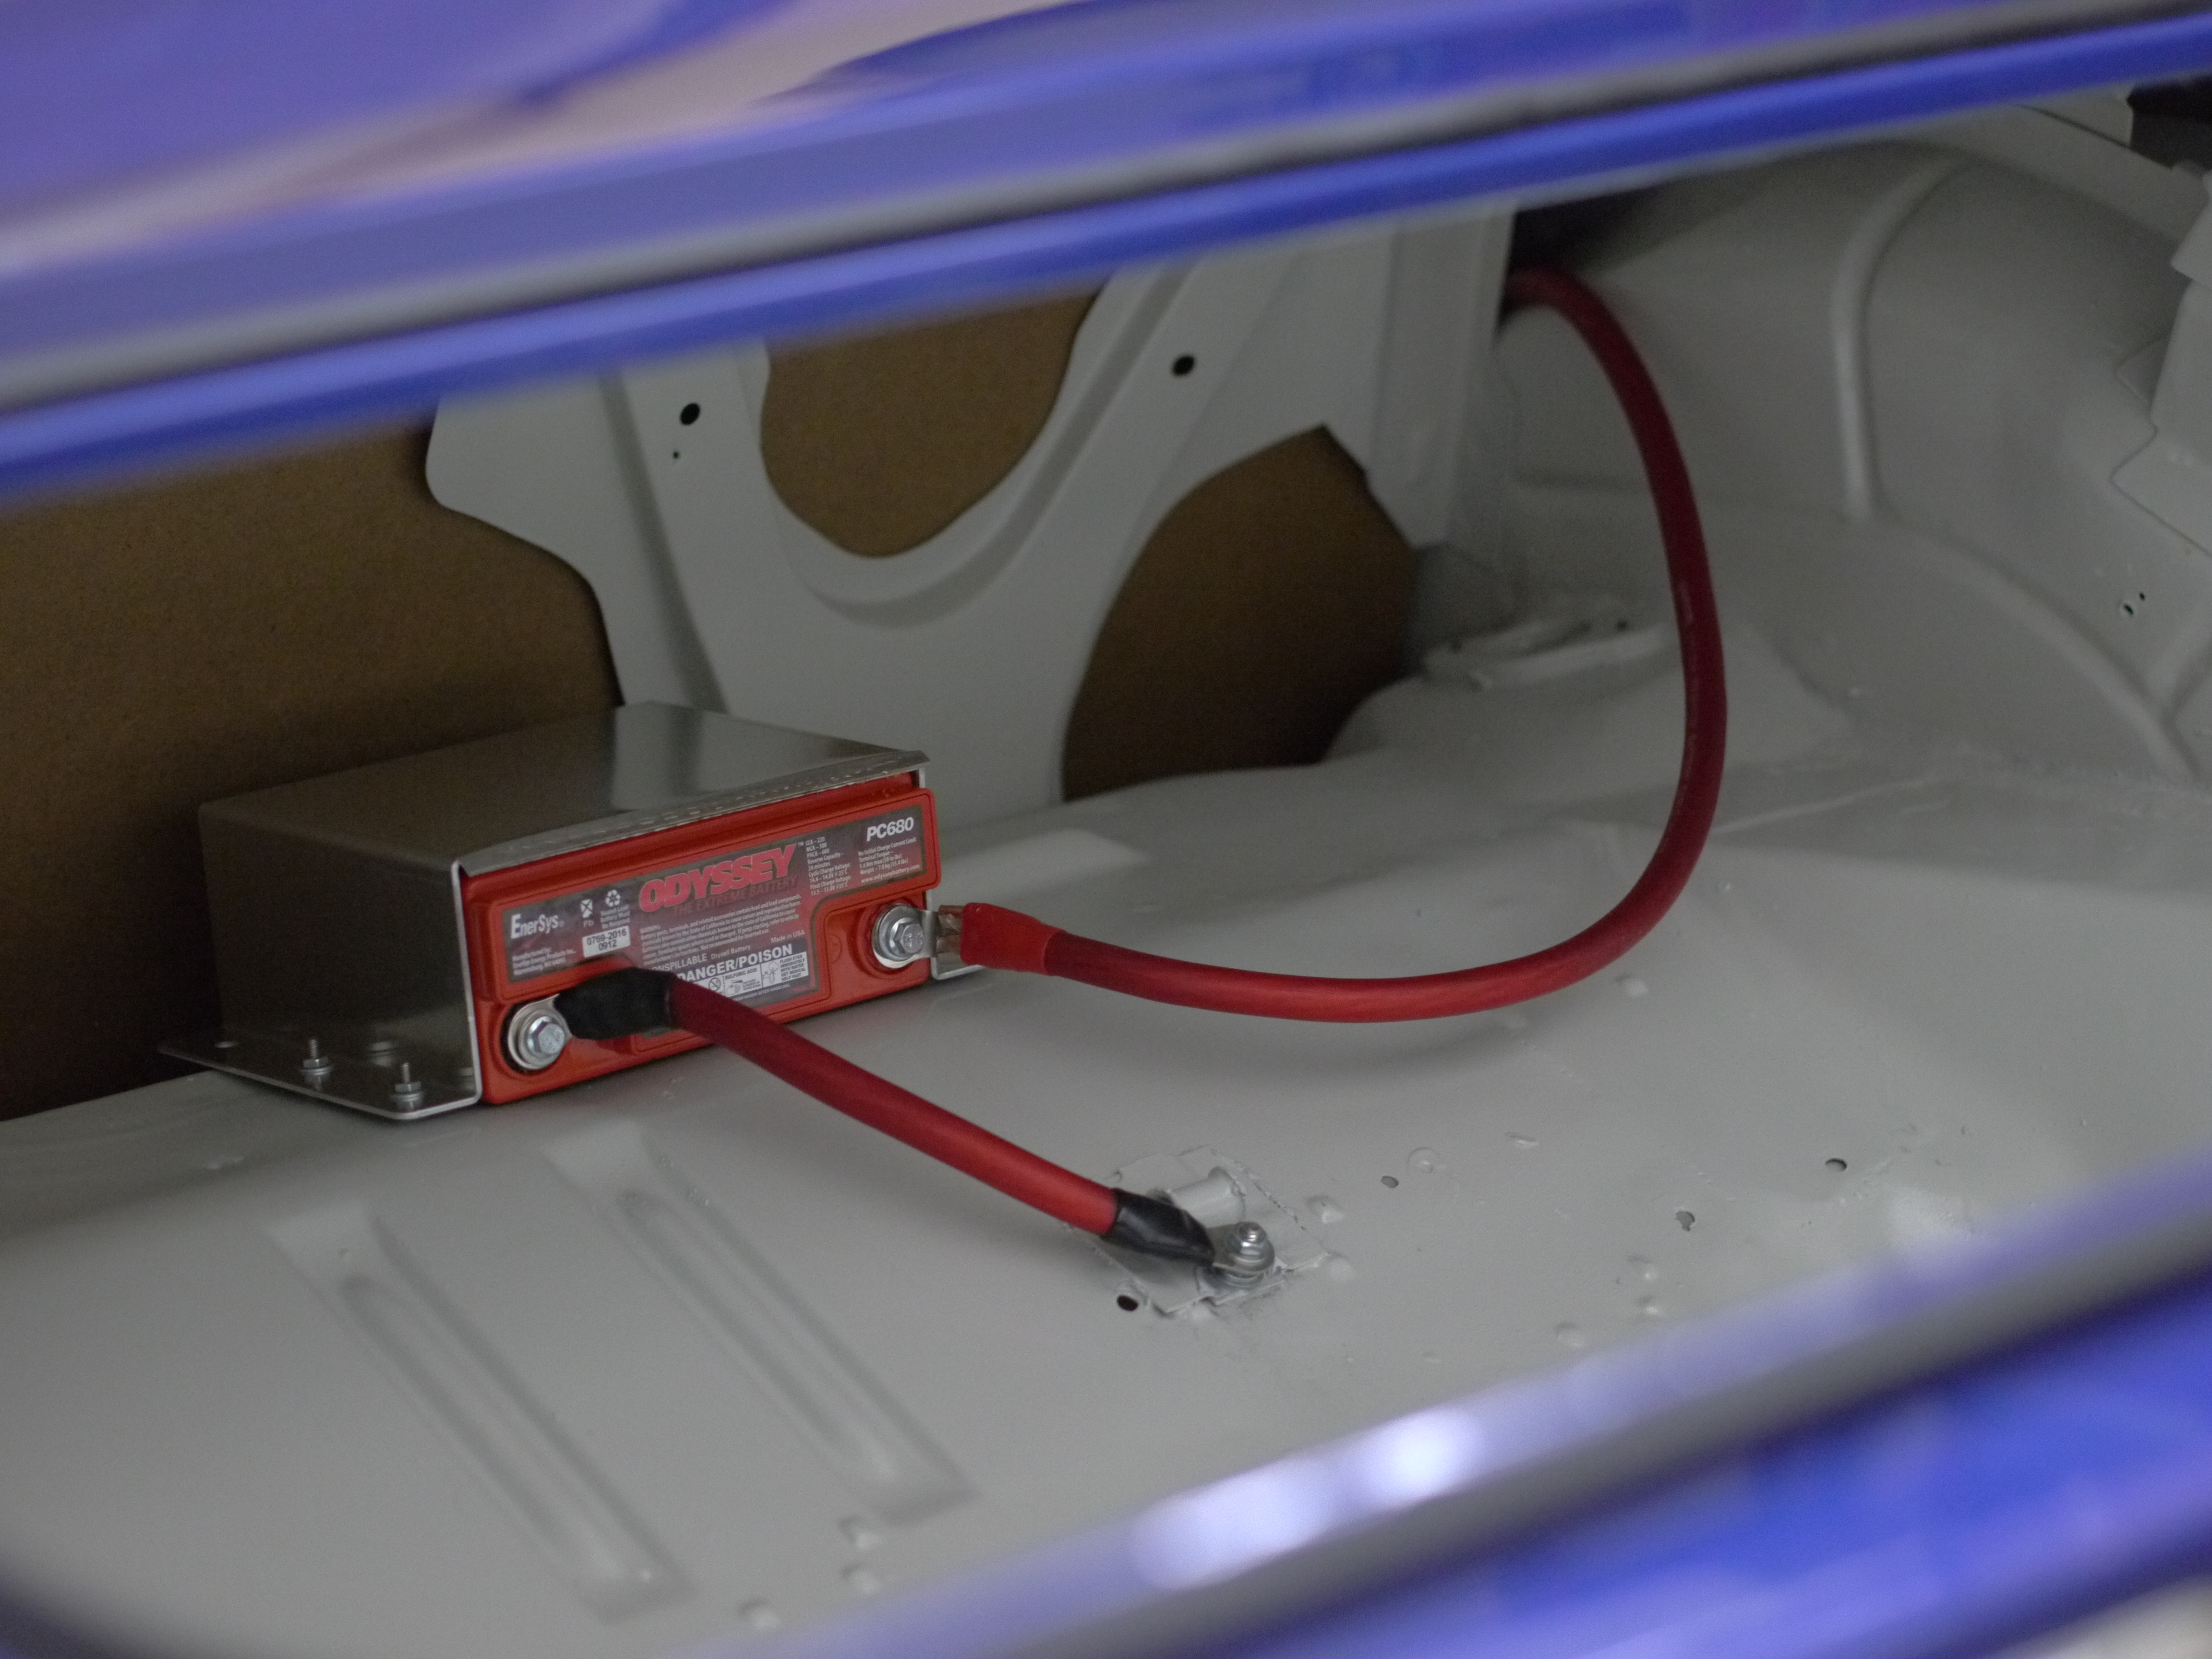
Have more thoughts on general battery placement, will have to share another time.
This battery was bought to get the car going (figuratively, not literally) – since in the beginning it is likely to get cranked a lot without much chance to charge normally, and this should stand up ok to that use. The *real* battery I plan on using is the C680 XS Power battery, which is only about 4 lbs., and is the same form factor as the PC680, meaning it will fit in that mount.
Interior
The insides of the car received some attention, mostly in the instrumentation area.
Steering was a bit out of whack, had to purchase a puller to get it all apart and re-clocked correctly, but it could at least be buttoned up-
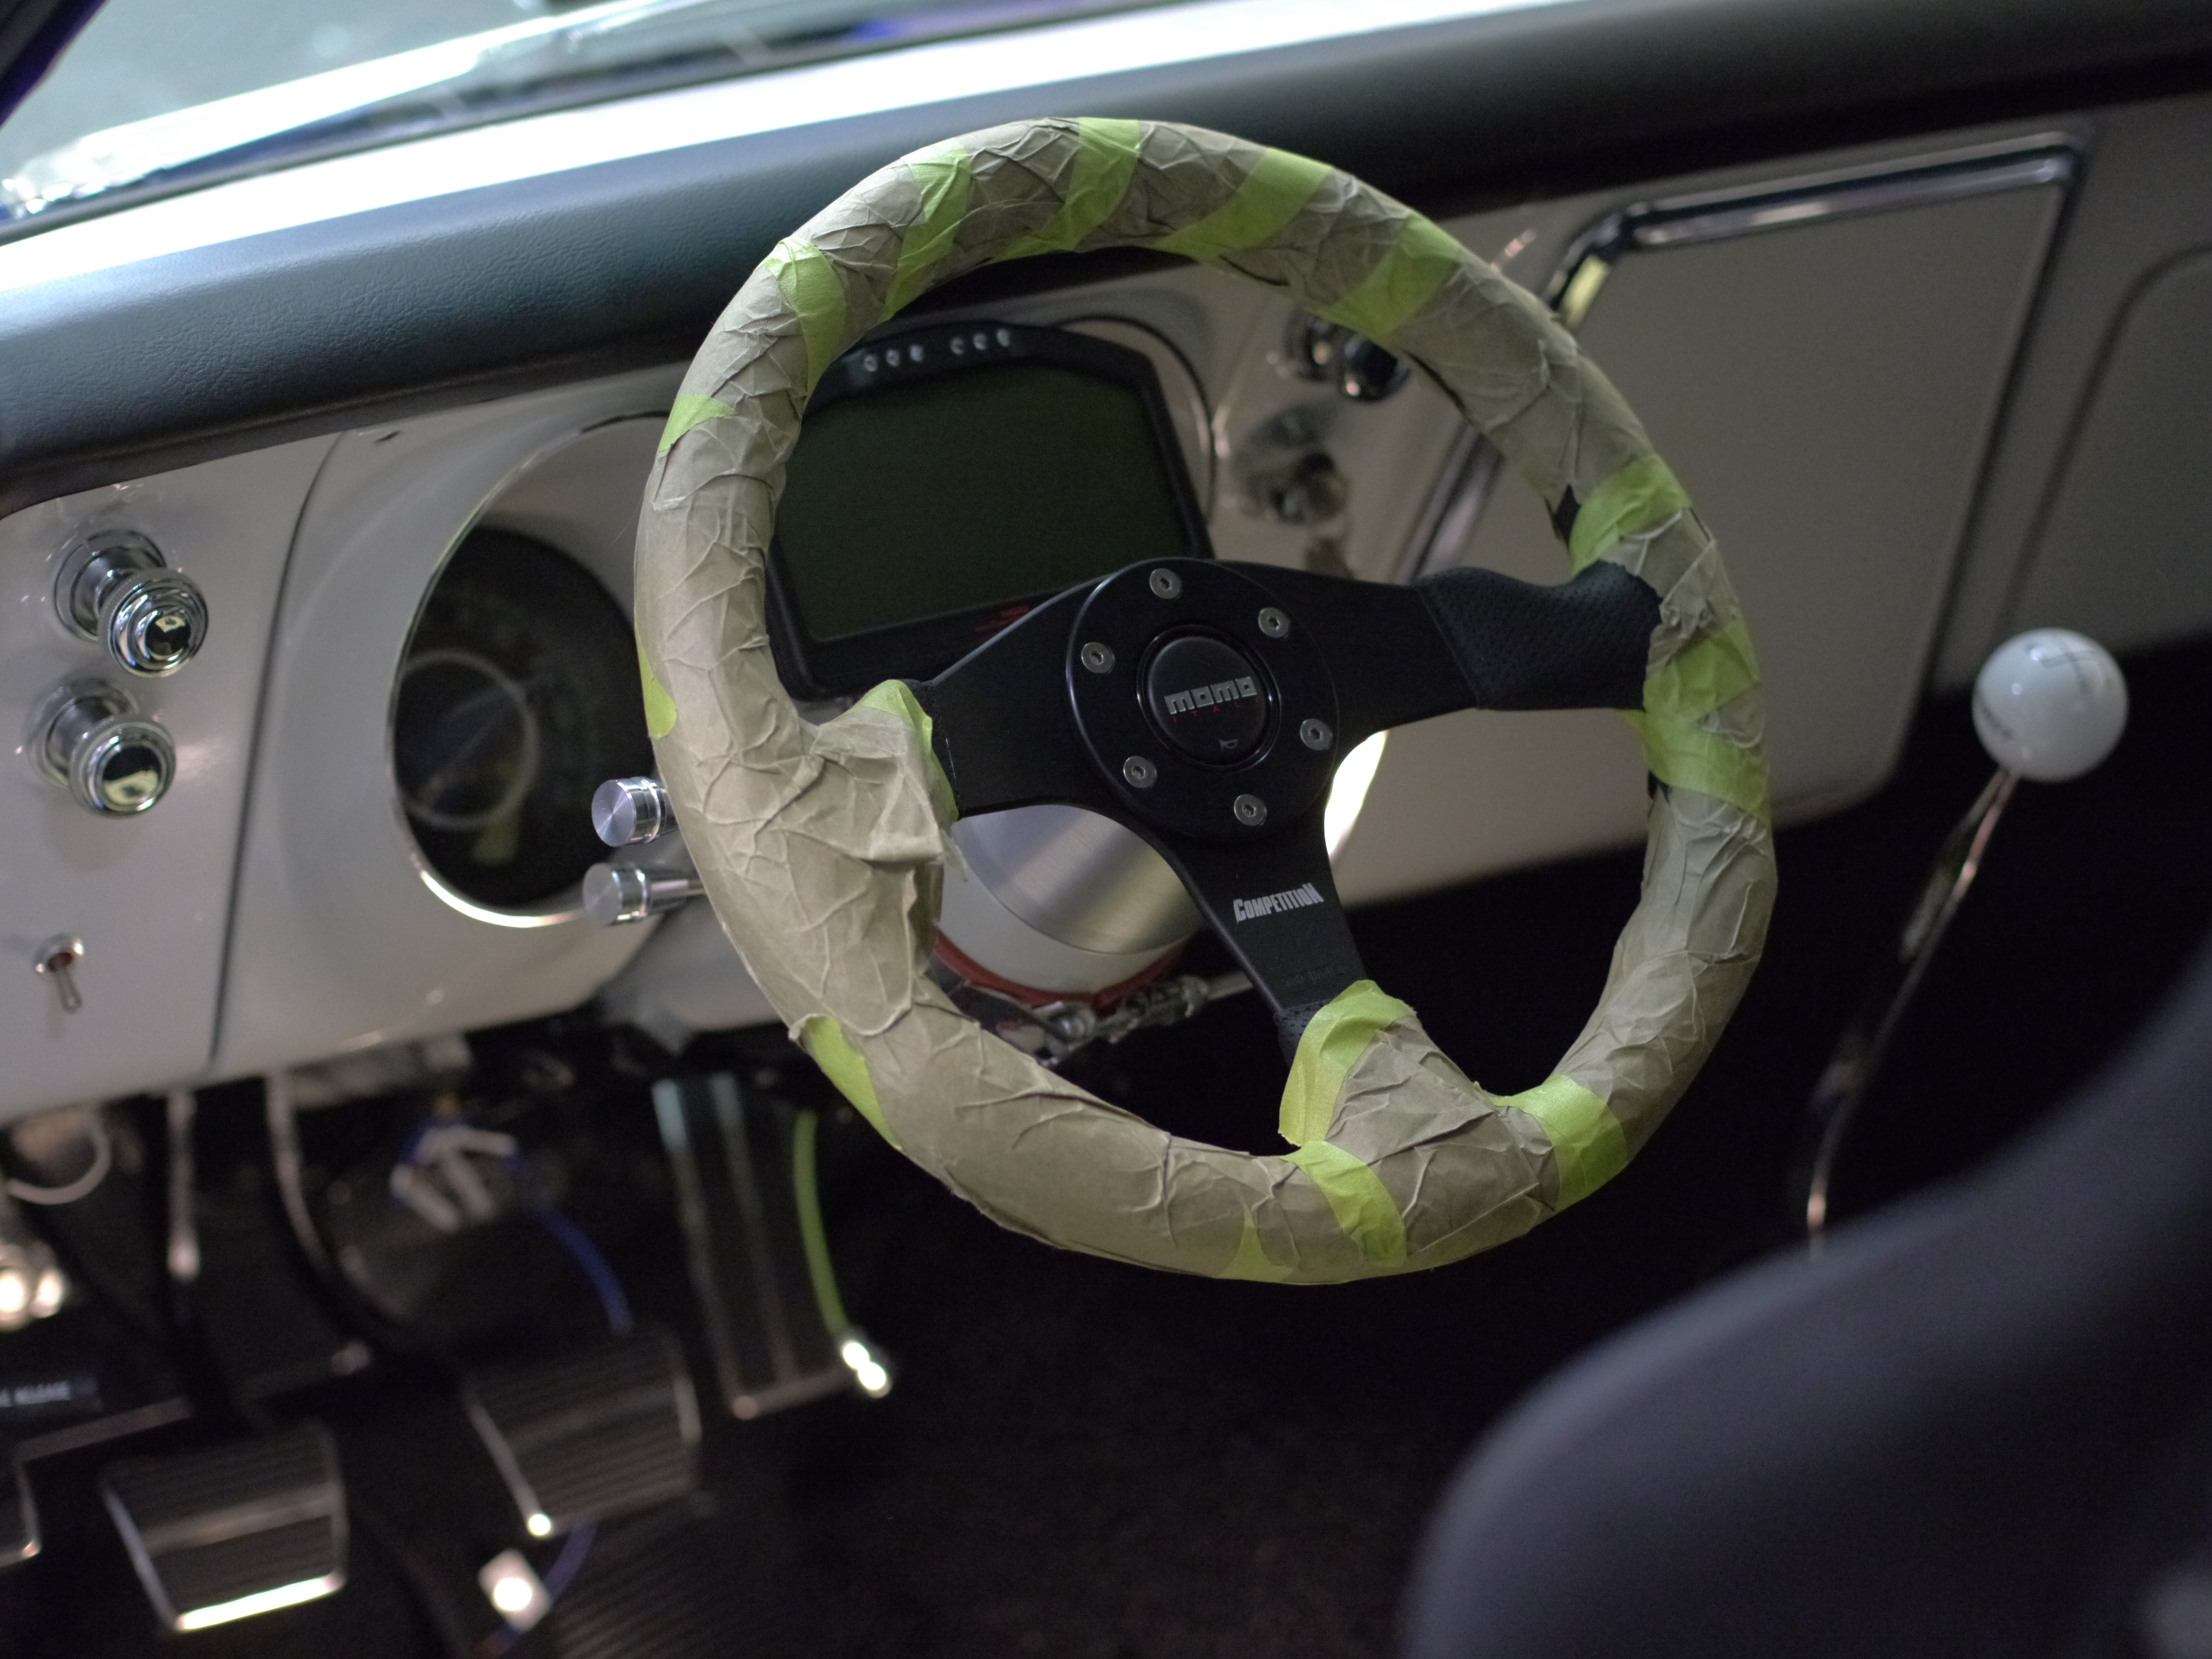
The wrap will come off soon! Still getting my hands dirty doing stuff, just not as bad as before.
Note the cover plate over the center of the dash – bare as a no-option car can be.
Couple other things to see – the switch at bottom left, and of course the DASH2 dash. The switch will be an independent control of power for the DL1 and DASH2. The idea is, I can keep it on, to help let the DL1 keep GPS lock between runs, or any other time I want to have the engine off but instrumentation on. Modern cars tend to have as their key positions, Off -> Accessory -> Ignition -> Run. This car has Off -> Accessory + Ignition -> Run. Want to be able to keep some of the electronics going, without all of it going.
Speaking of the DL1, it got its own custom bracket, just below the dash, to the right of the steering column.
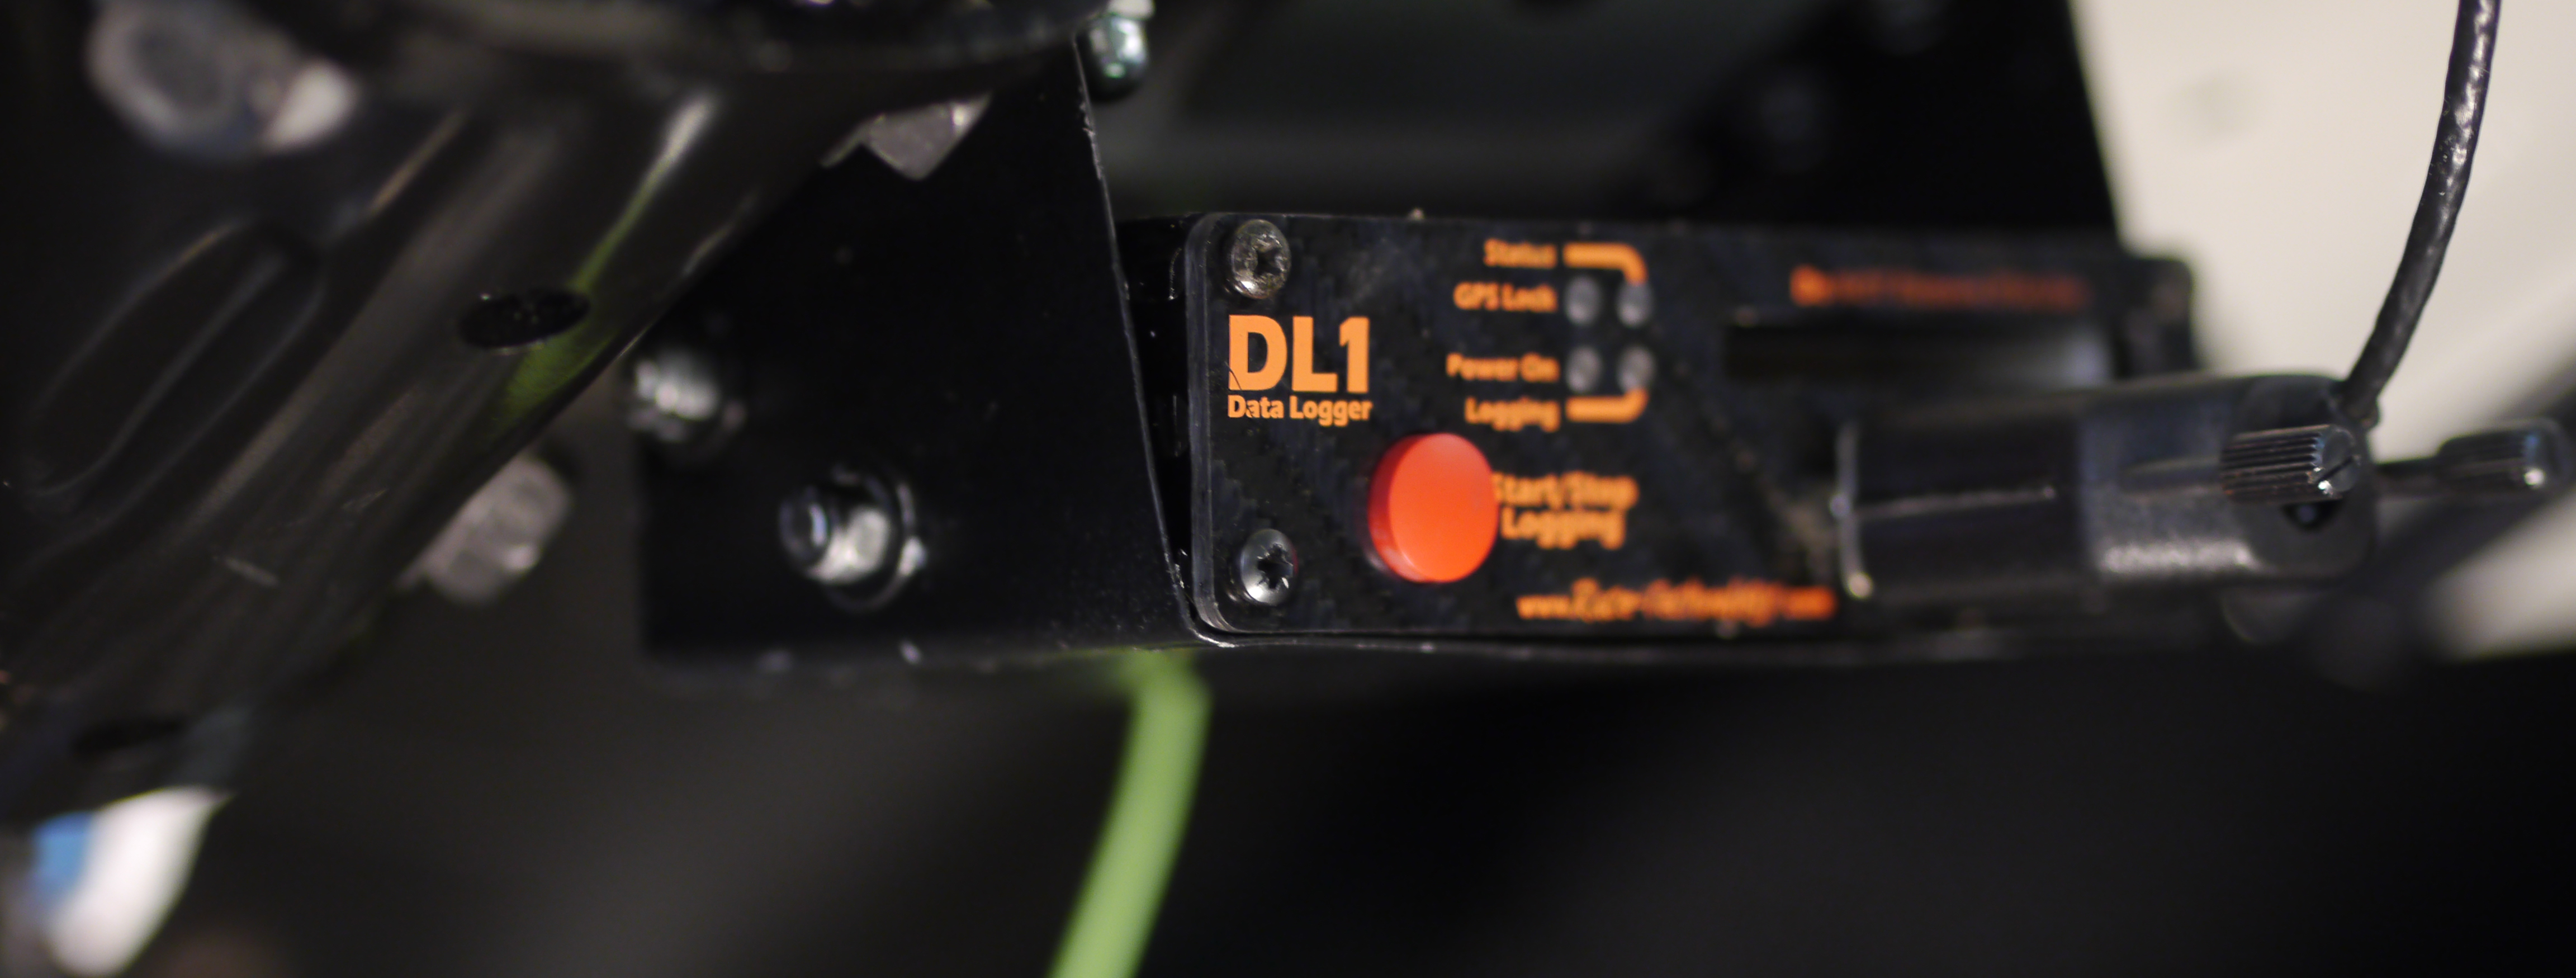
That silly bracket took a ton of time to measure and bend up, and I’m still not totally happy with how it ended up, as I had to change its position slightly to avoid having to use a serial extender between the DASH2 and the DL1.
With this configuration, the DL1 will be recording information from sensors (like coolant temp, RPM, and oil pressure) in addition to the things it can figure out on its own – speed and accelerations – and present this data to the DASH2, as configured, over an RS232 serial connection. This is handy, because you can’t really look at gauges while autocrossing. You might have a chance to look at the tach when doing an initial 1-2 shift, but that’s about it really. On the track you can take a glance for a second or so while on a straightaway, to ensure systems are still healthy, possibly even changing your approach if you see oil temps climbing, or something like that. In autocross you go out and hope the car makes it through the run without self-destructing. If you are having momentary drops of oil pressure, there’s no way you’ll see it, without some kind of alarm light programmed in, but that can be tricky, since 20psi might be OK at idle but death at 6k RPM. With the data acquisition, you’re watching the gauges 100 times per second, and if there are any concerning fluctuations, they can be correlated to other events, like hard right-handers following a braking zone, for instance.
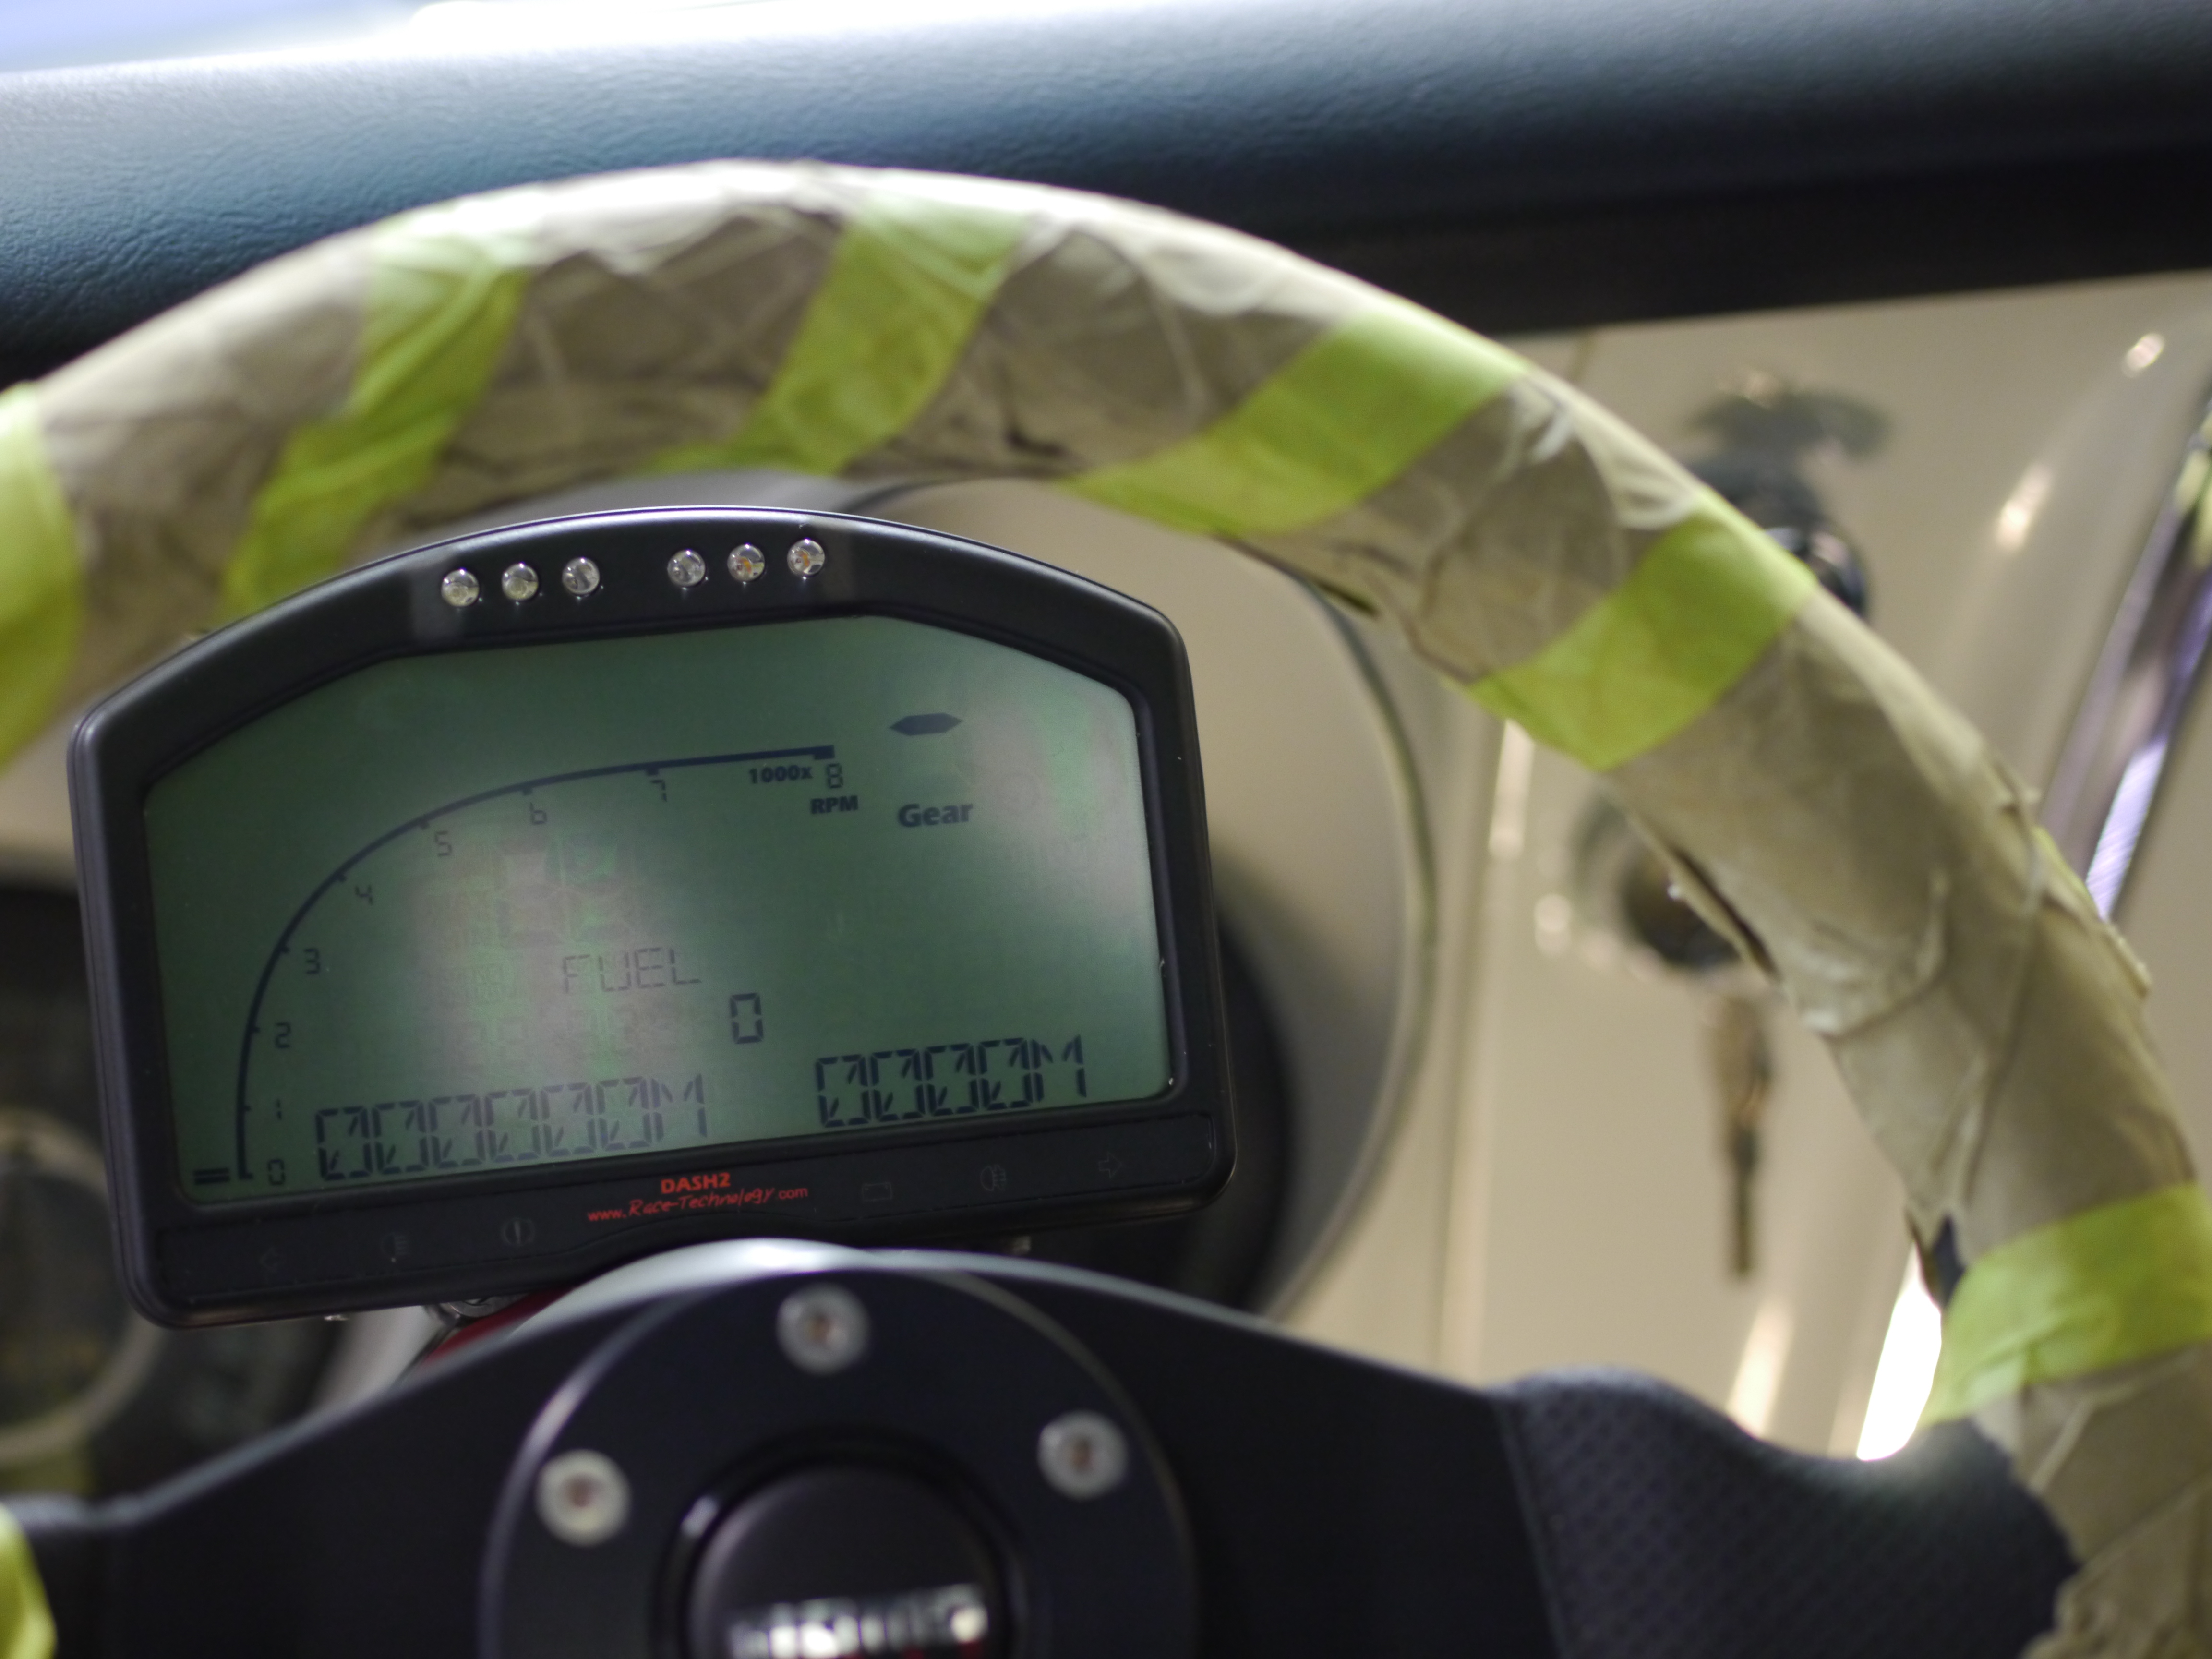
In this photo it isn’t yet talking to the DL1, so it only knows to output fuel level, which it will get from the main vehicle harness, and will not be datalogged. Common Camaro Lore dictates one most always autocross a first or second gen Camaro with a completely full gas tank. I’m hoping that’s not actually the case, will find out soon enough.
The DASH2 is mounted to the steering column via a custom bracket I made. When I envisioned the bracket, it had to be carbon fiber, and making it so, took extra time. In trying to get a photo of it tonight, I now realize now silly that probably was, you can only really see it when looking down through the windshield. Here it is, from roughly the middle of the car up against the windshield, looking back and left-
Even if the aesthetics aren’t perfect, pretty happy with how it turned out functionally. The size and positioning of the bracket and DASH2 unit, allow the wheel its full range of tilt adjustment, without bind or interference. Here it is fully tilted up-
With the steering wheel in a normal position, eye level is slightly above the unit, which is supposed to be optimal for its viewing.
Race-Technology was very supportive in sending me out a loaner so I could get the car fired up, while they send my bricked unit back to the UK for repairs. Thanks Al Seim and R-T USA!
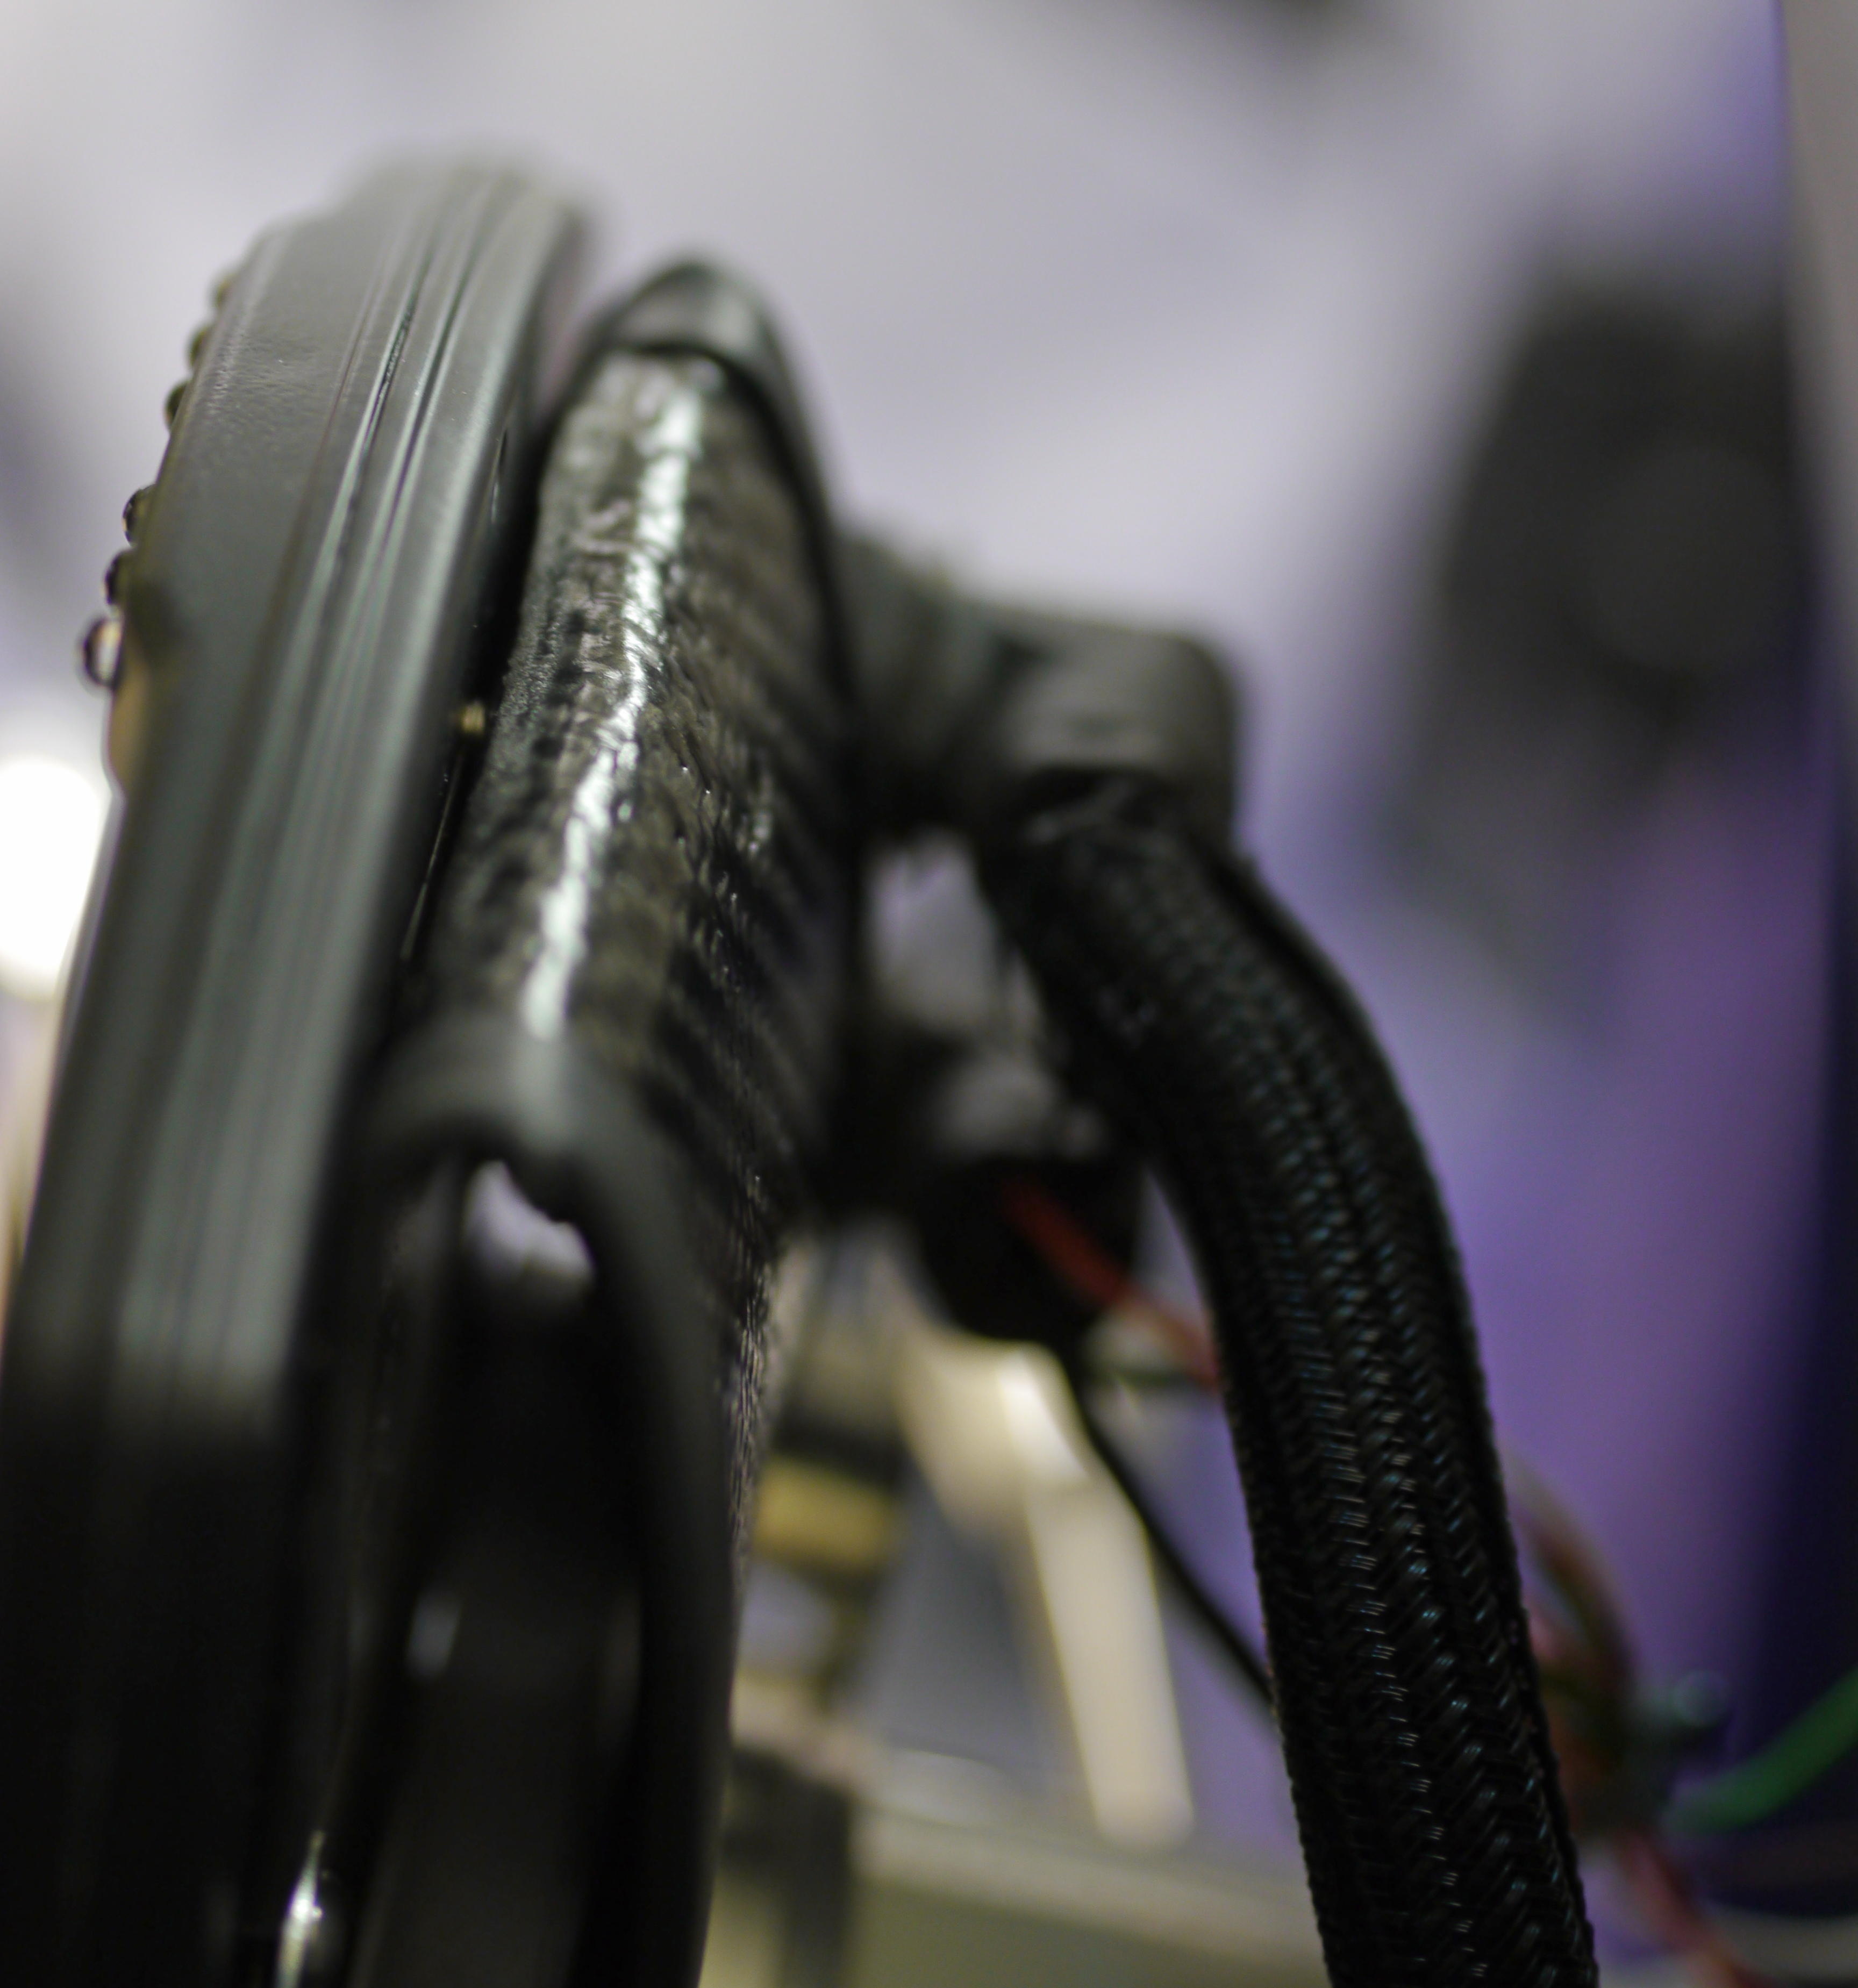
Belts
Not very exciting, was able to get a good length PS belt on the second try, looks like I’ll need a third attempt to get an alternator/fan belt of the right length, this one is a bit too long-
Looks like I may need to spend some time shimming the PS and water pump pulleys to get perfect alignment. Like so many things, you think belts will be a 5 minute deal, and it turns into hours… 🙂
###
The plan for the moment is to get it running, and solid enough to not fall apart or puke its fluids out everywhere on a short drive. Want to make sure it builds oil pressure by free-cranking it with the plugs out, before they go in and I try to fire it. It *should* be fine as it ran great on the engine dyno, but that was over 2 years ago, and it has since received a new oil pan.
It’ll need to go to an interior shop to get the headliner put in (it’s a least a 2-person, if not 3-person job on these cars), then to an exhaust shop (have some tweaks to the Magnaflow system I need/want), and to ProParts USA for some shocks. I want to have the car ready for the San Diego National Tour, which is a short three months away!
Lots of things are a pain
Have lots of different assembly sub-projects in the works at the moment. About 40 items on the to-do list left. Try to see them through, but often times they reach a frustrating point, and instead of getting aggravated and potentially causing a mess-up I’d regret later, the approach is to move to another project. That gives the subconscious time to work on the problem, maybe order a new tool or part that would help, and re-address it later when fresh.
Unfortunately after a while, you run out of stuff to switch to, and have to pick back up a frustrating aspect of the project. Here’s a brief rundown of some things causing frustration at the moment.
Power steering pump catastrophic leakage.

Spent a lot of time getting the power steering lines all cinched up, with the basic routing done. Poured in a couple ounces of the new Redline PS fluid, turned the wheel a bit (car in the air), all seemed fine. Added about half a quart. What’s that I hear? The PS fluid is streaming directly onto the floor! It’s not leaking from any of the fittings or orifices, it’s leaking from between the main pump body and the outer reservoir housing. No way to stop the leak, so I put the half full bottle of PS fluid back underneath and let it pour right back in. Used the above little lab bottle to collect the drips that continued for the next couple weeks, haven’t had the heart yet to get in there and undo all the painstakingly attached hoses. Need to get a new pump too.
Not hard to see how Donohue gave up on PS after only one or two races! It’s a lot of weight (20+ lbs.) and complexity, all up at the nose of the car, that also robs power. Just don’t think I can autocross this beast with a lot of caster without it though. Not and provide very precise driving inputs anyway.
Brake line fittings
This project has made me realize how easy most of my earlier car projects have been. Something as simple as brake lines, has been a big pain. The OE-style replacement hard lines don’t thread into the regular Wilwood calipers. Have to get a special adapter. Then there’s stuff like this one-

Have to figure out if it’s a bad fitting, mismatched threads, bad flex line, or something else, now after the system has some brake fluid in it. At least it’s a neat blue (ATE Superblue). Speaking of blue, took this photo of some oil. The LAT engine oil now in the car is a really fantastic blue color. Tried to capture it here by pouring a little in another bottle-

If you’ve ever seen the movie the Fifth Element, it looks just like blood from the Diva Plavalaguna after she gets shot. I’m sure that’s just what the oil engineers had in mind when they were blending it… 😉 Fortunately the engine oiling system is currently all set (though the pan install was not without its challenges), and doesn’t leak, now that an oil temp sender has been installed in the pan. Even have a dipstick now!
Leaf Springs
As noted back here, ride heights are all wrong at the moment. Front is relatively easy to adjust, with some turns of the Afco adjuster. Rear, not so much…variable height spacer blocks are available, but you don’t want to run any more spacer block than you have to.
The Hypercoil springs I first bought way back when are the only composite leafs they offer, and come with a 4.5″ “true arch”, whatever that mens. Of the many mistakes I’ve made in the progress of this project, one was assuming this would be a reasonable ride height. Turns out it is way way off, even with a 1″ spacer block. Car needed to be about 3″ lower from where it was with the Hypercoils, so the only real option was another set of springs. Liteflex LLC, who makes the springs for Hypercoil, didn’t return my message (their unit is a very high quality piece, despite the poor fitment for my application), so I called Flex-A-Form. With one call they were able to take my order. I wanted to replicate the Hypercoil specifications (spring rate and size), but be 3″ lower.
To their credit, they did get the springs to me relatively quickly, considering they had to be custom made. To their discredit, they weren’t going to offer anywhere near 3″ lower height than the Hypercoils. But again to their credit, they have an offset eye design in the spring end, which helps mitigate this – by disassembling the spring end and mounting it upside-down on the leaf, you can lower the effective mounting point by 1″ at one or both ends.

Looks easier than it is, they use a pretty aggressive glue to hold it on, making it some careful prying and chisel work to get the end off without hosing the fiberglass leaf. And the contours aren’t quite the same when upside-down so a bit of file work is required for it to fit right.
Once that’s done, I take a closer look at the Flex-A-Form leaf next to the Hypercoil, and realize that it is at least 2″ longer in the rear section. Ugg! So what do I do now, send them back? Will they take them back now that I’ve flipped the eyes? The more important question that came to mind was, what are the chances they even get it right the second time around, and what will continued messing about mean to the timeline? Instead, decided to modify them myself-

Marked and cut off the extra length; re-contoured the fiberglass to receive the spring eye; positioned eye (in the lowering upside-down orientation) and drilled holes for the mount bolts; cleaned it up, applied sealer/adhesive, and bolted it back together.
Then there’s the issue of bushings and bolt sleeves and washers and fasteners. John Coffey did a good job getting the Hypercoils mounted up way back when but had to custom-make a few pieces on his lathe to get it to go together. I don’t have a lathe or the raw materials, and thus had to improvise, cutting down and hogging out bushings to fit the larger sleeves John had made. *Nothing* about the springs just fit as delivered. Oh, and the subframe connectors have to be mostly removed to get the forward spring pockets out, which requires pulling apart a bunch of the interior.
What should have been a couple hours (swapping out rear springs for lower units) ended up taking at least 8, and only the first one is done! Other side should go faster but geez what a pain. Good news is, I should have all the info needed to get the next pair of Flex-A-Forms built right (I don’t expect the 250# spring rate I’m starting with, to be the one I stick with forever) so the work on the bushings and hardware should be re-usable on the next pair, making this swap only a couple hours, the sort of thing you might try between days at a multi-day race, with normal tools.
Road Draft Tube
Most people don’t even know what this is, and admittedly I didn’t either until recently.
In the old old days – like, before the Camaro – automakers had this thing called a “road draft tube”. They recognized that engines built up positive pressure in the crankcase, especially while the engine was working hard, and they had to figure out what to do with it. Without anywhere else to go, the pressure would cause oil to leak out past the seals, and make a mess of the car. So what they did, was run a tube from a port on the engine, down and back a ways, so liquid and mist oil escaping from the engine, would drip “harmlessly” on the road beneath the car. This was a significant contributor to the black stripe in the middle of our highway lanes; an intentional, built-in oil leak.
By the early 60’s people had begun realizing 1, this was bad for the environment, and 2, engines actually like a little bit of vacuum on this port – so what the heck, why don’t we just ingest this misty oily air and burn it in the combustion chamber? Thus the modern PCV system was born.
In the case of a ’67 Camaro V8, the road draft tube and PCV system are fairly basic. In the picture below (not my engine) you can see the “tomato can” – a very basic attempt at an air/oil separator – it is plumbed to the port on the block you see at the very top left.

From that port, a tube runs up and into the underside of the air cleaner lid. This provides a slight vacuum and causes oily badness to get sucked into the engine. This is actually not a good thing for combustion in a performance scenario, as it affects mixture in a negative way. Thus the benefit of catch cans, which are allowed in STX (even Stock) so long as the “original PCV function is retained”. Current plan is to run the road draft tube outlet to a catch can-slash-air/oil separator, which will then be plumbed back into the original place in the air cleaner. This should meet the rules while helping preserve healthy combustion.
So all of this ancient emission history is great, but what’s the problem? The problem is, the tube has this dome thing on it where it covers the port, where a single long bolt runs down through it, into female threads in the block. Since this probably makes for a common oil leak spot, somebody in the history of this block, must have overtightened the bolt, and it is now snapped off in that port, without enough meat protruding to get a tool on. The broken-off bolt has a nice dome shape to its top, making it tough to keep a drill bit centered, and it is recessed so far down there, normal bolt extractor bolts and tools can’t reach. Yay! As an added bonus, this is at the extreme rear of the block, so to even look at it, requires climbing into the engine bay and contorting one’s self, being careful not to mess up all the shiny, new, and sometimes delicate, engine parts.
I plan to give it a go with a traditional drill bit, and maybe see about extending the bolt extracting bit in some way, to get it down into the hole drilled. On a day when I’m feeling very patient and well rested… 🙂
Coolant Temp Sensor Port
The pristine intake manifold I bought from Jerry MacNeish two years ago now-

came with a plug in the port next to the thermostat housing mount, there on the right side. That port is used in ’67 Camaros for the coolant temperature sensor. In later years it was moved directly to the cylinder head.
I’ve tried penetrating fluid, tried heat, and even tried extreme force (ended up breaking the 1/2″ -> 3/8″ adapter), and nothing has been able to make that plug move. At this point it likely needs divine intervention, but in the meantime, have emailed Jerry asking for advice. Might try drilling it out, though I’m not enamored by the idea of the inevitable loose aluminum shavings floating around the cooling system.
On a related note, recently bought a complete tap and die kit. Not sure how I ever got along without it before, it’s been tremendously valuable.
Vent Windows
1967 was the only year the Camaro came with vent windows and as such, this is one area where replacement parts are hard to come by. And there are a whole lot of parts to replace! While I’m a big fan of the vent windows and like their classical elegance, from a technical standpoint, they are probably the least elegant things on the car. It takes an atrocious number of oddly shaped metal parts, contorted gaskets, and strange hardware, to make one of these vent windows work. Since some of the key stuff isn’t remanufactured, you have to make the best of what you can find. When it’s all said and done, it is heavy and makes you wonder why they even tried doing these things in the first place.

It’s not all cleaned up here, and the gasket still needs some trimming, but the driver’s side vent window is IN!
Headers back, couple minor things
Headers made it back from Swaintech with their White Lightning coating.

Again a very high quality result, and now that I see how close the headers run to critical components like the starter and power steering, am even more glad I went with it.
The coating itself should last a long long time, and help the neighboring components last longer too.

Thought I’d let the pimpy valve covers make their entry now. They’re the same off-white used everywhere else on the car, though they do look a little different here in the light.
Still have a few little things to take care of on the underside of the car before the exhaust can go in, not the least of which is the remaining bends to make on the shifter linkage so it doesn’t bind itself up when in reverse.
Out back, made a couple modifications to the rear swaybar, even though it hasn’t been used yet. One, was shortening the endlinks on both sides by about an inch. The second, was shortening the driver-side arm, so it’s the same length as the non-adjustable passenger side. These two changes should provide a lot more bump travel – with this arm length, the bar arm ends will contact the floor (if nothing else hits first) at its highest point, allowing for maximum travel. You can see it somewhat here:

A couple weeks ago I put together a to-do list of things I could think of off the top of my head. Presently it has 57 items, of which 7 have been done. 4 will require outside help – mount tires to wheels (which themselves haven’t even been made yet), add a slight bend to front swaybar arms (purchased a narrower front center section for the swaybar to allow for more tire clearance, but it requires modification to the arm shape), welding the alternator bracket to the header (found a bracket but should have it welded for better stability/reliability), and the headliner install. I could *try* the headliner install myself but everything I’ve seen says you need at least 2 people, if not 3. It’s not like newer stuff where it snaps in, it’s a real fabric thing with adhesive and these wacky metal rods. Looks like awful work.
Each of the tasks on the list are 4-8 hours, so still a long way to go. Will try to take more pictures along the way. Here’s an artsy one in the meantime…

STX thrust comparison 2012-2013?
A recent thread on the new Toyota Scion FRS & Subaru BRZ on roadrace-autox.com took an interesting turn around post #3680, when someone opined on where the car should go in the Street Touring category.
Now that Street Touring has moved from seats-and-displacement based classing, to one relying on subjective assessment of vehicle performance, there are many places where a given car could land. As a normally aspirated and lightweight 2+2, the FRS/BRZ could fit in many of the classes, and every single one – STC, STS, STX, STR, and STU, have been mentioned.
A good bit of the discussion was on how the car would fit in STX, given how similar it is to the RX8. Some dynos were shared and thoughts on acceleration given.
Since I’d already collected the data for some other STX cars, it was not too much work to provide an STX-centric thrust spreadsheet, which I’ve linked to below here.
There’s still a lot unknown about the FRS/BRZ, including what size tires it can fit. Feel free to download this spreadsheet and make adjustments as you see fit.
Based on what I’ve seen so far, the accelerative capability (which by no means dictates in-class performance!) looks to be on par with the RWD class leaders in STX. The BMW 328 appears to have a slight edge over 55mph, and the Scionaru would appear to have an edge at very low speeds (~25) which could possibly be an edge up to 35mph if there were a way to tune out the torque dip. These all pale in comparison to the nearly-forgotten WRX, which dominated the class for so long but has been out of favor in recent years.

The sample data I’ve provided here for the Camaro includes a very optimistic curb weight, and dyno numbers from a magazine engine build, that are possibly somewhat representative, but certainly not identical, to a stock-legal engine build for the same motor.
Header test fit
Small-block Chevys with headers is the automotive equivalent of a peanut-butter sandwich with jelly – once you have the first thing, you have to try having it with the second. I’d bet anyone, that more headers have been designed, built, and sold for the ubiquitous SBC, than any other engine in history, and likely, for any engine that ever will be made. So choosing headers for the car should be a slam dunk right? 😉
Given the popularity and huge run of the SBC, there are a staggering number of choices out there. And amongst those choices, pretty much all are available to fit in a Camaro – which, for the most part, has plenty of room for headers of any design.
The most common design is a 4-1 long-tube style, usually with primaries about 30″ in length. Among the best of this breed are Stahl headers – these:

are built off the same jig used to make the headers used on the Penske/Donohue road race cars from ’68 and ’69. Great ground clearance, with a race-proven design. Fits the theme too…so a good choice?
Since the primary use of cars like Camaros from 1970 until recently has been drag racing, most of the brand names you think of (Hooker, Hedman, etc.) designed their headers with drag racers in mind. Drag racers don’t tend to run their cars as low as road racers, so they’re less concerned about ground clearance, and low weight. Most headers you find for this crowd are a heavy-ish gauge steel, with a crummy high-temp coating, and hang down 2″ or more below the frame of the car.
One trait drag racers and road racers have in common, is a focus on the top end of the powerband. As a vast generalization, the common 4-1 design SBC header promotes maximum peak horsepower, and the primary tube diameter (1 3/4″) and collector size (3″) most often offered, is really bigger than needed for a typical SBC in most uses. In my case with a 302 (at the small end of SBC displacement) and a focus on midrange (this is an autocross car after all!) – the vast majority of the headers out there just weren’t the right fit for the application, at least not as I see it today – including Stahl’s headers above.
My priorities:
- Good ground clearance, not hanging below the frame if possible. The car will be on and off trailers often. Super low cars with long wheelsbase (108″ remember!) are a nightmare to load and unload from trailers. Plus sometimes we have bumps or dips while racing.
- Good low-end and midrange. While even in the worst case I should have more acceleration at low engine speeds than the competition (especially now that unfortunately, Terry Fair has wussed out and gone to ESP with his crazy-powerful 5.0 Mustang), the 3000-4500rpm engine speed range (equating roughly to 30-45mph with initial gearing choices) are what matters, and a lot of people will say the 302 doesn’t even “wake up” until 4500. I’m hoping “those people” are those used to big blocks, who would say that something like an RX8 never wakes up… 🙂
- Low weight. This weight is up on the nose, and not all that low. Thin-wall stainless like 18ga would be lightest, but also the most fragile in a header-impacting event.
Based on this, I took a plunge on an off-the shelf header that *should* meet these requirements. As with the shifter in the previous post, things aren’t quite right out of the box – the passenger side header needs to be bent downward a bit at the rear, to keep from hitting the floorboard. Might just cut off the triangle flange and go with a v-band, haven’t decided yet. Driver side fits perfectly.

Instead of a 4-1, it’s a “tri-y” design, also known as 4-2-1. It’s not stainless, but is a thin-wall mild steel, the units are quite light. Primaries are 1 5/8″, and collectors are 2.5″. Those are good conservative starting values, similar to what was used on the engine dyno, though the dyno headers were 4-1. The purpose of the test fitting was to make sure they’d fit the car and its components, before being sent off to Swaintech for their White Lightning coating to be coated inside and out. This stuff is extremely effective at keeping the heat in, I had used it years ago for the turbo components when I took my 240sx to Street Modified:

This should really help keep the interior heat levels under control. A lot of the restomod/Pro-Touring guys add a hundred pounds of sound and thermal insulation to their cars…definitely not a fan of that approach for a car with heavily sporting intent. Will probably be doing Swain on the rest of the exhaust system (which itself is still somewhat TBD) to help keep the floor cooler.
From inside the engine compartment, passenger side-

Not much going on over there, especially with no heater. The Swain will help keep the starter from getting cooked, and not working on a hot engine on a hot day.
Driver’s side is a lot more cramped, but they fit well, with at least ~3/8″ clearance to the other hard parts. Again, counting on the Swain coating to help keep the PS fluid from boiling, or other things from melting.

Ground clearance – not perfect, but close to it, for this car. The larger diameter things have a harder time staying tucked up like this.

If I end up with the nice-to-have problem of too much low-end and midrange torque, such that throttle modulation is impossible and the 265 street tires are constantly being blown away… then I might consider going to a more top-end-centric header design, as an archaic sort of traction control. Or, if the power feels lacking somewhere, having someone like Burns Stainless design and build a custom super-thin stainless set of headers based on all the engine parameters, with a focus on beefing up the spot of the powerband that feels lacking.
I’m hoping the SBC have been around long enough, the unit I have is an effective design, taking into consideration its apparent goal of being a good “street” header. I had Burns do a full workup years ago for my 240sx when it was in STS (stock engine, normally aspirated) and the tubing diameters and lengths their software spit out, were pretty much exactly what DC Sports had put together in their cheap off-the-shelf unit.
Now that I’m confident these things are going to fit, placed an order for the rest of what needs to go under the hood. Hope to get the flow of updates coming more regularly soon.

Stay tuned!
Site running in an upgraded home
Spent a little time over the last few days, moving the site to a host in Amazon’s EC2 “cloud” infrastructure. The dusty laptop in my closet serving rhoadescamaro.com was 5 years old at the beginning of this project and is now over 7, long past its due date.
Got WordPress up to latest version and did some other general cleanup. This should all be transparent to the site’s followers.
I anticipate providing a lot more high-definition content in the coming months. Amazon will be able to deliver the site’s big photos and video faster than my pro-sumer home connection could.
Don’t worry fans, this is me gearing the site up for the car’s exciting final build steps!
Taking a little break

I know some of my more ardent blog followers will find this disappointing, but I’m going to be taking a break from the Camaro for a while.
As for progress from the last update – the rear quarter windows have been installed (much harder than it sounds to get it right), and I’ve put the rear seats in. Windshield washer system is put together. Flywheel/clutch/pp, bellhousing, and transmission are all together and in. Fuel tank is fully in and buttoned up. Original driveshaft fits perfectly though it will need to get cleaned up and receive fresh U-joints.
Left on the to-do list:
- Fuel system
- Cooling system
- Power steering system
- Electrical system (alternator and gauges)
- Vent windows and door glass
- Front seats
- Exhaust system (headers and header-back system)
- Wheels and tires
- Odds and ends
Planning to get back to this late in the Spring or sometime in Summer. In the meantime, have a planned investment in infrastructure – an enclosed trailer, which I’ve never myself owned before, always borrowed. The timing should work out well, I can use San Diego’s great autumn and winter to fine tune the car, so it is all ready to go for next year, instead of a big event like the SD Tour being its first outing.
If you’ve been following along some of the SCCA forums threads, you may have an idea what I’ll be driving in 2012 instead of this. Some opportunities are too good to pass up!
When I’m back to work on the car, I’ll put some notes up on Facebook and the forums I visit, so don’t worry about visiting here every day for updates.
CVD Series – Chapter 3 started
Made a couple updates to the CVD series, chapter 2 and 3a. If you mouse-over the ![]() box at top, it should provide a drop-down to all chapters.
box at top, it should provide a drop-down to all chapters.
Chapter 2 is a boring yet somewhat gruesome dissection of a classic autocross lap.
Chapter 3a is the longest yet, explaining the process for evaluating and comparing the rolling acceleration capability of two cars. This should be a good resource if you ever find yourself embroiled in a “horsepower vs. torque” debate.
Started work on 3b, then on to cornering! Car got back-burnered for a couple weeks while John works a little magic on an A-Mod autocross car.
Staying sharp in the off-season – sim racing
The “sunshine tax” we Southern Californians pay affords us year-round opportunities for autocross and track days. Still, since I won’t have a car for a while, and there’s some free time while the car is out, decided to do a little more sim racing this winter.
There are several sims out there, the two I’m most familiar with are the SimBin GTR series of games (GTR2, GTR Evolution, Race07), and iracing.com.
The SimBin games are fun and a tremendous value – for $20-30, you’ve got unlimited access to 100+ awesome cars and dozens of neat tracks. Within a few minutes of installing, I was driving a Team Oreca Viper around the Nurburgring. Their Porsche 935 is by far the most fun sim car I’ve driven. You can download even more cars and tracks from sites like nogripracing.com. They also have a “Hot Laps” section, where people can post up their fastest laps, so you can see essentially the world record laps to compare to.
iracing.com is a little more hardcore. When you sign up you only get access to a small handful of cars, on an even smaller handful of tracks. The only real car you get when you start is a crappy Pontiac Solstice. You’ve got to keep paying a monthly fee, and you have to pay more every time you want to try a new car or a new track. Still, the simulation aspect of iracing is even better than the GTR games, which makes the subscription-based iracing a worthwhile endeavor for a few months in the off season. From within the iracing website, you can look up the world record laptimes for a given car on a given track, to compare to. No excuses here – with an average PC and wheel/pedal combo, you should be able to run with the very fastest guys in the world, once you’ve had some practice.
The sims always feel a bit cartoony and obviously the sensations are missing, but anecdotally it seems helpful. It helps you remember how to stay focused, how to stay smooth on your inputs, and if you race against other people, it even feels like a bit of exciting pressure at times. Some of my best driving in 2010 was the year’s first event – the San Diego Tour, when I hadn’t driven the Viper for 5 months, but had played a bunch of iracing after Santa brought a Logitech G27 wheel for Christmas.
Also, I look at a guy like Bryan Heitkotter. Bryan was already a really good autocrosser, then he got into iracing and rose to be one of the gods amongst its ranks. Meanwhile out in the real world, the guy is now just plain unstoppable, winning every race he enters, in a tough class against some really great drivers.
This isn’t an advertisement for any sim racer (though if you sign up for iracing, I wouldn’t mind if you told them I referred you 😉 ), just an observation that these programs have come far enough along now, to be valid training tools for use in the off season.
More fabrication work complete
Despite having to simultaneously deal with a cold and waves of “Camaro groupies” coming by the shop to check things out, John has made a bit more progress on the car.
Unitrax completed the rear end with the ring & pinion and diff all installed right. The passenger-side leaf spring mount was bent, rusty, crooked, and had been re-welded or something by a caveman with a blowtorch; it needed some fixin’-

The sawzall, saws all:

Removed, and readied for the new perch:

This is one place the Camaro’s popularity helps. Replacement spring perch from Summit was just a few bucks, they had it in stock, etc. Probably not many cars where replacement welded-on pieces like this are so easy to come by-

All prettied up and rust protected:

I’d been thinking about buying a lathe and making some of my own bushings, but there are really only a few this car needs, and I don’t have a ton of spare workbench space…so I’m having John make the custom bushings the car needs also. He completed the first couple pairs, for the rear leaf spring shackles-


These Hydlar bushings should offer much improved response over the worn-out stock bushings, which in an informal durometer test, measured just above “marshmallow”