Header test fit
Small-block Chevys with headers is the automotive equivalent of a peanut-butter sandwich with jelly – once you have the first thing, you have to try having it with the second. I’d bet anyone, that more headers have been designed, built, and sold for the ubiquitous SBC, than any other engine in history, and likely, for any engine that ever will be made. So choosing headers for the car should be a slam dunk right? 😉
Given the popularity and huge run of the SBC, there are a staggering number of choices out there. And amongst those choices, pretty much all are available to fit in a Camaro – which, for the most part, has plenty of room for headers of any design.
The most common design is a 4-1 long-tube style, usually with primaries about 30″ in length. Among the best of this breed are Stahl headers – these:

are built off the same jig used to make the headers used on the Penske/Donohue road race cars from ’68 and ’69. Great ground clearance, with a race-proven design. Fits the theme too…so a good choice?
Since the primary use of cars like Camaros from 1970 until recently has been drag racing, most of the brand names you think of (Hooker, Hedman, etc.) designed their headers with drag racers in mind. Drag racers don’t tend to run their cars as low as road racers, so they’re less concerned about ground clearance, and low weight. Most headers you find for this crowd are a heavy-ish gauge steel, with a crummy high-temp coating, and hang down 2″ or more below the frame of the car.
One trait drag racers and road racers have in common, is a focus on the top end of the powerband. As a vast generalization, the common 4-1 design SBC header promotes maximum peak horsepower, and the primary tube diameter (1 3/4″) and collector size (3″) most often offered, is really bigger than needed for a typical SBC in most uses. In my case with a 302 (at the small end of SBC displacement) and a focus on midrange (this is an autocross car after all!) – the vast majority of the headers out there just weren’t the right fit for the application, at least not as I see it today – including Stahl’s headers above.
My priorities:
- Good ground clearance, not hanging below the frame if possible. The car will be on and off trailers often. Super low cars with long wheelsbase (108″ remember!) are a nightmare to load and unload from trailers. Plus sometimes we have bumps or dips while racing.
- Good low-end and midrange. While even in the worst case I should have more acceleration at low engine speeds than the competition (especially now that unfortunately, Terry Fair has wussed out and gone to ESP with his crazy-powerful 5.0 Mustang), the 3000-4500rpm engine speed range (equating roughly to 30-45mph with initial gearing choices) are what matters, and a lot of people will say the 302 doesn’t even “wake up” until 4500. I’m hoping “those people” are those used to big blocks, who would say that something like an RX8 never wakes up… 🙂
- Low weight. This weight is up on the nose, and not all that low. Thin-wall stainless like 18ga would be lightest, but also the most fragile in a header-impacting event.
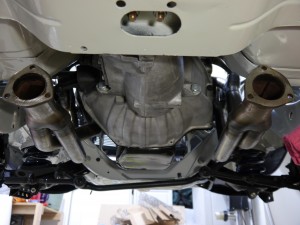
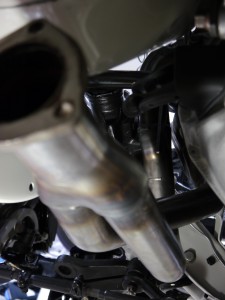
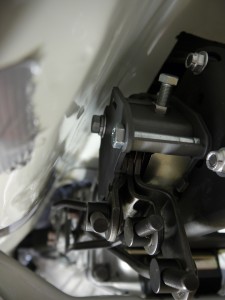
Based on this, I took a plunge on an off-the shelf header that *should* meet these requirements. As with the shifter in the previous post, things aren’t quite right out of the box – the passenger side header needs to be bent downward a bit at the rear, to keep from hitting the floorboard. Might just cut off the triangle flange and go with a v-band, haven’t decided yet. Driver side fits perfectly.
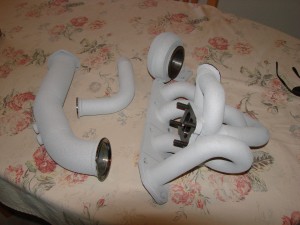
Instead of a 4-1, it’s a “tri-y” design, also known as 4-2-1. It’s not stainless, but is a thin-wall mild steel, the units are quite light. Primaries are 1 5/8″, and collectors are 2.5″. Those are good conservative starting values, similar to what was used on the engine dyno, though the dyno headers were 4-1. The purpose of the test fitting was to make sure they’d fit the car and its components, before being sent off to Swaintech for their White Lightning coating to be coated inside and out. This stuff is extremely effective at keeping the heat in, I had used it years ago for the turbo components when I took my 240sx to Street Modified:
This should really help keep the interior heat levels under control. A lot of the restomod/Pro-Touring guys add a hundred pounds of sound and thermal insulation to their cars…definitely not a fan of that approach for a car with heavily sporting intent. Will probably be doing Swain on the rest of the exhaust system (which itself is still somewhat TBD) to help keep the floor cooler.
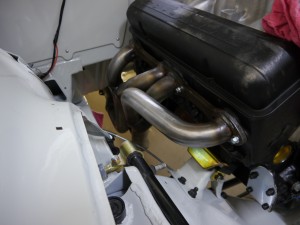
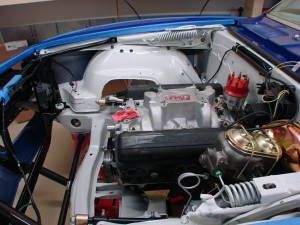
From inside the engine compartment, passenger side-
Not much going on over there, especially with no heater. The Swain will help keep the starter from getting cooked, and not working on a hot engine on a hot day.
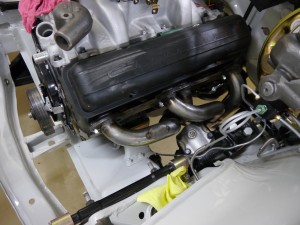
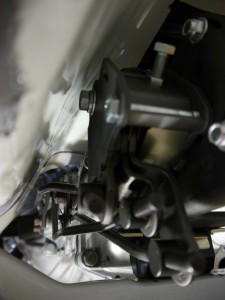
Driver’s side is a lot more cramped, but they fit well, with at least ~3/8″ clearance to the other hard parts. Again, counting on the Swain coating to help keep the PS fluid from boiling, or other things from melting.
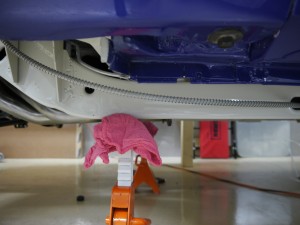
Ground clearance – not perfect, but close to it, for this car. The larger diameter things have a harder time staying tucked up like this.
If I end up with the nice-to-have problem of too much low-end and midrange torque, such that throttle modulation is impossible and the 265 street tires are constantly being blown away… then I might consider going to a more top-end-centric header design, as an archaic sort of traction control. Or, if the power feels lacking somewhere, having someone like Burns Stainless design and build a custom super-thin stainless set of headers based on all the engine parameters, with a focus on beefing up the spot of the powerband that feels lacking.
I’m hoping the SBC have been around long enough, the unit I have is an effective design, taking into consideration its apparent goal of being a good “street” header. I had Burns do a full workup years ago for my 240sx when it was in STS (stock engine, normally aspirated) and the tubing diameters and lengths their software spit out, were pretty much exactly what DC Sports had put together in their cheap off-the-shelf unit.
Now that I’m confident these things are going to fit, placed an order for the rest of what needs to go under the hood. Hope to get the flow of updates coming more regularly soon.
Stay tuned!
Shifter
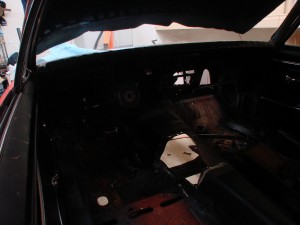
Car came with a hole in the trans tunnel from a prior modification, patched with some screwed-in metal I removed in tear-down. Here’s a dark photo illustrating the size of the wound:
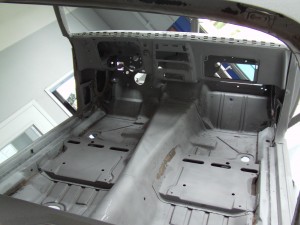
It’s all been repaired since, had new equal-gauge metal welded in and smoothed when at the body shop:
But as I went to install the Hurst Competition Plus shifter on the freshly rebuilt trans, I realized there was no freakin’ way it was going to fit, without re-creating a monster hole. After some investigation, turns out I had the wrong shifter – even though it worked fine with the trans, it was meant to fit in a Chevelle, which has a big hump on the driver side of the tunnel to accommodate that type of shifter.
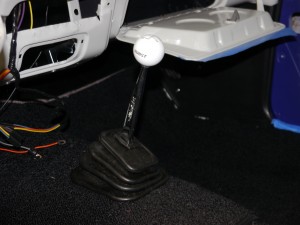
So, a brand new Hurst Competition Plus shifter – this time for the Camaro, was purchased and installed-
No holes were cut in the installation, though it was a bit of a pain, you can barely get it in there.
As you can somewhat see in the picture above and this one below:
The shifter works on the transmission through a collection of rods – one for 1-2, one for 3-4, and another for reverse. The instructions say the rods may need some bending to “fit your application”. Turns out they’re right about that – they all need bending. Got the 3-4 rod bent now so it’s not hitting the trans tunnel, but the reverse rod hits the 1-2 rod when you use it, causing the transmission to select second gear and reverse simultaneously! (Not so good when adjusting your position on the line at a Pro Solo with mere seconds left, and the trans gets stuck like that!)
So, still some more bending to do – looks like there’s plenty of room to get everything to work with no interference, just needs a bit more time and persuasion. It’s funny to me, how a shifter design that literally must be 50 years old – one that probably still sells well today – still just plain doesn’t work right out of the box without some tweaking.
Would like to take the rods apart again anyway – noticed the Chevelle-style shifter had steel bushings in the ends of the rods, whereas the new ones are nylon, which might dampen a little vibration, but also might break.
Shifter is a medium height, a decent starting point. Hurst makes a bunch of different shifter sticks, if I’d like it up higher (closer to the steering wheel) they make longer ones, and if I’d like a shorter throw, they make shorter ones.
Call to arms
Steering arms, in this case.
For some time, been scouring the internet looking for a pair of original Z28 outer steering arms for the Camaro. These are extremely hard to find, and not currently reproduced. (Same story goes for the chrome portions of the ’67 vent windows, if anybody has a pair in good shape, please let me know).
David Pozzi put together as close to a complete detailing of Camaro steering components as exists on the internet here.
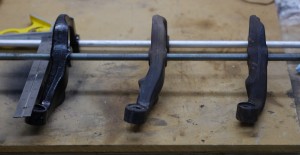
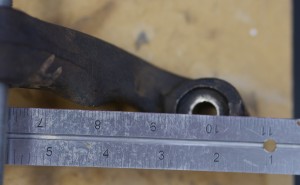
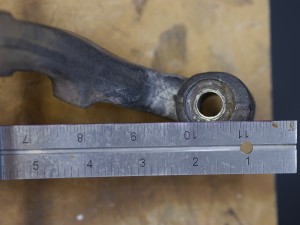
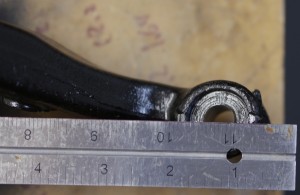
I now have three pairs of outer steering arms-
The leftmost arm is from Speedway Motors, which they are claimed would be shorter/faster than manual steer arms. Their product description:
Don’t know if you ever thought about this or not, but the steering arms on some cars were a different length depending if they were power or manual steering. The manual cars had a longer arm and if you convert them to power steering you still have slow steering. These forged arms are shorter (faster) than manual steering arms.
The middle arm is one I had on the car at purchase. The car was manual steer, and the state of everything gave me no reason to think any of those components had ever been changed.
The right arm is the more recent addition.
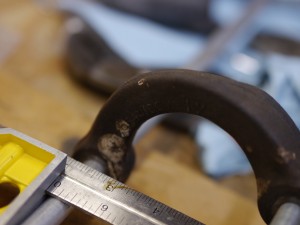
Used two 1/2″ rods to keep the arms aligned. Measurement is from the rear of the farthest hole. Angle on the square is up at 2″, so the actual distance measured is 2″ less than appears on the ruler. I’m looking at the distance from the “back” of the rearmost hole, to the “front” of the tie rod hole, maximizing the distance. Working back from right to left on actual lengths-
Rightmost arm: 8 1/8″ (part number 3954876)
Middle arm: 8 5/8″ (part number 3916266)
Leftmost arm: 9 1/8″ (Speedway part number 91034912)
Tsk tsk on Speedway – their arms are longer than manual steer arms! There is a clear 1/2″ difference in length with each arm. If Speedway had made their arms shorter than manual steer arms, they’d be just fine, but they did the opposite.
Why the fuss over 1/2″? A few reasons-
- The shorter outer arm length provides a quicker steering ratio. This means less steering input required for a given maneuver, and ultimately means less hand-over-hand, shuffle-steering maneuvers. I hate moving my hands on the wheel, and loathe the slow steering of cars like the E36 era BMWs.
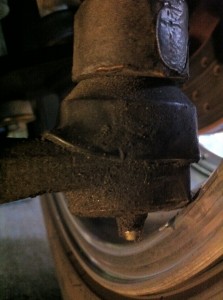
- The shorter arm is less “in the way” of high offset wheels. Of course, “high” offset in the early Camaro world is anything above zero, but in general the shorter arms help you avoid this situation:
The dreaded tie-rod rub. The guys that run big bump steer spacers, get it worse. The above is not my car though ironically, the original steering arms had the tie rod rubbing the inside of the sidewall of 245-14 tires on the ’84 Berlinetta wheels I drove the car down from Sacramento on. Scary!
With the suspension all together, I’ve since measured for wheels with the manual steering arms, and the size of wheel I’d like to run in 18″, just barely clears in many places. With the shorter Z28 arms, I could theoretically fit 17″ wheels with similar clearance, at least to the tie rods.
- These arms are technically the correct part for the car. A big part of this exercise is to experience what it would be like, to drive a vintage Trans-Am Camaro built to SCCA STX rules. While I could probably get away with running one of the inferior arms under the “parts no longer available” allowance, it just wouldn’t be the same.
…
Sorry it’s been so long without an update everyone, still don’t plan on getting into full steam on this for another couple months. For those of you wanting to see progress that I didn’t run into at the SD National Tour or ET Pro Solo, you can thank your SCCA brethren for one of the most effective guilt trips I’ve ever been on the wrong side of… 🙂
Lots more to come!
Site running in an upgraded home
Spent a little time over the last few days, moving the site to a host in Amazon’s EC2 “cloud” infrastructure. The dusty laptop in my closet serving rhoadescamaro.com was 5 years old at the beginning of this project and is now over 7, long past its due date.
Got WordPress up to latest version and did some other general cleanup. This should all be transparent to the site’s followers.
I anticipate providing a lot more high-definition content in the coming months. Amazon will be able to deliver the site’s big photos and video faster than my pro-sumer home connection could.
Don’t worry fans, this is me gearing the site up for the car’s exciting final build steps!
Taking a little break
I know some of my more ardent blog followers will find this disappointing, but I’m going to be taking a break from the Camaro for a while.
As for progress from the last update – the rear quarter windows have been installed (much harder than it sounds to get it right), and I’ve put the rear seats in. Windshield washer system is put together. Flywheel/clutch/pp, bellhousing, and transmission are all together and in. Fuel tank is fully in and buttoned up. Original driveshaft fits perfectly though it will need to get cleaned up and receive fresh U-joints.
Left on the to-do list:
- Fuel system
- Cooling system
- Power steering system
- Electrical system (alternator and gauges)
- Vent windows and door glass
- Front seats
- Exhaust system (headers and header-back system)
- Wheels and tires
- Odds and ends
Planning to get back to this late in the Spring or sometime in Summer. In the meantime, have a planned investment in infrastructure – an enclosed trailer, which I’ve never myself owned before, always borrowed. The timing should work out well, I can use San Diego’s great autumn and winter to fine tune the car, so it is all ready to go for next year, instead of a big event like the SD Tour being its first outing.
If you’ve been following along some of the SCCA forums threads, you may have an idea what I’ll be driving in 2012 instead of this. Some opportunities are too good to pass up!
When I’m back to work on the car, I’ll put some notes up on Facebook and the forums I visit, so don’t worry about visiting here every day for updates.
Engine finally in
Any movie that involves building a fast or special car usually has some kind of montage where the characters are rolling around on creepers, wiping grease and sweat from their brows, and at least at some point – lowering the hot new engine into the car. It’s an exciting moment, one where the car goes from being just a shell or chassis, to the beginnings of an automobile. The body receives its heart.
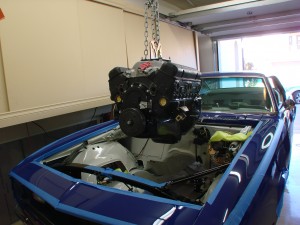
Especially so in this case. The engine isn’t just any small-block Chevy, but an accurate reproduction of the original 302 cubic inch engine found in the original ’67 Z28.
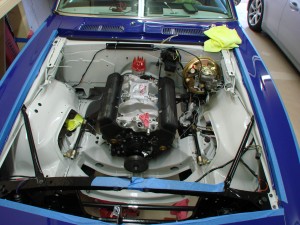
It sits nicely in the engine bay, further back than you might think. These cars have a reputation for the big heavy motor hanging out past the nose of the car, but as you can see it’s not really the case:
Front axle centerline is somewhere in the vicinity of piston #1. Could be better, but clearly not as bad off as something awful, like a Subaru. With no fan, shroud, and radiator in place, there’s room to stand inside the engine bay in front of the motor.
Still looks pretty open in there, but there’s lots still to be added. Cooling system, fuel system, headers, power steering, alternator, etc. You can see here the brake hard lines have all been run, that was the last thing I wanted to get done before dropping the engine in. Transmission *would* be in, but I’m missing one critical part (clutch fork pivot ball) needed for assembly.
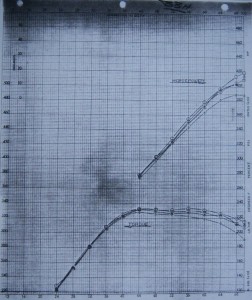
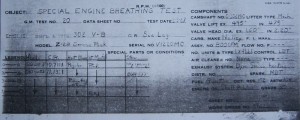
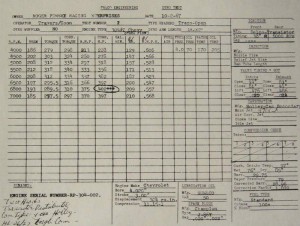
Coincidentally I came across some neat dyno charts today of the 302, from back in the day. Credit for these goes to Jon Mello from the Camaros.org website, where I’ve done a lot of my research. These first couple pictures show the gains produced from some (not ST legal) modifications to the engine.
Interestingly, the engine gains very little in the midrange from the modifications – benefits come mostly above 5500rpm, where the engine would see little time in autocross (though plenty at the track). The baseline dyno in this series isn’t terribly far from an ST legal engine – it uses the stock 4bbl carb (jetting unknown), dyno “service” headers, high-octane gas, but with a cheater cam and milled heads. Note the test date, February 3, 1967!
Here is another fun one, this from legendary engine builder Traco. The Traco team were a key element to Penske-Donohue success, starting with the Camaro and in many cars that followed. This is a fully built motor, likely representative of the power levels available in race trim back in those days. Must have been a hoot on bias-plys!
Still not going to say how my motor did despite it being an aspect of the car people like to speculate over quite a bit. It’s entertaining to see even if it’s not super relevant to the car’s competitiveness. In fact, you might almost argue for wanting to have less power, if the results of Terry Fair and their super-beast Mustang are any indication.
Bits & pieces
Was recently reminded of a little passage from the book that seeded the idea for this project. Even though it’s not from the Camaro chapter but the Javelin one, it describes well the phase of the project I’m in at present:
We started our first Javelin as a stripped chassis from the factory. We needed hundreds of other stock parts , though, such as hinges and brackets and linkages and thing, which are really quite a problem to order individually. For some reason American Motors didn’t want us to strip them off another complete car as they were needed. After we had installed the roll cage and widened the fenders we had to have some pars to continue with, and none we coming. I was getting desperate, so I called the factory and said, “Look, you’ve got to give us a car to take odds and ends out of. We have to have parts now! So they agreed to loan us a car, on the condition that we would rebuild it as the parts we ordered arrived. I was promising anything at that point. We picked up a running Javelin at a dealership and it got stripped … and stripped … and stripped … until it was virtually useless.
By the time we had the racer running the stripper was a pile of junk sitting in the corner.
Similarly, at this stage of the project, the Camaro is in needs of lots of odds & ends. The “kits” you can buy, to do things like the interior, don’t include several parts they assume you’re keeping. Things that aren’t really wear parts, but that tend to get funky with 45 years of age. Don’t want anything funky on this bird so everything is getting replaced or spruced up.
Instead of being able to turn to a fully-loaded “parts car” next door (which I could for a while when I owned two 240sx’s), I have to get online and order the part. Work on a particular oart of the car proceeds, gets stuck because of a missing part, so I move to something else, work until stuck at a missing part, and when the day is done, put together an order for all the missing parts plus anything else I can think may be needed. Not the most efficient method of proceeding.
Despite this, the interior is progressing. Still waiting on the driver door window actuator mechanism to show up from backorder. Several of the other window components need to be thoroughly cleaned and either painted or powdercoated. Looking for replacement vent windows – earlier it appeared these were stocked by online retailers for a reasonable price, but it turned out not be the case…so now I’m stuck looking for the main chrome pieces to the vent windows.
Carpet and under-dash pad are in. Boo hoo hoo, weight from sound deadening. At least it’s low I guess. New painted factory gauge cluster is in, wiring is about done.
This car will be getting the full DL1 treatment, as the 240sx did. Also have the Chasecam camera fully wired mounted up where the dome light goes. So many car videos are from bad positions – on the dash, roof, or on the front bumper. While better than nothing, these videos are only about 10% as useful as a video showing the driver’s inputs. A vantage point that shows the road ahead in addition to the steering inputs from the driver is the best, it really gives you the right kind of perspective to understand what’s going on, and how the car is behaving. Dome light should be a good spot in this car.
The back seats have been upholstered and are ready to go in, but they can’t until the rear quarter windows have been fully installed, and I’m waiting on one sneaky trim piece to complete that step. Then onto the front windows, front door panels, headliner, and remaining trim.
Interior thus far
Making some slow progress on the car of late. Fuel tank is in, wheel dimensions are all measured out (wheel/tire story to come later), and the wiring is about done.
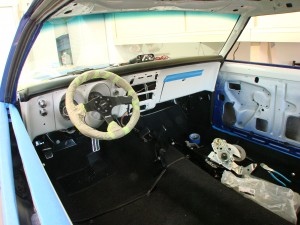
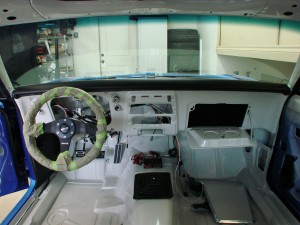
Here’s the interior as of today-
Obviously will fix the Momo center cap rotation before all is done. 🙂
Glove box is in, blanking panel for the center is ready. Hole for shifter is cut. You can see the carpet hanging in the back left, it needs to stretch out a bit before it can go in.
Still have much to do here. Have all new window mechanisms to install, can be arduous to get everything aligned. Gauges to do too, have a fun surprise in store there. Haven’t really liked any of the gauge setups I’ve seen in these cars thus far. Mine wlll be different, if nothing else…
Transmission rebuilt
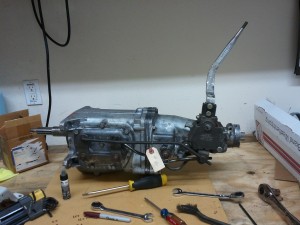
Got the transmission back today from Harold’s Automotive in El Cajon. Like the rest of the car, it needed just about everything new – new second and third gears, new synchros, shift forks, and seals.
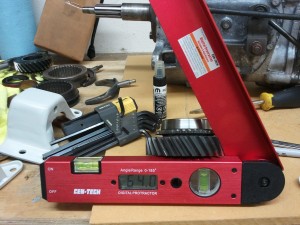
Made some marks at the input and output shafts to verify gear ratios-
As I suspected from the drive home (now over 1 year ago!) first gear is the tall 2.2, making this an M21 transmission, the standard unit in the ’67 Z28. Apparently the M20 wide-ratio was available as an option. Might seek one out if ProSolo launches with this tall first gear don’t work well.
The other thing it could be is the fabled “rock crusher” M22 Muncie. The M22 had a much shallower gear helix angle which made the gears stronger, but the transmission was very loud.
M20 and 21’s have an average helix angle of 35 degrees, M22’s have an average angle of 21 degrees. This one’s definitely an M21:
Blast from the past
Got a call the other day from a fellow in Oregon, who was working on a 240sx, and found some paperwork with my phone number on it.
Turns out my car was bought by a family there, and the young man of the family has been campaigning it in their local drift series – winning all the events he’s entered so far-
Car looks pretty good still, much as it did. Wheels and tires are a bit narrower, and it’s got a cage. Still the same funky hood and Tire Rack sticker.
Too bad I never took it to Nationals – a 240sx won the SM Championship this year, I think my car could have won it too. Oh well! Happy to see it’s getting some good use out there, and I asked the fellow to try to get the new owner out to an autocross to learn some real car control! 😉
