Oops. Sorry about the downtime!
The cobbler’s kids have no shoes, and the IT guy’s servers probably don’t get maintained as well as they should. 🙂
The Amazon EC2 machine holding this site had a drive failure, and some time ago I’d put the site’s media onto ephemeral storage, mostly out of laziness. Had a relatively recent backup, but it took some time to upload the 10+GB of media from a crummy home internet connection.
eFLEKTOR – The only ad you’ll ever see here
Between the Camaro having achieved some of its beginning completion milestones, and it having been relegated to STU this year, I’ve had lots of time to spend on an unrelated endeavor, starting my own business.
http://www.eflektor.com – check it out, won’t you? 🙂

The basic idea here, is a product that effectively shields its owner, from their cellphone’s radiation. Primarily while they sleep-

but could also be used while the phone is on their desk at work, with the bonus of keeping it out of sight.

Phone in pocket, phone against head, and large-form-factor “phablets” are future use cases under consideration – the first product targets the 2/3 adults and especially the parents of the 5/6 teens who sleep with their phone at bedside.
Most of the other stuff out there is some kind of magic sticker that somehow protects you, without affecting signal. If it sounds too good to be true…
This device has a very large and continuous piece of steel inside (steelities anyone?) – if you have it positioned so the protective direction aligns with your only nearby cell tower, it will affect signal. In most urban/suburban environments this isn’t an issue but for anyone where it is, might be reason to move it to the other side of the bed.

Given what this blog is mainly about, I’m certain there are several engineers in the audience scoffing right now. That’s ok – I believe everyone is entitled to their viewpoint (notwithstanding the universal applicability of science/logic).
My approach differs from the competition in this space, in that I’m not trying to scare anybody. I’m not here to exaggerate potential risks, or hide evidence there may be no risk – I’ve collected all the best studies, articles, videos I could find on the subject, and organized them in the eFLEKTOR InfoCenter
The idea, is let people educate themselves, and then decide what they want to do about it. Of course I’d love it for them to become customers!
Personally, in the past 10 years, I’ve had not one but two people close to me develop brain “lesions”, which led to multiple conversations with a fellow that knows more about brain tumors than most:

Dr. Black is often used by CNN and other news outlets, any time the subject of cellphones and health comes up. My own approach follows his view, which boils down to “We don’t have enough data yet to know the long-term effects, so do what you can to minimize exposure.” This jives with the Precautionary Principle advocated by the World Health Organization.
In 20 or 30 years, we’ll look back and either say “Remember when all those people were worried about cell phones causing brain tumors?”… or… “Remember what it was like before everyone had eFLEKTORs?”
$39.95 is cheap enough insurance you end up on the right side either way.
Some firsts today, and CAM
Been a long time without an update – hasn’t been much to report, but there are a couple developments worth mentioning.
This weekend was the San Diego National Tour, approximately the first anniversary of the car’s first autocross. As mentioned in the previous post, the car has been moved to STU where it is hopelessly outgunned, so I won’t be running it Nationally this season. Instead, for this year’s SD Tour I co-drove with Gary Thomason in his killer 2008 Viper, same car I ran with him at the 2012 National Champsionships-

The car is a lot of fun – the handling is right about where my black Viper was when I sold it (still miss that car!), but his has even more power, which is always a good thing :). Despite have a lot more power than the Camaro, the Viper is actually much easier to drive, because it has race tires, the chassis puts power down very well, and the gearing is very tall…then there’s the ABS when it’s time to slow it down.
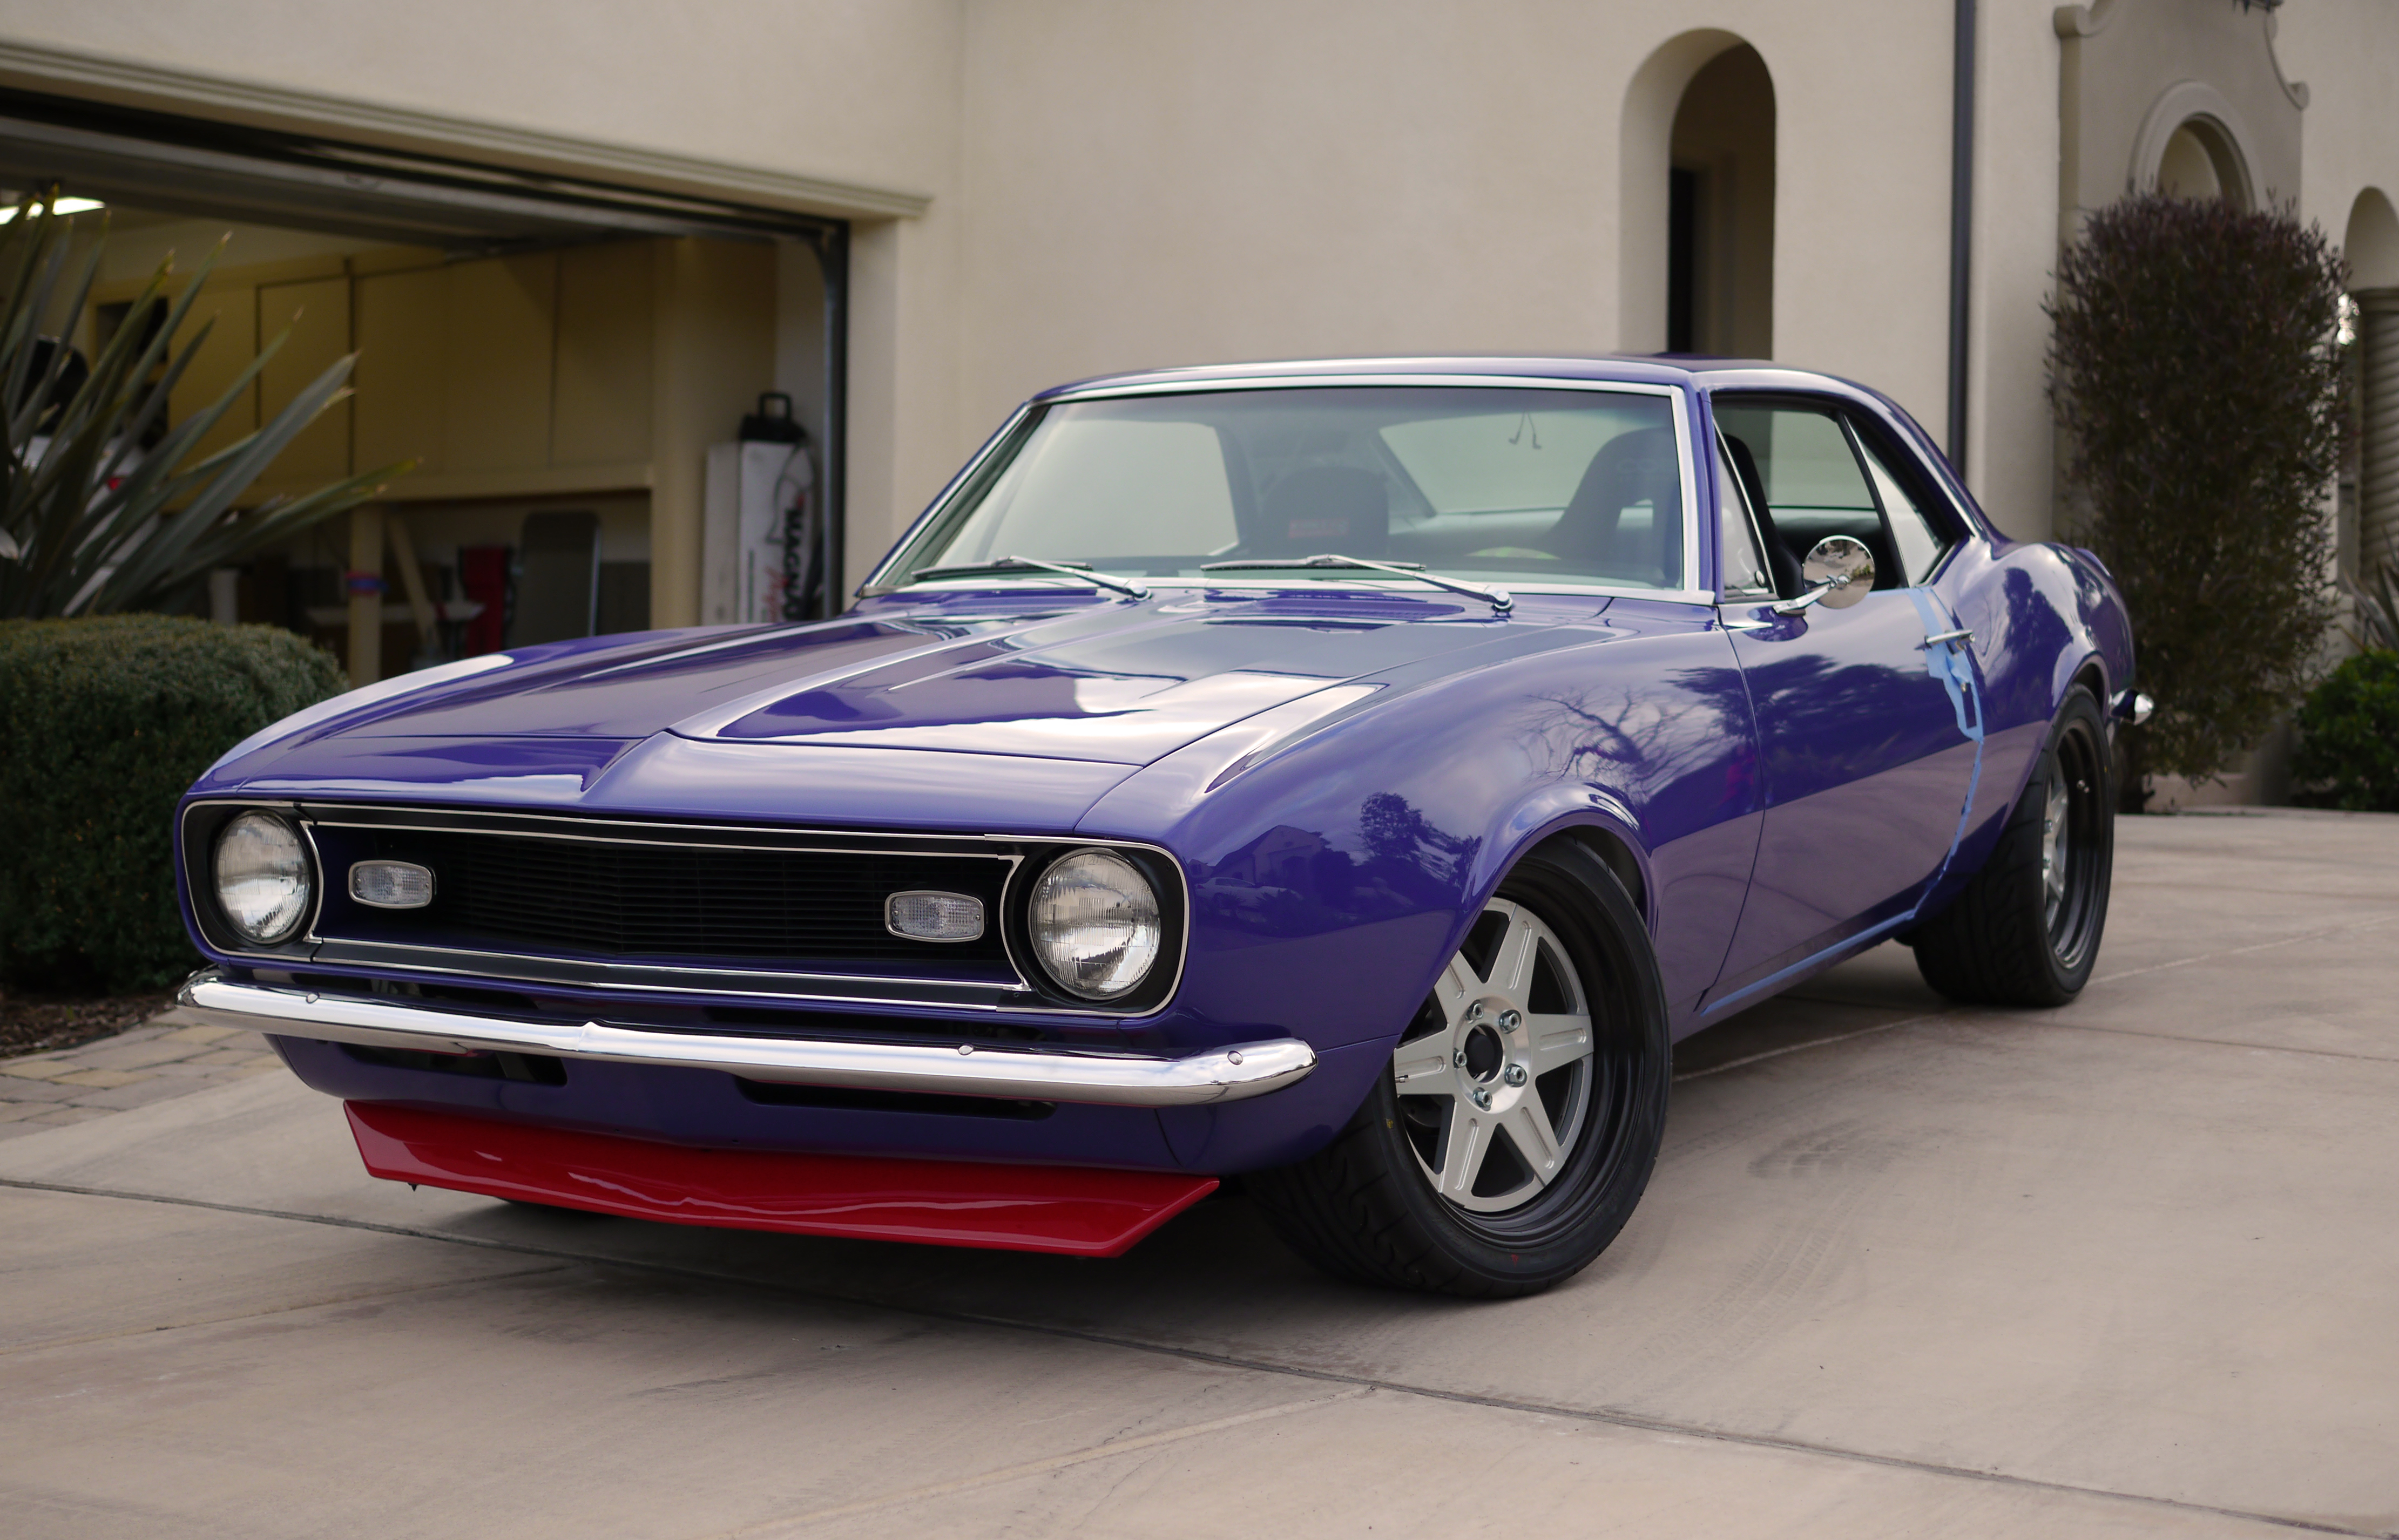
On Saturday of the Tour I saw several nice musclecars present as part of the SCCA’s new CAM class. The attendance wasn’t great, but considering the relatively steep entry fee for a Tour (>$100), and there being a Goodguys event that same weekend in town, the turnout wasn’t bad. This inspired me to commute down in the Camaro on Sunday. I try to drive the Camaro around at least once per month, and it was due…

With the optional 4.88 final drive ration, 60mph worked out to about 4000rpm – which is a very high rpm for cruise in a small block chevy. And that was with the >27″ tall “vintage” wheel/tire setup I have, first put on the car back in November 2012, but never driven on, until today.
The taller tires effectively lengthen the gearing – on the regular autocross setup, 4000rpm would have been more like 55mph! This was the car’s first time on the freeway since the day I drove it home from Sacramento. Fortunately other than some sore eardrums, the car made the 20-miles-each-way journey just fine. The drive home was actually quite warm (~80)and I was impressed by how well the car’s flow-through ventilation system worked.

(Credit to bigtime STX Camaro fan, 2014 SD Tour STX Winner, and all-around swell chap Max Hayter for the above photo!)
After more off-season thought I had been thinking about lengthening the gearing as a means not only of extending the 2nd gear top speed, but of extending the engine’s (especially the valvetrain’s!) life. Today’s freeway drive reinforced that line of thinking. Also, that the sidepipes have got to go, for something that exists back behind the car.
###CAM###
Over the past several years, multiple series of successful non-SCCA-related “Pro-Touring” focused automotive performance events have arisen. Pro-Touring has no agreed upon definition, but most would agree it is something like “Classic American cars set up to turn and stop, in addition to go straight – while retaining streetability. A Pro-Touring car delivers the performance capability and civility of a modern sports car, with the cool of a classic.”
Some of these events have been very low speed autocrosses in tiny lots, where the car show is the focus, but others have had timed high-speed track sessions as part of the curriculum. Most of the people attending these events are learning to turn corners for the first time, but there are a few skilled veterans that have partaken in the movement also.
IMO, a few years later than they should have, and since my last post, the SCCA took notice of this trend, and created “Classic American Muscle”, or CAM. In CAM, which is an experimental provisional regional-only class for 2014, any American car weighing 3000lbs. on 200TW street tires is legal, so that would include my Camaro with a full tank of gas and its heavy battery.
When creating something this new – where you’re trying to ensnare a big pool of potential new club members – there are a variety of approaches that can be taken, along what one might call a “spectrum of inclusivity”. At one end of this spectrum would be an approach where the class starts off with a well thought-out and thorough ruleset, designed to eliminate years of obvious pending takebacks. This would probably look a little bit like a mix of our existing CP, SM, and XP allowances, where aero is restricted, some body/chassis dimensions can’t be changed, some roadgoing equipment must be retained, and there are limits on tire/wheel size, as well as resulting vehicle balance. Unfortunately this approach is also the least inclusive option on this spectrum.
At the other end of the spectrum is maximal inclusion – which means letting just about everybody in, which means you can’t bother people with any rules that would make them illegal. This is the approach the SCCA took.
If this approach gets a lot of people signed up and paying SCCA dues, creating lifelong members and participants (in their P-T car or not), then it will have succeeded. The part I worry about isn’t the early honeymoon phase, it’s later on down the road when it’s time to try to mold it into something that isn’t totally unlimited, without angering and losing the people you’ve worked so hard to attract. The unlimited nature of CAM feels like a trick the SCCA is playing on the average, naive-to-racing-rulesets P-T type, which I hope doesn’t have the affect of turning SCCA-neutral people into SCCA haters.
So what’s so wrong with CAM as it sits today? Well, let’s start with my car, which works OK for what it is – what would I need to do to prep for CAM?
- First, is junk everything forward of the firewall. Fenders, hood, bumper, lights, front subframe, engine, cooling system, etc.
- Next, is cut a big hold in the firewall to maximize setback of the new aluminum V8 it’ll be getting, paired to a Jerico or other lightweight race transmission.
- Then, build a custom front tubeframe chassis for the modern SLA front suspension that is also narrow, allowing for 315s or wider without increasing overall front width. It will have to attach to a custom cage, vs, underneath, so the whole car can get several inches lower without a frame hanging under the floor.
- All the steel gets replaced with lightweight composites, and the cooling system, front structures, etc., all get a ton lighter, lower, and moved further back.
- At that point I’d have a car that instead of 2950 with 56% front weight, is around 2600 @ 50/50. But since it has to weigh 3000 lbs. when done, ~400lbs. of ballast goes in at ground level just in front of the rear axle…
- Wait, did I just say rear axle? What I meant to say was, just in front of the new independent rear suspension that gives room for 345’s on 13’s without widening the car.
IRS? On a classic musclecar?

That picture I took yesterday – it’s an Art Morrison IRS at the left rear corner of Mary Pozzi’s 2nd Gen Camaro, the one that’s been made immortal by its video game fame.
But we aren’t done yet!
- Retrofit 4 wheel ABS
- The most awful, humongous, ridiculous aero package, ever.
- Composite doors, quarters, etc. – anything to get the weight down to the ground, just ahead of the rear axle.
- And on and on and on…how about a sucker fan? Etc.
At that point you have a decent starting point for a Camaro CAM car.
The problem still is, the wheelbase is too long, and the car too wide. So start all over with a Vega or Pinto or Fiesta or whatever other tiny little horrible car no P-T person actually wants.
Then, start over again like you’re building an AMod car, that somehow incorporates part of the body tub of a 30’s roadster, because that’s legal too.
So, if I seem hesitant to start working down the CAM path, hopefully this illustrates why. The class needs restrictions on wheelbase, overall width, wheel/tire (vs. weight), ground clearance, weight distribution, and aero. Let people get to those limits however they want, but restrict the end values of those easily measurable and understood dimensions to keep the ridiculous sorts of cars described above, from ever being built.
The current arms race in the P-T community should remind us all what has happened countless times in “run whatcha brung” forms of racing. Everything is fine until people actually start to care about winning.
To everybody out there that might build for CAM – be careful with your wallet and energy – the mods you do today, may not be legal in the CAM of 201x, should the class survive.
For now I’ll be campaigning to have my car (and perhaps similar size-weight platforms like the Mustangs from the 60’s through the Fox) moved back into STX for 2015.
Brief documentary on the Camaro
Heyward Wagner, the SCCA’s communications director, was out at the El Toro Pro Solo last weekend. While there he put together a very nice little documentary piece on the Camaro.
Enjoy!
First real drive
Took the Camaro for its first real drive today, to get gas of course!
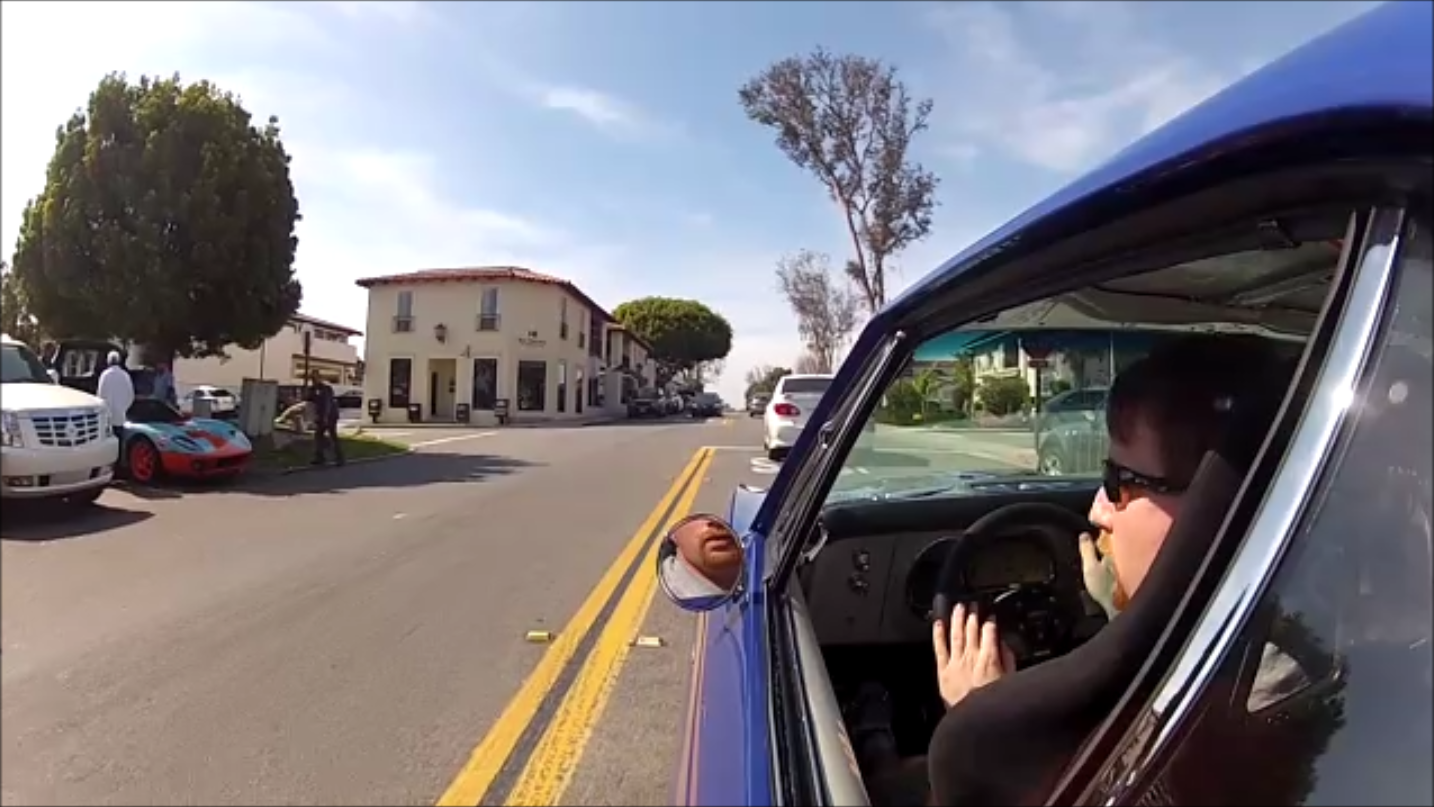
Suppose it is likely expected to see some kind of Ford GT thing blocking the driveway of your local 100-octane fuel station.
Speaking of which – ouch!
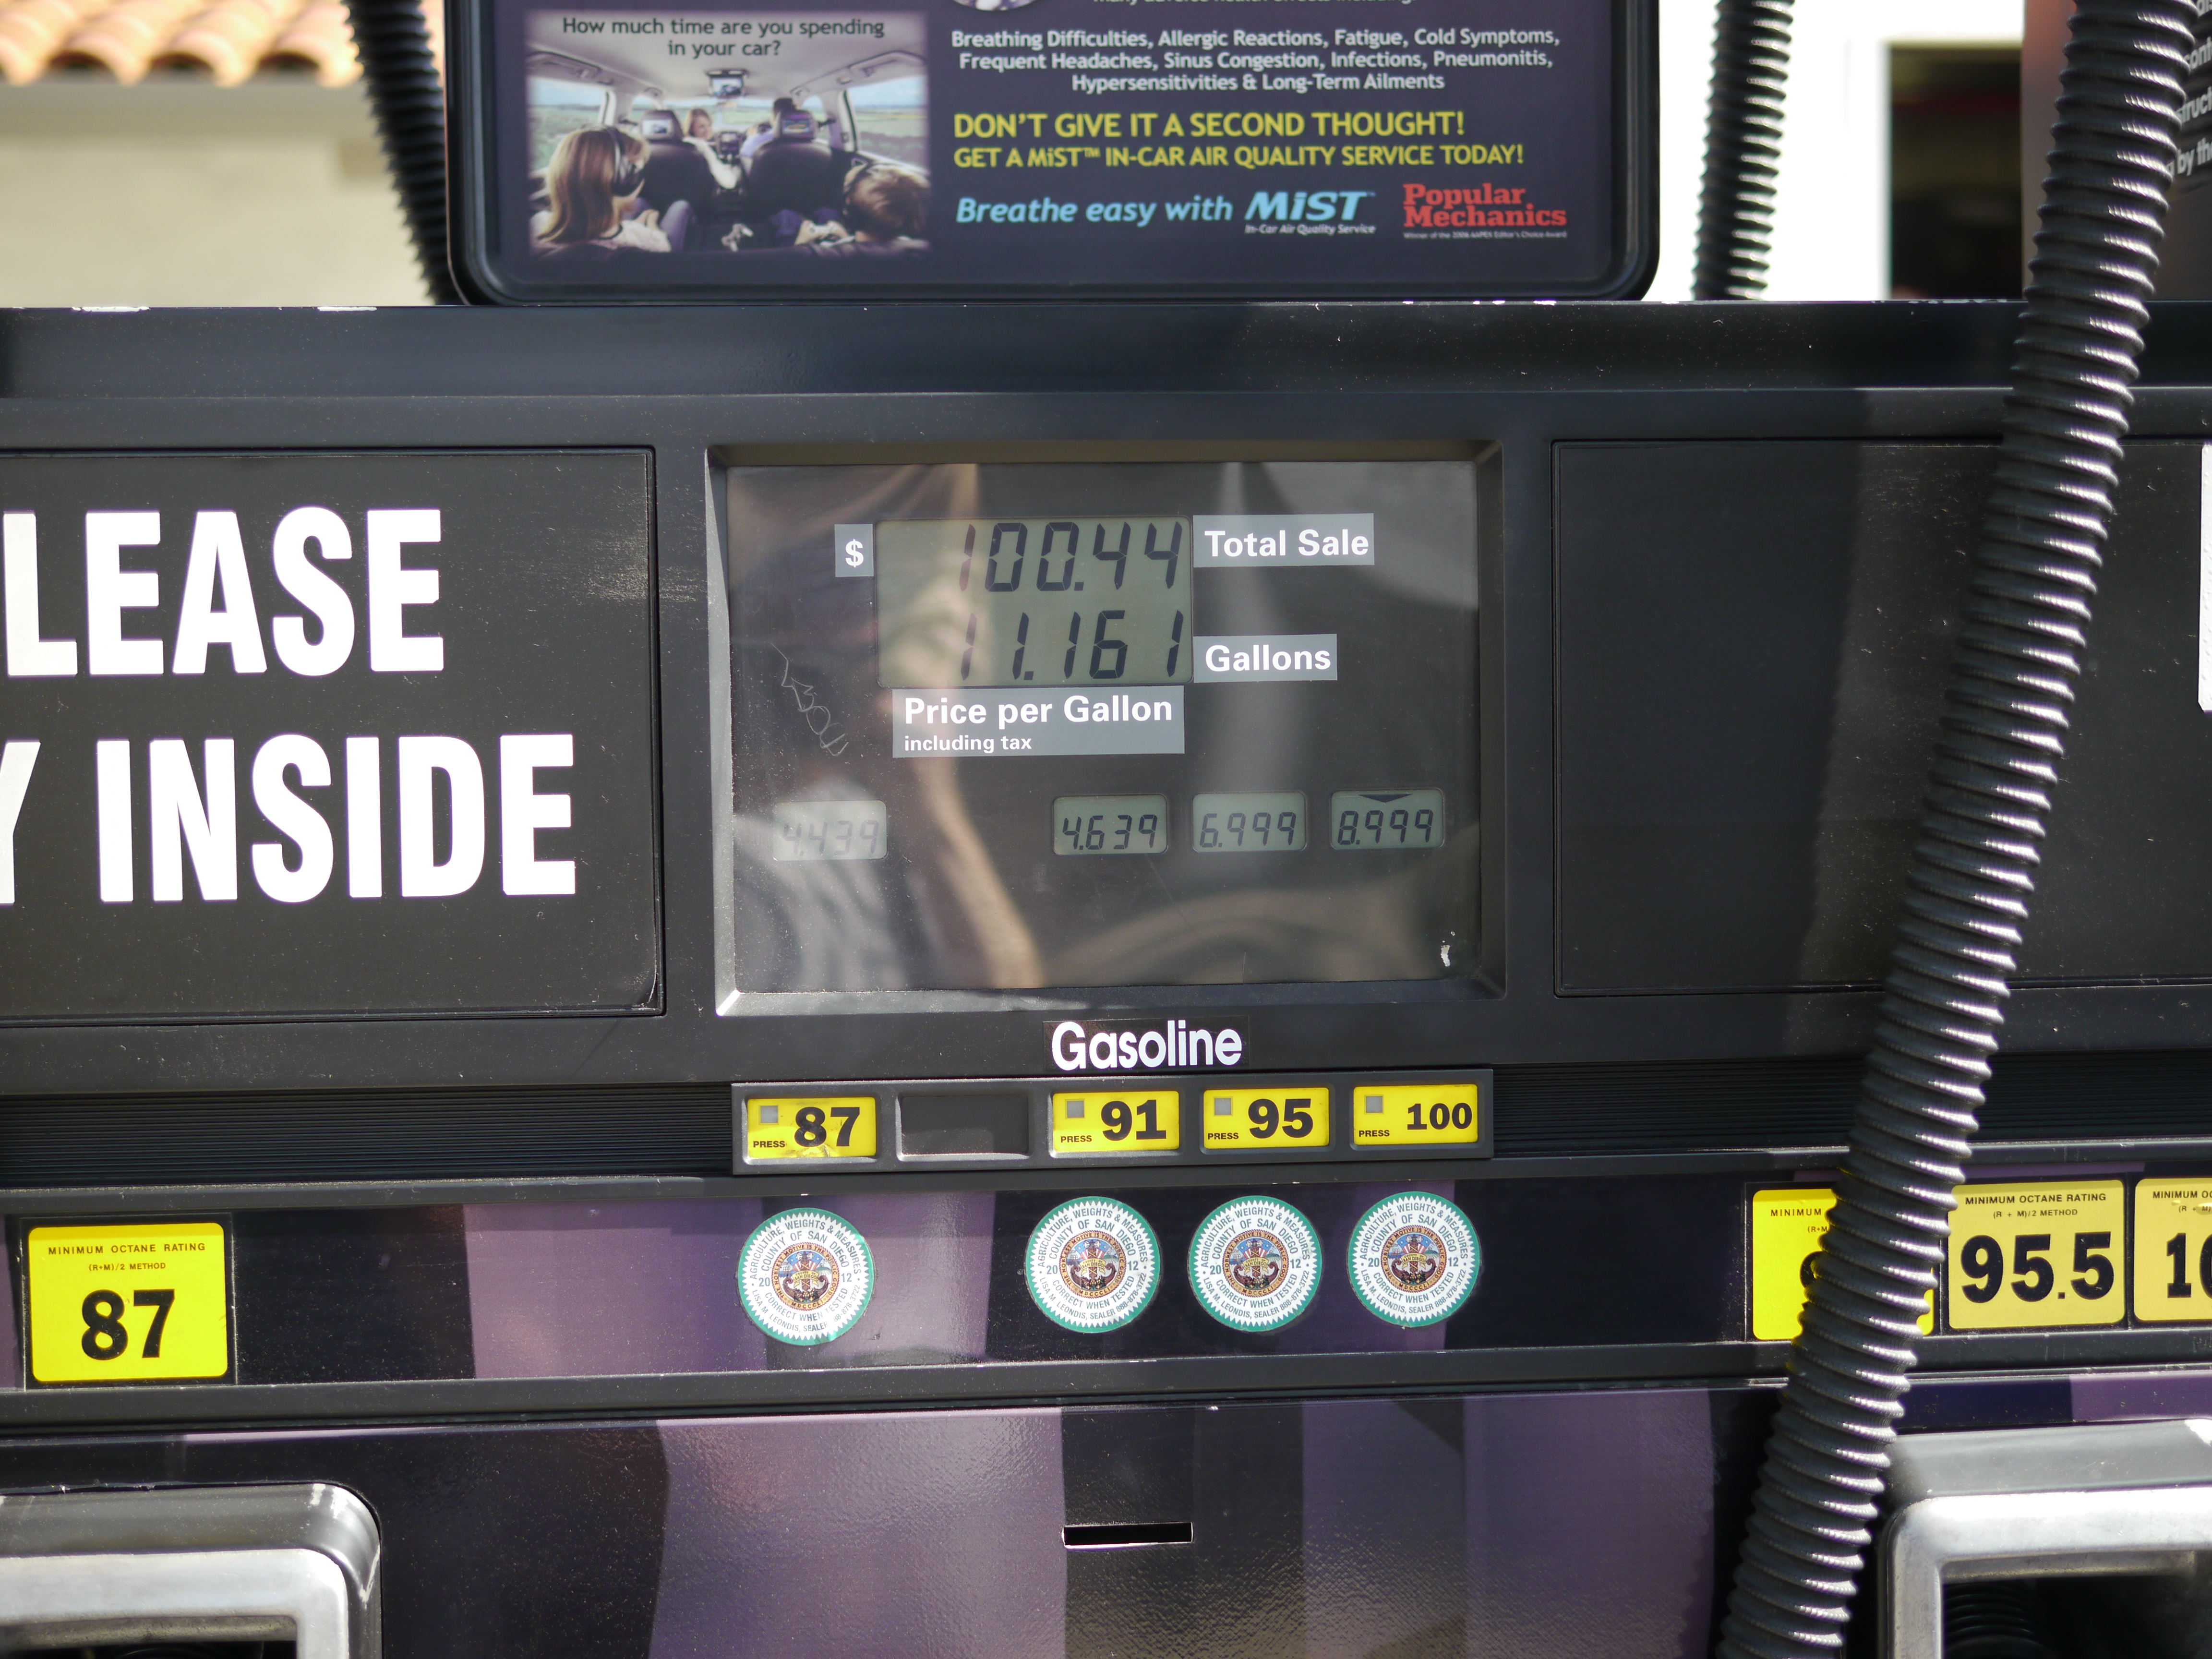
Put 10 gallons in earlier, so with this it’s been fed 21+. Surprised it took that much, and it wasn’t even filled to the point of splashing out the back. Must have burned more than I thought getting it tuned and taking it around the block, tank can only hold 18.
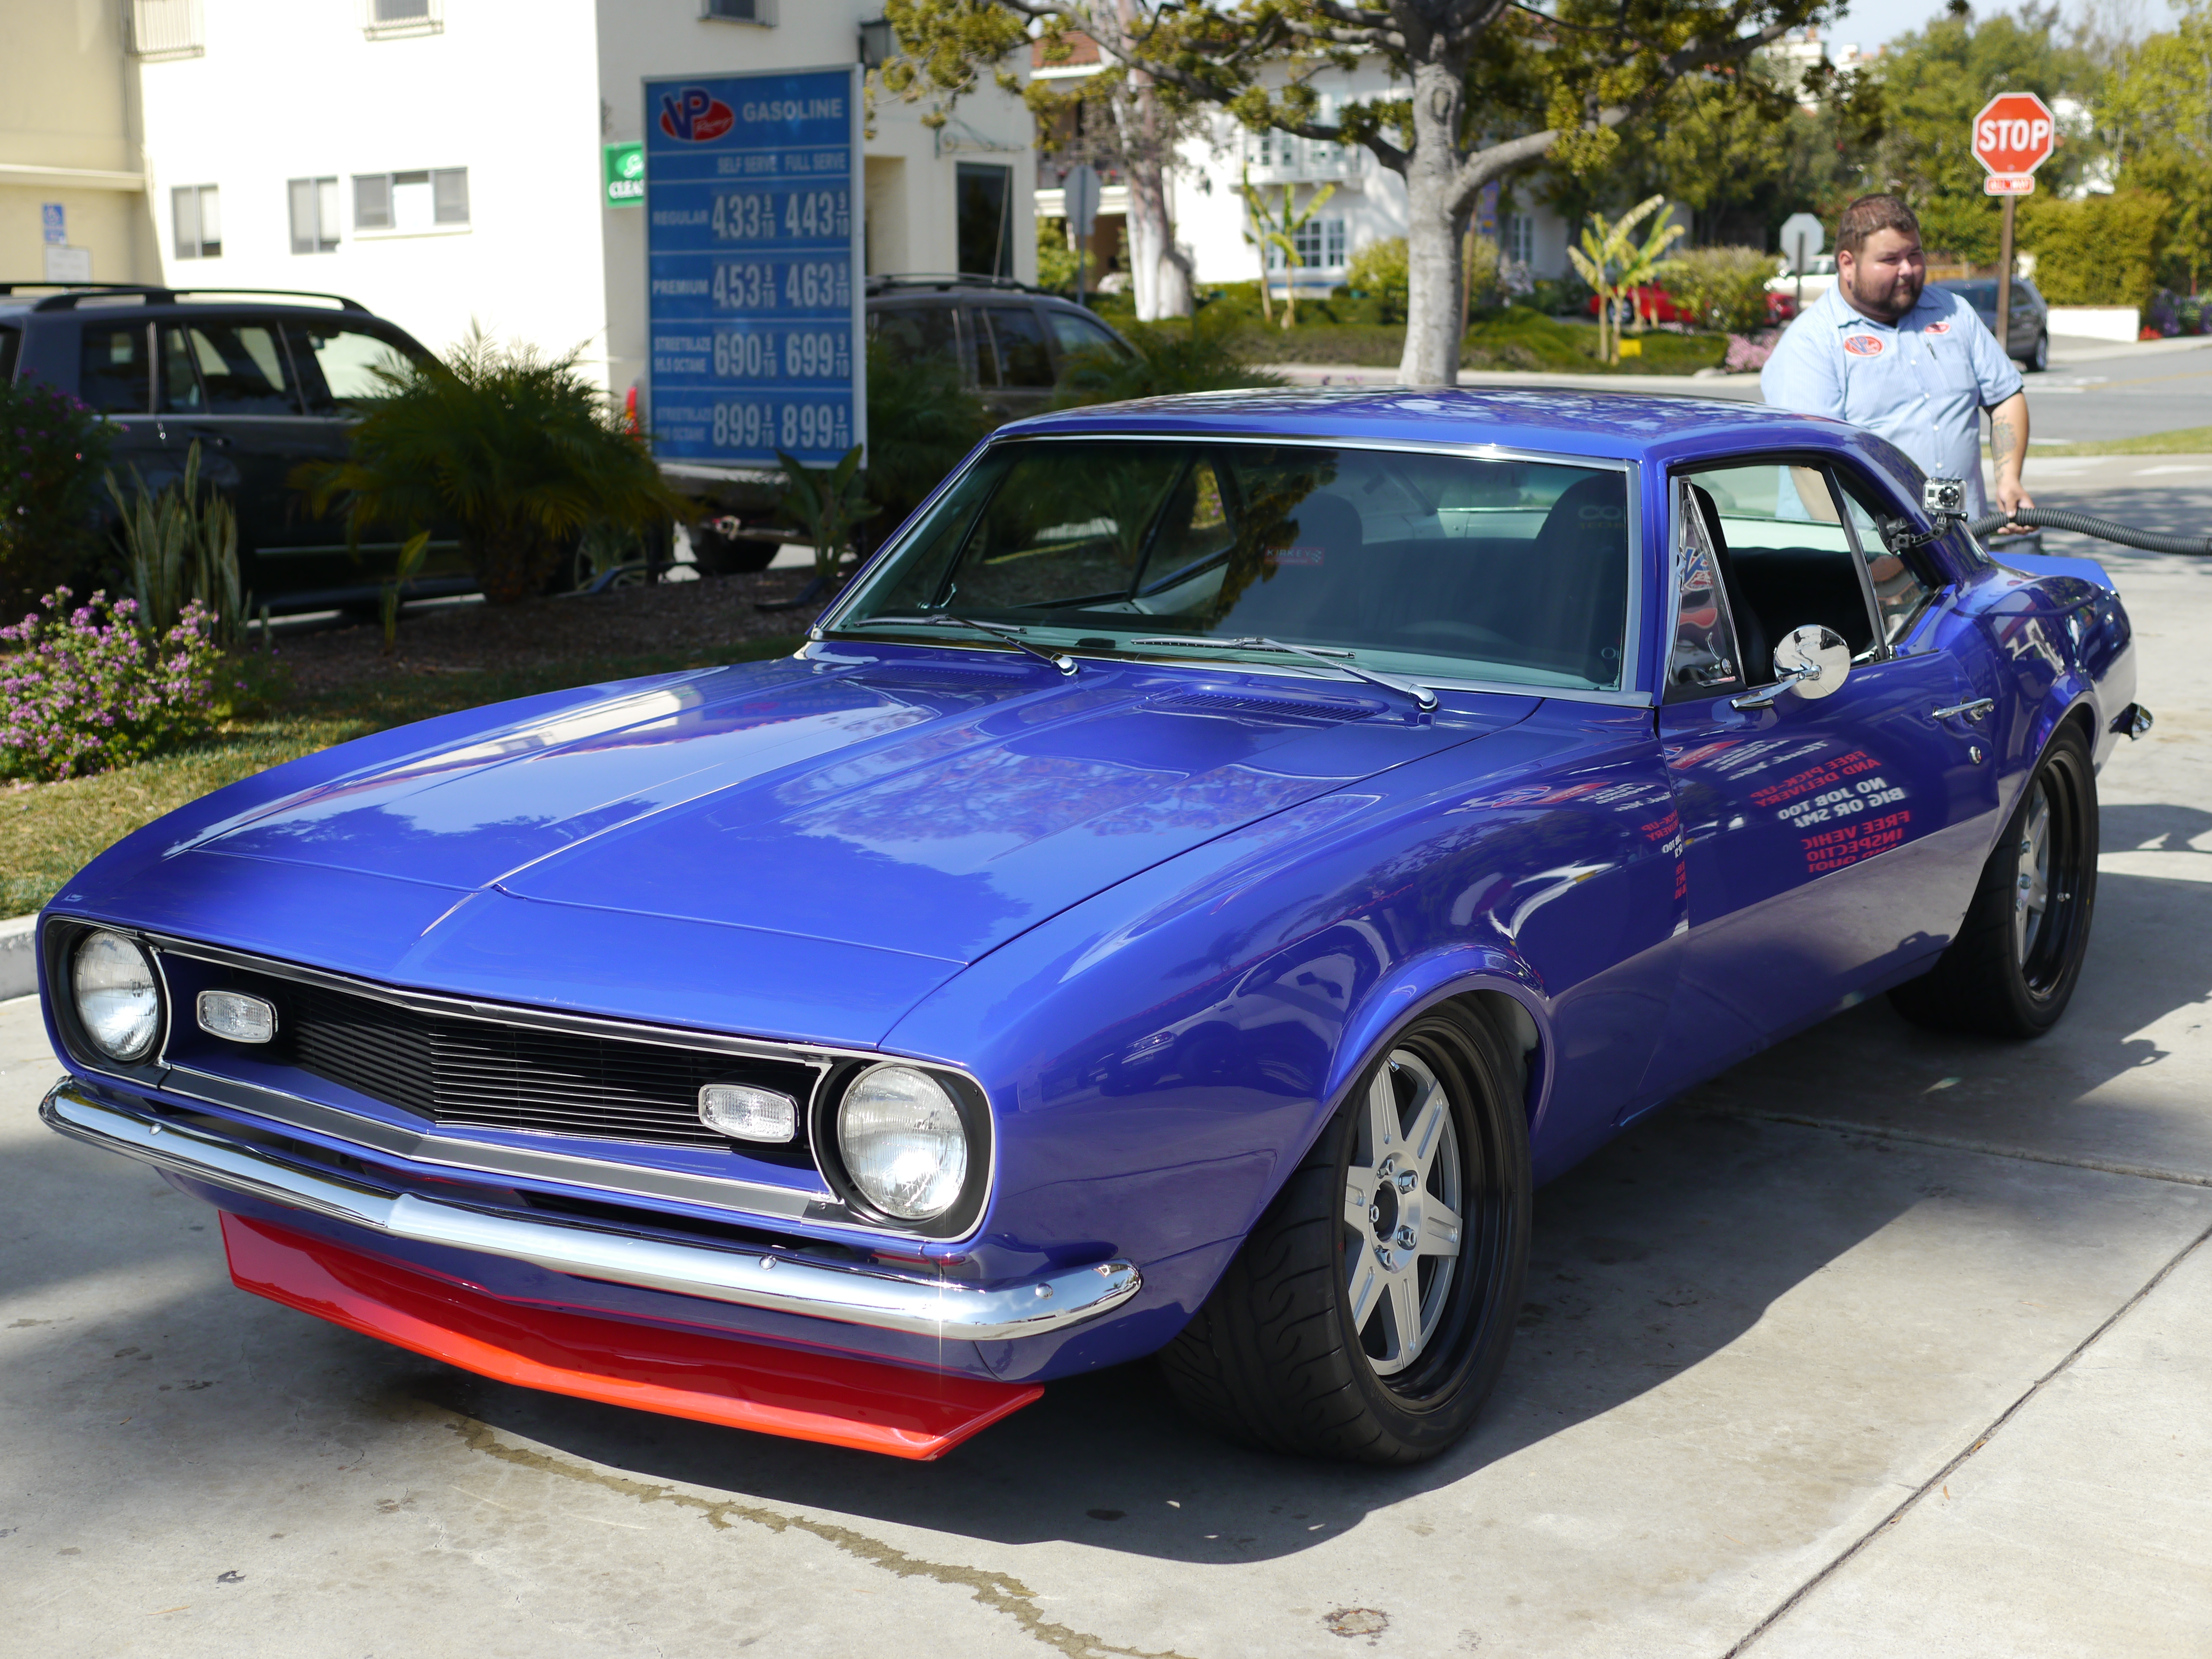
The river of fluid in the front of the car was it. Being a newbie to old cars, I didn’t realize you aren’t supposed to fill the radiator up all the way. As it gets hot, the fluid expands and dumps out the overflow tube. In this case onto the ground, there is no overflow bottle from the factory. In this case it’s pretty safe because it’s just distilled water + Redline Water Wetter, nothing slippery like coolant. Since the car had just been driven and was then sitting, the extra heat soak caused some extra spillage. Should be at the right level for this weekend.
GoPro was attached for the drive there – video here: http://youtu.be/MtqnUKTV_Zs – this is a pretty boring video, but…keep in mind this is the first drive of the car above about 20mph. I was stressed out of my mind. Every noise and vibration was a new one, and with everything new, never can tell if what you’re hearing/feeling is ok, or something you forgot to tighten. Suspect I’ll have that kind of stress for a while.
Driving impressions…hmmm…
The brakes were a little weird with a sort of shuddering at first. I think that was just the weird black stuff being taken off the front rotors. That went away pretty quickly. Brakes feel good now. Haven’t tested them to lockup yet, not sure which end will do so first.
The idle is too low, around 750rpm. Factory spec is 950, adjusted the idle screw after getting home. Stalled the car once at a stop sign, so embarrassing. The car started ok at the gas station, but took several seconds to get going at this stop sign. Thank goodness for that much bigger battery! Will be investigating some kind of heat shielding for the starter.
Back tires feel a little slippery – got the back end to move pretty easily, but controllably. Could be the grease and oils they’ve collected from sitting in the garage for almost 6 months.
There was only one pseudo-corner taken on the drive, and late in corner exit the rear made a banging noise over a mild bump. Will need to spend some time underneath to ascertain root cause – it wasn’t the shocks, they have almost 2″ of bump travel not used. Could have been the axle on the frame, or the front of the diff hitting the driveshaft tunnel.
Need to check pinion angle and possibly play with rear ride height.
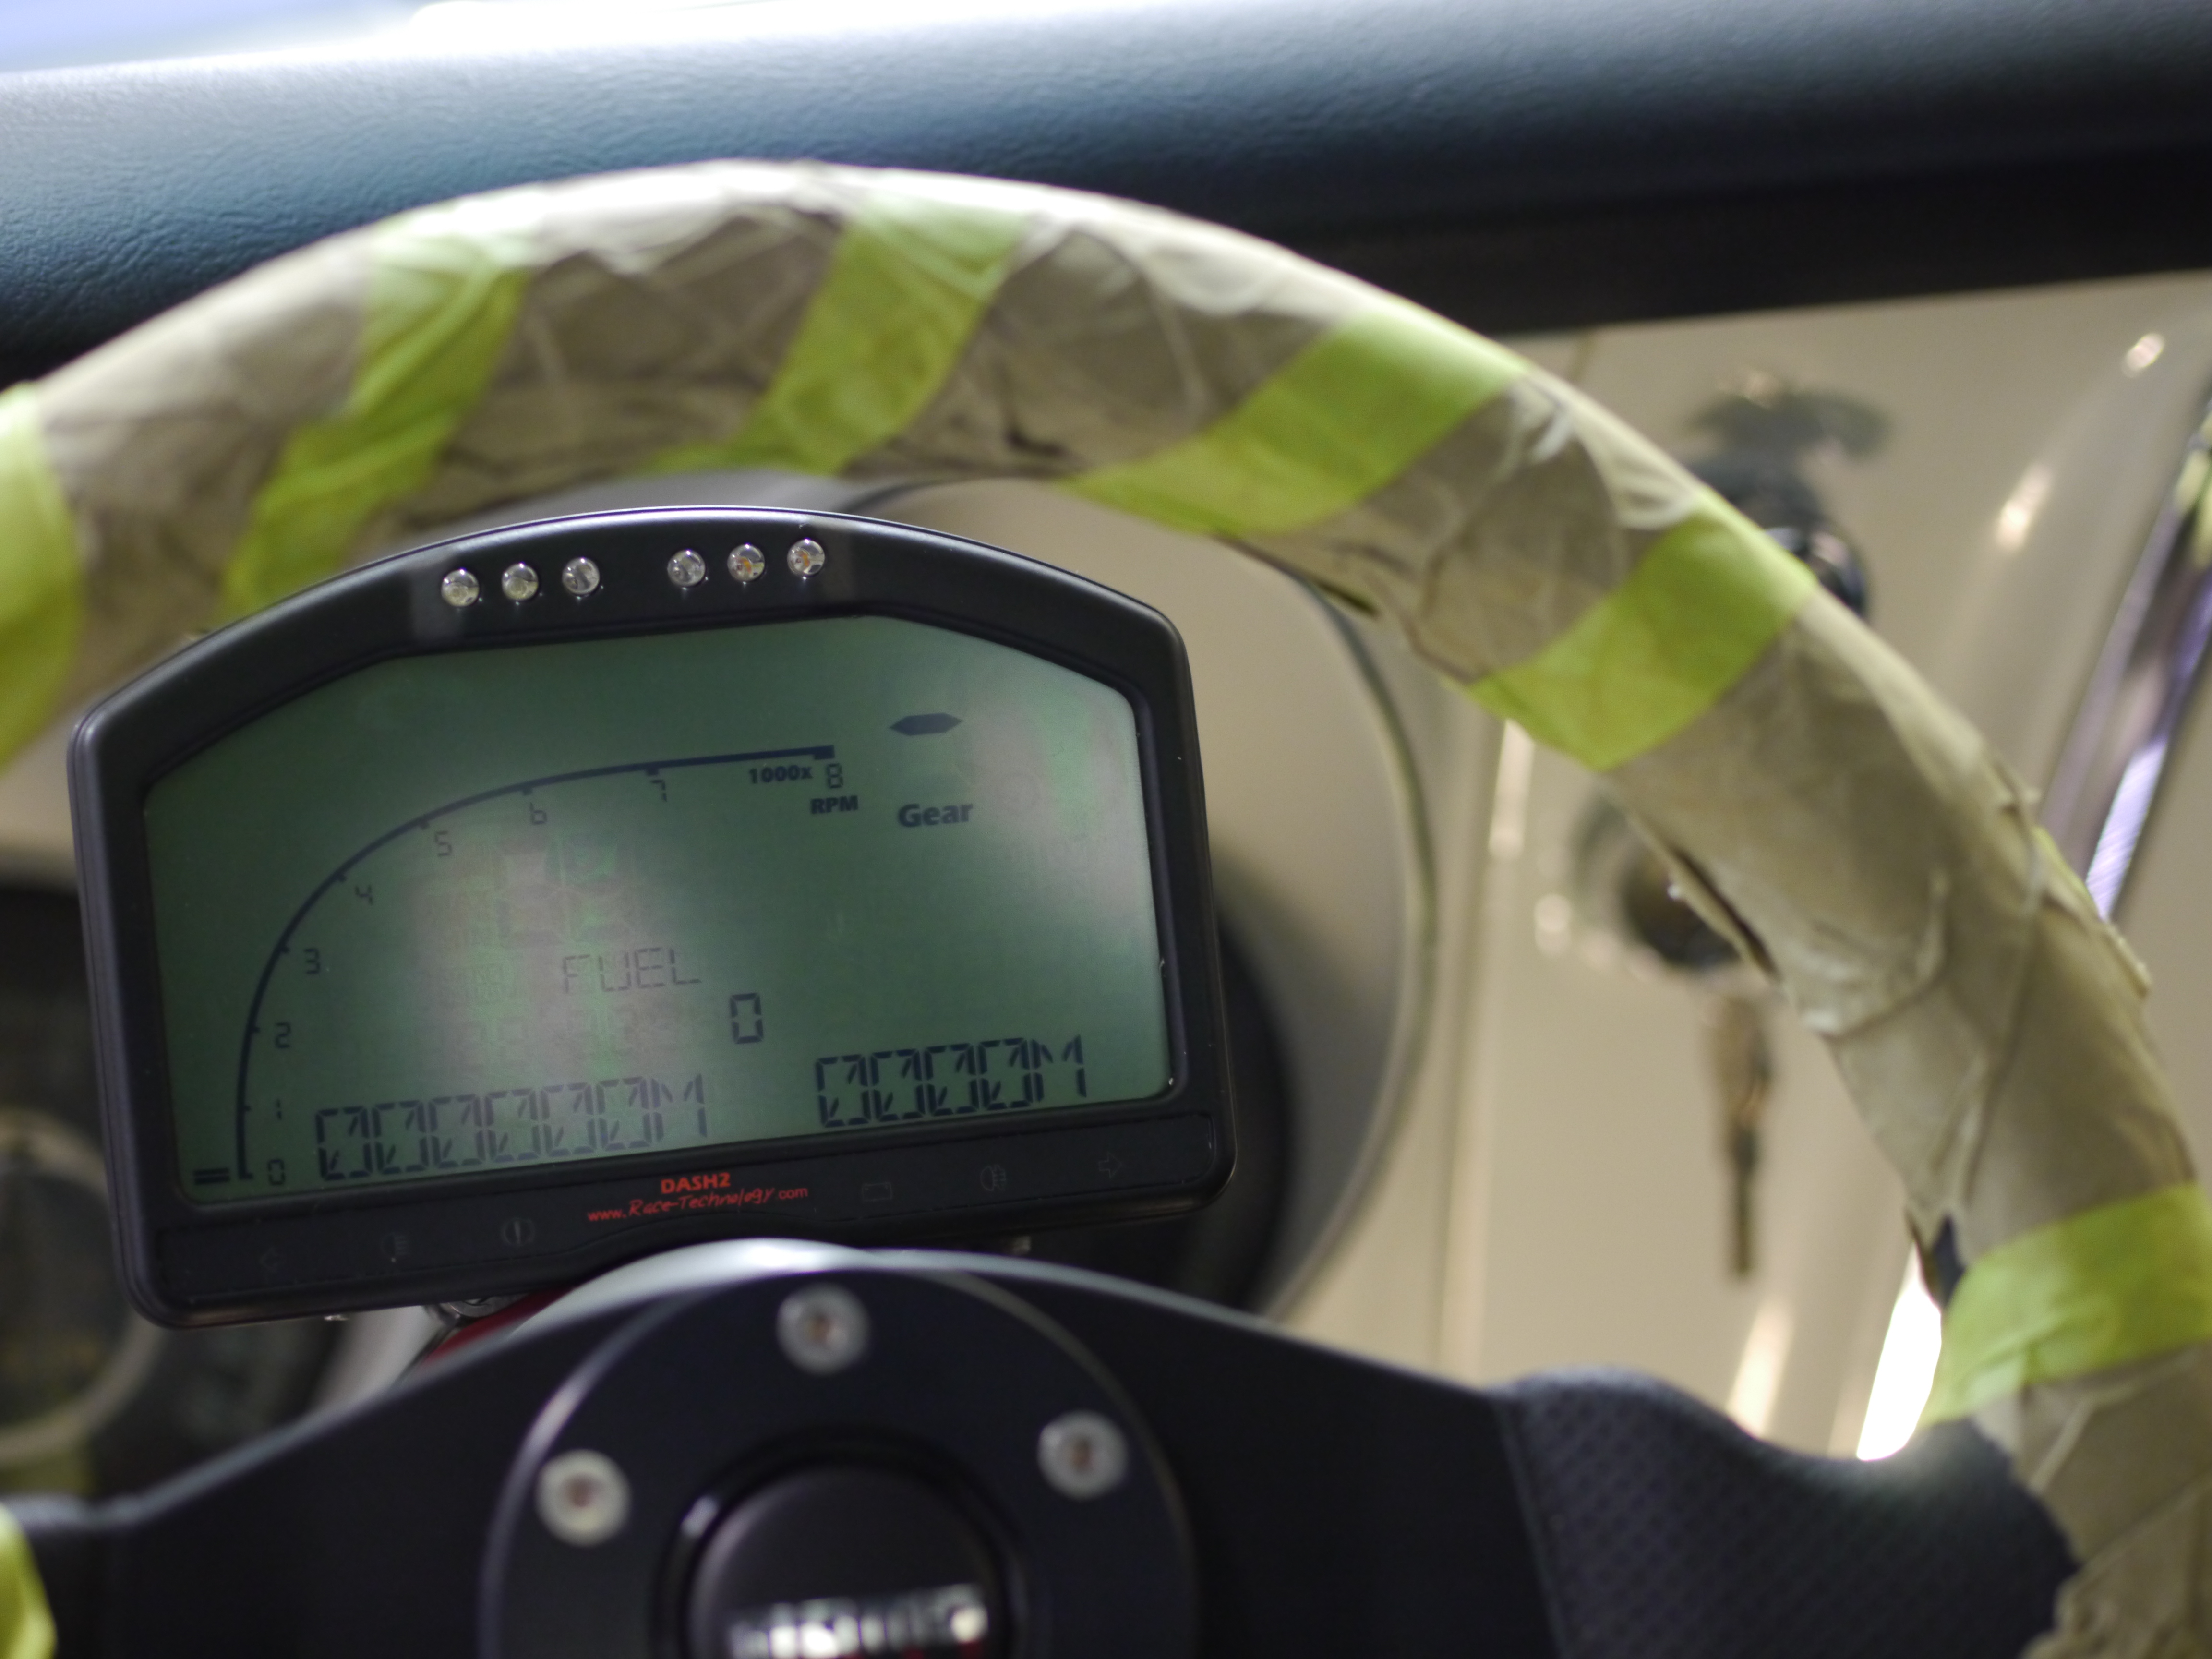
All major systems working well. Alternator charging, oil pressure is good, and the cooling system is keeping temps where needed. You can see all three (out-of-focus, shooting-while-driving photo, sorry) in the dash display below-
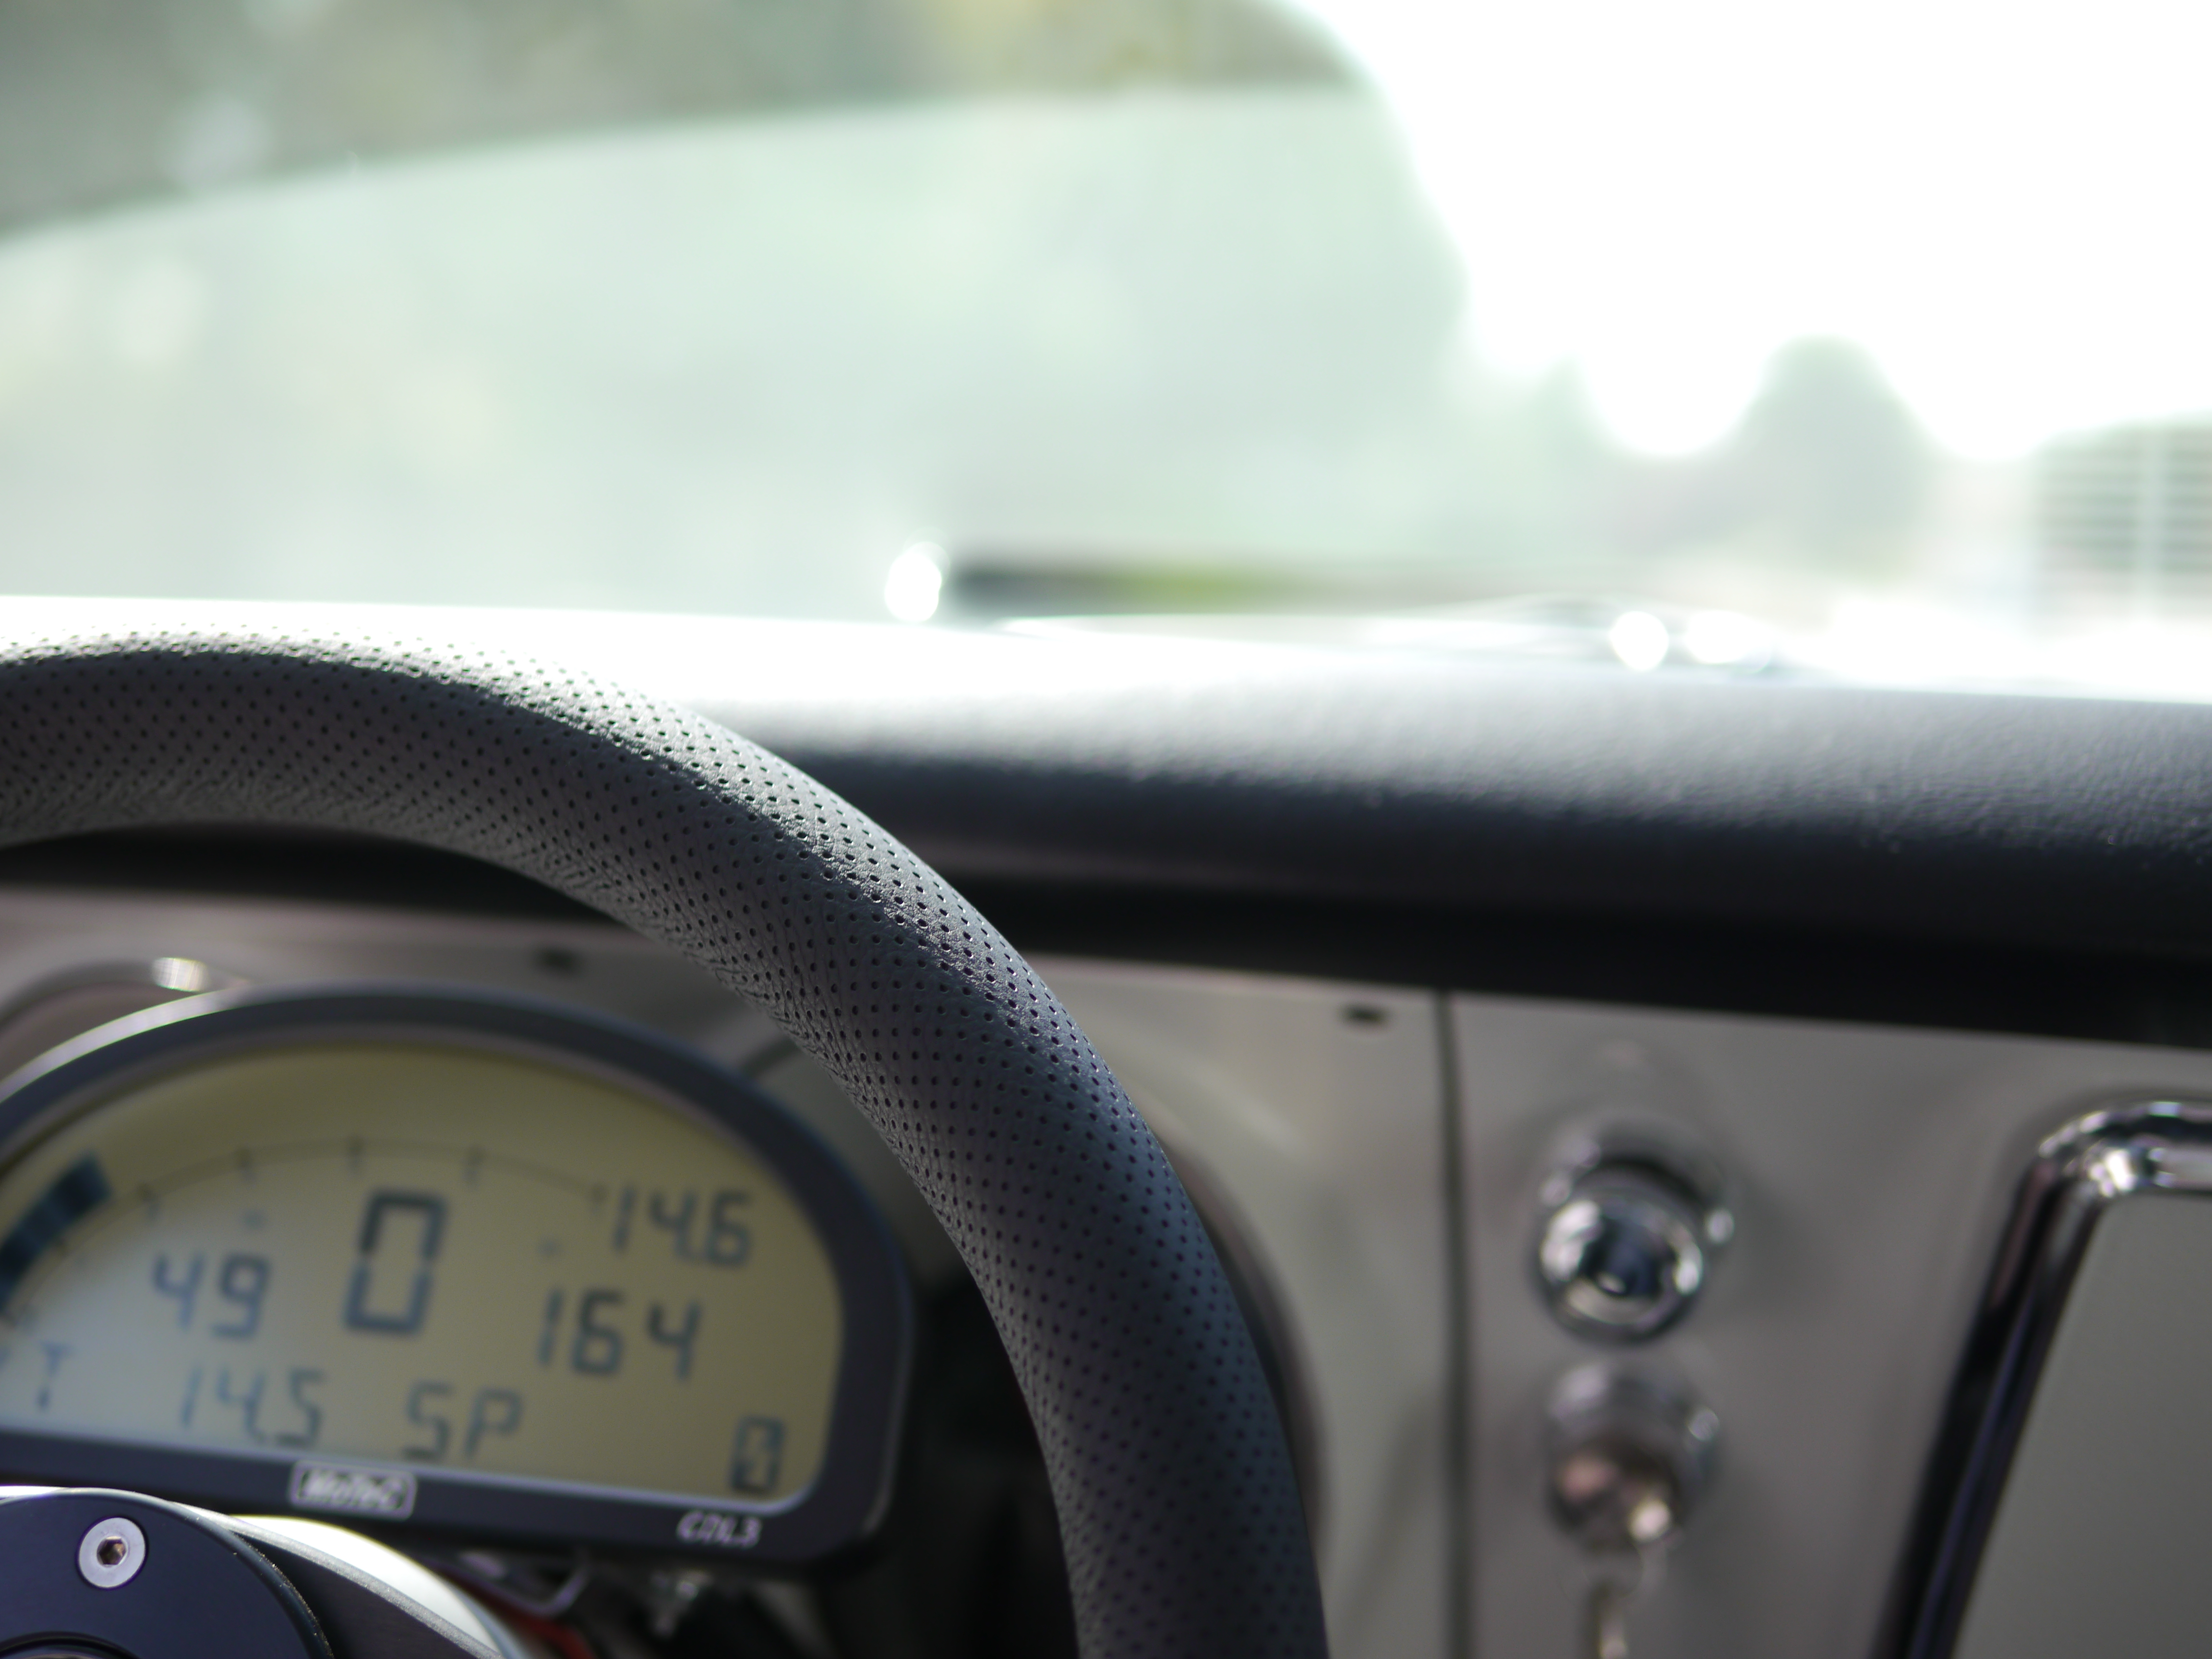
Speaking of which, I *love* the Motec CDL3. Perhaps it is due somewhat to my day job as the IT Director for a software company – but I have a real appreciation for hardware and software pairs made to this level of excellence. Yes, it was expensive, but this is a case where “you get what you pay for” works out favorably. Need to get it pulling speed from the GPS, at which point it can also do a gear calculation to replace the big 0 in the middle.
Car is pretty loud – plan to get it in to the exhaust shop this week for some help. While decelerating in gear, the steep rear end sounds vaguely like a siren, a little unnerving 🙂
Spring rates are pretty extreme for this chassis (~1500 front, 250 rear) but the car doesn’t feel that stiff. While it looks low, it really isn’t – components like the headers and oil pan have good clearance underneath, tucking above the frame rails, making it so I can get in and out of driveways and such just as easily, if not more so, than a stock Viper.
The only shock setting I know is the fronts are at full stiff for rebound. Everything else will be all over the map. Feels like it needs more rear rebound – in some quick steering inputs I could tell the front tires were turning, but the car mostly just wanted to keep going straight. Could be it has some front toe-in.
Where to go from here?
I like an autocross car to feel responsive, almost dangerously so, on the street. Today this felt a lot more like a pickup – safe and sure-footed. Perhaps that’s because it shares more in common with a pickup than a sports car…
From here it’s going to be a long way to go in getting it to work how I want in STX. Nationals is only 5 months away, many iterations of spring rates, shock settings, alignments, potentially shock valvings, wheel/tire tests and decisions. The car is not likely to be very good early on, so for those following along, don’t get discouraged by a particularly poor finish. I am likely to get slaughtered at my first few events (which just happen to be big SCCA National races) but really I’ll be happy if the car just makes it through the events ok mechanically. Haven’t driven at all since Nationals of last year (7 months back now) so some of it will be driver too.
Still a few things on the to-do list for the week to be ready for the weekend:
- Headliner and interior panels
- Exhaust – weld up mating flanges, exit out side or rear
- Thorough nut-and-bolt check
- Alignment
- Shock baseline
- Numbers
Apt to be tired by the time it gets here!
Quick data from a tire test
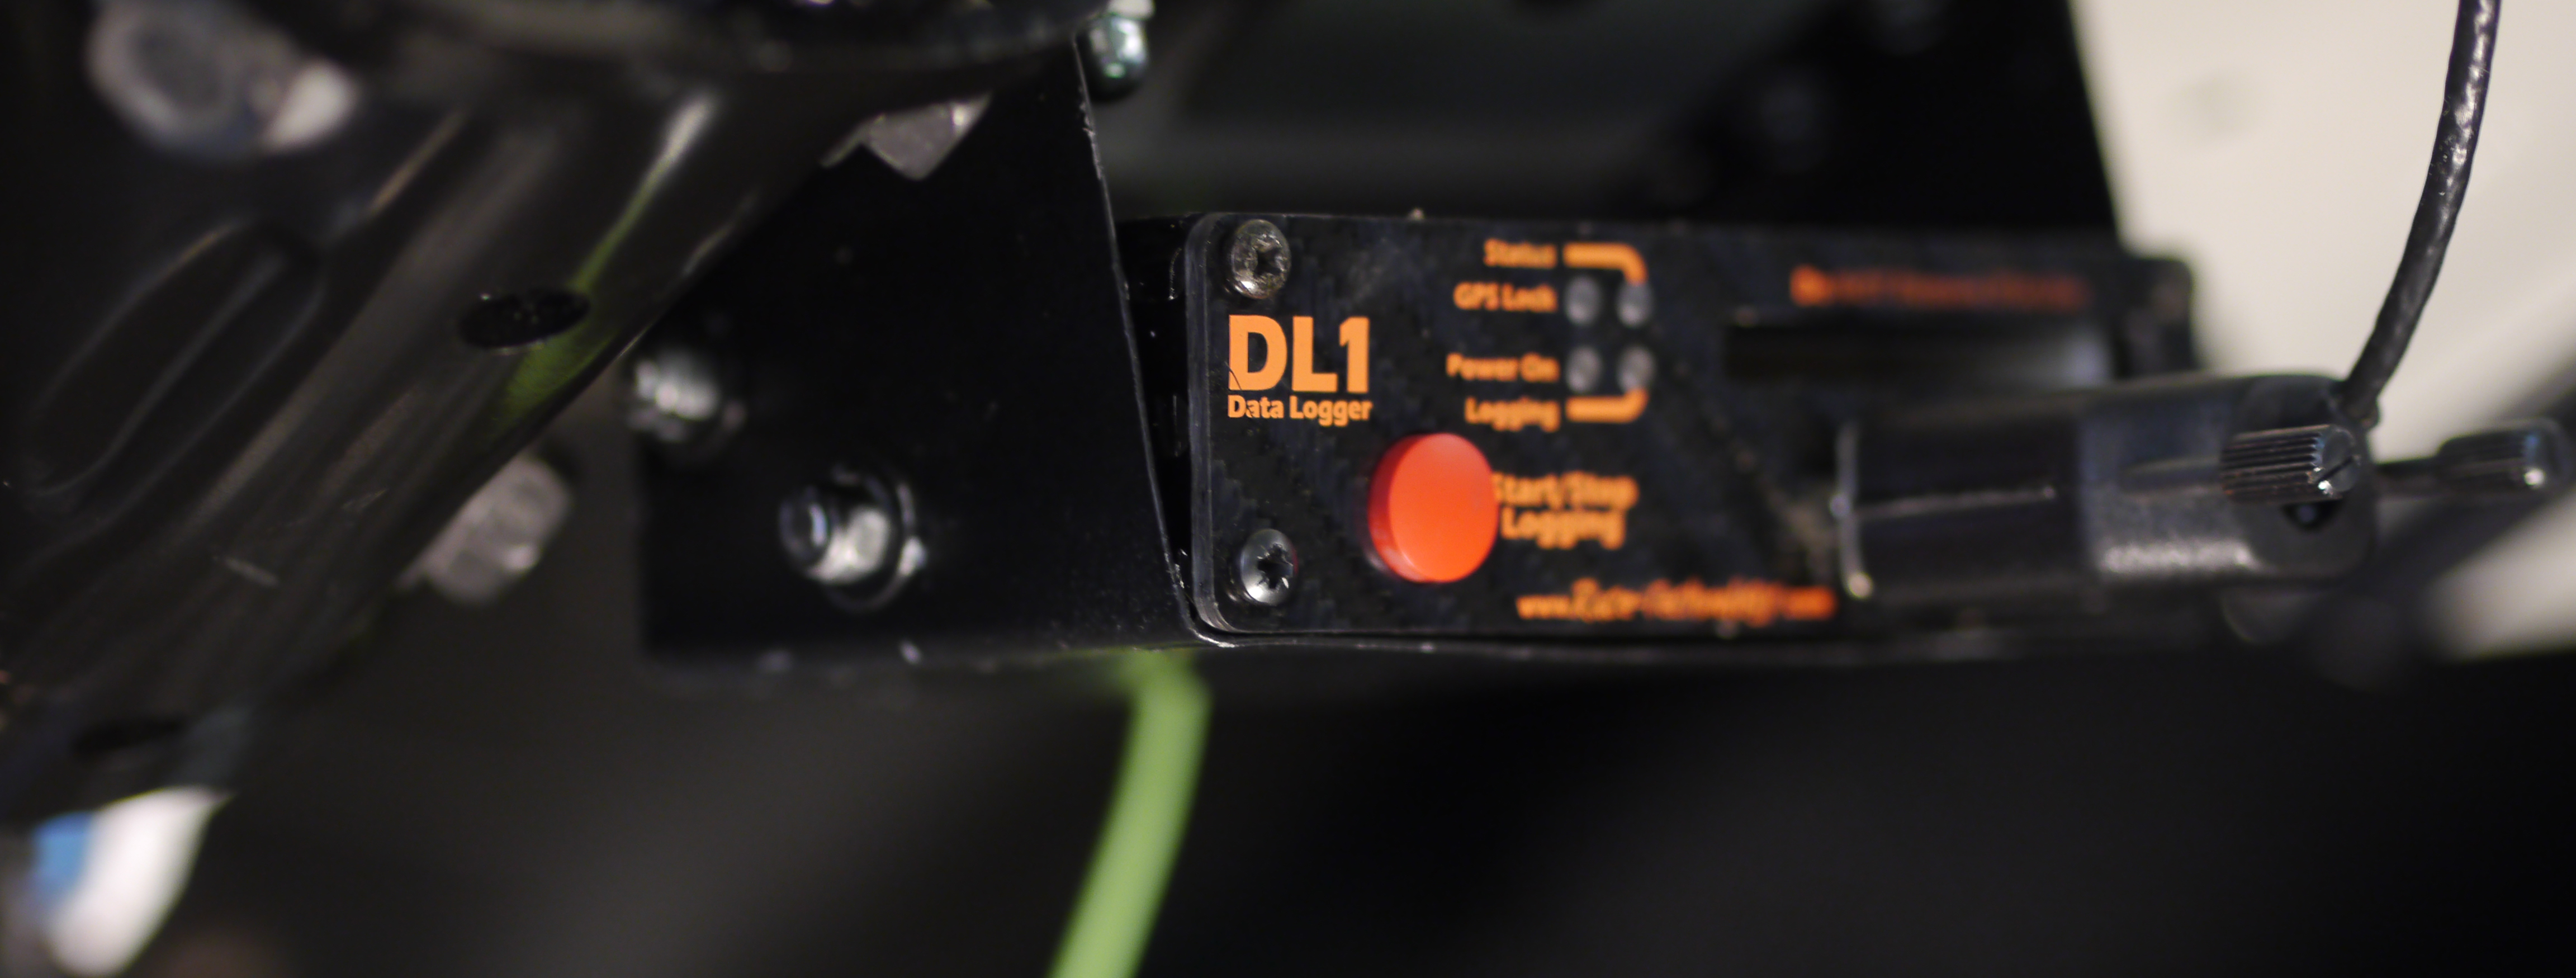
My buddy Jeff Cawthorne ran a best-effort tire test this past weekend of two new tires in the Extreme Performance Summer category – the BFGoodich G-Force Rival against the Dunlop Direzza ZII. The test was conducted in his “Stock-prepped” (extra front camber, lightened exhaust) 2013 Scion FRS. For those that don’t know him, Jeff is a veteran racer who would likely have a few National Championship jackets hanging in his closet, if any of us could ever convince him to come to Nats…;)
Upon hearing word of the test I offered Jeff my DL1 data acquisition system, to get a peek at how these new tires are really working. My Camaro will be making its maiden voyages on previous-gen tires, the Yokohama Advan Neova AD08. Both of the tires tested are newer and quite probably better than the Yokohamas.
Below is a screen capture from the Race-Technology data analysis software, showing a comparison of the best Rival run (red) v. the best ZII run (blue).
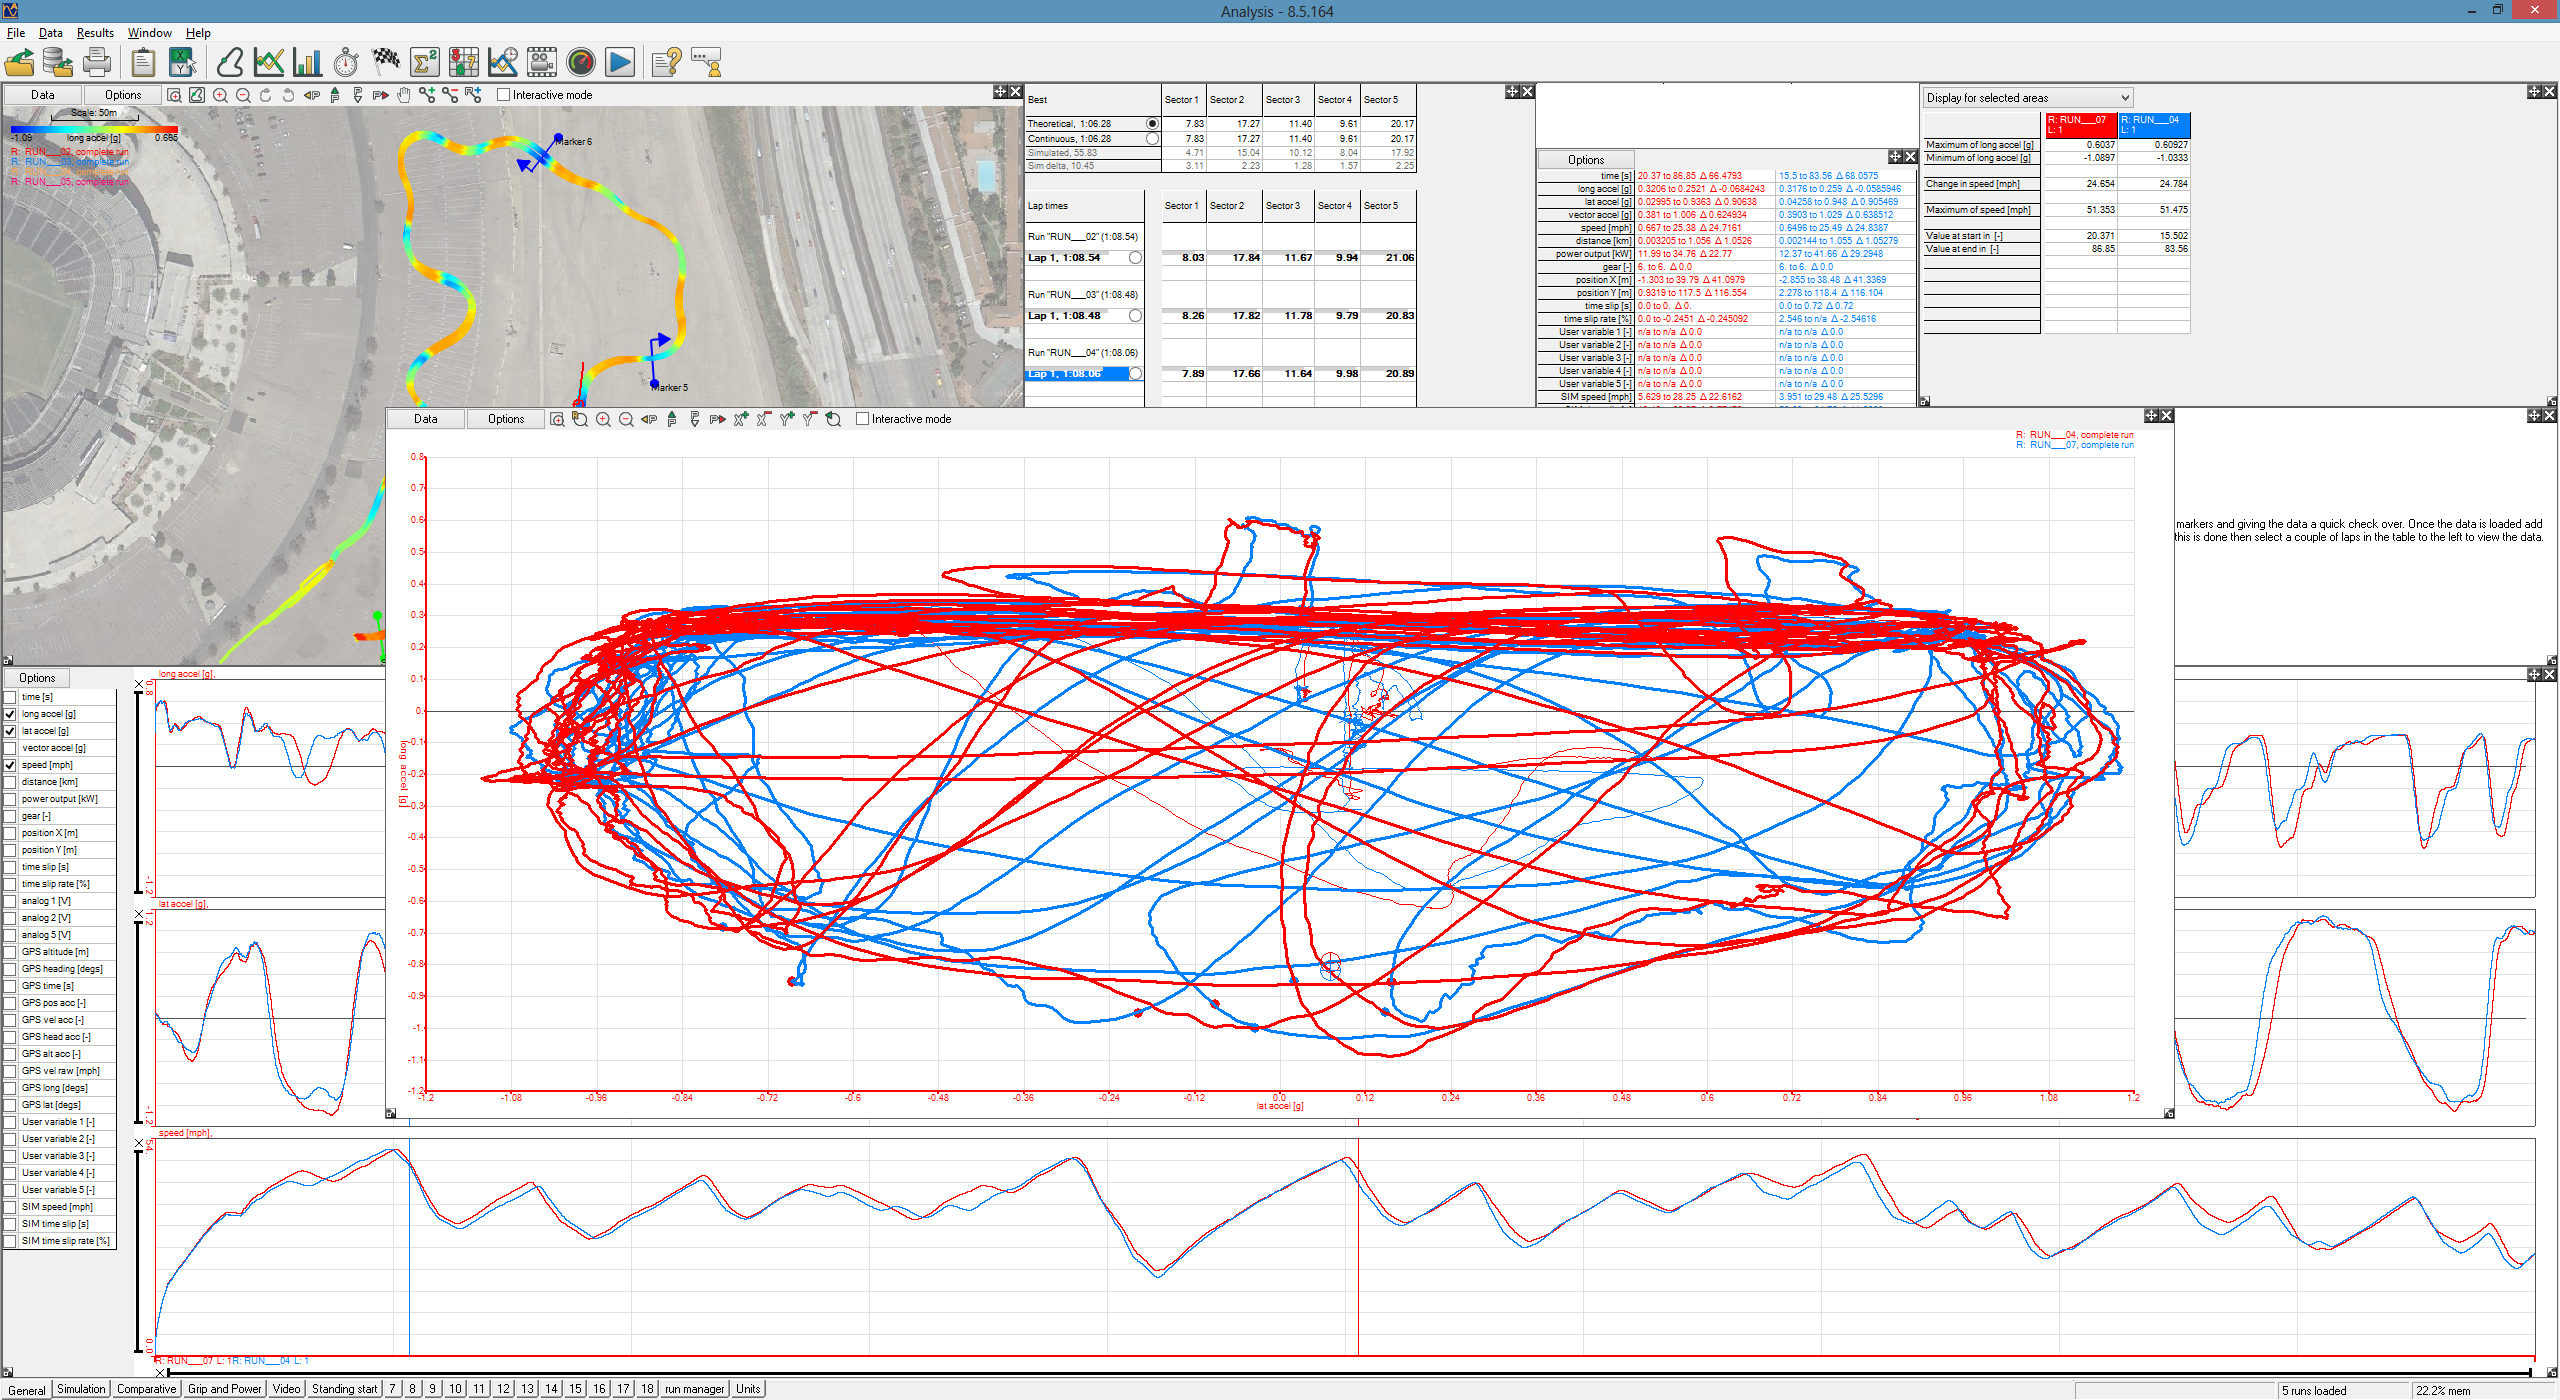
The main graph in the center here is an X-Y graph I do sometimes when I’m not looking to do any driving analysis, but instead see if a setup change made any difference in the car’s limits. The outer edges of this graph shape is sometimes called the “envelope” though to me the shape a lot of the time looks more like an acorn. (More details on this here in CVD Part2)
This was Jeff’s first time on these tires, in a car that was new to him, and using a DL1 for the first time – all at an event that wasn’t really designed to let him execute a careful test plan in the way anyone would have wanted to. As such, he wasn’t able to get all the data he’d like, or take as many runs, under the sorts of conditions he would’ve liked.
On this day, the Rivals were a lot – 1.4 seconds on a ~65 second course – faster. So there’s not much to see in the data, the Rivals were faster everywhere, in all sectors of the course, and in all phases of the corner. The limits appear a little higher, and the data indicates to me, Jeff had an easier time keeping the Rival at or near its limit.
However – the very next day, Jeff did something of a repeat test at a regular local championship event, and was a little faster on the Dunlop. Didn’t get data from that day unfortunately, but the actual differences are likely quite a bit smaller than the first day’s results bore.
There’s another event this weekend on a grippier surface, hope to get more data from it.
Dash Replacement
The Race-Technology DASH2 was a purchase I’d made early on in this build (back in 2010) when I saw a basically new one come up for sale for a good used price. It sat in a box for about two years, until I was ready to get it mounted in the car and wired in (covered here, in the second half).
The Race-Technology DL1 data acquisition system has served me well since 2006 – never a fault or hiccup in what has to be 100+ events, many times crammed into the center console of baking hot cars. Race Technology’s analysis software has always been good, and they’ve made continuous improvement over the years, both for general purpose and closed-circuit autocross-type events. The DL1 offers amazing bang for the buck, and at no point had I come close to maxing out its capabilities to datalog many analog signals simultaneously.
Unfortunately I found myself having lots of problems with the DASH2 paired with the DL1. It required a strange sequence of button pushes to start displaying data, and sometimes it would just freeze while in action. Any time the car stalled or had to be restarted, you had to repeat the sequence – which served to compound the already aggravating scene of trying to start a finicky high-compression carbureted musclecar with a dying battery. I spent a lot of time (time that could have been spent advancing other elements of the car) playing with different data speed settings for the serial interface, turning off unused channels, all to no avail.
There have been some data acquisition advancements since 2006. One is an increase in available GPS frequency – the DL1 MK2 I have is 5hz, and there are now 10 or 20hz options. The other thing is the availability of combined dash/datalogger units in a single box. In general I don’t like the proliferation of “magic boxes” and other add-ons inside an interior, preferring things simple and “clean”.
Despite 7 years of nothing but positive experiences (until just recently), outstanding software that might be the most advanced and in-depth *for autocross use*, and excellent responsiveness and attempts to make things right through good service, I decided to punt on the R-T gear. So what now?
Definitely leaning toward an integrated dash/logger. I enjoy nerding out on data, diving into deep analysis on the nights between and days after a race – so I need very good software. It’s got to be of a quality commensurate with the rest of the build, and available in time to have it here and on the car in advance of the SD Tour later this month.
With those parameters in mind, there are really only two other choices – AiM and Motec.
AiM is coming out with their MXL2 very soon now, which appears to offer the combined data/dash capability present in the DL1+DASH2 Race-Technology combination, at a reasonable and competitive price…but it’s not out yet, and retailers weren’t sure exactly when it would be. They have the Pista dash which does these things, but it is getting very long in the tooth now, and if I went that way, I’d be installing something that is basically already outdated.
That left Motec. The problem with them isn’t quality or capability or even availability – it’s price. Their ADL3 (Advanced Data Logger) system used in most professional race cars is amazingly robust and powerful – with a price tag to match. The ADL3’s cost of entry makes sense when you’ve got big-name sponsors and are vying not just for first, but also for TV time during your race. Besides being way too much $$$, the ADL3 is also way more than the Camaro needs. They have a lower-priced SDL3 (Sport Data Logger) which cuts out a lot of the super-high-end features of the ADL3, and about halves the price. That puts it much closer, but the thing about Motec is they get you with add-ons – the GPS is $$, additional I/O capability is $$, and even turning on the built-in data logging capability is $$. So, even if the SDL3 started out within the realm of reason, by the time the needed add-ons are tallied, it is back into unreasonable-land.
Fortunately there is one step further down their food chain, the CDL3 (Club Data Logger). This is a relatively recent unit, introduced at the end of 2011. Designed for the weekend warrior club racer type, it includes even few features than the SDL3 – but even then, it still does more than I need.
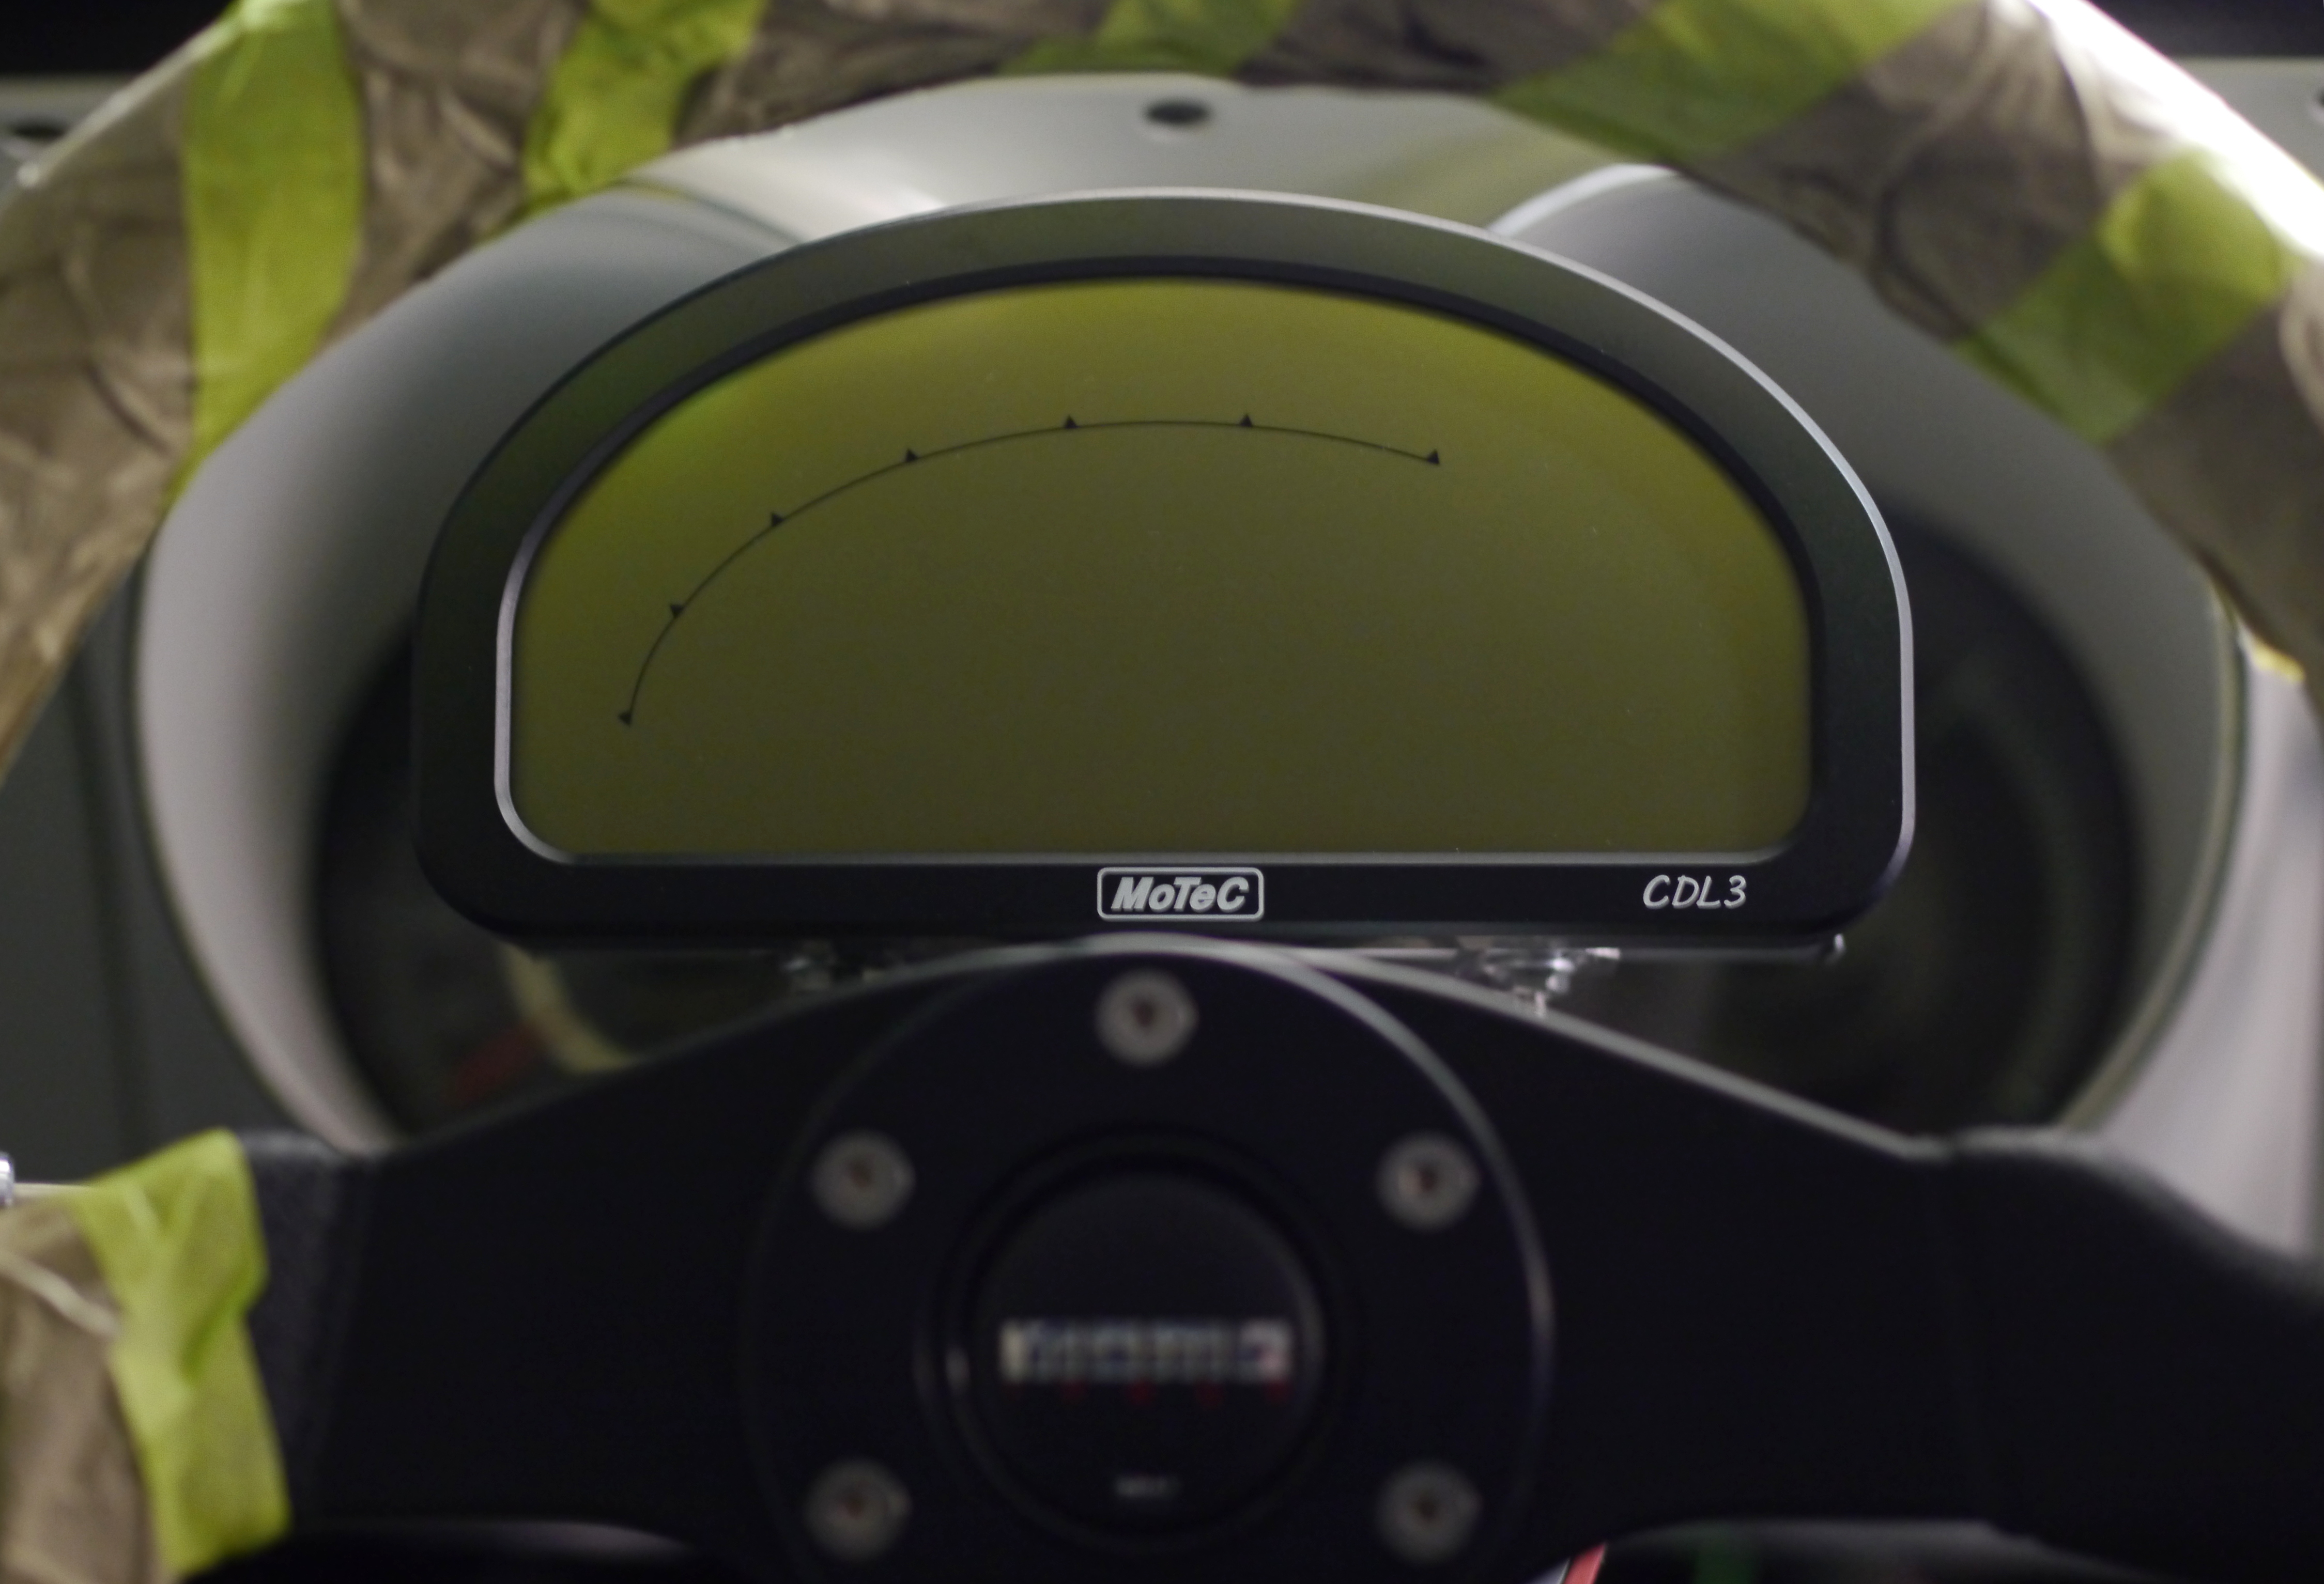
Well, there she is. Bracketry was a bit rushed, as I’m getting the looming sense time is running out; the impetus is on getting it in (done) and wired (not yet done). Excited to get some data collected and begin to use their software.
Couple videos of first drive
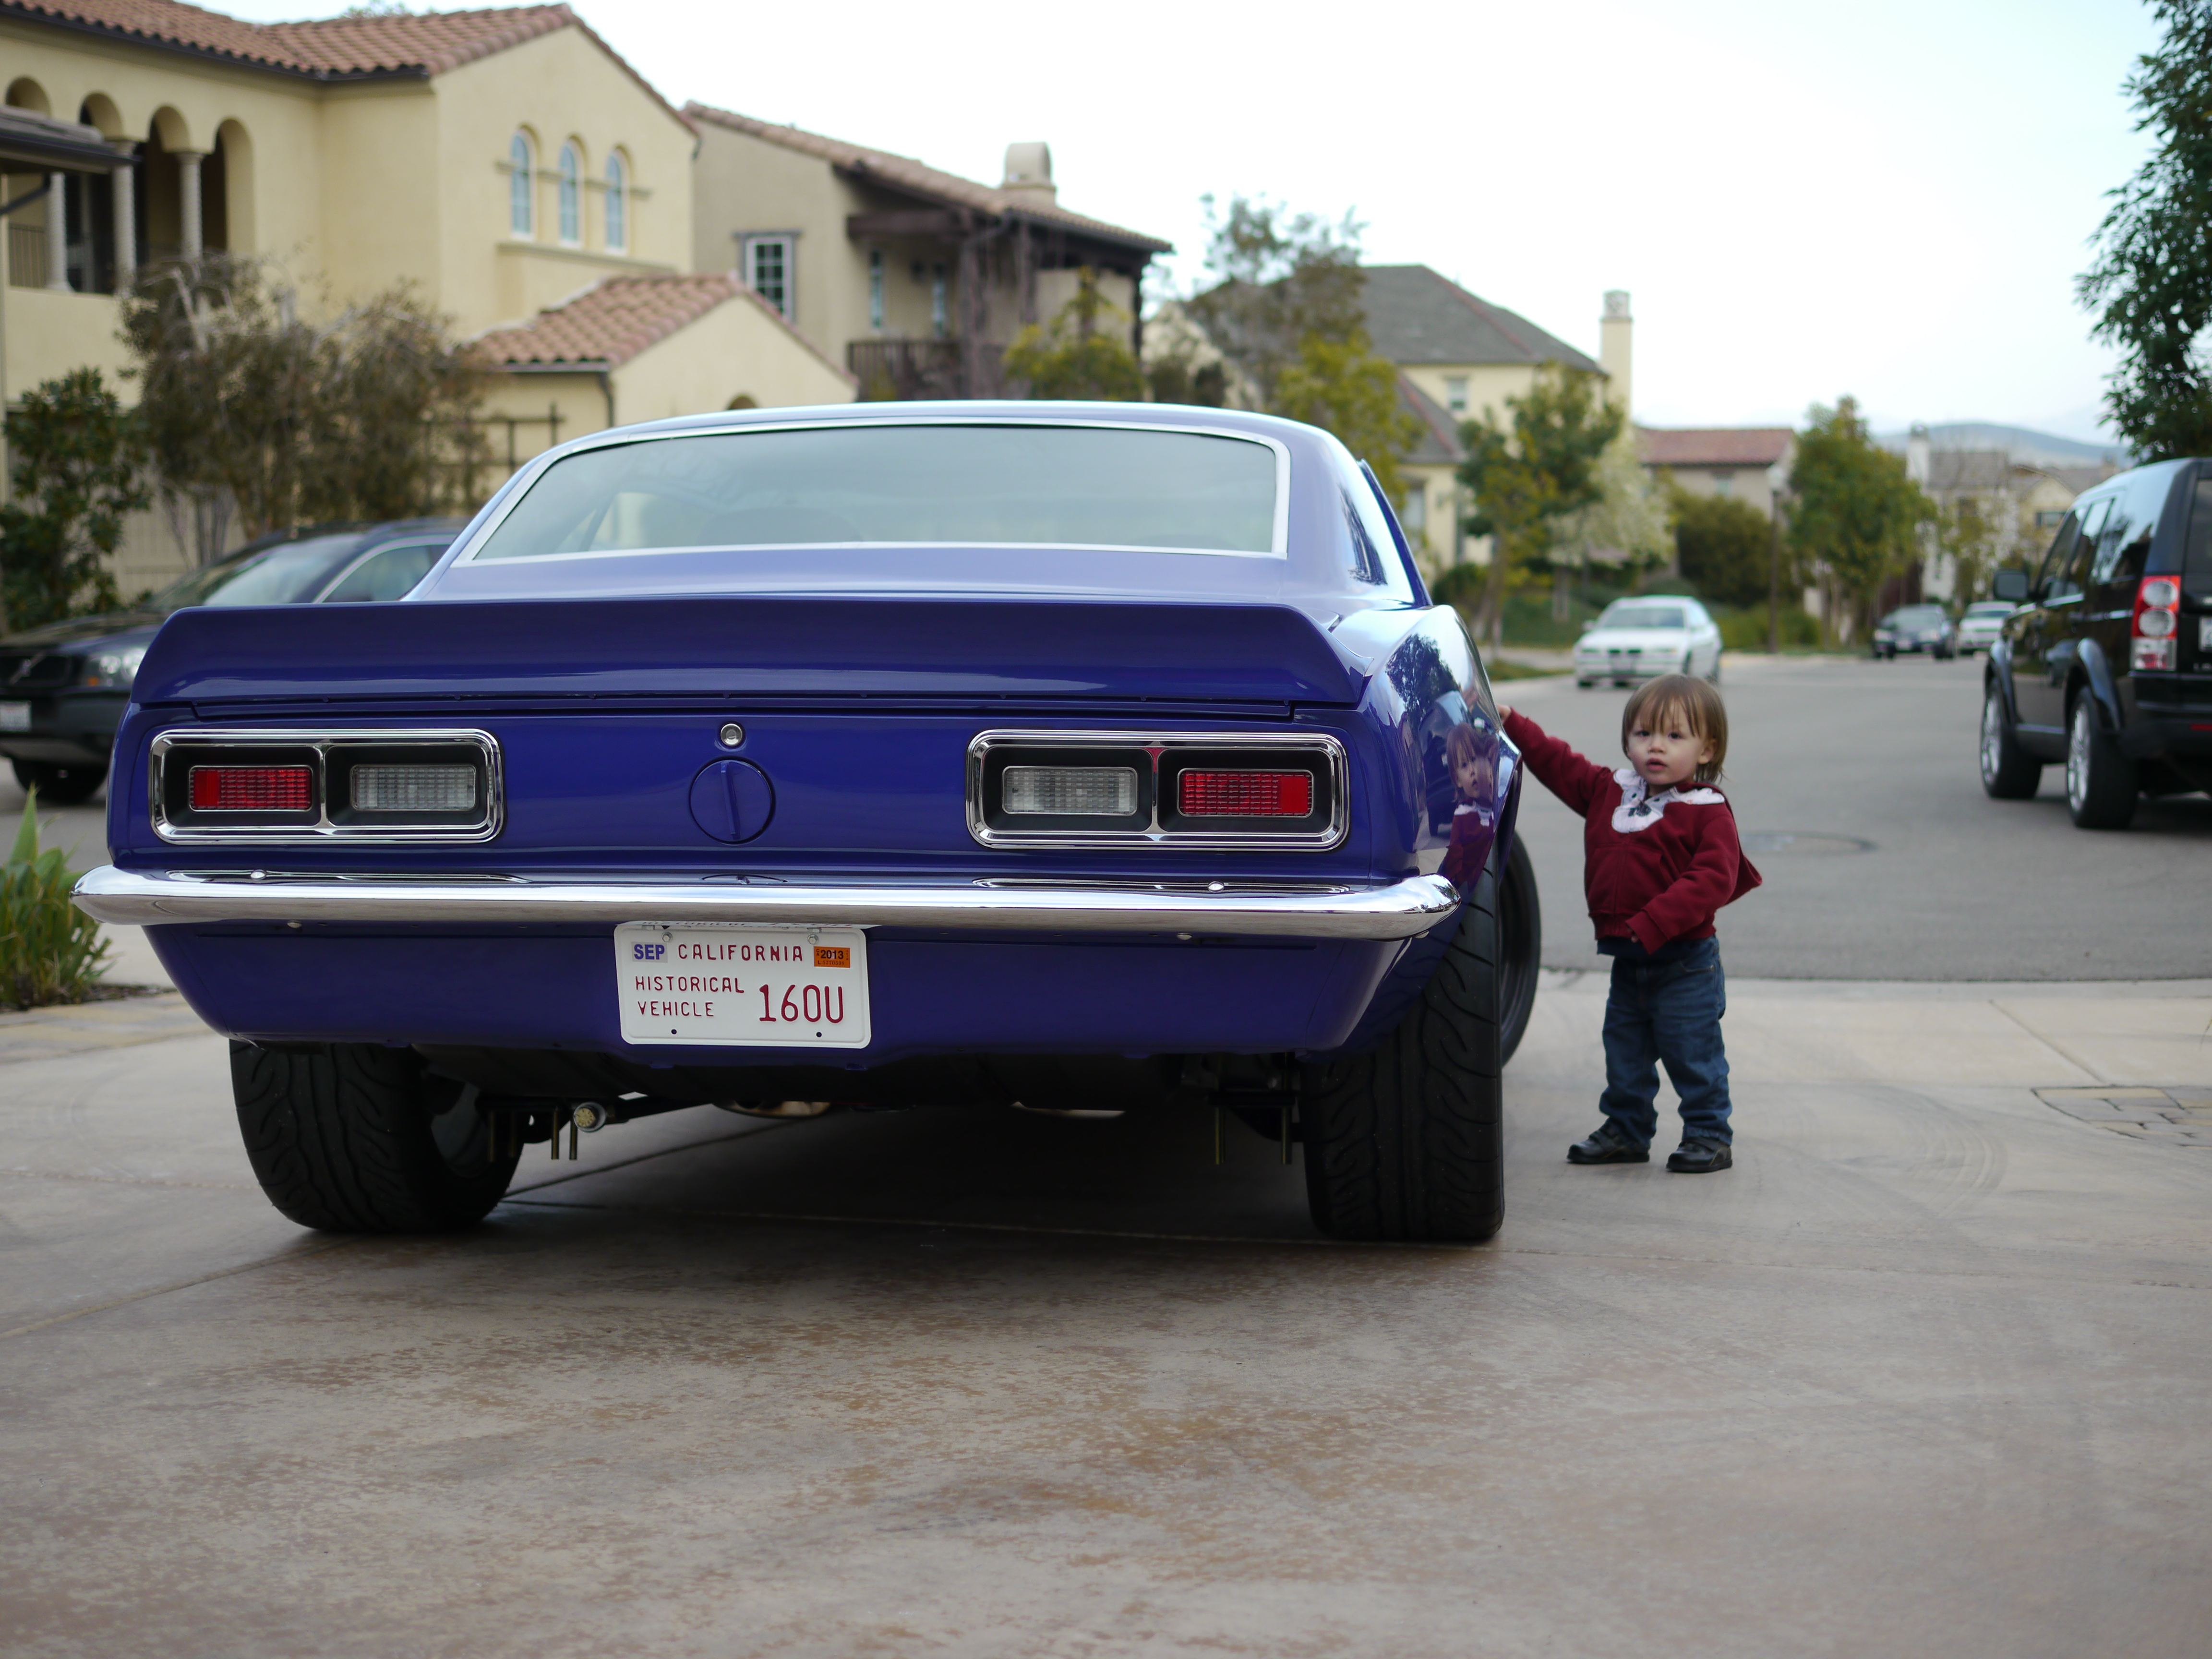
The family was kind enough to come outside and do some camera work as I maneuvered the Camaro out onto the street:
http://www.youtube.com/watch?v=kmWIYpJrp8A
and around the block:
http://www.youtube.com/watch?v=ET-FRcrcH-w
for the first time.
Fortunately the car made it off the crazy curb we have without scraping anything…not sure the story would have been the same with the subframe connectors still in place.
In the first video it is amusing to see how freely the rear axle articulates as the car descends the curb/gutter. That’s what having zero rebound will do for you! 🙂
Embarrassingly, I did stall the car on the driveway (mostly due to a small wheel interference issue I’ll soon fix) – and the lesson there, was it needs a new battery. I’d let the PC680 in it now run down a couple times, and while it will rise to and hold a normal voltage, it doesn’t deliver diddly-squat when it comes time to turn over the motor. Even with a plug-in battery tender/jump-starter at its max 80A setting, the motor wouldn’t turn over after the stall. I thought this was some kind of dreaded starter heat-soak issue, but as soon as I supplied a battery-based jumpstarter multi kit (which is also an air compressor, light, and 12V DC/110V AC power source) it turned right over and fired.
Given how much a pain getting it going in that situation was, I’ve decided to go to a much larger (and unfortunately, heavier) battery for the time being – an Odyssey PC1200. At 38 lbs. it’s about 2.5x the weight of the PC680, but delivers over 3x the reserve and more than 2x the cold-cranking-amps needed to get this high compression motor turning. Will have to save the 4lb. lithium-ion PC680 equivalent for Nationals.
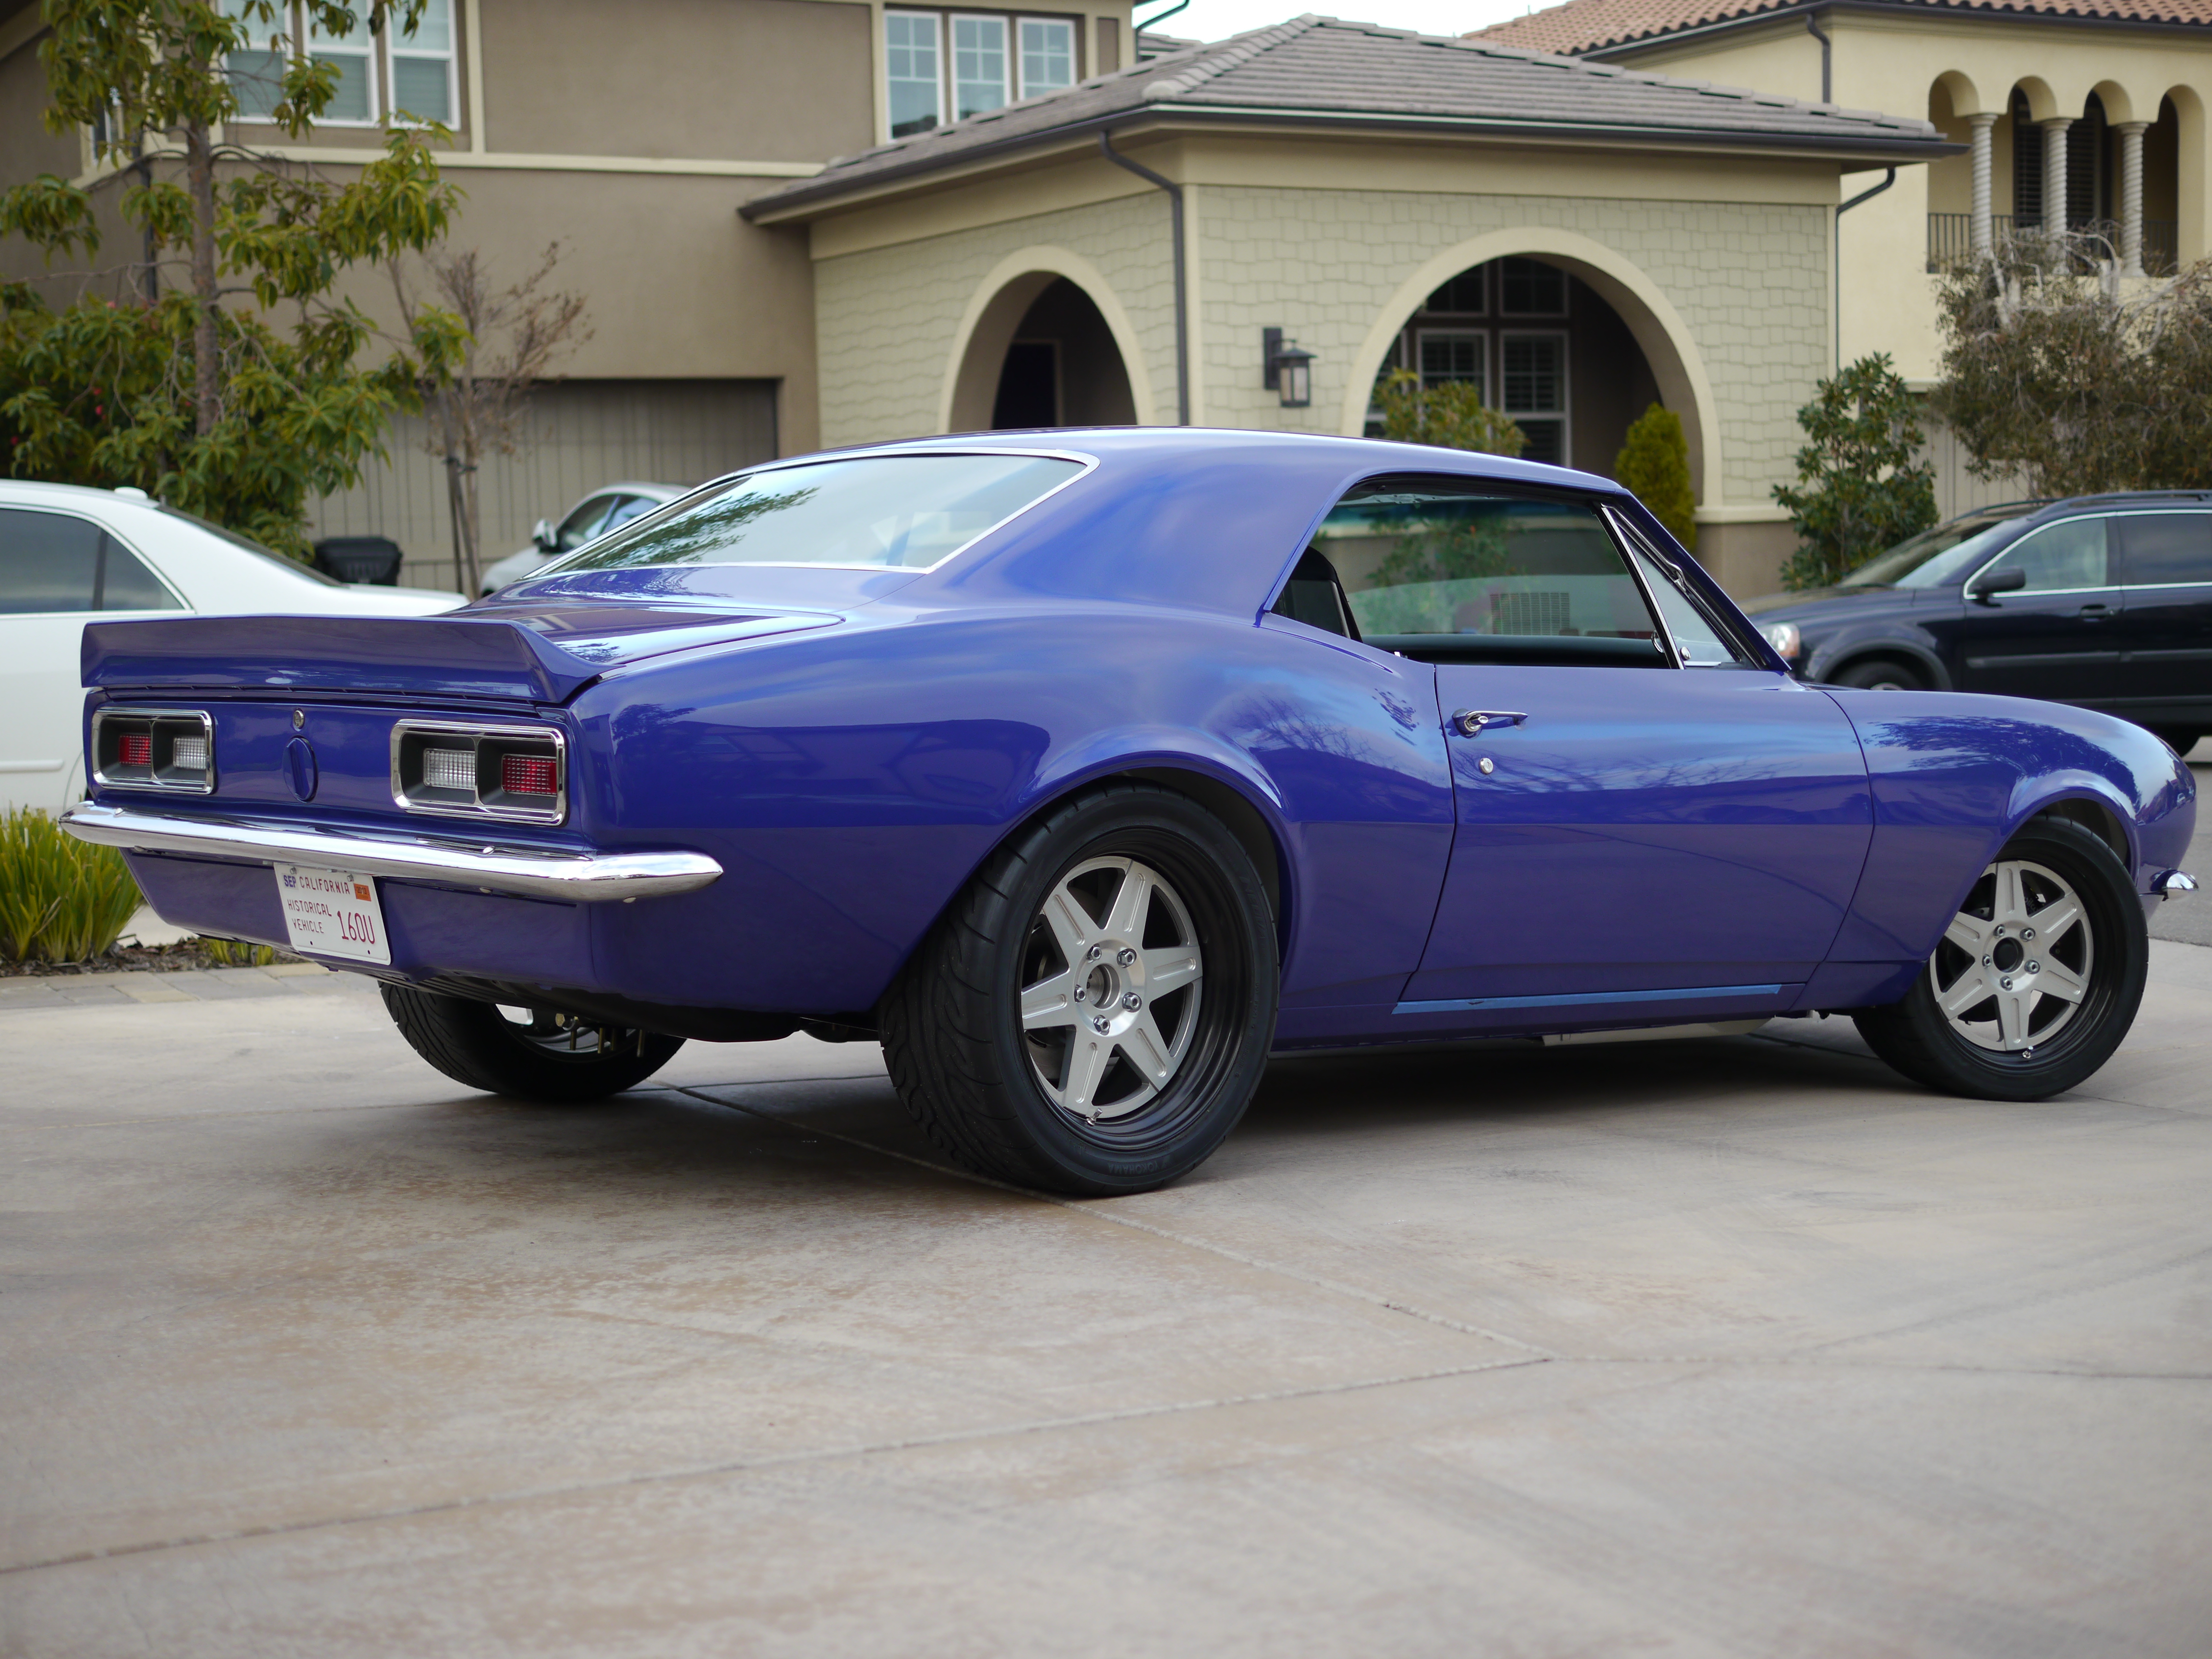
Oh! I have slipped the surly bonds of … the garage

This pic is funny to me, because of how much I like seeing the reverse lights. How they worked was actually a mystery until the last couple weeks, when suddenly a curious hole in the filewall, a lonely connector under the dash, and a few parts I hadn’t yet ordered, all came together. It’s a good feeling to be closing out all the remaining mysteries I had for how one of these things goes together, and given the amount of head-scratching that went into it, I’ll never take reverse lights for granted again.
Once out on the driveway took a few shots…leaving a little of the blue tape on for a while since the door glass isn’t done yet, it detracts somewhat. But I think finally, the ride heights are at a pretty good place, a decent starting point anyway.
Had some help of course!
Did get a couple little videos, will get them posted soon.
First race entry
The SCCA San Diego National Tour is coming up March 30-31 – this is my home event on the SCCA National Tour series, and will probably be the car’s first live autocross. That only leaves 7 and a half weeks to get this thing together!
To put extra pressure on its completion, went ahead and registered now – so here is the car’s first appearance on an autocross entry list–
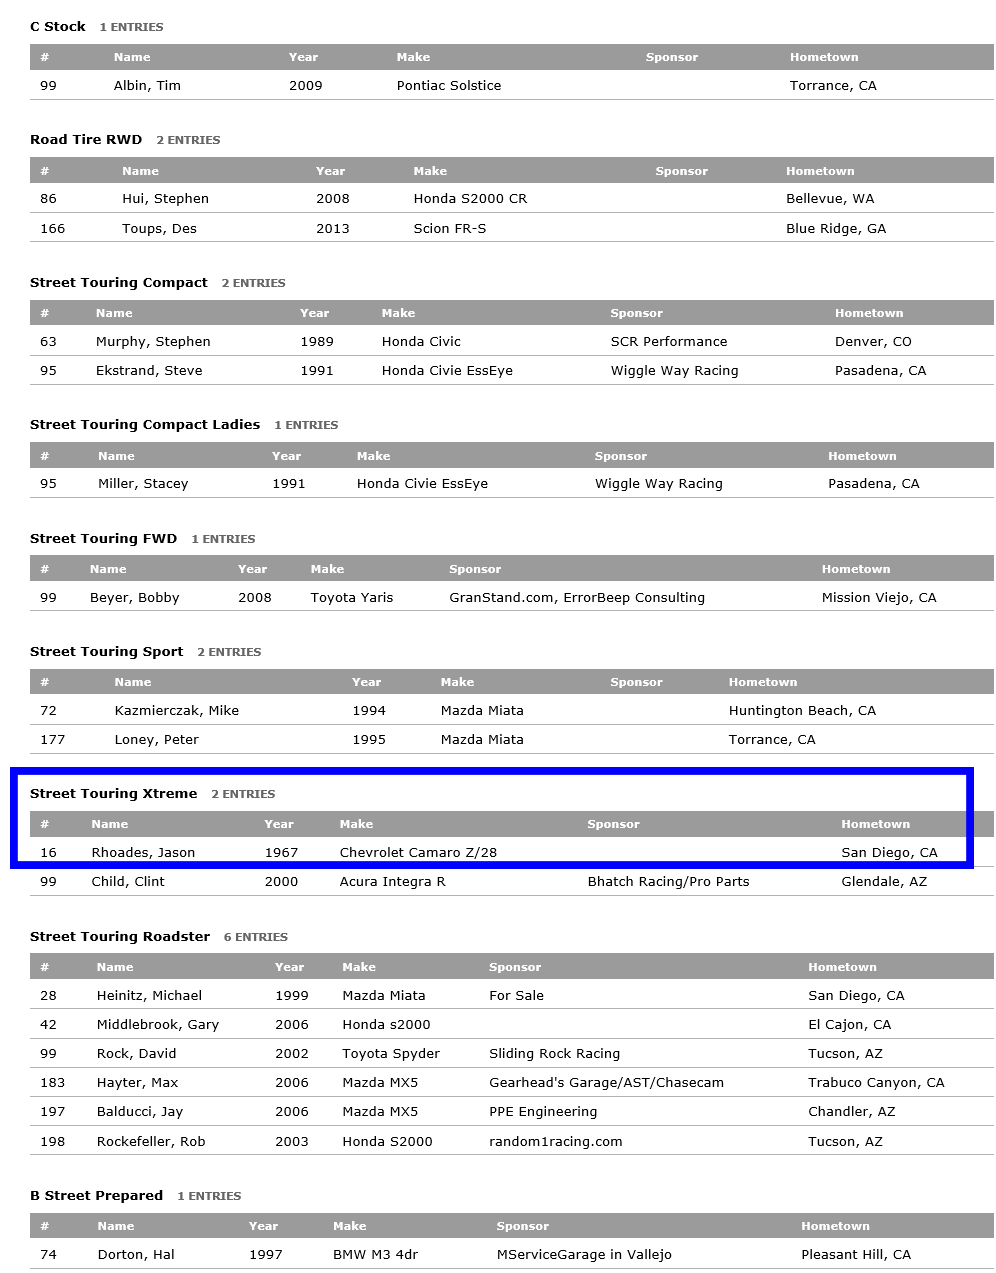
Entries are still a little light as of today – most people register in the few weeks just before the event. There are 30 registered at the moment, should be 300+ by the time registration is complete. The 2 entrants in the STX (“Street Touring Extreme”) class should be 12 or so come race day.
Still a lot to do, though the to-do list is slowly shrinking.