Wrenches turning again
A vision for the Camaro’s next iteration has come into clear view, and progress has begun.
More details later – in the meantime, I’m reminded of a passage from Peter Egan I read a long time ago. His context was one of restoration vs. modification, but much of the things are the same. Though today, getting the pieces brought together is a mixture of modern online shopping with phone calls to cottage industries and folks who sometimes, were there for the heyday of the Trans-Am and Can-Am series.
Knowing all this, I paused. Walked around the car many afternoons, gazed at the dirty engine under the hood, tapped fingers on a faded fender, jingled the change in my pocket and tried to assume the bleakest possible expression of realistic hardheaded disinterest.
A car restoration, like marriage, is not to be entered into lightly. It is a fork in the road.
If we look at an old car in need and do nothing, it just sits there. The sun rises and the sun sets. Seasons come and go. The robin builds its nest, morning dew drips from a pitted chrome bumper, children grow up and need bigger shoes, and sediment in the sediment bowl turns to anthracite. A clock ticks on a wall and old men sit on a park bench and watch shadows lengthen in the town square. The car gets older, your checkbook sits on the dresser. Nothing changes.
Not restoring a car is almost the perfect embodiment of stasis. It makes a stagnant pond look like a three-ring circus.
But if you take the other fork in the road, toward restoration, everything changes: your life, your finances and the destinations of a hundred UPS trucks. It is, as Marcus Antoninus said, “like letting slip the dogs of war.”
A set of narrow whitewall tires is shipped across the country; a water pump in Cleveland gets taken off a dusty shelf by a Clevelander and sent to a Wisconsinite; telephone calls in search of superannuated oil seals crackle across a continent; a man in a Texas scrapyard pulls the front bumper off a car rear-ended when Lyndon Johnson was president; old oil comes out the bottom of an engine and new oil from new cans (for today’s higher-revving engines?) goes in the top. A bright orange oil filter spins into place, and a huge breaker bar is unlimbered from the bottom of a toolbox; Liquid Wrench flows like champagne; clean amber brake fluid courses to the car’s four corners, pushing brand-new brake shoes against freshly turned drums.
For sheer unleashed energy, it’s like one of those World War II propaganda newsreels showing American industrial workers giving Hitler a bust in the chops, everything spinning, gushing and throwing off showers of sparks. Tanks and airplanes on parade. Stand back! We are in motion here and we will not stop. We are on a holy mission and our eyes have a zealous glaze; we never sleep.
Car restoration is its own life form; the decision to go ahead and do one is a strange pivotal moment, a headlong act of resolve and suspended logic combined, like lighting the fuse for the first cannon shot at Fort Sumter.
Blow out the match and life remains simple and quiet. Maybe a little too quiet. Light the fuse and there is no peace in the world until the car is restored and rolling. In the meantime, all is glorious havoc.
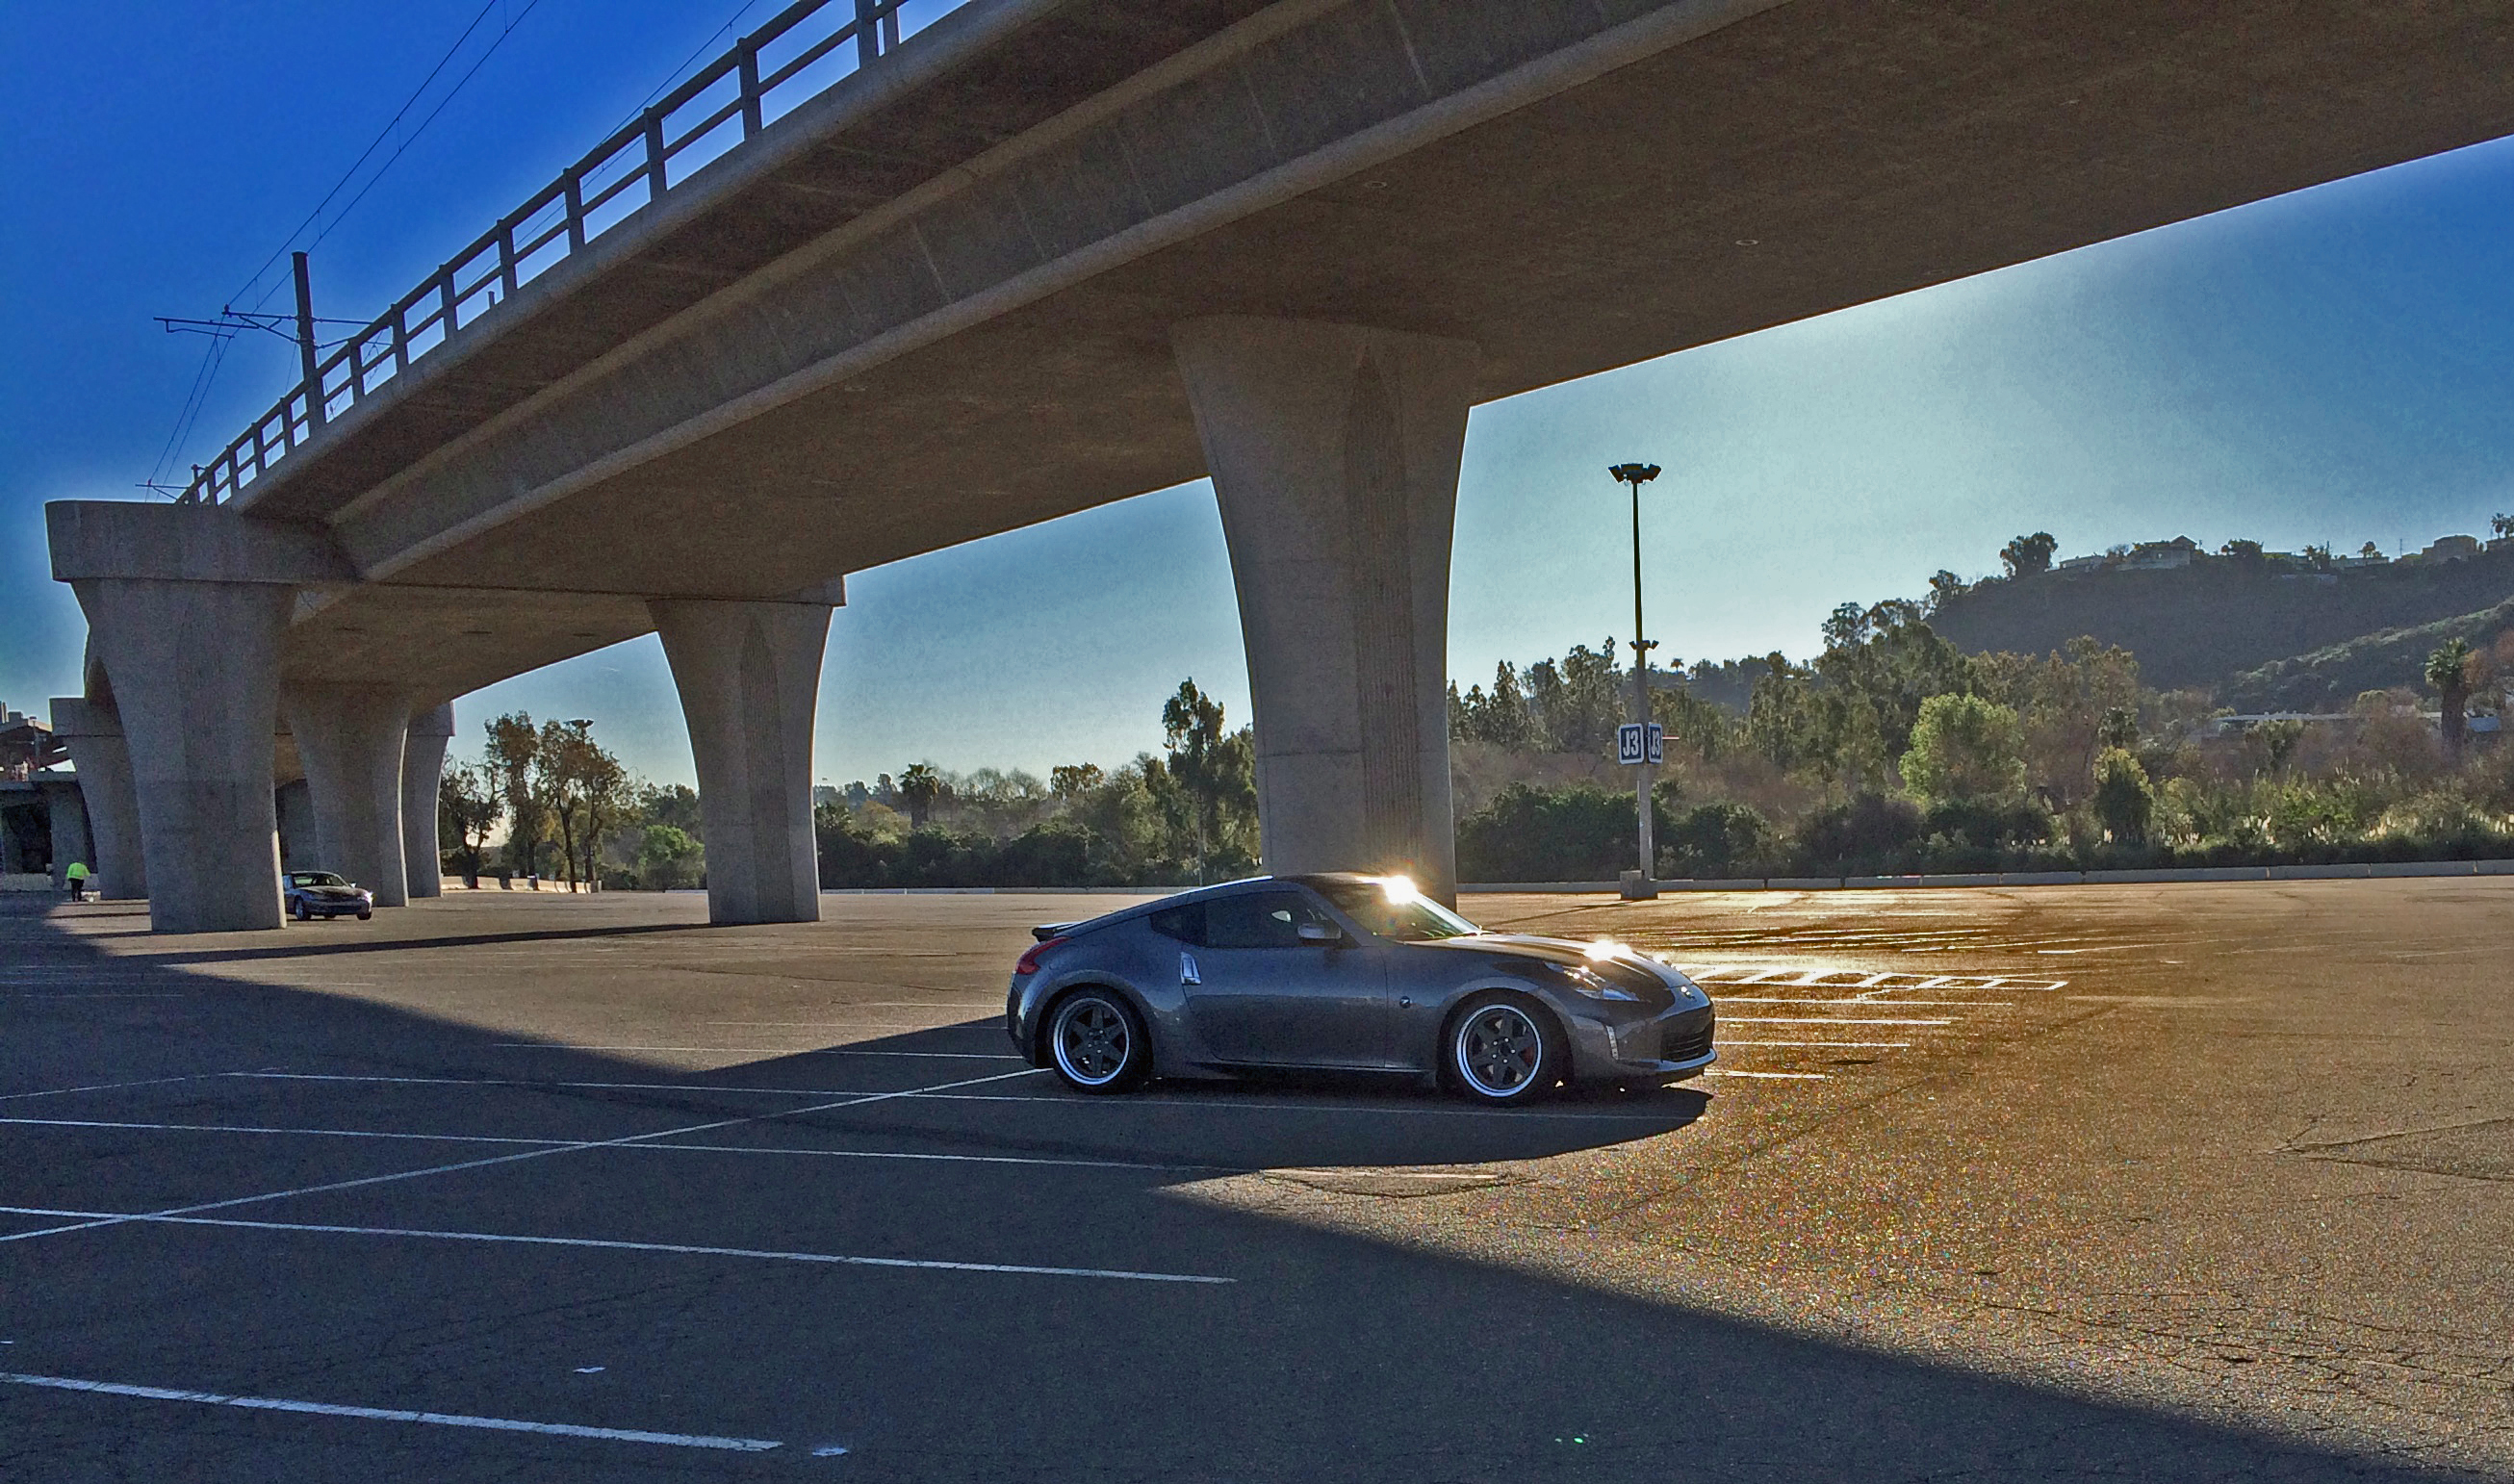
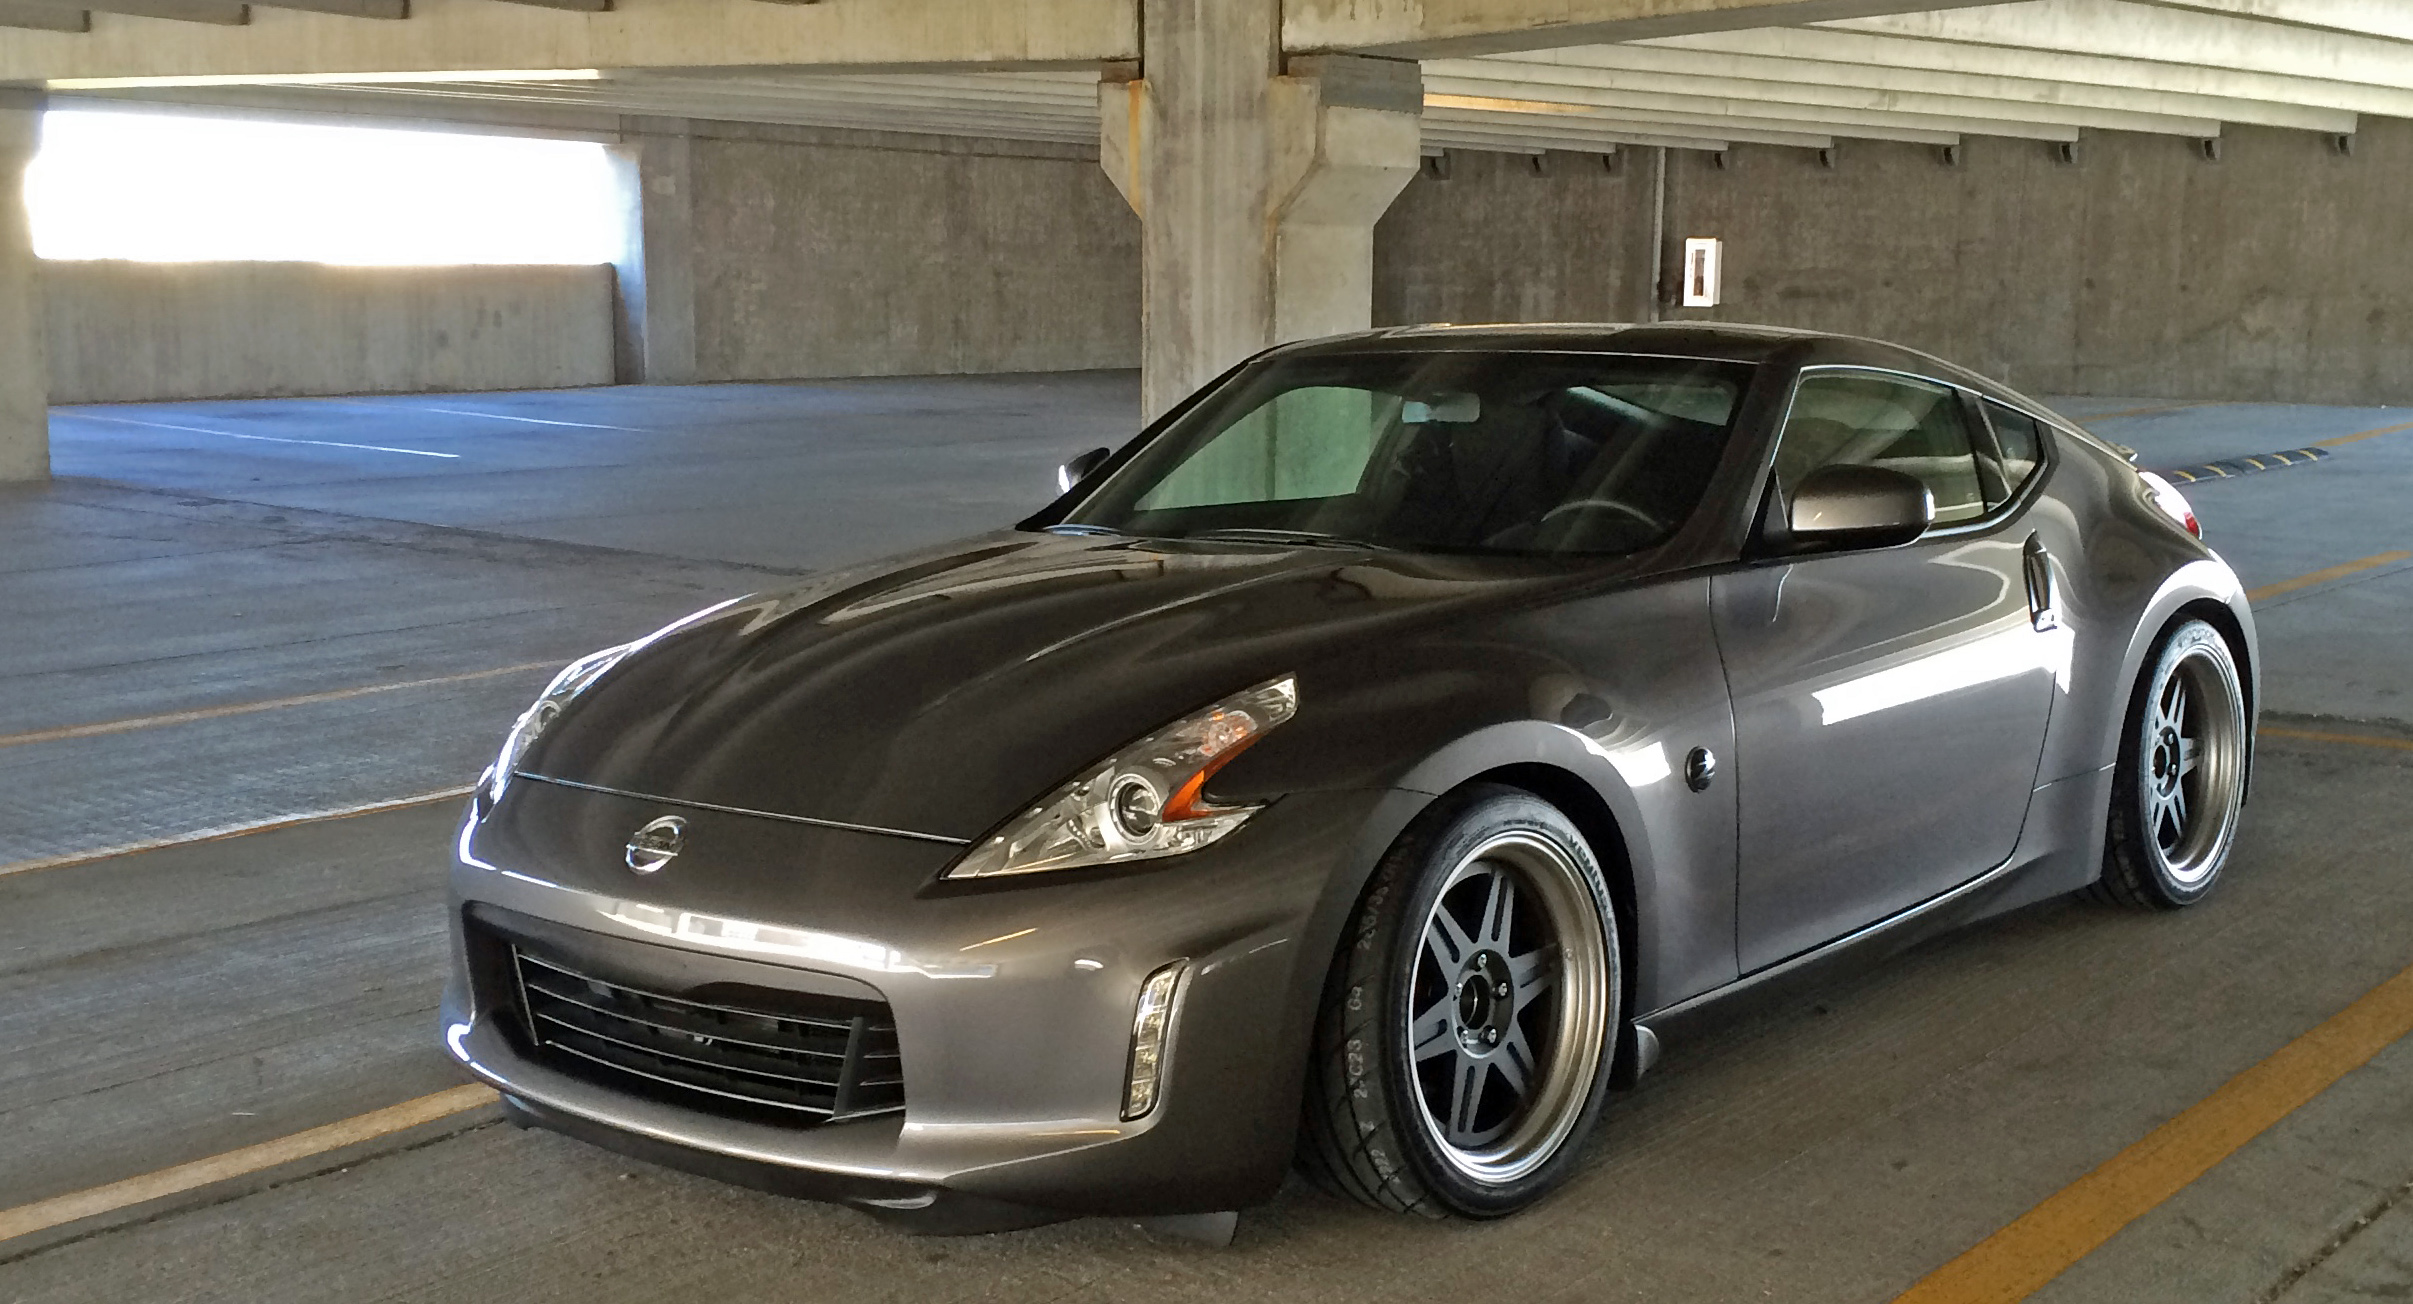
It’s back!
Got the Camaro out of storage today. The Z is pretty much “done” for now, so they traded places. Mag wheels overdue for a polish, and it hadn’t been run in a long time. Fortunately it started right up and made the drive home just fine.
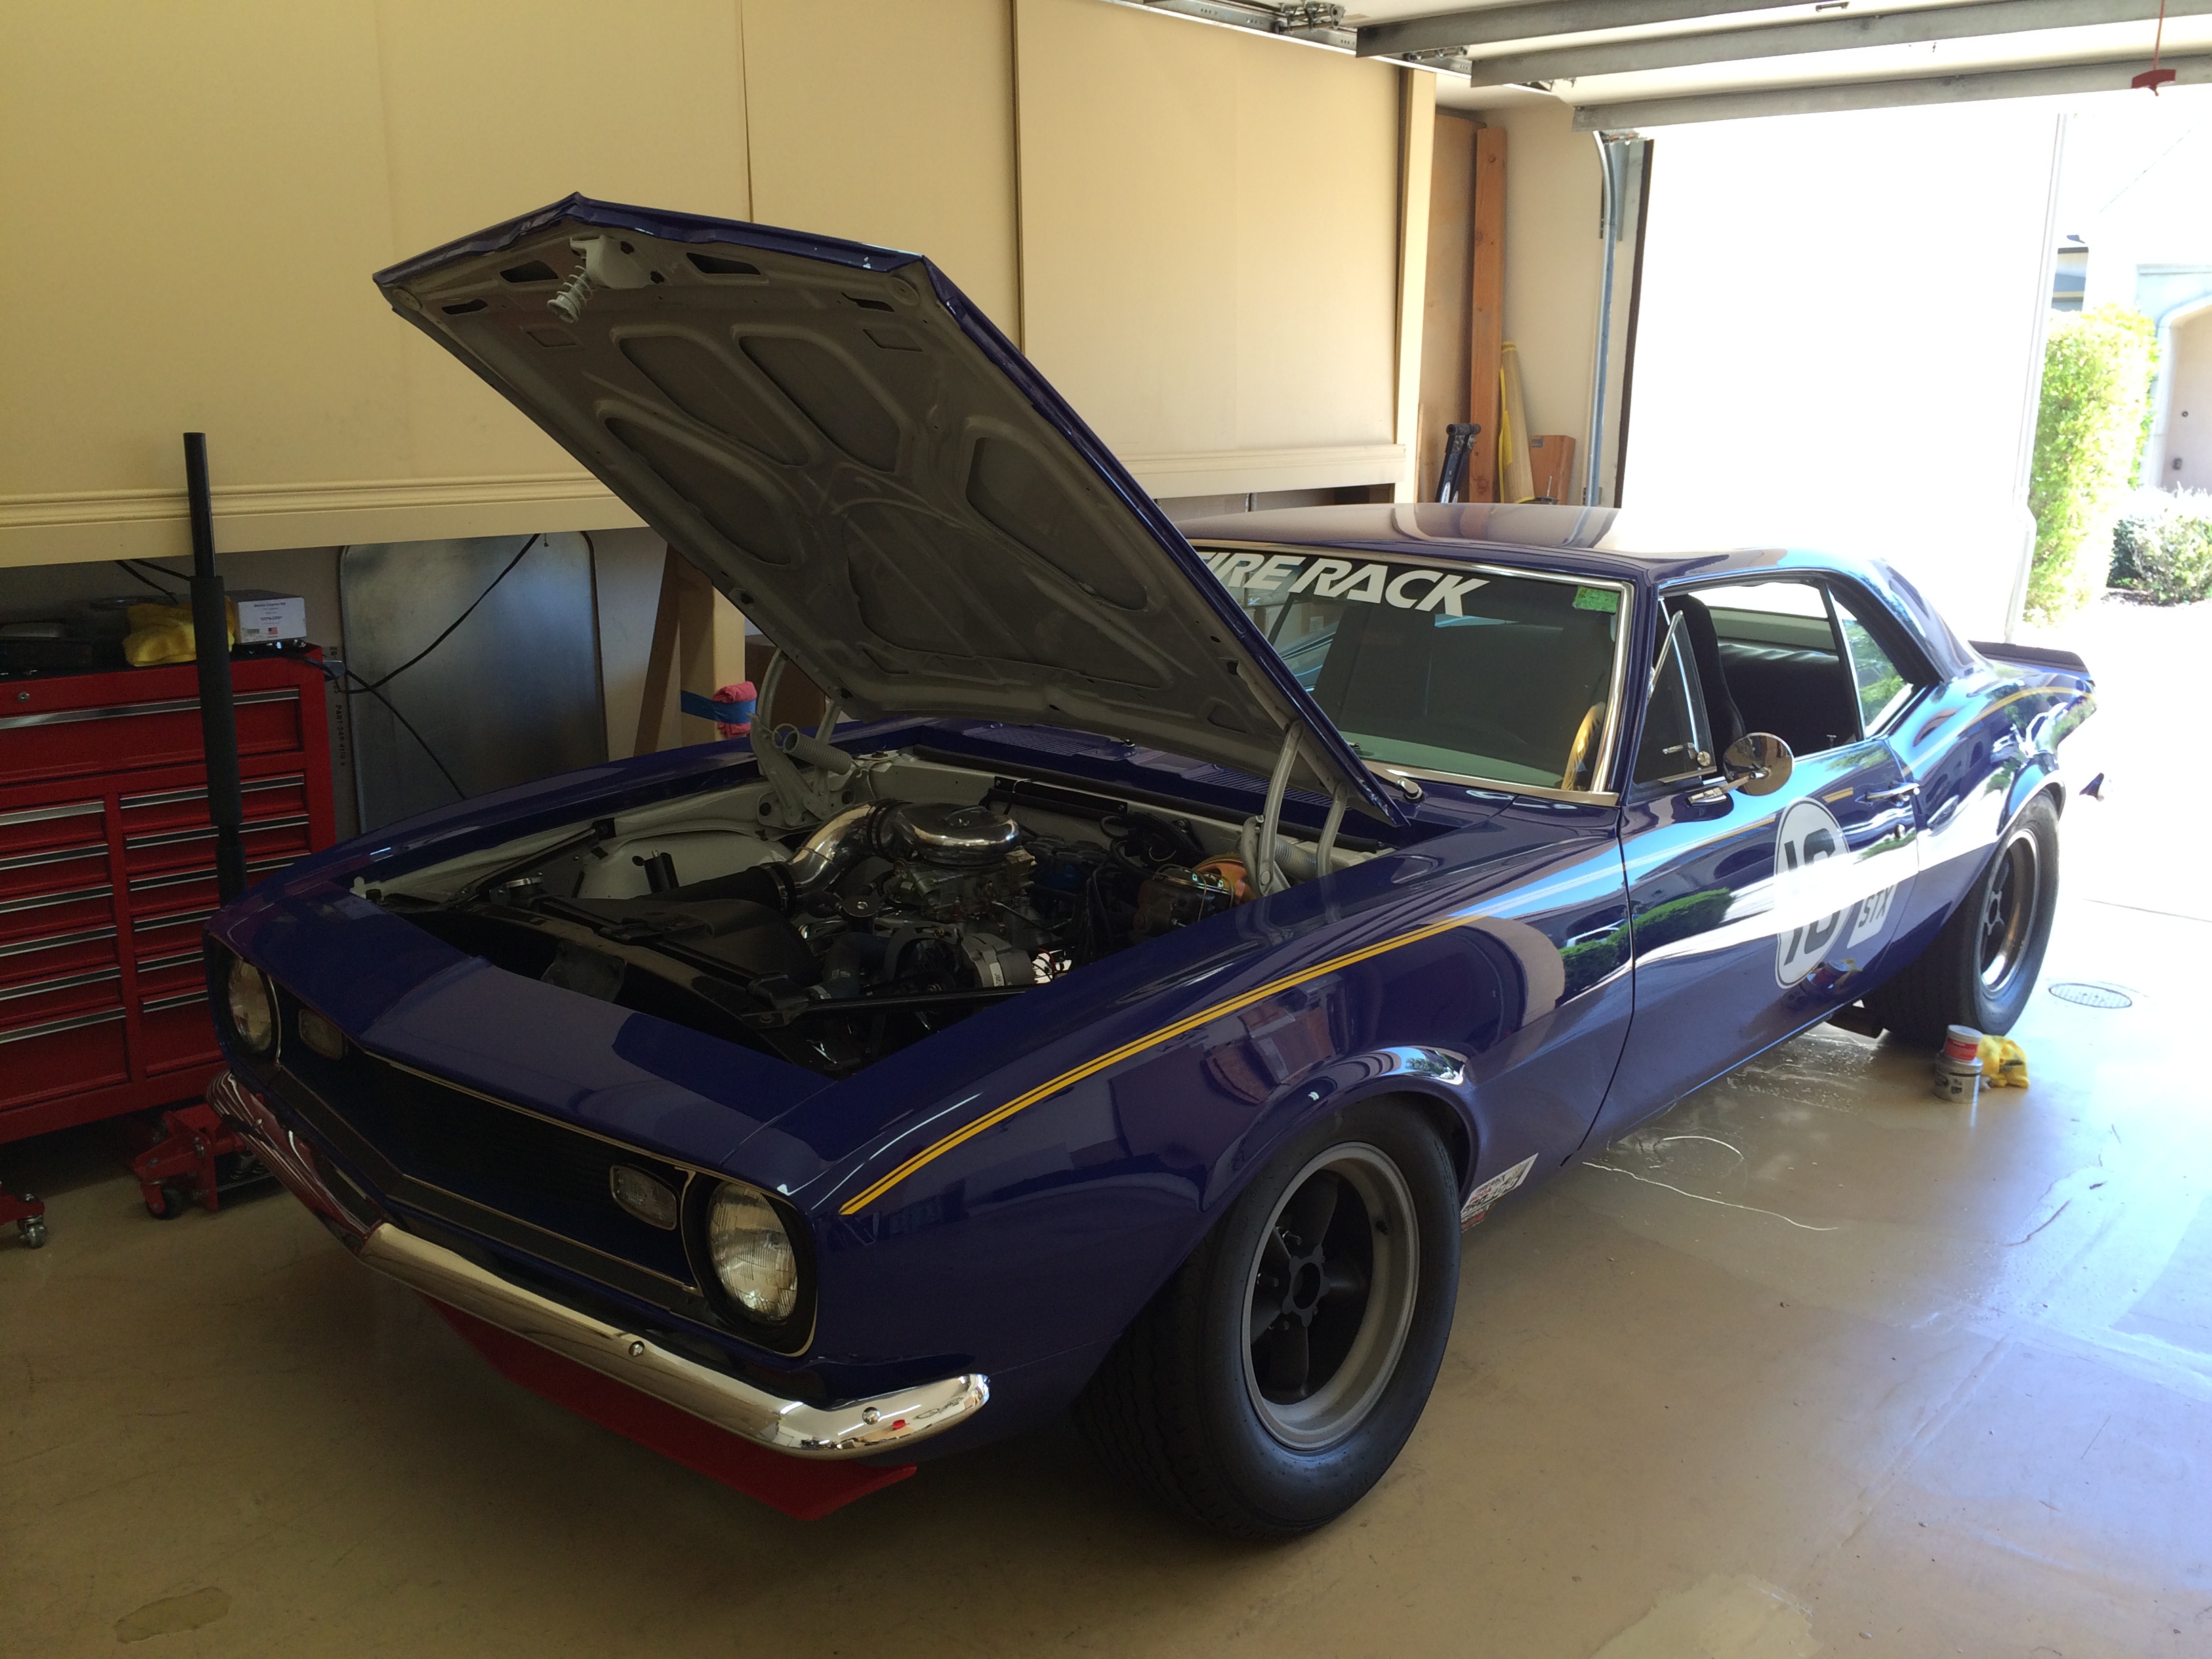
Not sure what’s next but it’s nice to have it back – distance makes the heart grow fonder and all that. I’d gotten pretty burnt out working on it after 2013 – putting the Z together for STR was a refreshing break.
Lots of potential places to consider as targets for its next iteration. STU, STP (for non-National competition), CAM (also non-National), ESP, SM, CP? Make it even more like a Penske/Donohue close with a cage? Maybe some non-SCCA stuff?
For now, just gonna get those wheels shiny again 🙂
Spring Nationals 2015
Well that was a lot of meh.
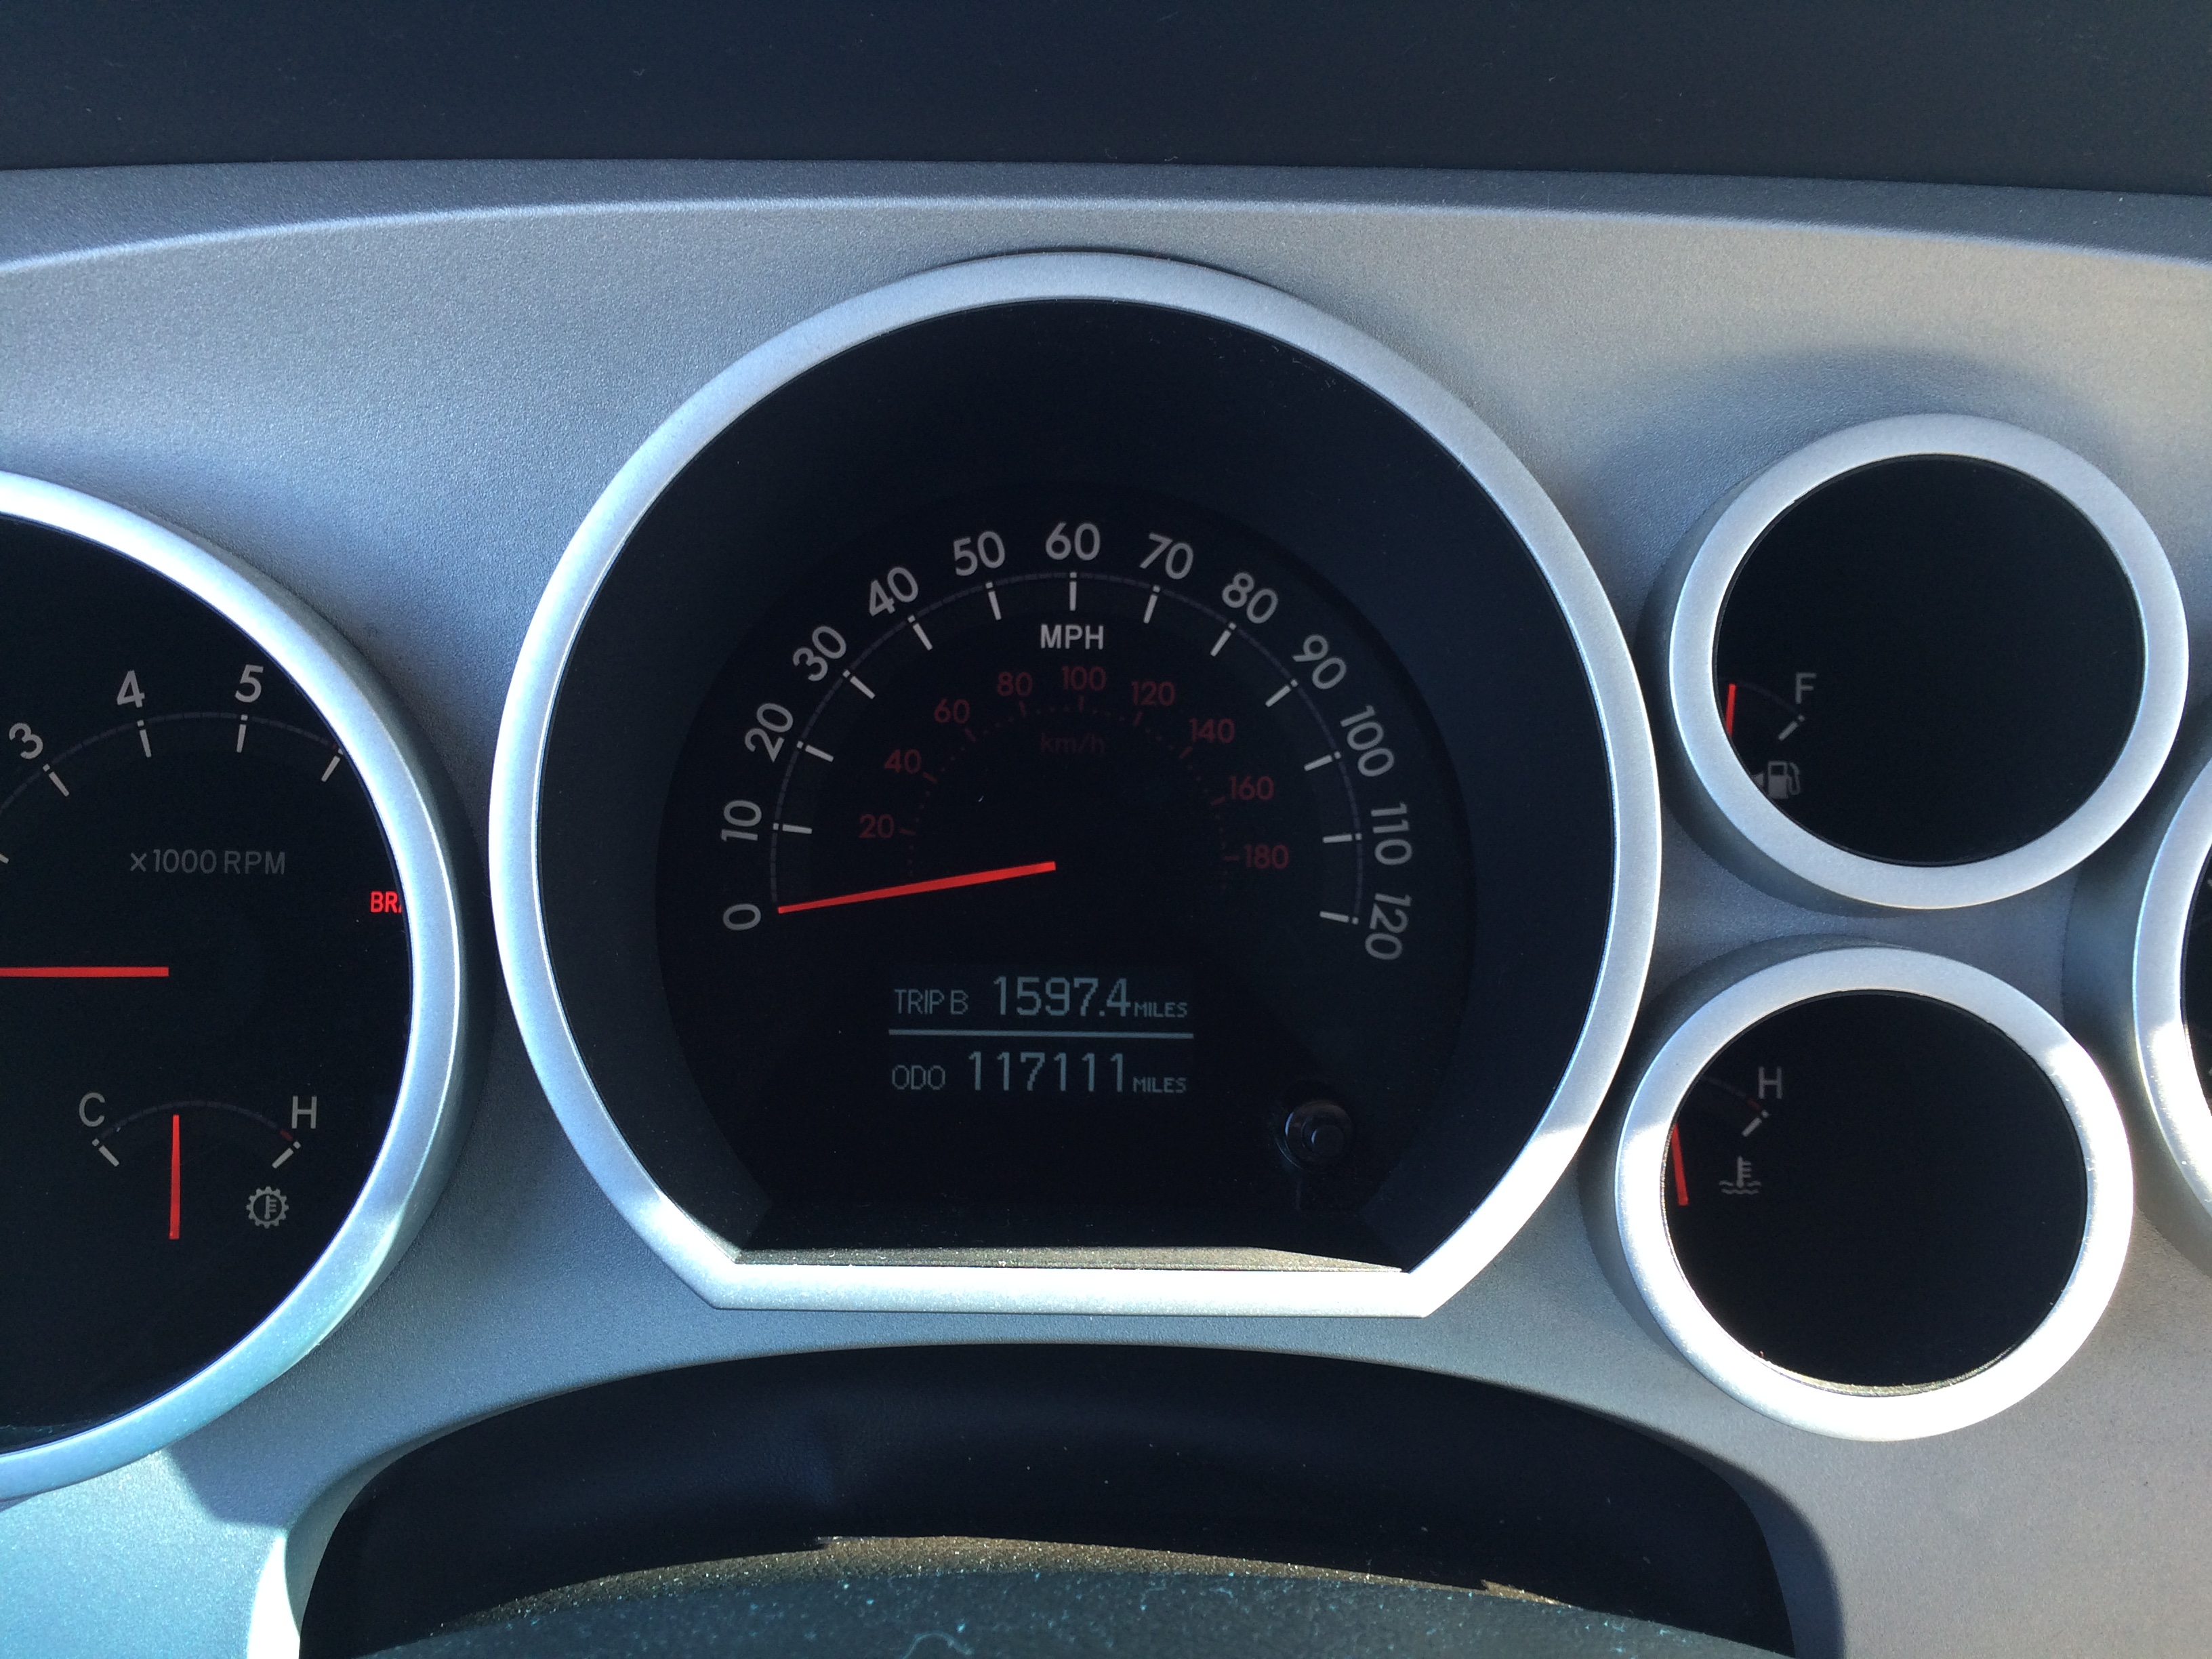
Couldn’t make the Crows Landing events in CA this year so I hauled the Z out to Nebraska for 4 days of racing – ProSolo followed by a National Tour – they call Spring Nationals.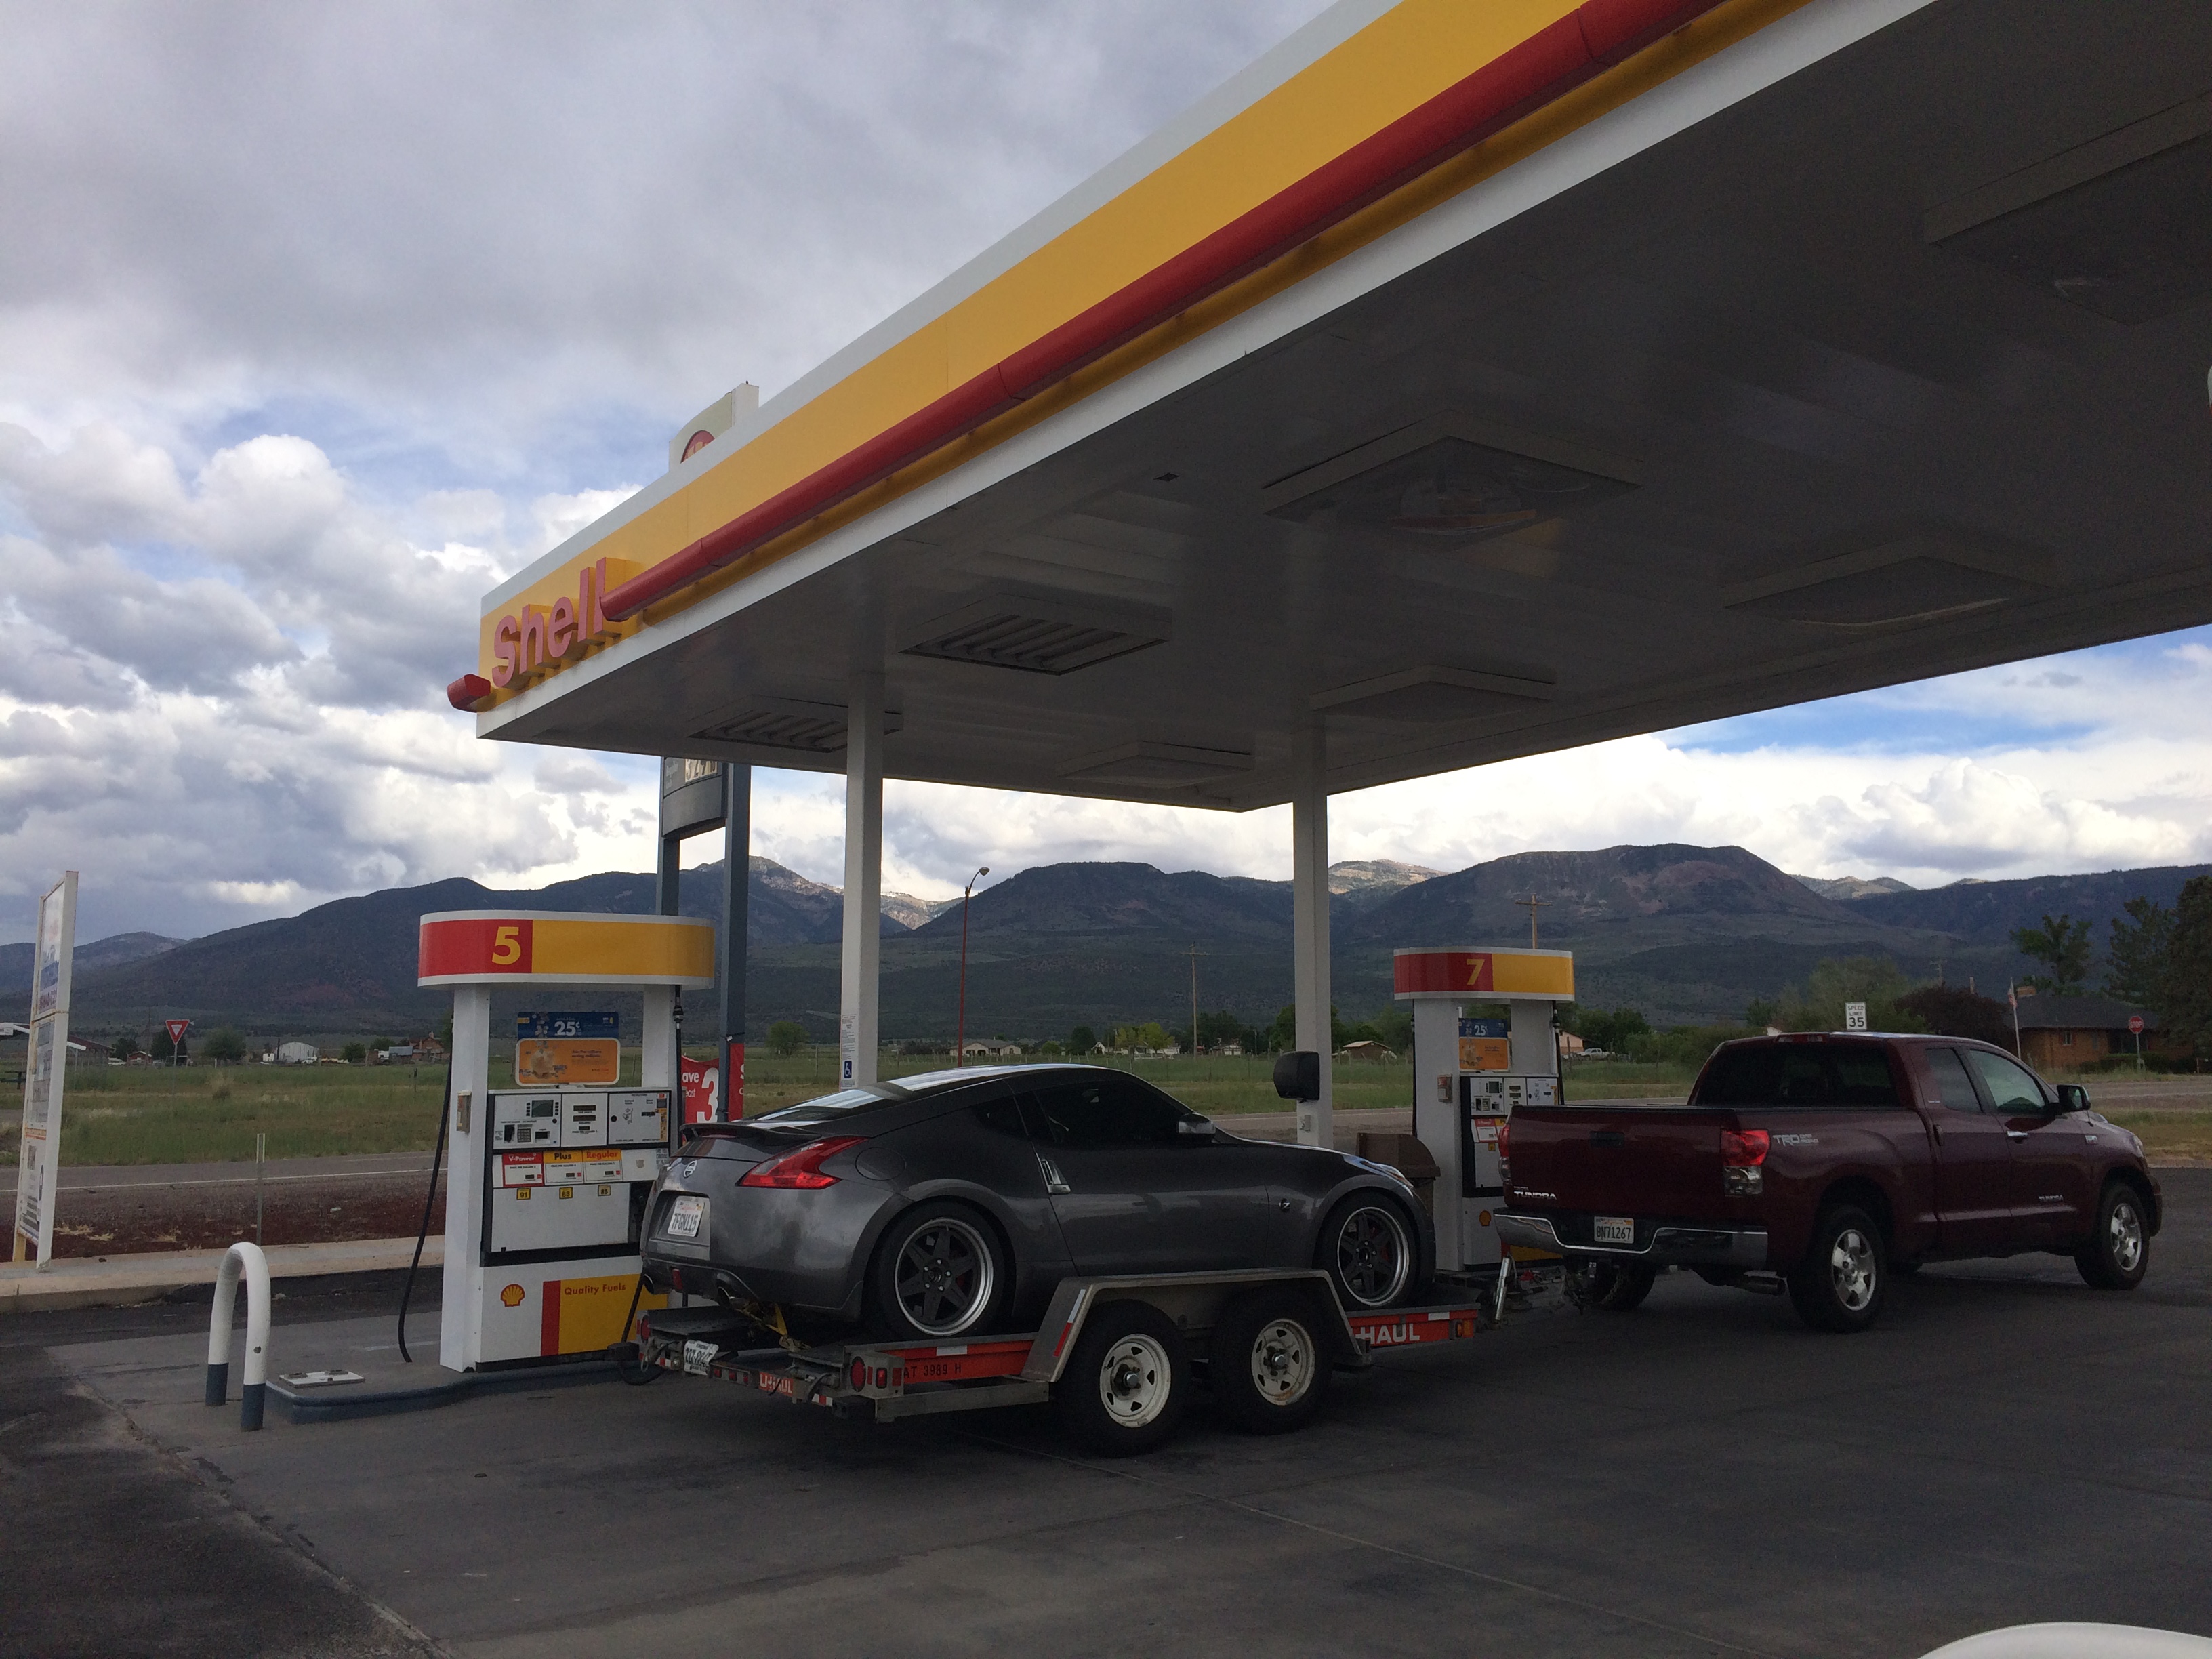
Lincoln is a long way from San Diego. Reset the Trip B odometer in the driveway on my way out one morning. And here it is stopped in my paddock spot the next afternoon:
Towing an open trailer is a lot more serene an experience than the enclosed, with the Tundra. Power and brakes are fine and stability is good in most cases, but the range is sooo much better with the open trailer. Mileage is about 10 (+/- 2 depending on geography) where it averaged about 13.5 pulling the open trailer. That means it was easy to go 250 miles between stops with the open, where you’re looking for gas between 150-180 with the enclosed. Next truck will have a much bigger tank!
The weekend started with the ProSolo. First pair of runs Saturday morning were decent, but I failed to improve basically at all the whole event- whereas the rest of the class had no trouble doing so. Was a little unnerved in that upon coming in from my third run smoke was billowing out from the front of the car. Given all the work I’d just done with the headers, was worried something might be getting cooked underhood. Turns out it was just the brakes bedding to the new front rotors but uggg, what a distraction.
After reviewing some of the photos, am surprised how much steering input the car has into it in spots. Have since upped the rear spring rate from 700 to 800 – but that wasn’t until I got back.
An in-car from a left-side run Sunday morning.
Since El Toro, I’d moved from 245-40 to 255-40-18 RE71R Bridgestones. Went down a click in front bump (from 6 to 5 of 13) up half a turn in front rebound (from 1.5 to 2 out of 2.5 turns). Also up in rear bump and rebound (from 3 to 5 of 13 clicks on both). Also went up from full soft to the middle setting on the rear bar. Did the headers and front brake rotors mentioned earlier too.
Car felt great in the slaloms – best it’s been so far, and really, the first time it’d ever felt good in a slalom since I’d owned it. Mid-corner balance was better, but maybe still not quite there yet.
The Tour that followed wasn’t really any better. The first day was wet to drying, and I learned a little about the nannies the hard way.
The second day went a bit better, but still a full second off the pace. There was one big mistake early on that cost a few tenths, but most of the rest of it felt about as fast as I could make the car go.
Hopefully the spring rate change will free the car up a bit more and help its overall speed. It’s never even hinted at inside wheelspin and only got a little bit loose once or twice.
Hopefully will get once local practice at El Toro before Nats, but might not, not sure yet. Car is a lot of fun, and have the full OBD data acquisition hooked up now, will post some more on that later.
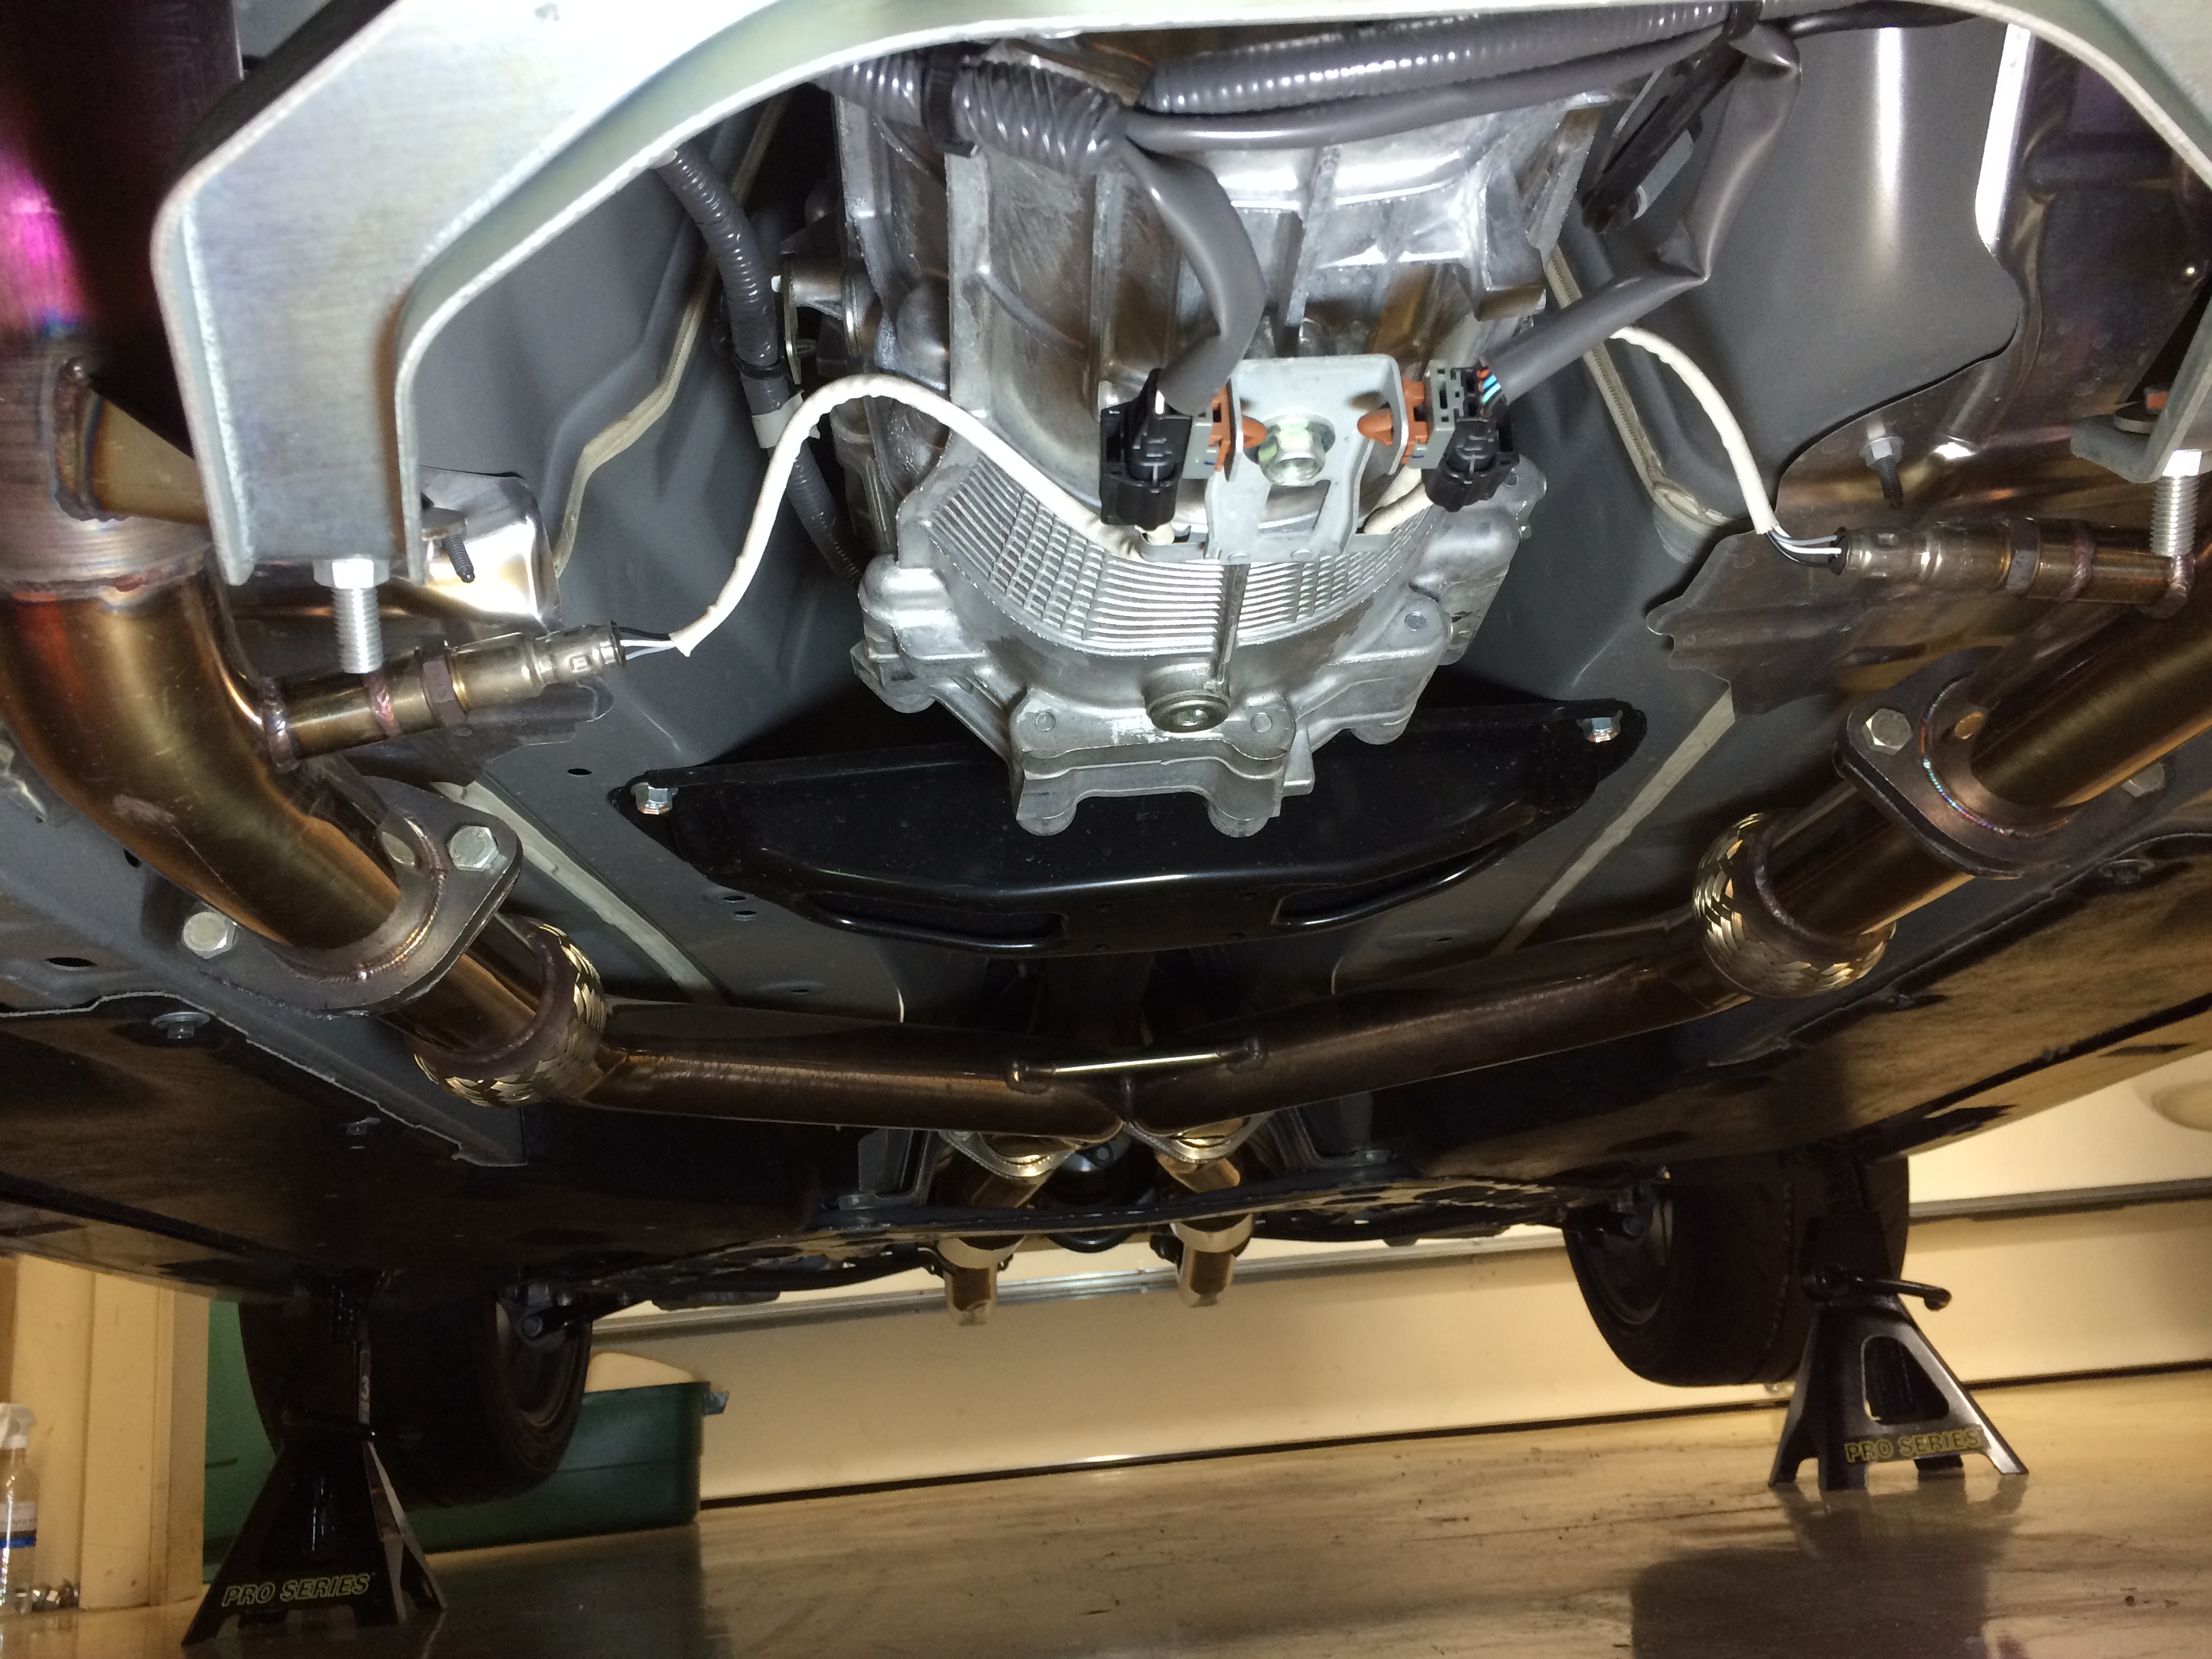
Exhaust work and dyno session
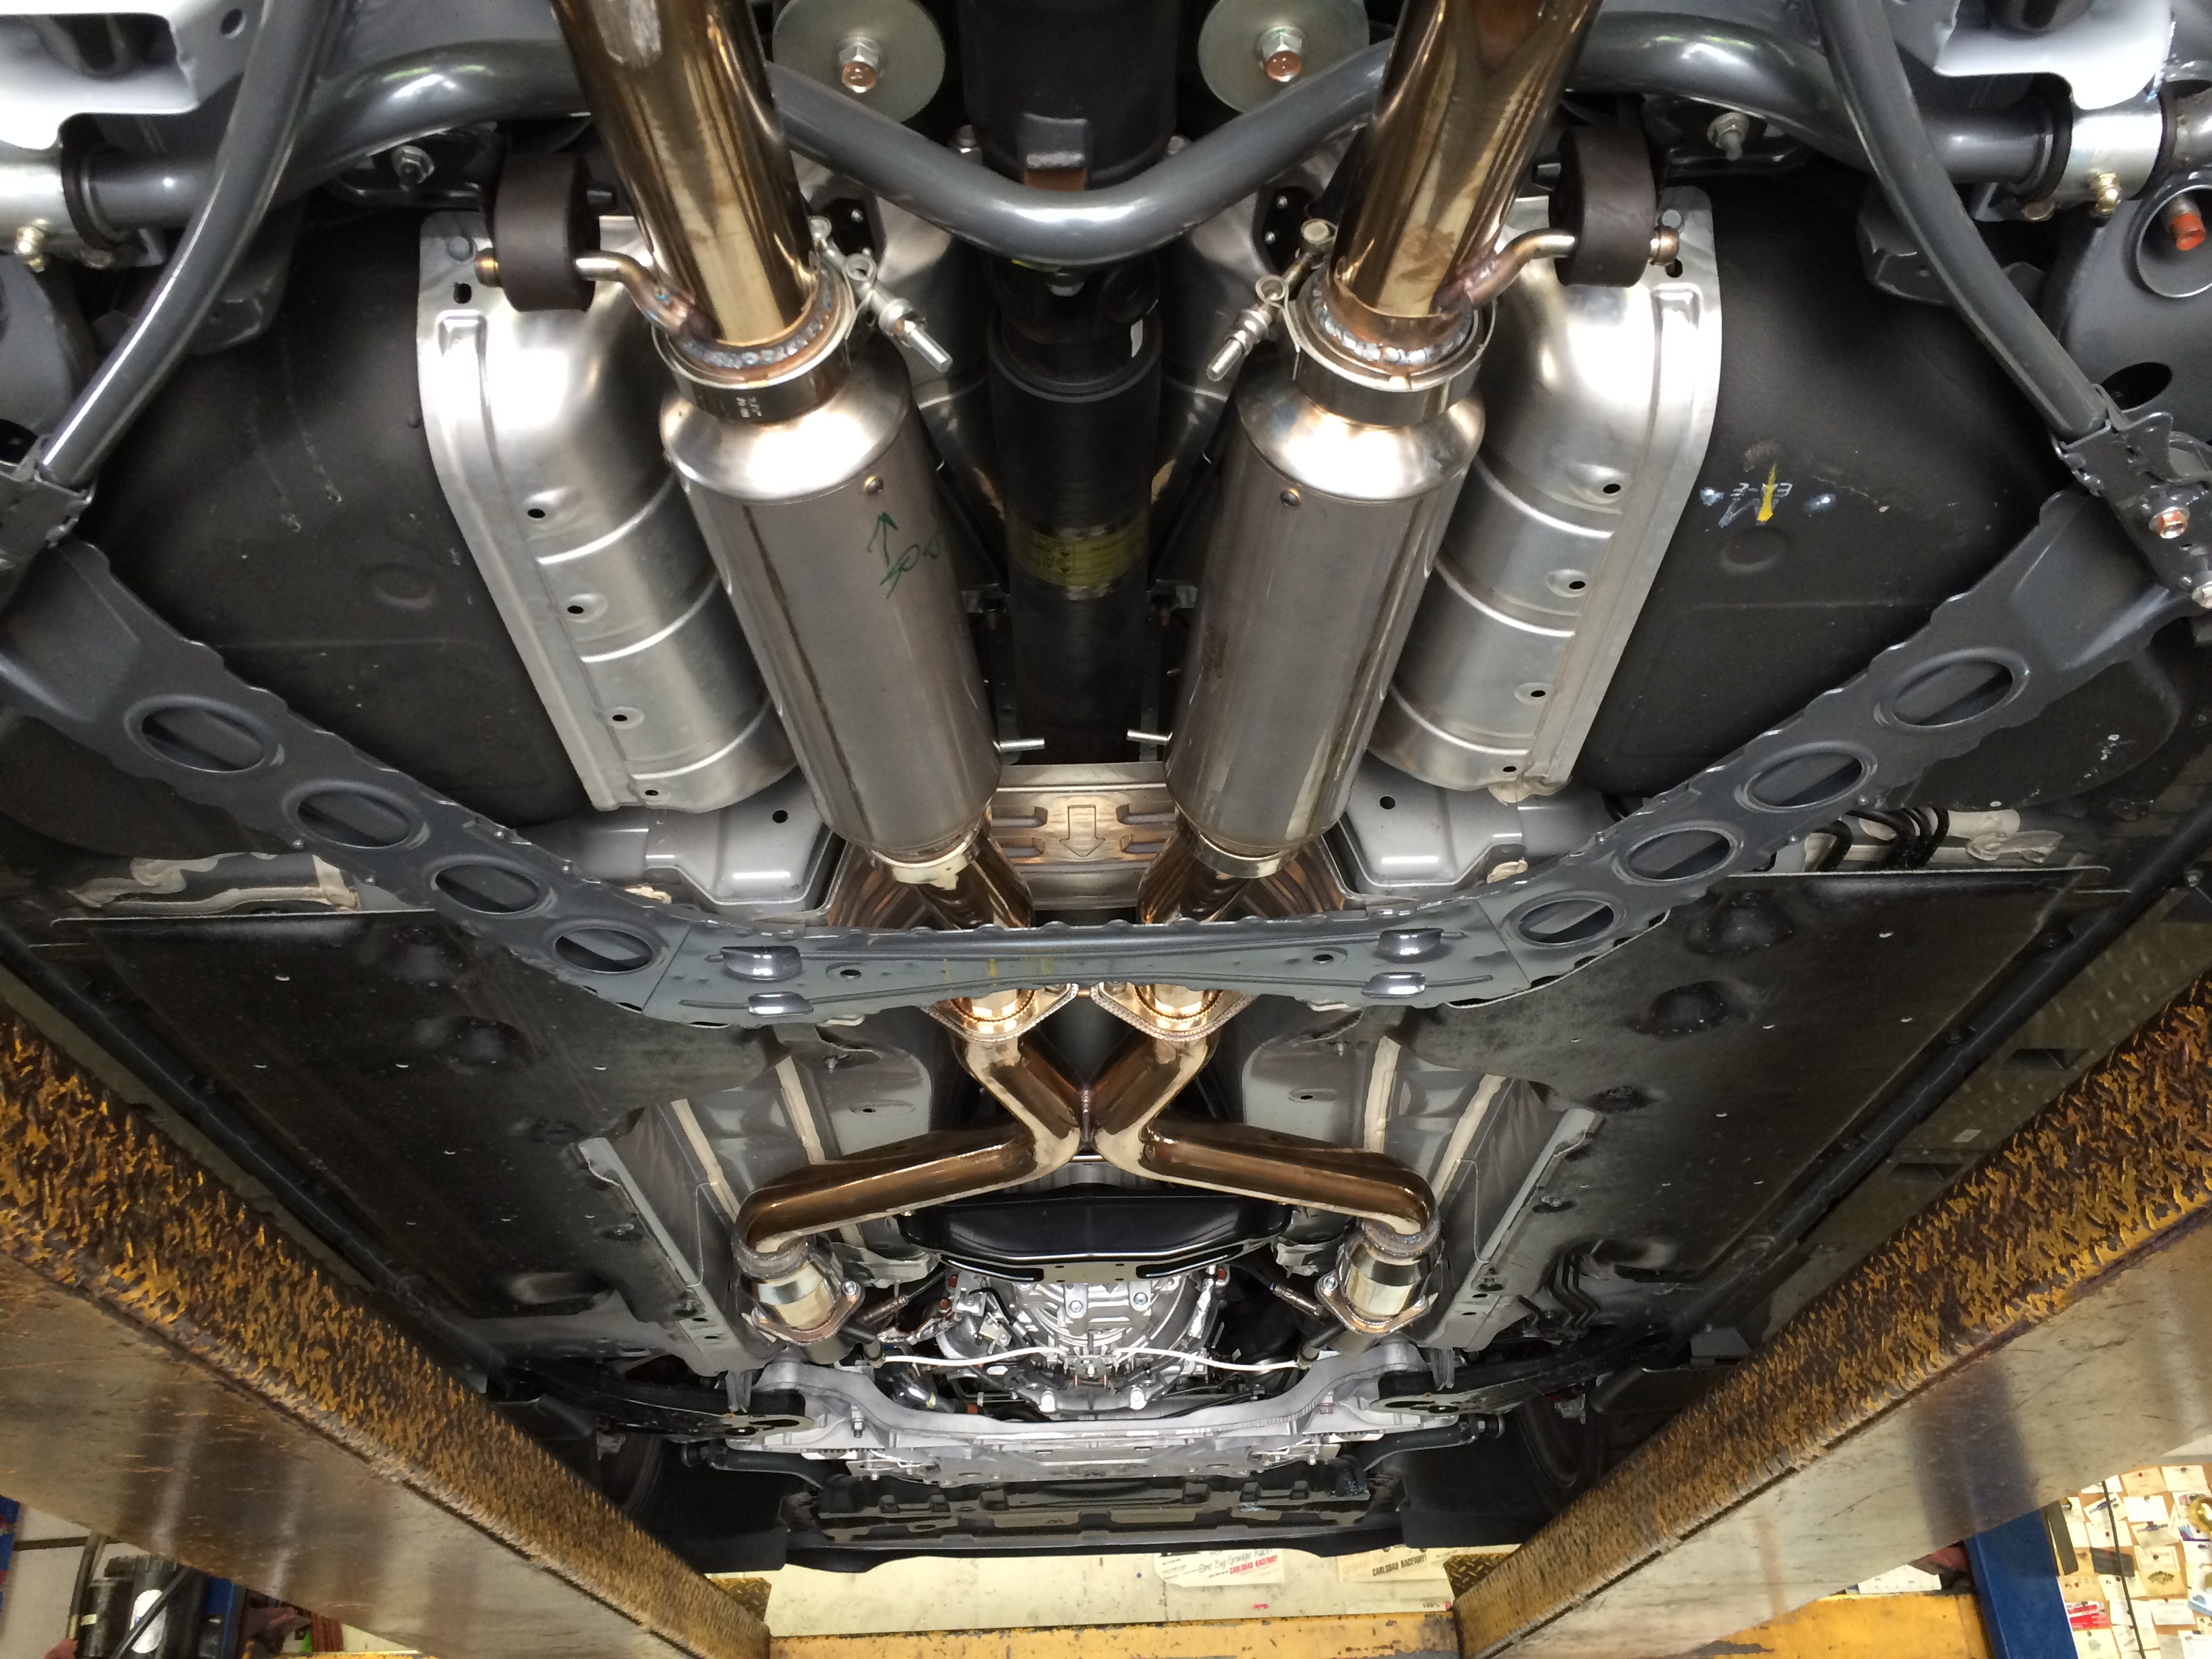
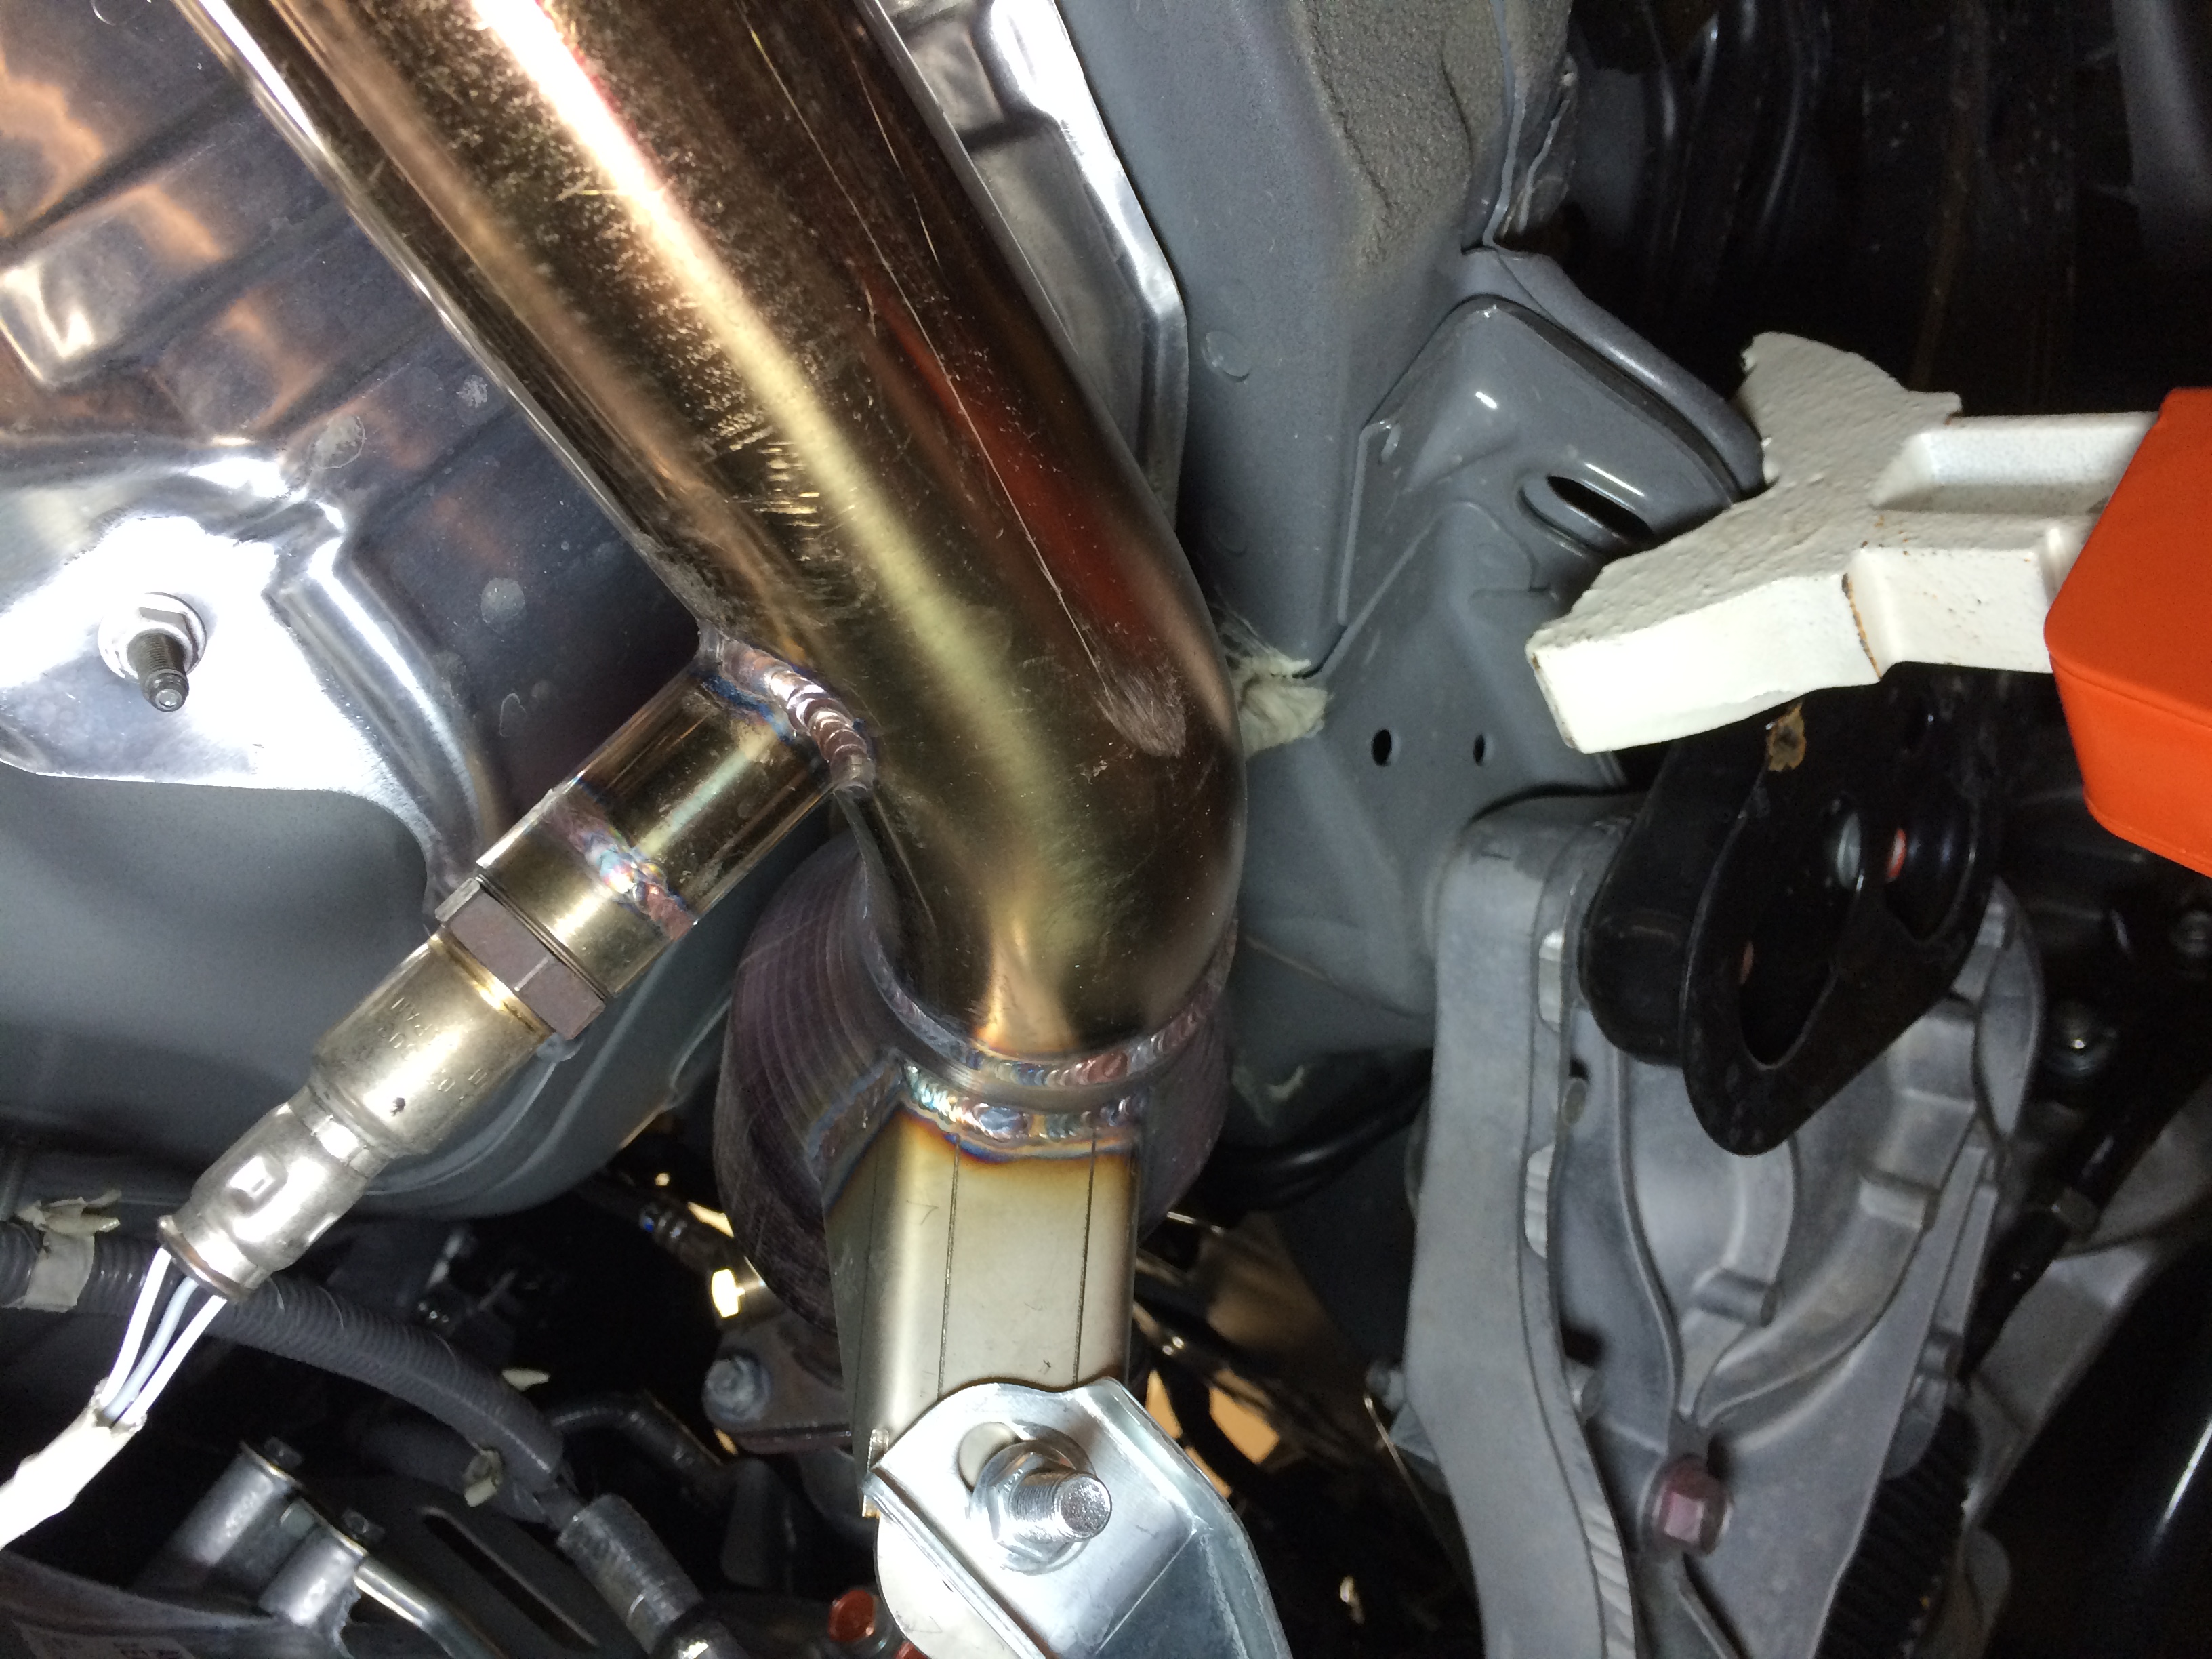
Street Touring rules allow for headers but we must retain catalytic converters no further than 6″ down the flow path from the stock unit. In the previous post detailing header install the Berk high-flow cats (which sit in roughly the stock place but are much shorter in length) went bye-bye.
Spent the morning at A&A muffler here in town (and recommend them if you need exhaust work done in San Diego) – first project was to get a new pair of high flow cats welded in just aft of the new longtubes, where the garageline mid-pipe provided a flex joint. These cats are 100cpi high-flow units from my buddy Rick at Ciro Racing. Given how far back they are, and how large and not dense their cell structure, they should be providing very little backpressure.
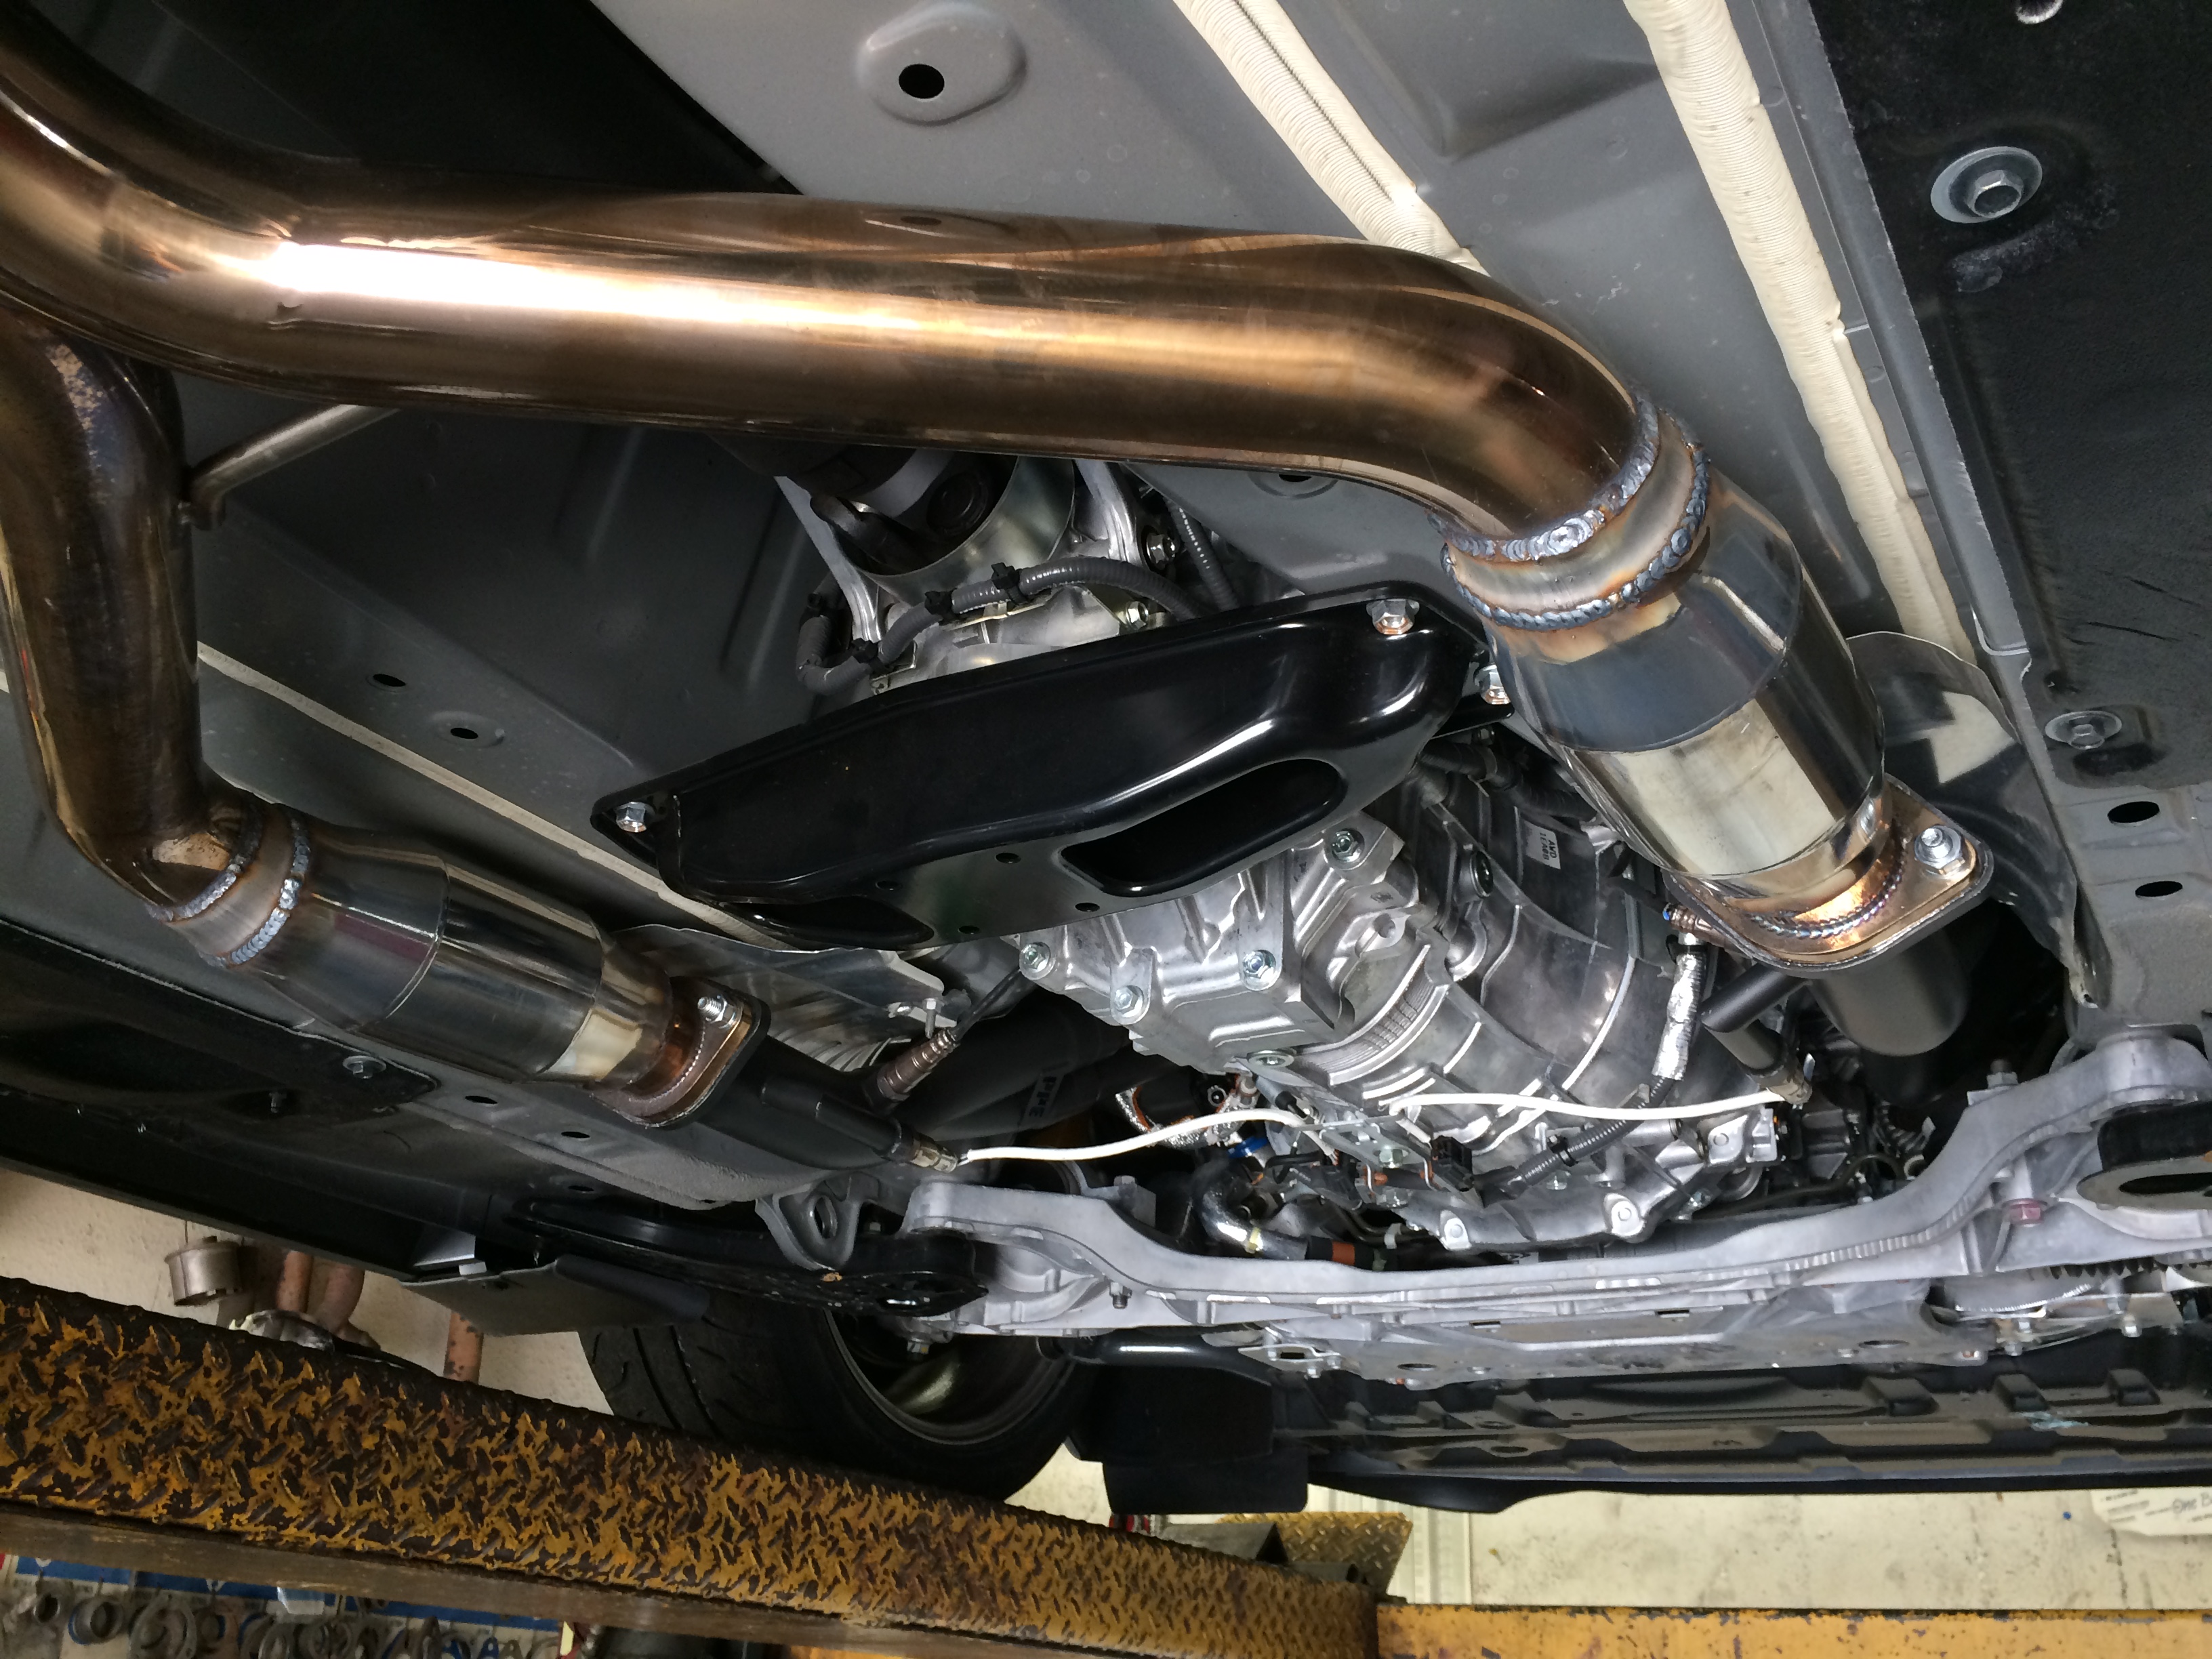
From there it was back to where garageline provided a pair of resonators. They have a ~10″ body length and help knock the noise down a little – but there’s room for more. The garageline midpipe provided a great canvas for the next evolution of the car’s exhaust.
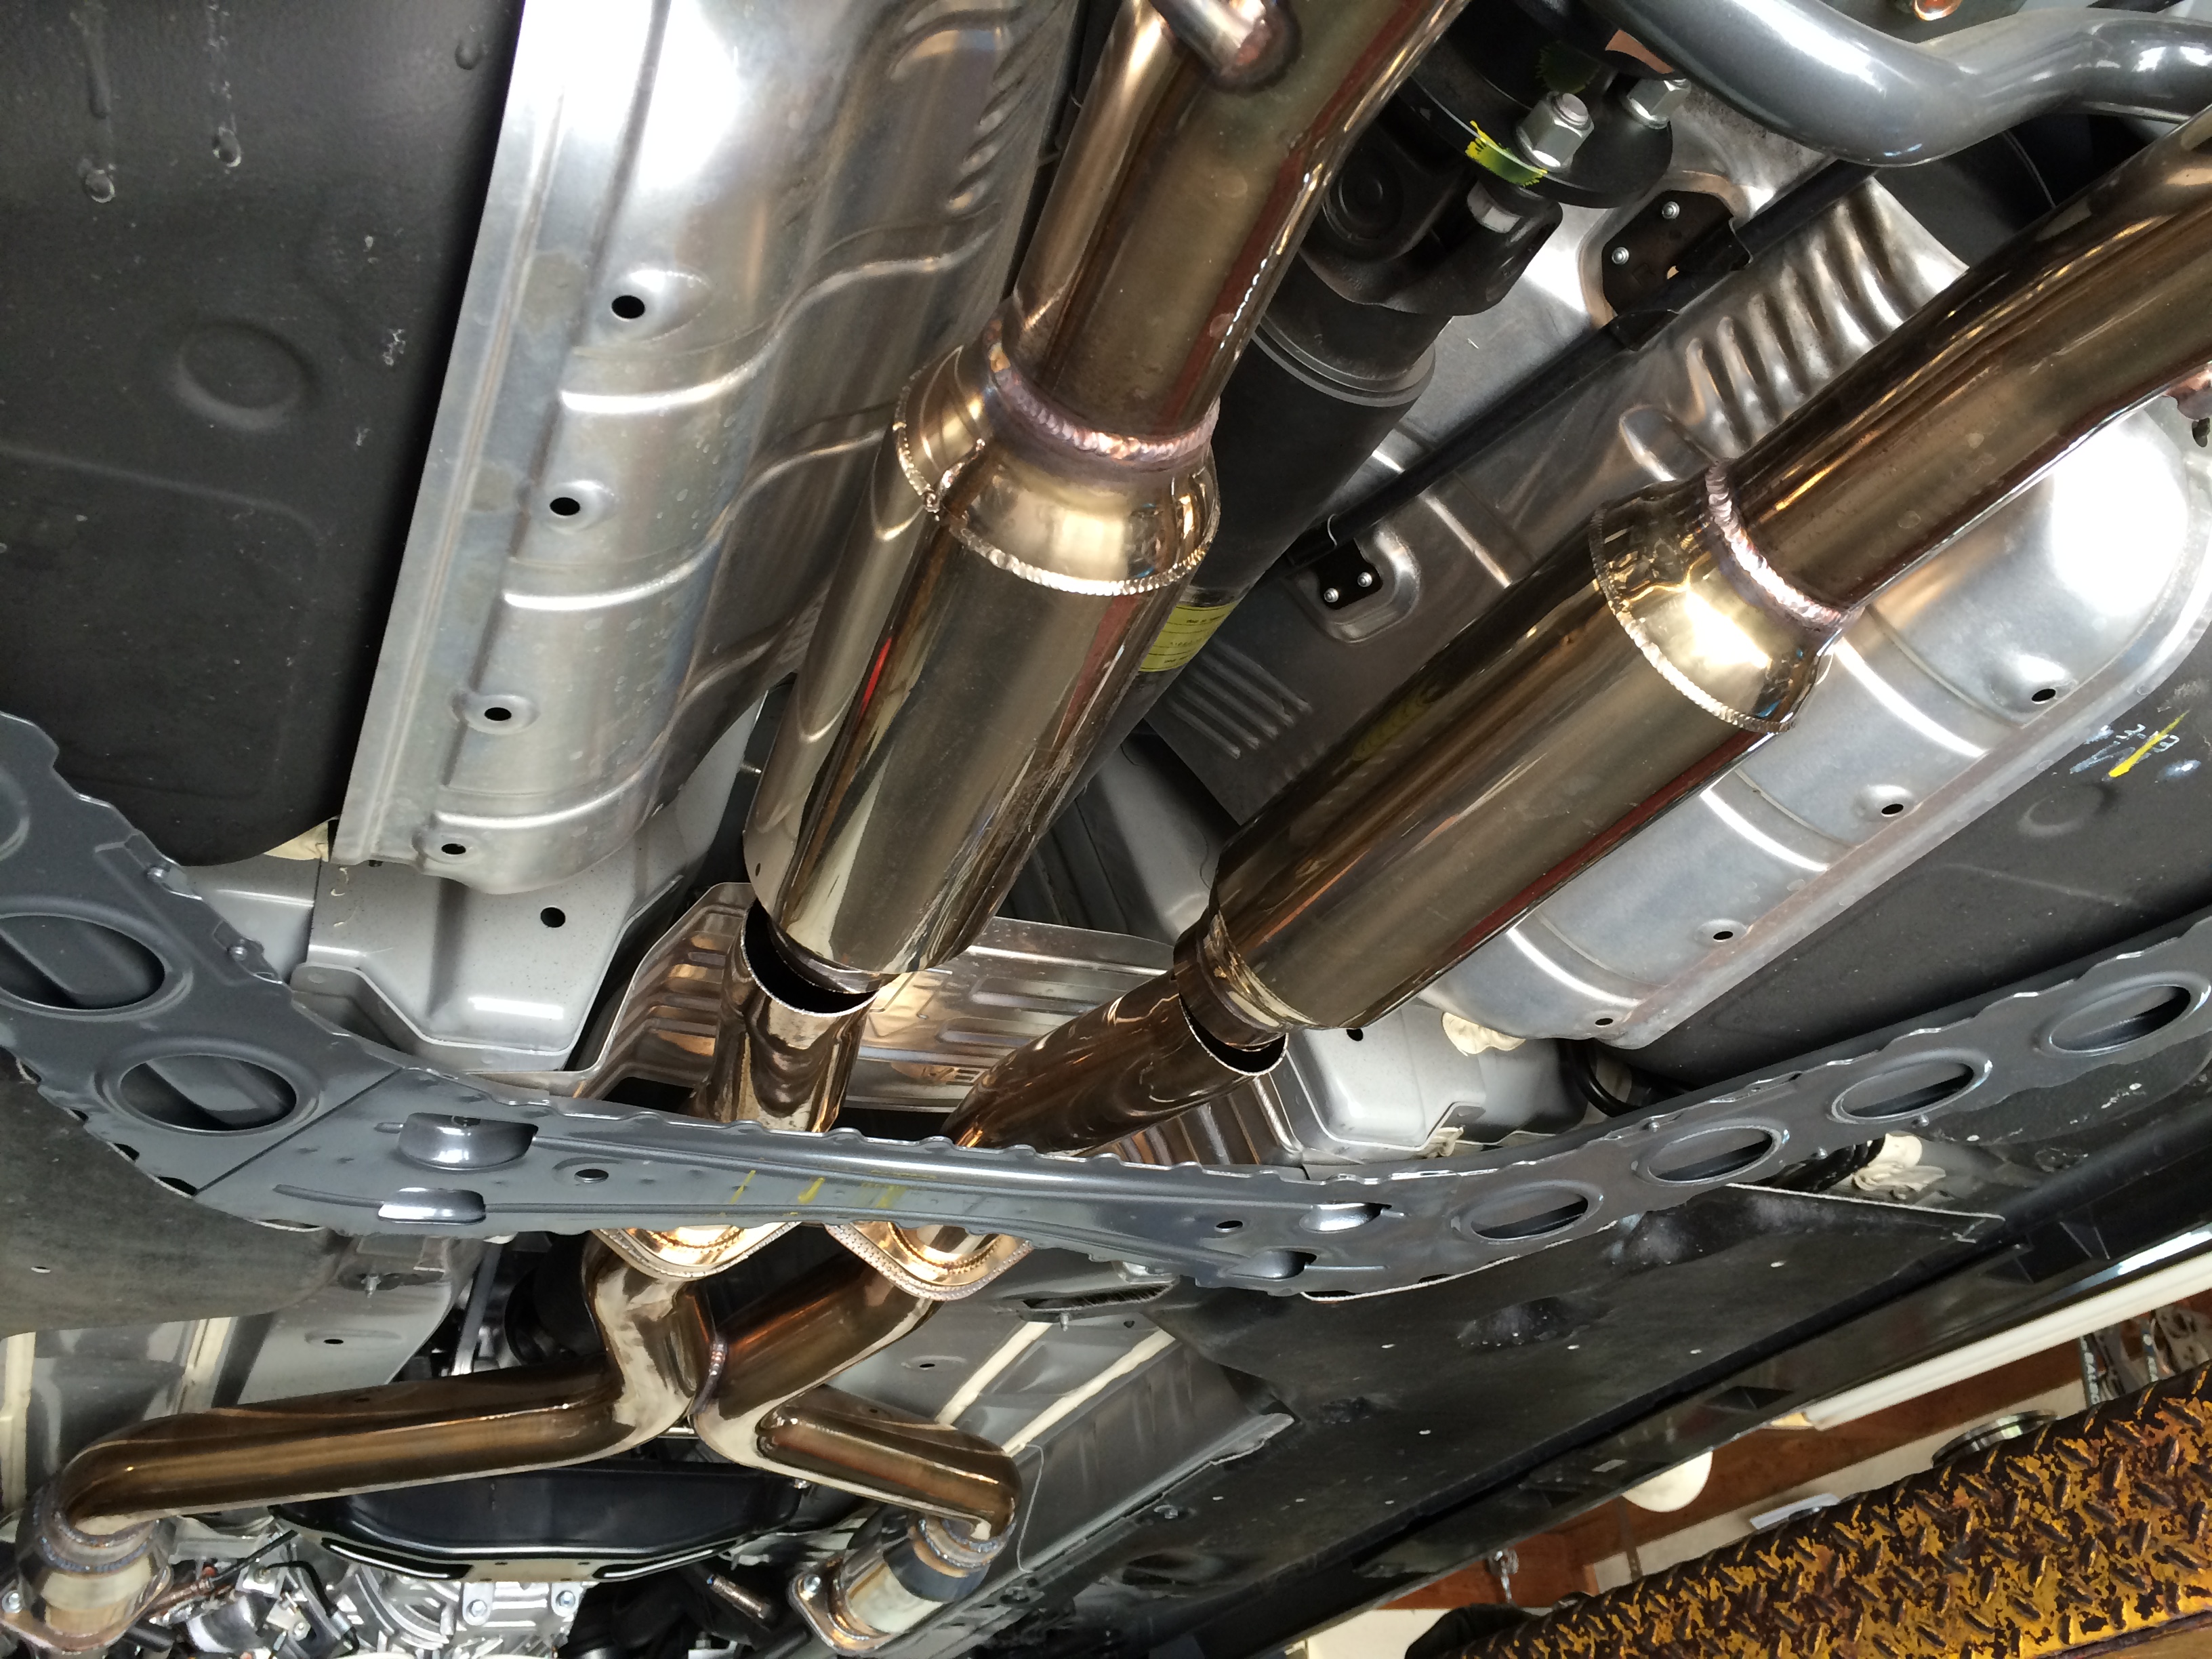
Inside view of one of the resonators removed:
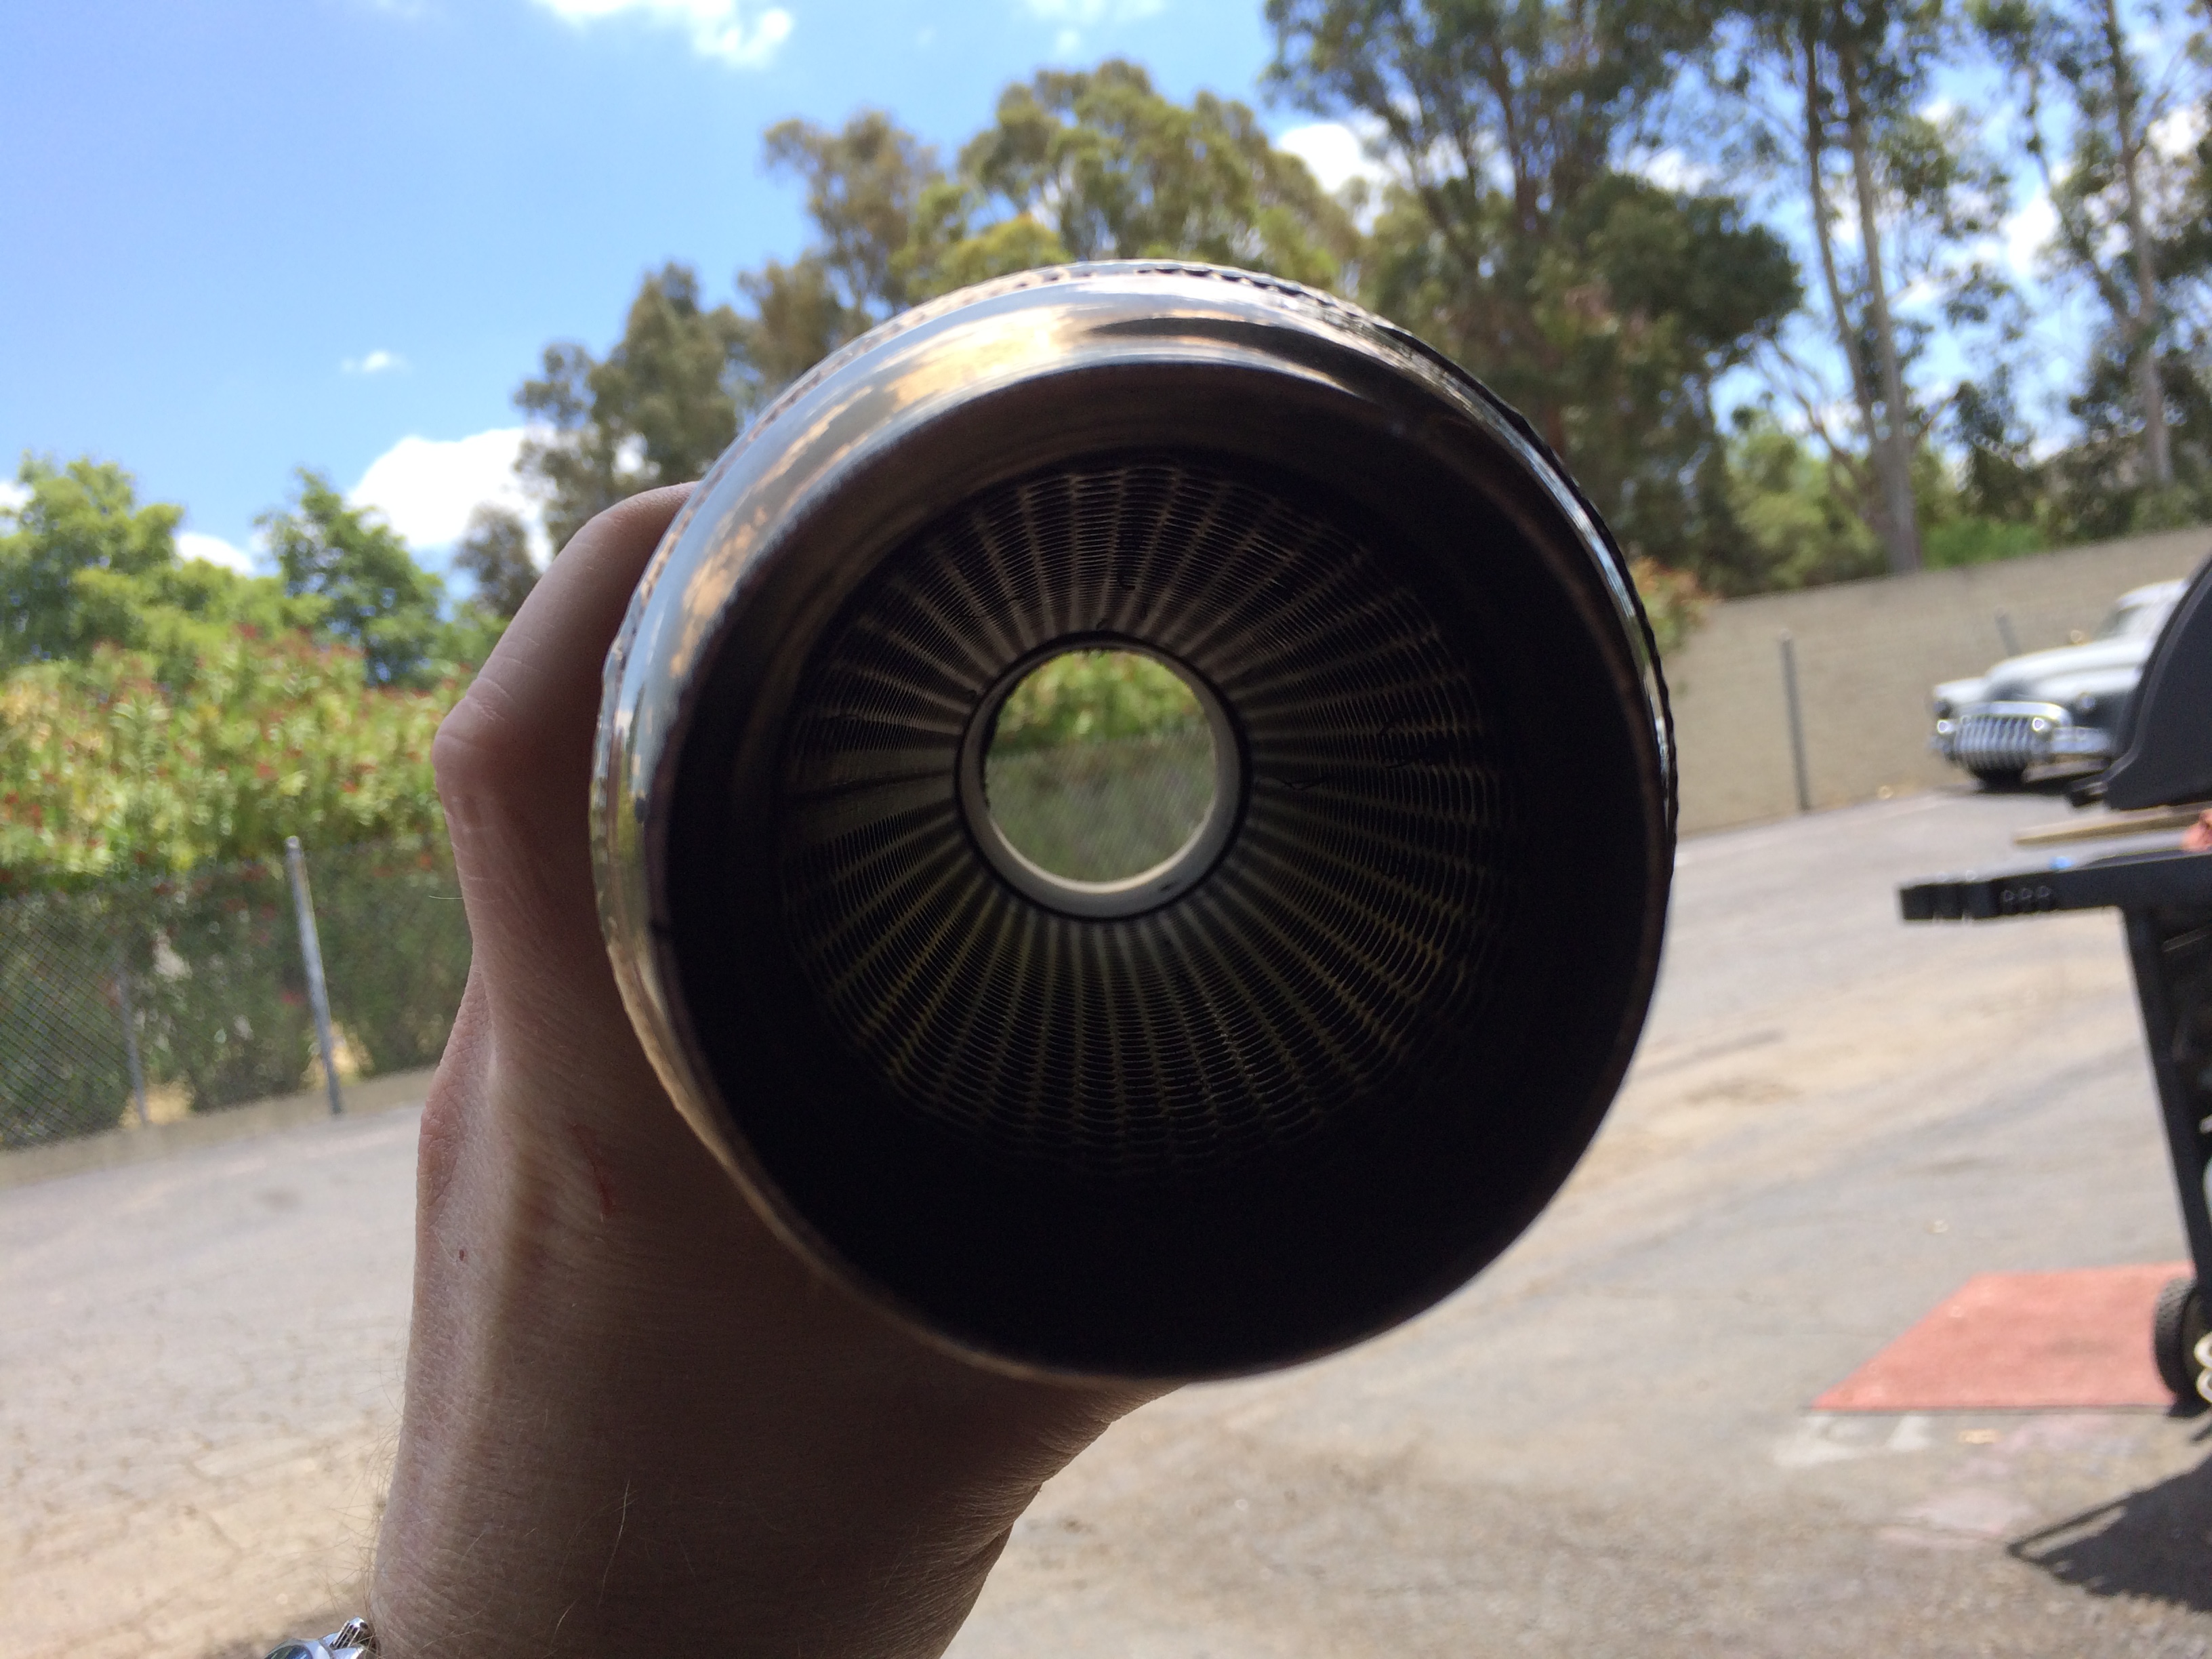
In their place, a pair of 2.5″ 17″ long Burns Stainless single-stage mufflers. Very lightweight but also very effective. Installed with v-bands to they can be swapped out for straight pipes later if needed. These mufflers *shouldn’t* cost much if any power but I didn’t back-to-back with straight pipes. I don’t think they’re any more restrictive than the resonators that were in there already.
The car is actually a little quieter now than it was before with stock manifolds, the Berks, and the unmolested garageline midpipe (kept the stock muffler on throughout). Hit 95db in San Diego with that setup – hopefully this gets it under, hard to say.
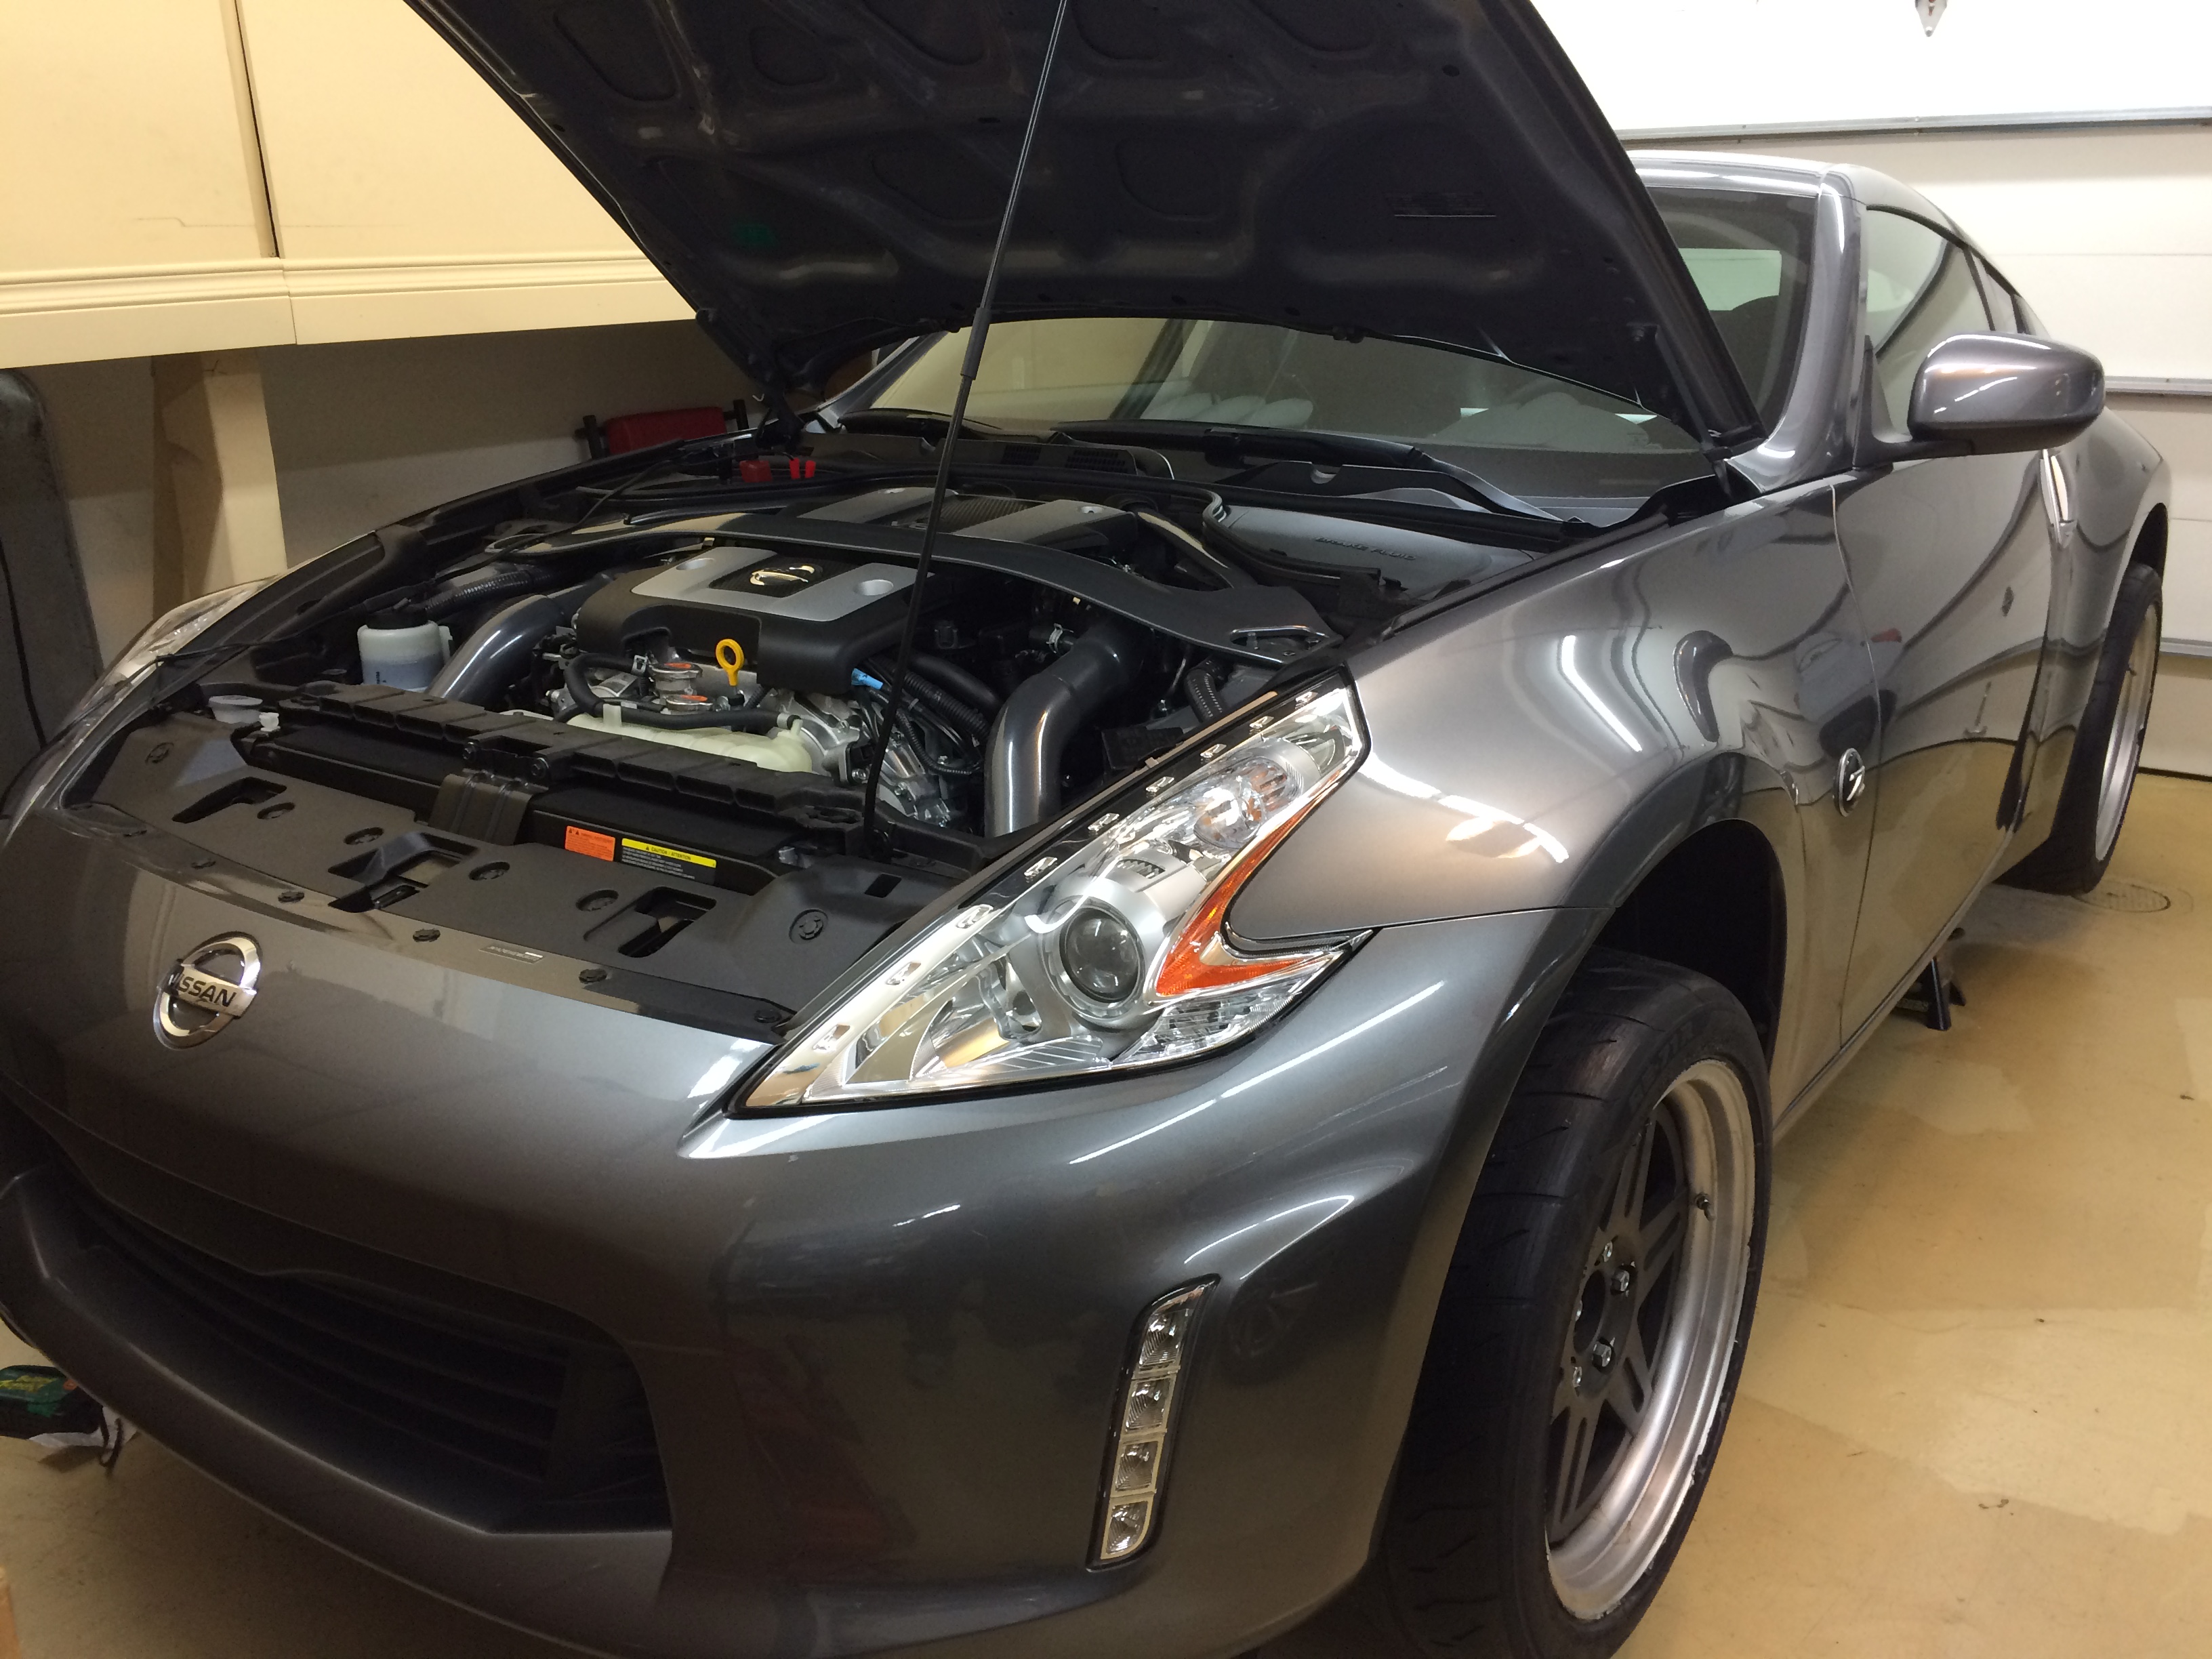
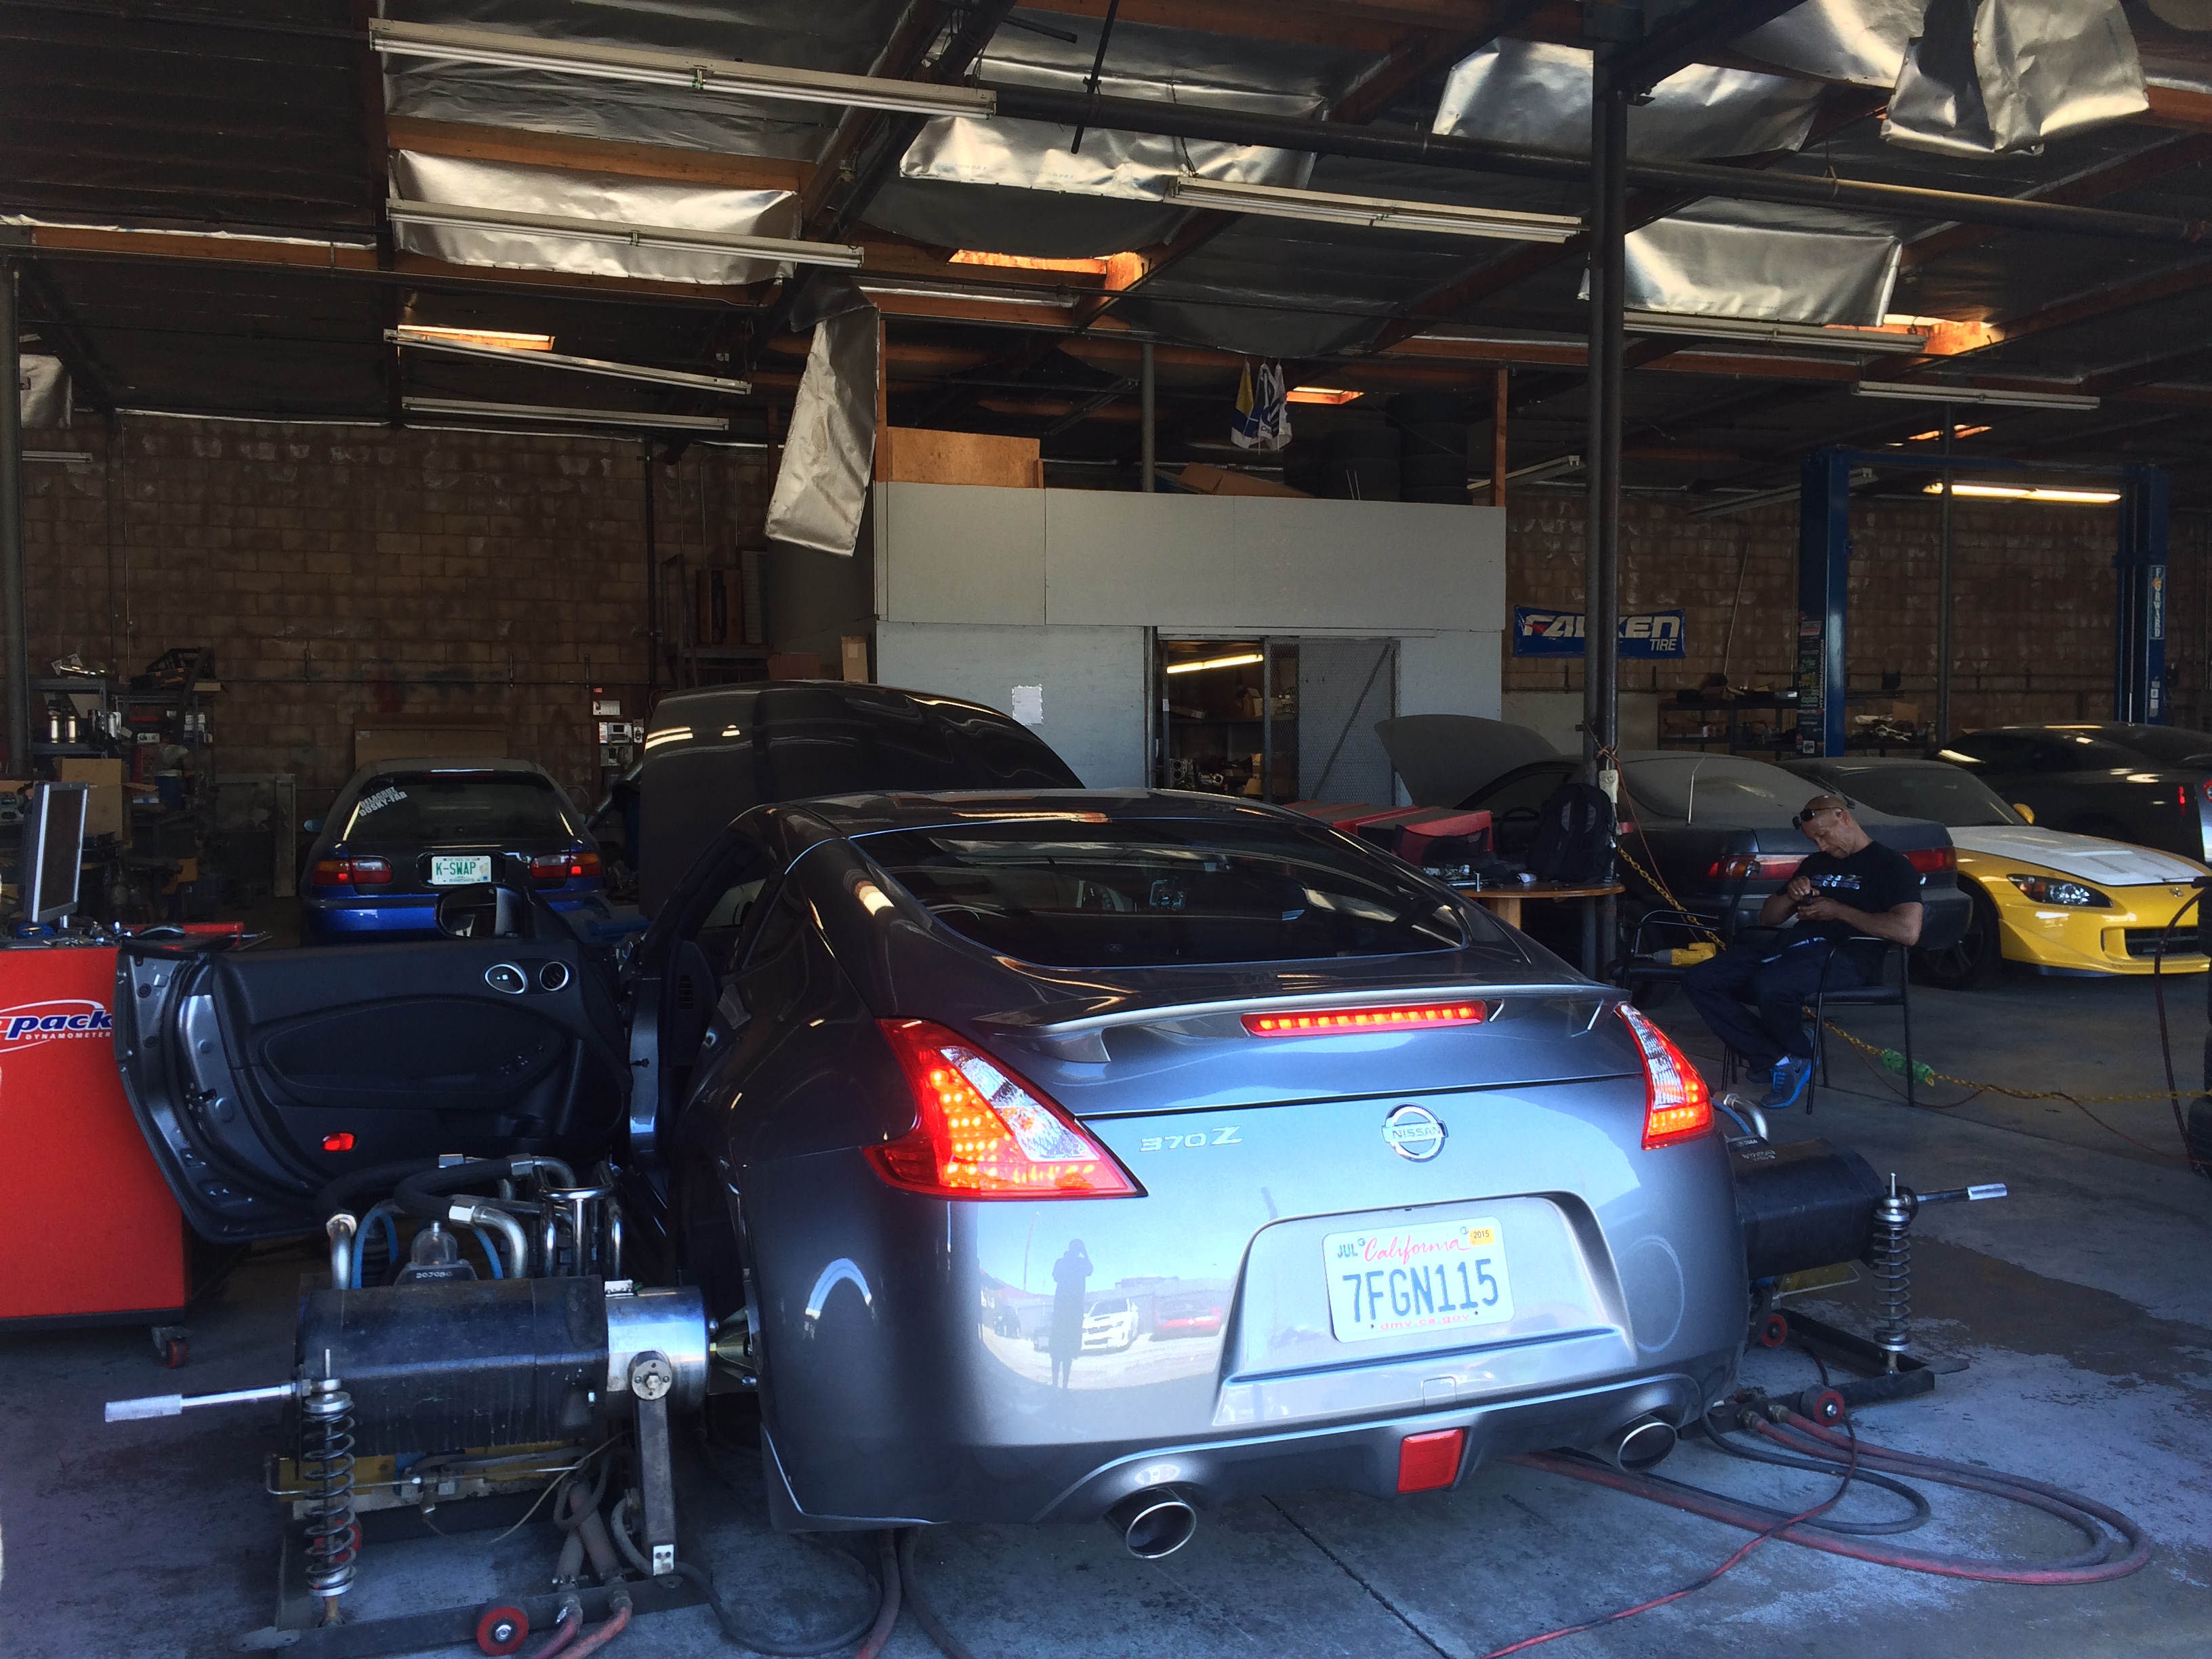
From there, 100 miles north for a dyno touch-up at Shawn Church’s in LA. This is probably maxing out the iPhone microphone, but believe it or now, was a noticeably a little quieter than last time.
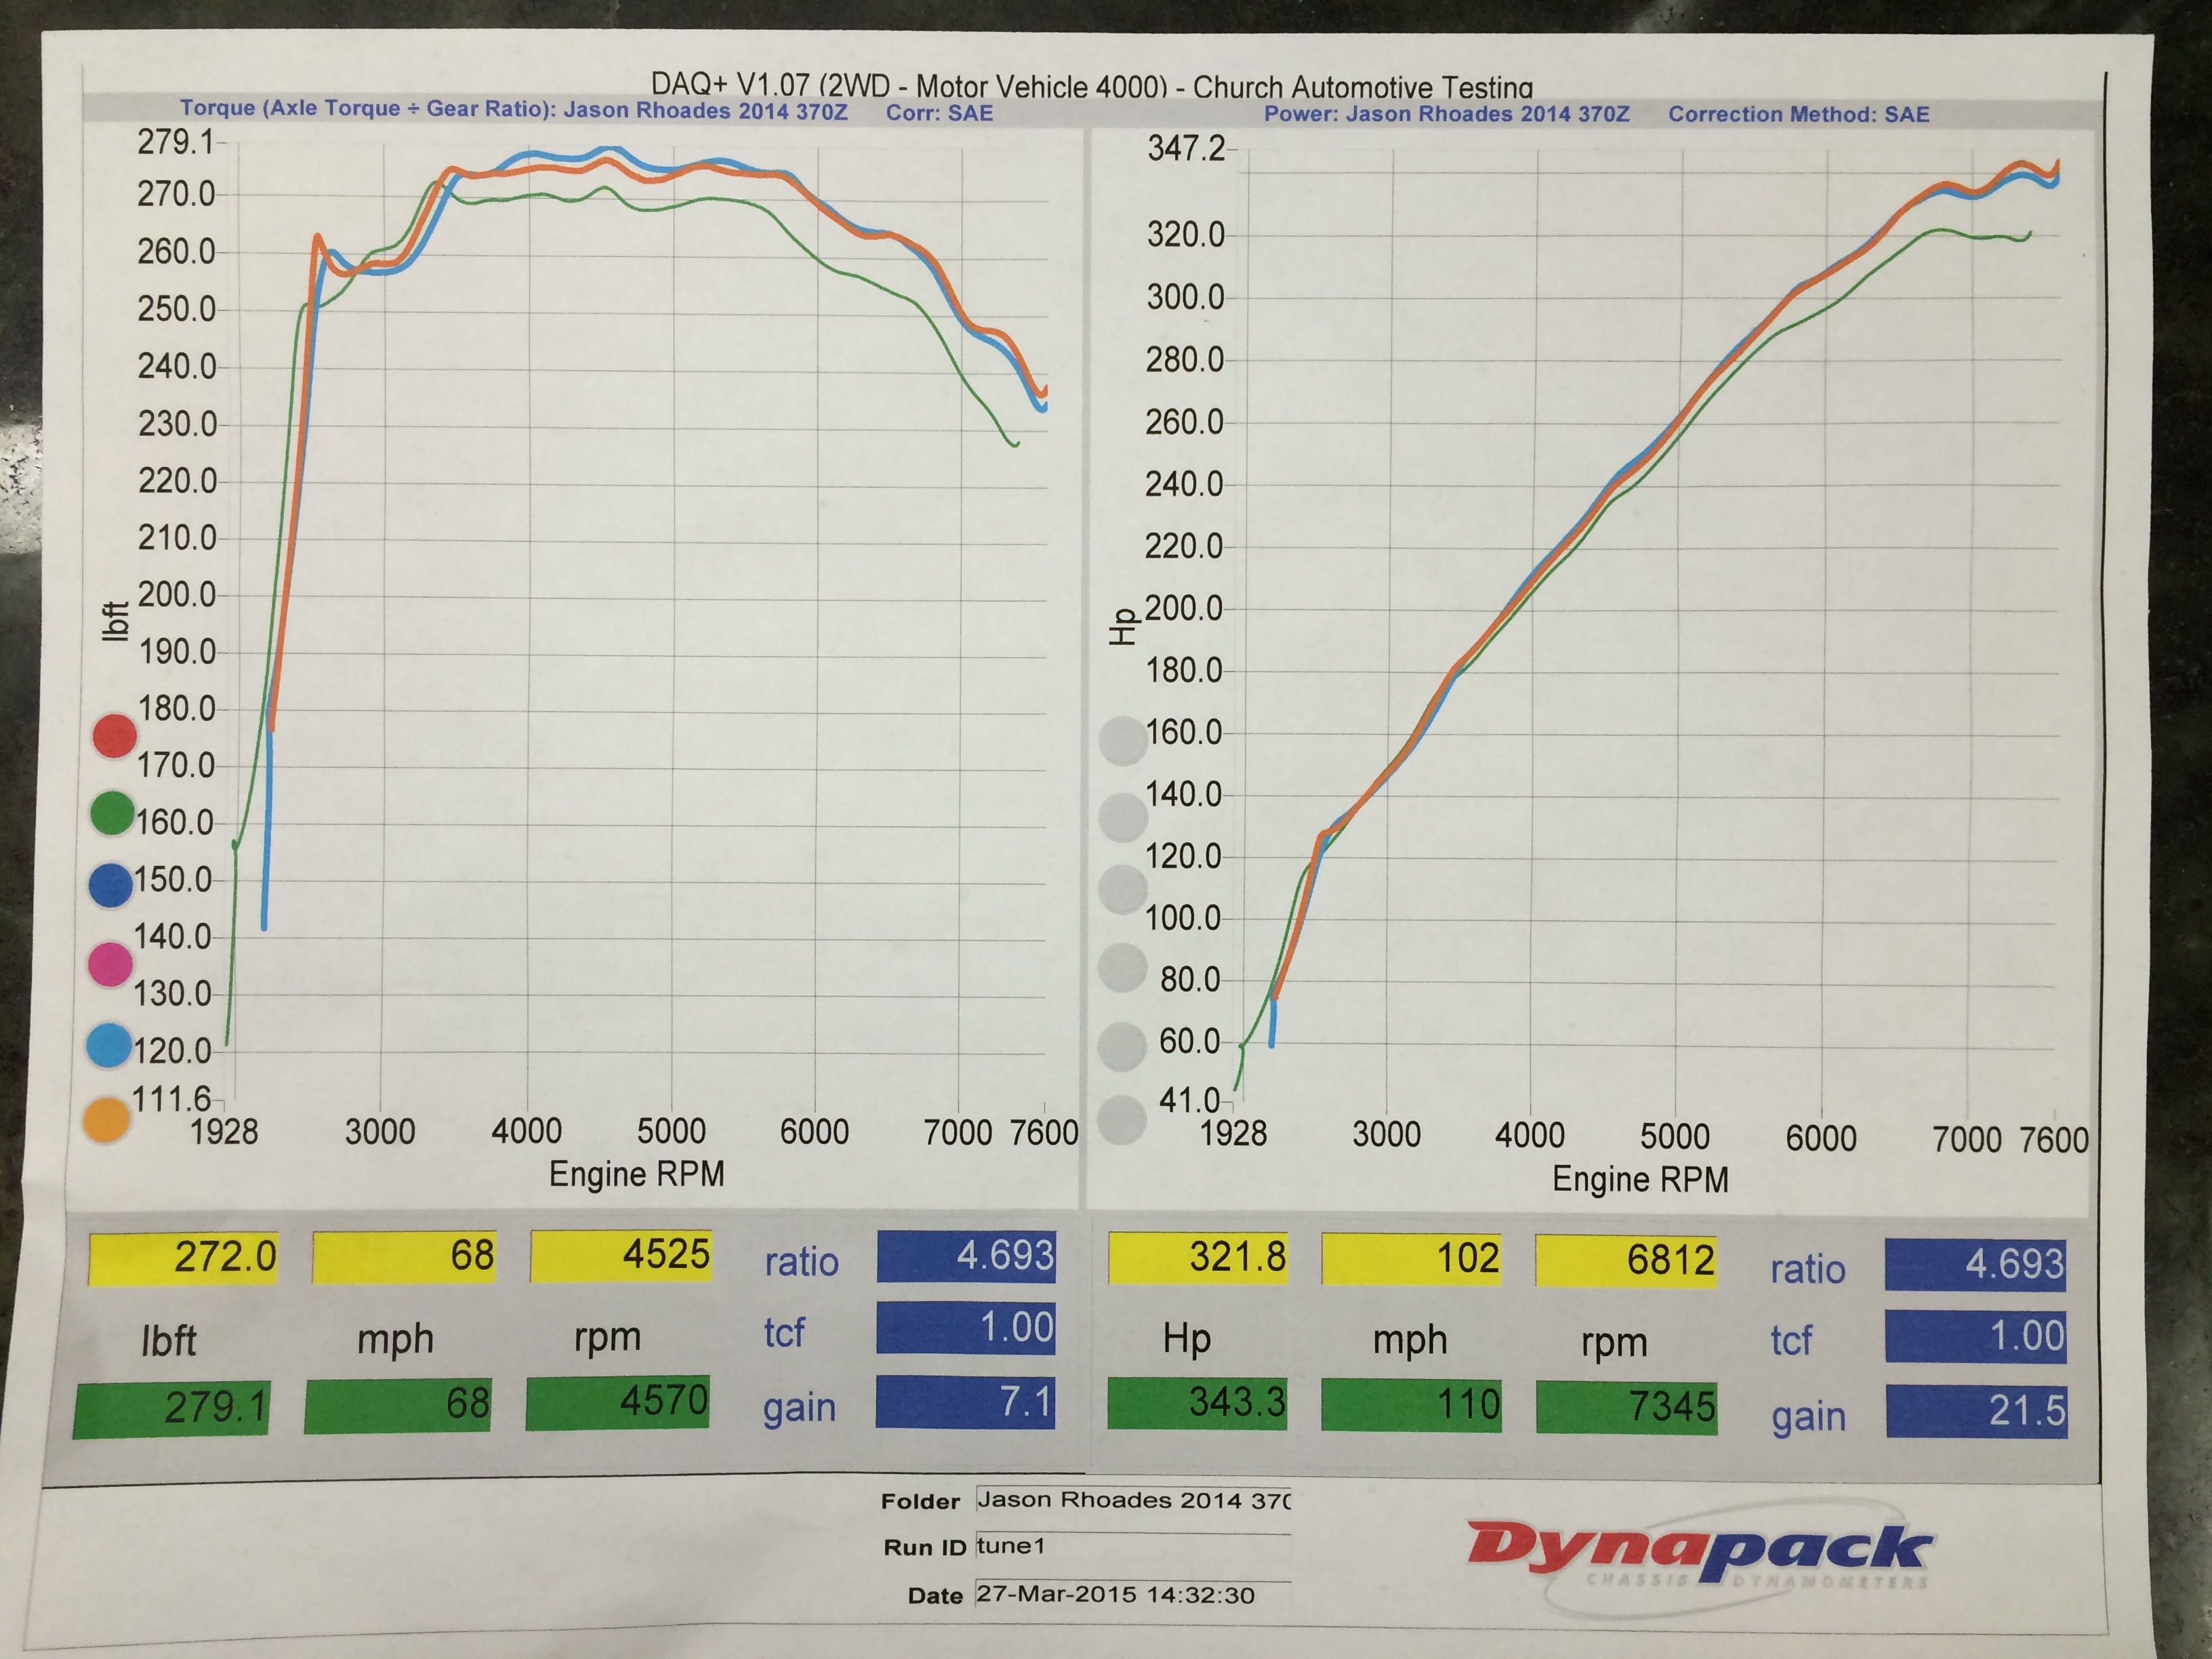
Here’s how she did:
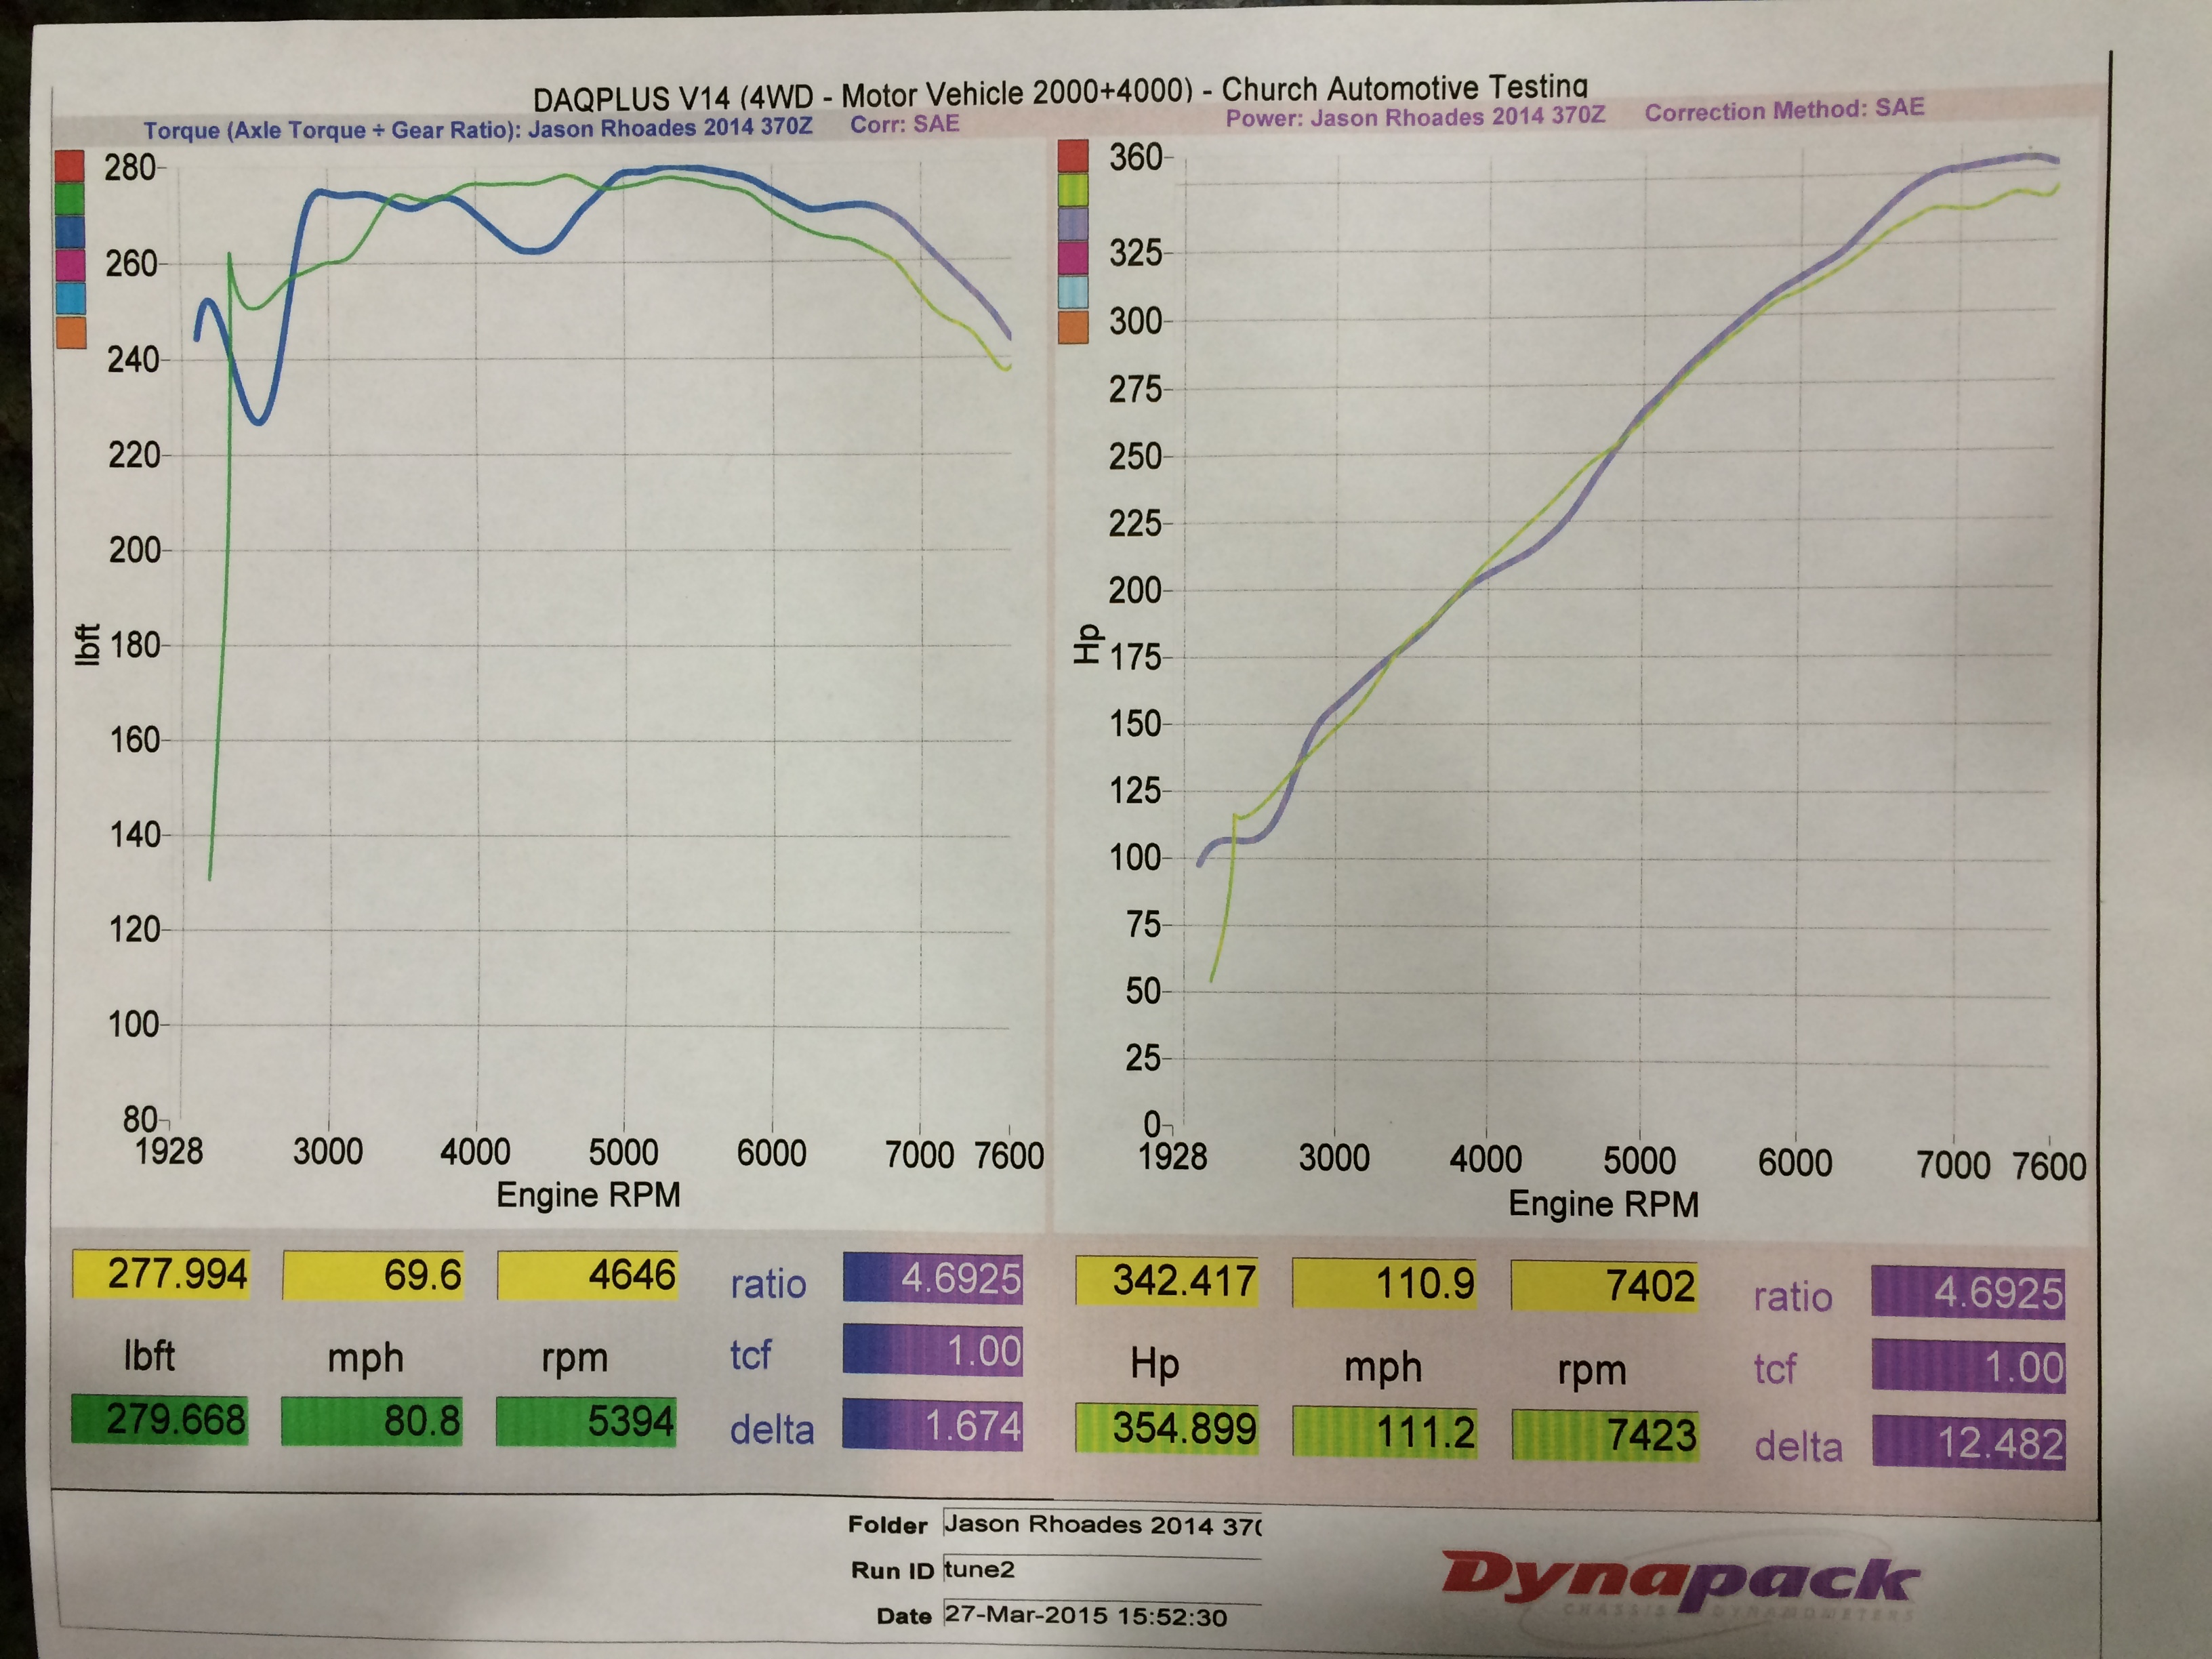
The bummer point first – there’s a new 1000rpm-wide torque dip centered around 4400rpm. I don’t know that I’ve seen this before on other Z’s with longtubes – need to keep looking. I suppose it’s possible it’s some artifact of either the new cats or mufflers, but it’s so pronounced, hard to say. It was actually worse than this on the first couple tunes, this is the result with the dip minimized via tuning.
Two good areas more than make up for it. First is the far left, from ~2800-3500rpm – those are some real gains, something like 15ft-lbs. in places. With the car’s gearing it does ~8.8mph per 1000rpm, so our slowest corners (~25mph) work out to about 2850rpm.
The car is stronger once out of the dip all the way to redline, especially above 6000. It doesn’t seem as coarse and choked as it did from the factory, now it zings all the way to the top. Makes the car a lot more fun to wring out, with the sounds it made stock, it sounded like you were hurting it, now it seems to love to rev 🙂
The sound is a little bit “buzzy”, not sure how else to describe it. You can kinda hear it in the video. 370 folks who switch to high-flow cats hear a buzz on decel through certain parts of the rev range – the car now does that everywhere. There’s a bit of vibration through the pedal at 3500rpm under heavy throttle but nothing terrible. Glad I kept the stock motor and trans mounts!
Last thought on another benefit – the headers saved 10 pounds over the stock manifolds + Berk HFC.
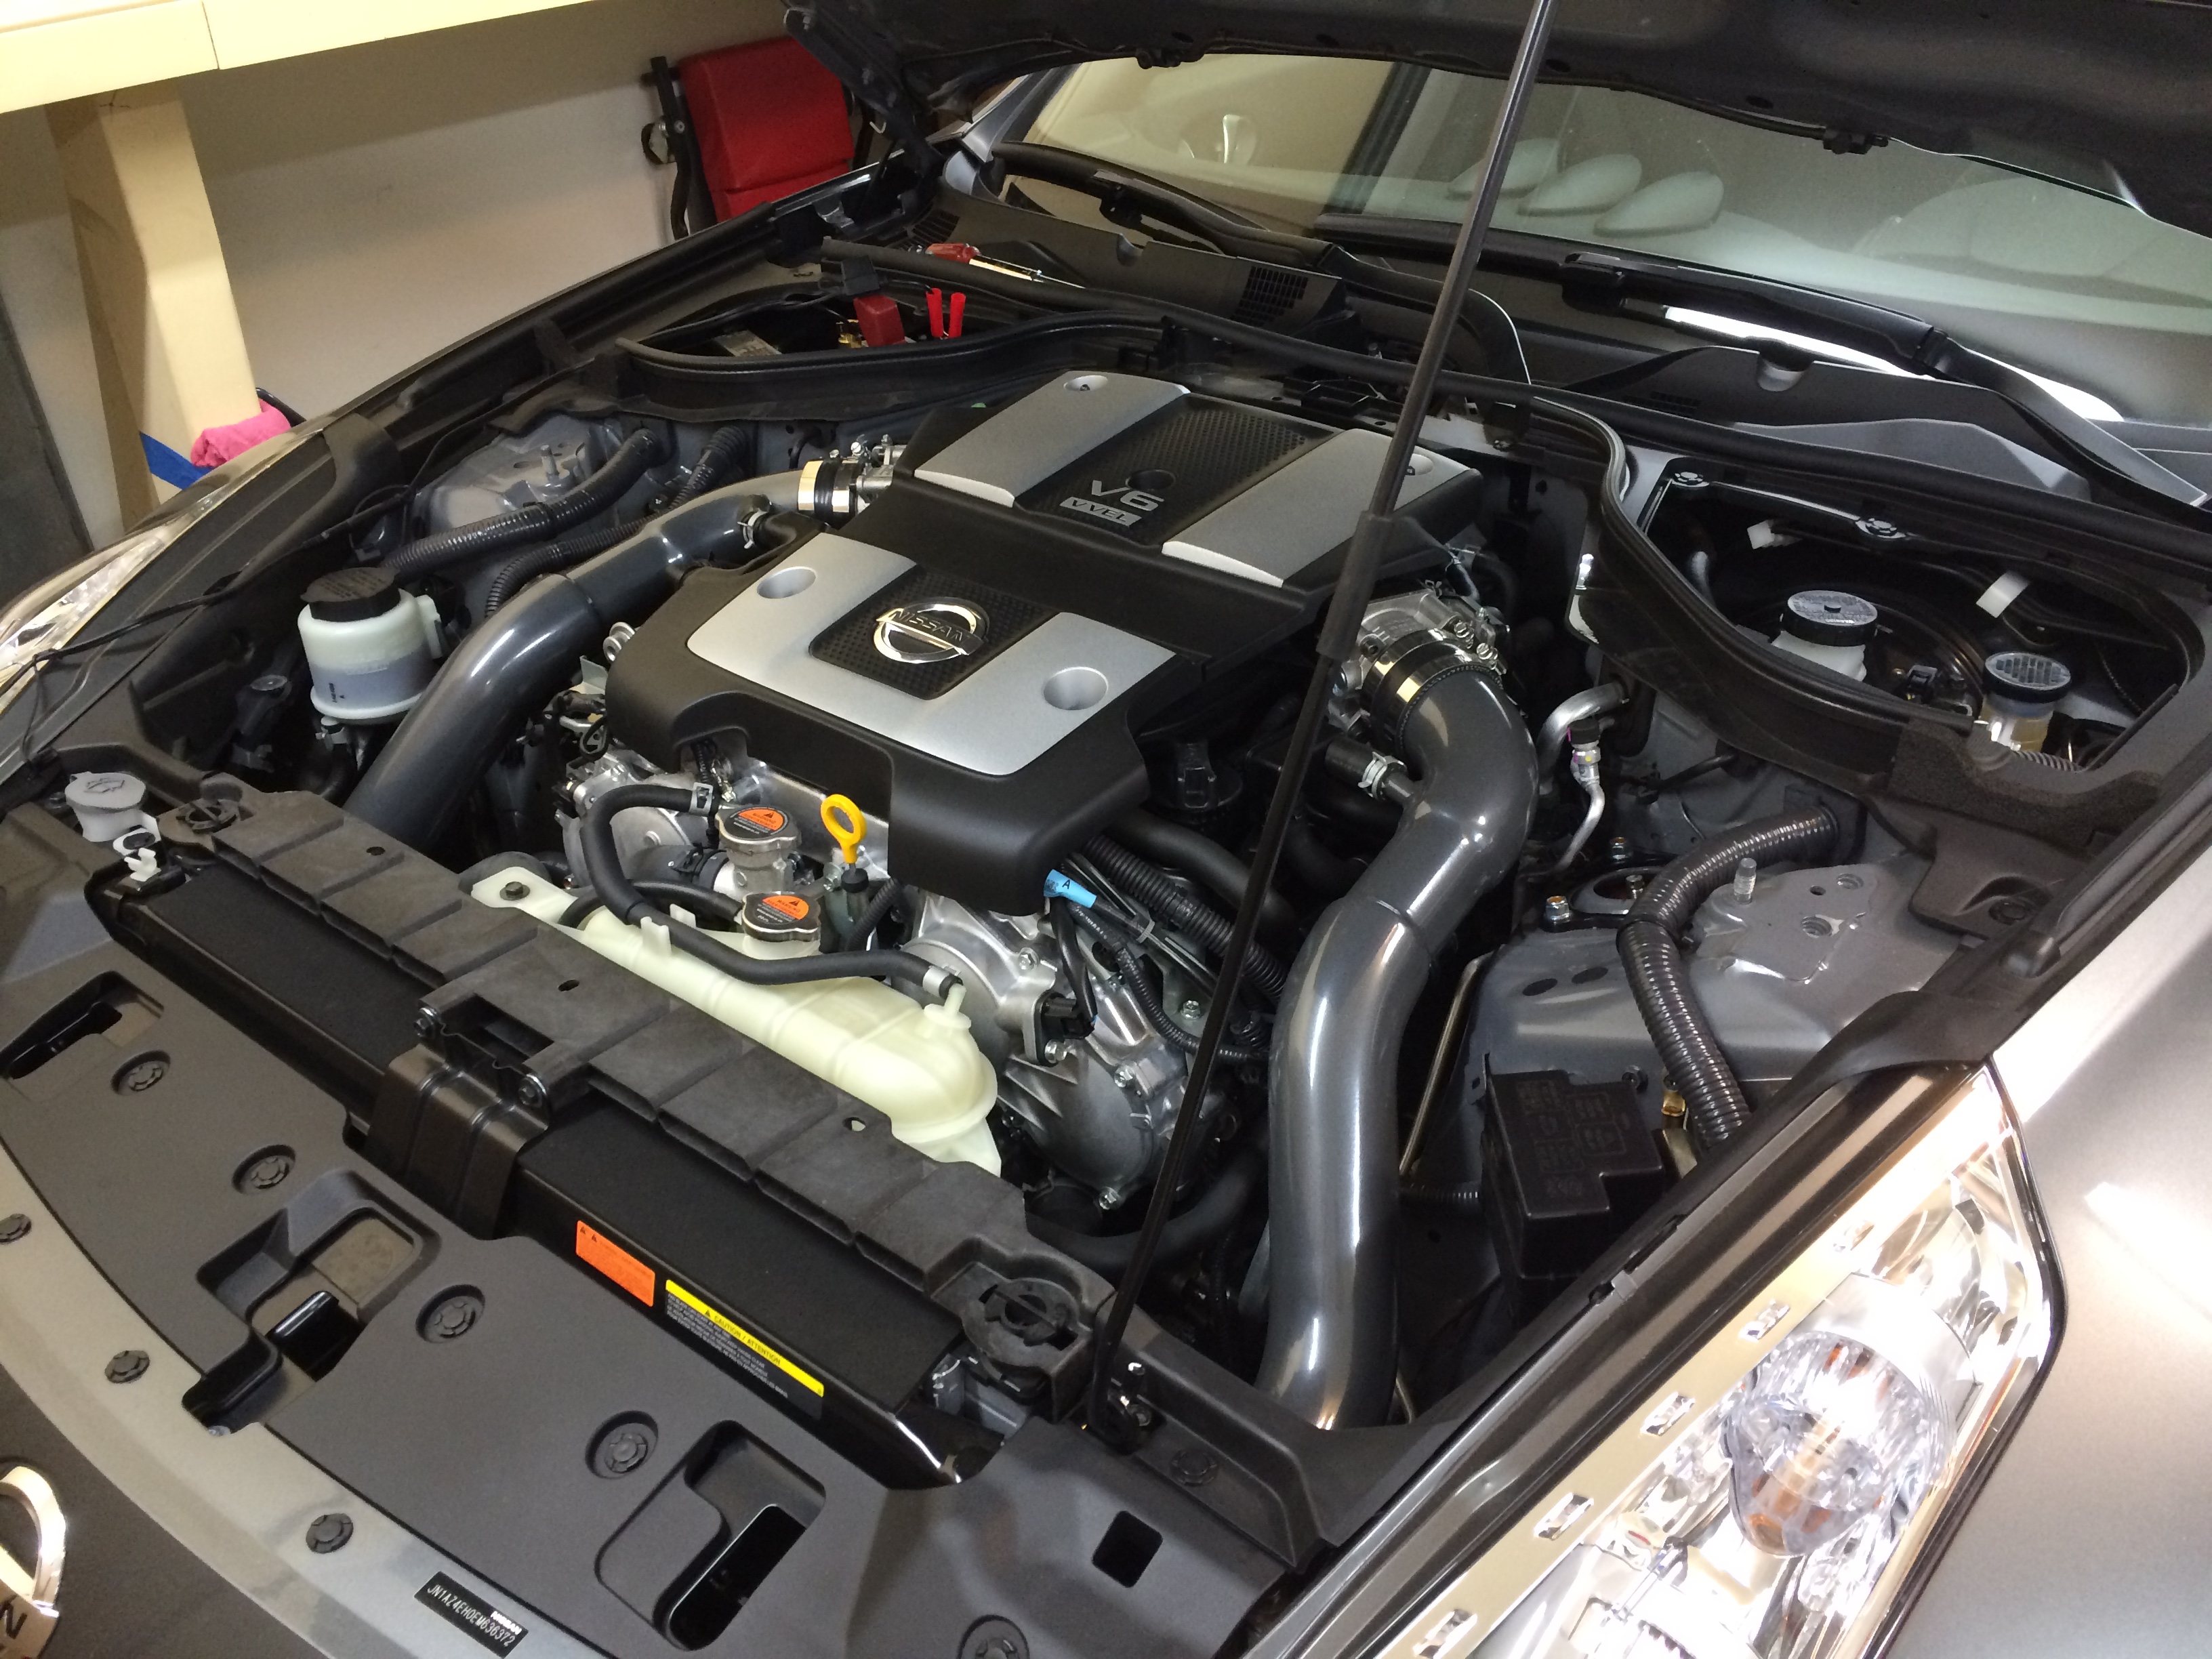
PPE Long-Tube Header install
This is one of the more gnarly projects for these cars. Headers, particularly long-tubes, can be tricky to install on any car but it’s especially the case with the 370.
I’ve read a few stories of people working through it, but haven’t seen the journey well documented yet. Tried to take a lot of photos and mental notes along the way.
By myself using jackstands, it took me about 12 hours to do it over 5 evenings. I work pretty slowly and made some oopsies along the way, but at the same time my car only has 1400 miles and I didn’t have any issues with stripped/rusted/seized fasteners. I’ve seen people pay anywhere from $600-1000 to shops to do the install – point being, have a good idea of what your own time is worth to you before beginning.
1: get the car in the air
2: remove factory strut bar. You don’t have to remove all the panels at rear, just the middle portion. Nuts and bolts are 14mm
Step 3: View of the driver’s side heat shield. Held in with 4x 10mm bolts. Got to all of them from above.
4: View of the passenger heat shield. Same thing, 4x10mm bolts accessed from above. Both heat shields come out up/forward.
5: Time to get underneath the car. There are about 8,000 10mm/phillips bolts holding in the undertray, with three of the push-snaps in the middle. Easiest to remove all the bolts and the snaps last so it isn’t hitting you in the face half the time.
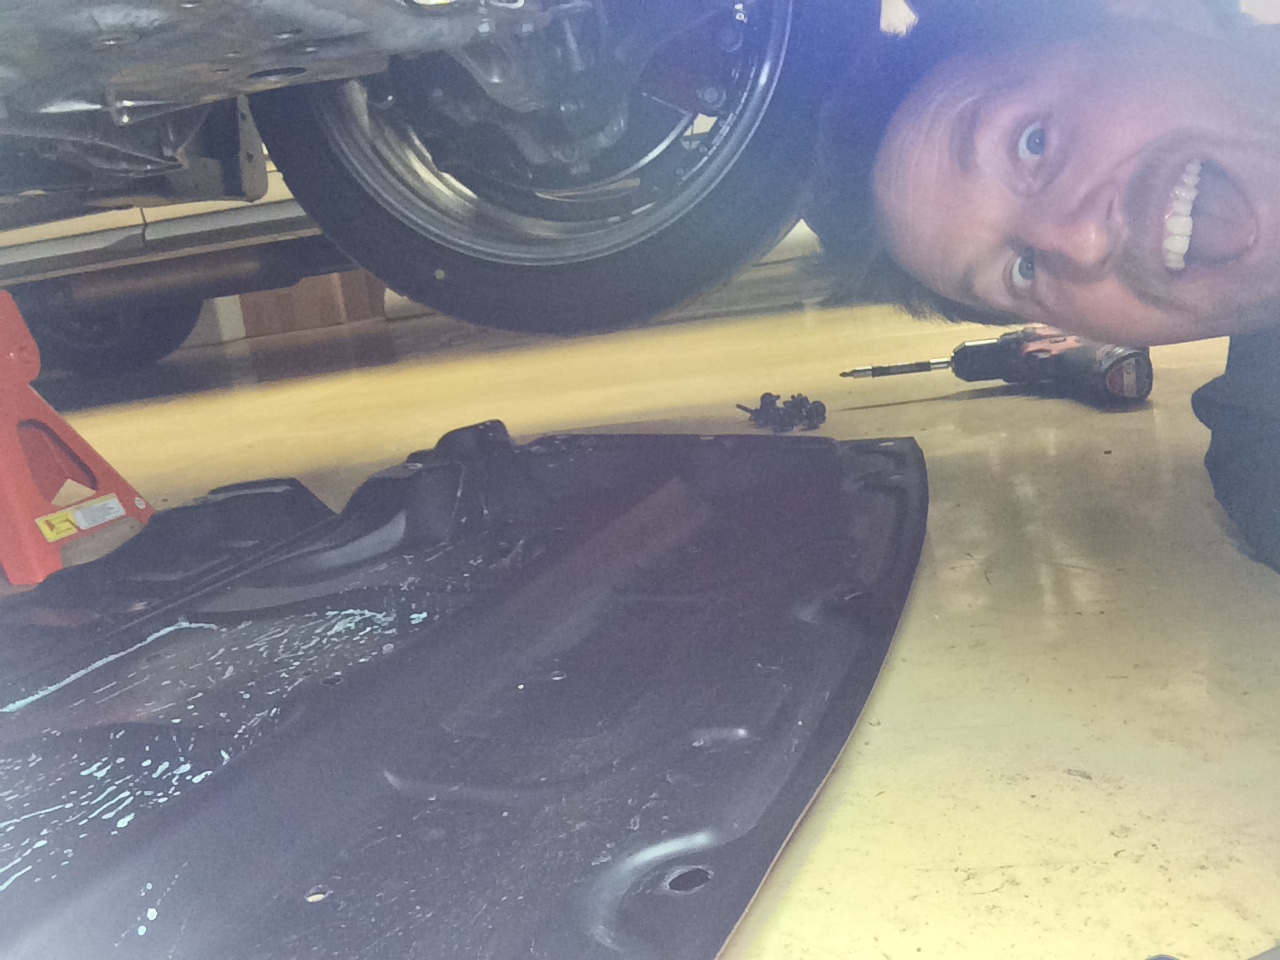
Better be still smiling here, if not you better turn back!
6: Before shot of the cats. Car already has Berk HFC on it, but the stock would look similar here.
7: Passenger cat “before”. Cat removal/replacement is covered in HFC install DIY articles. Some people have removed the OE headers keeping the cats attached, and I suppose you could. The Berks came back off pretty easily.
8: Driver’s side “before”. Little bit busier in there 🙂
9: Passenger cat out. With the HFC you can get to all three fasteners from underneath which is nice, no crazy 3′ snake of extenders like you have to do when removing the OE cats.
10: Driver’s side out. Only a little tougher than passenger.
The above took me about 2 hours, that was evening 1.
Evening 2 begin:
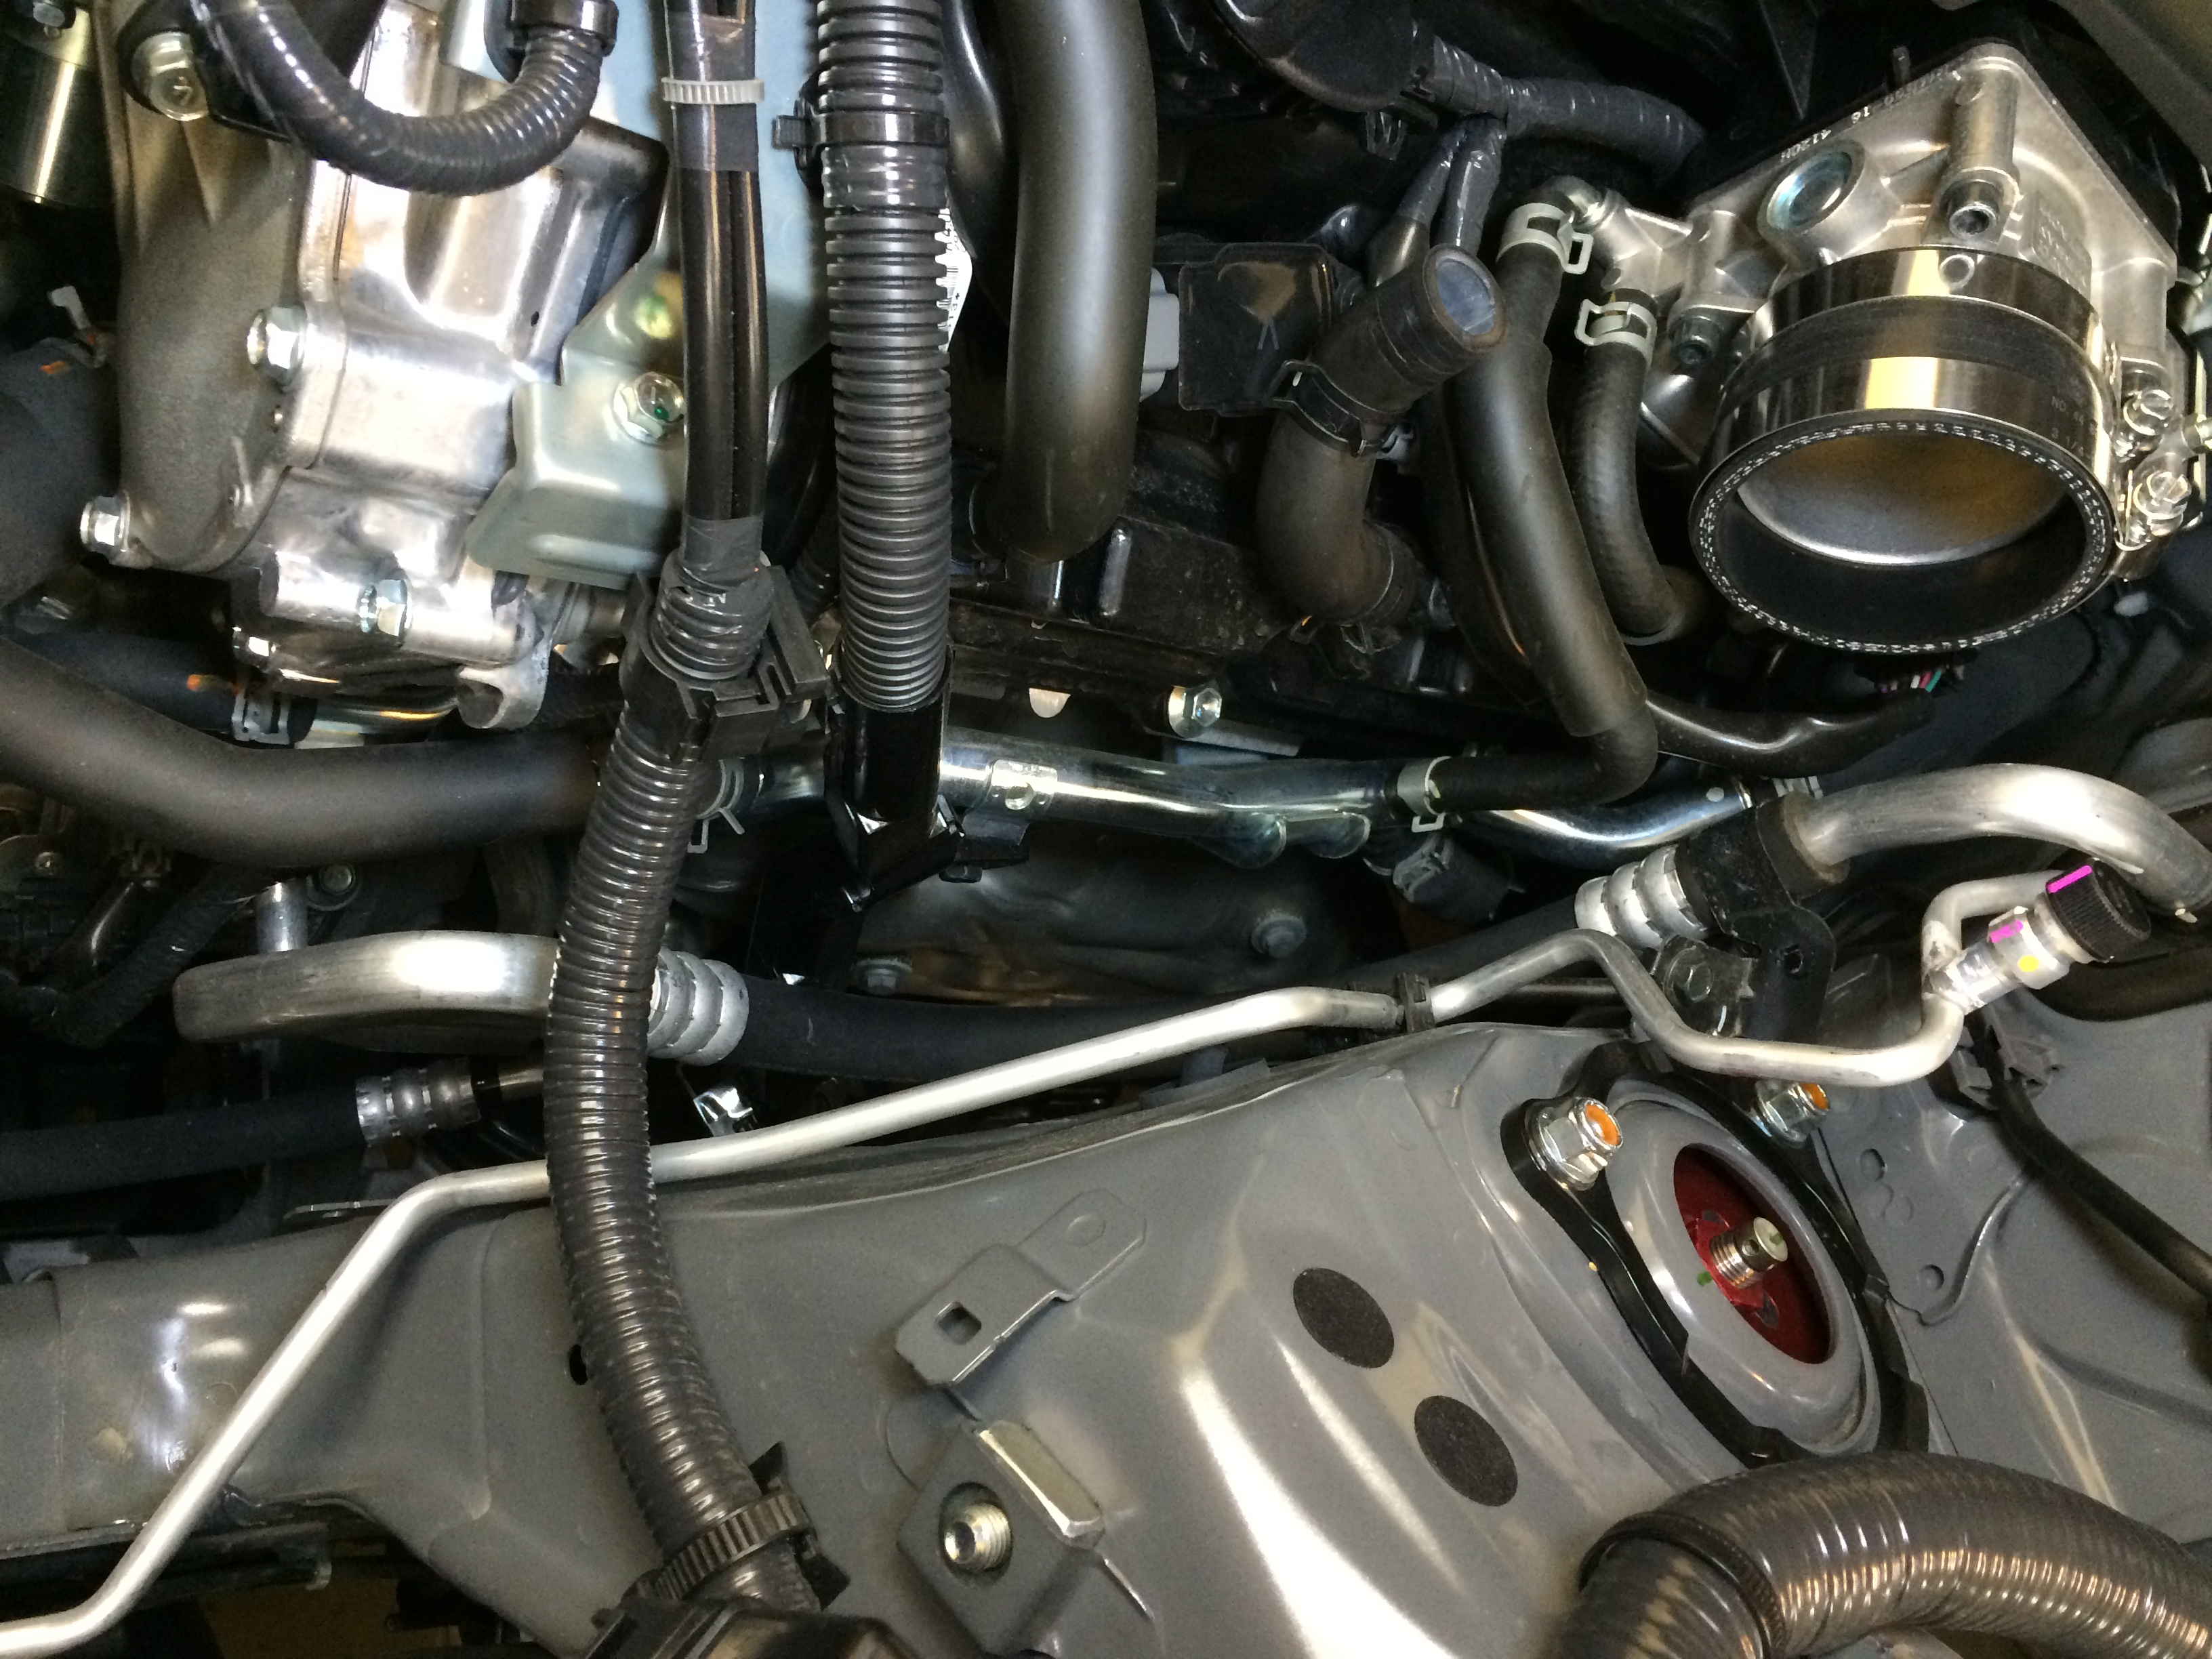
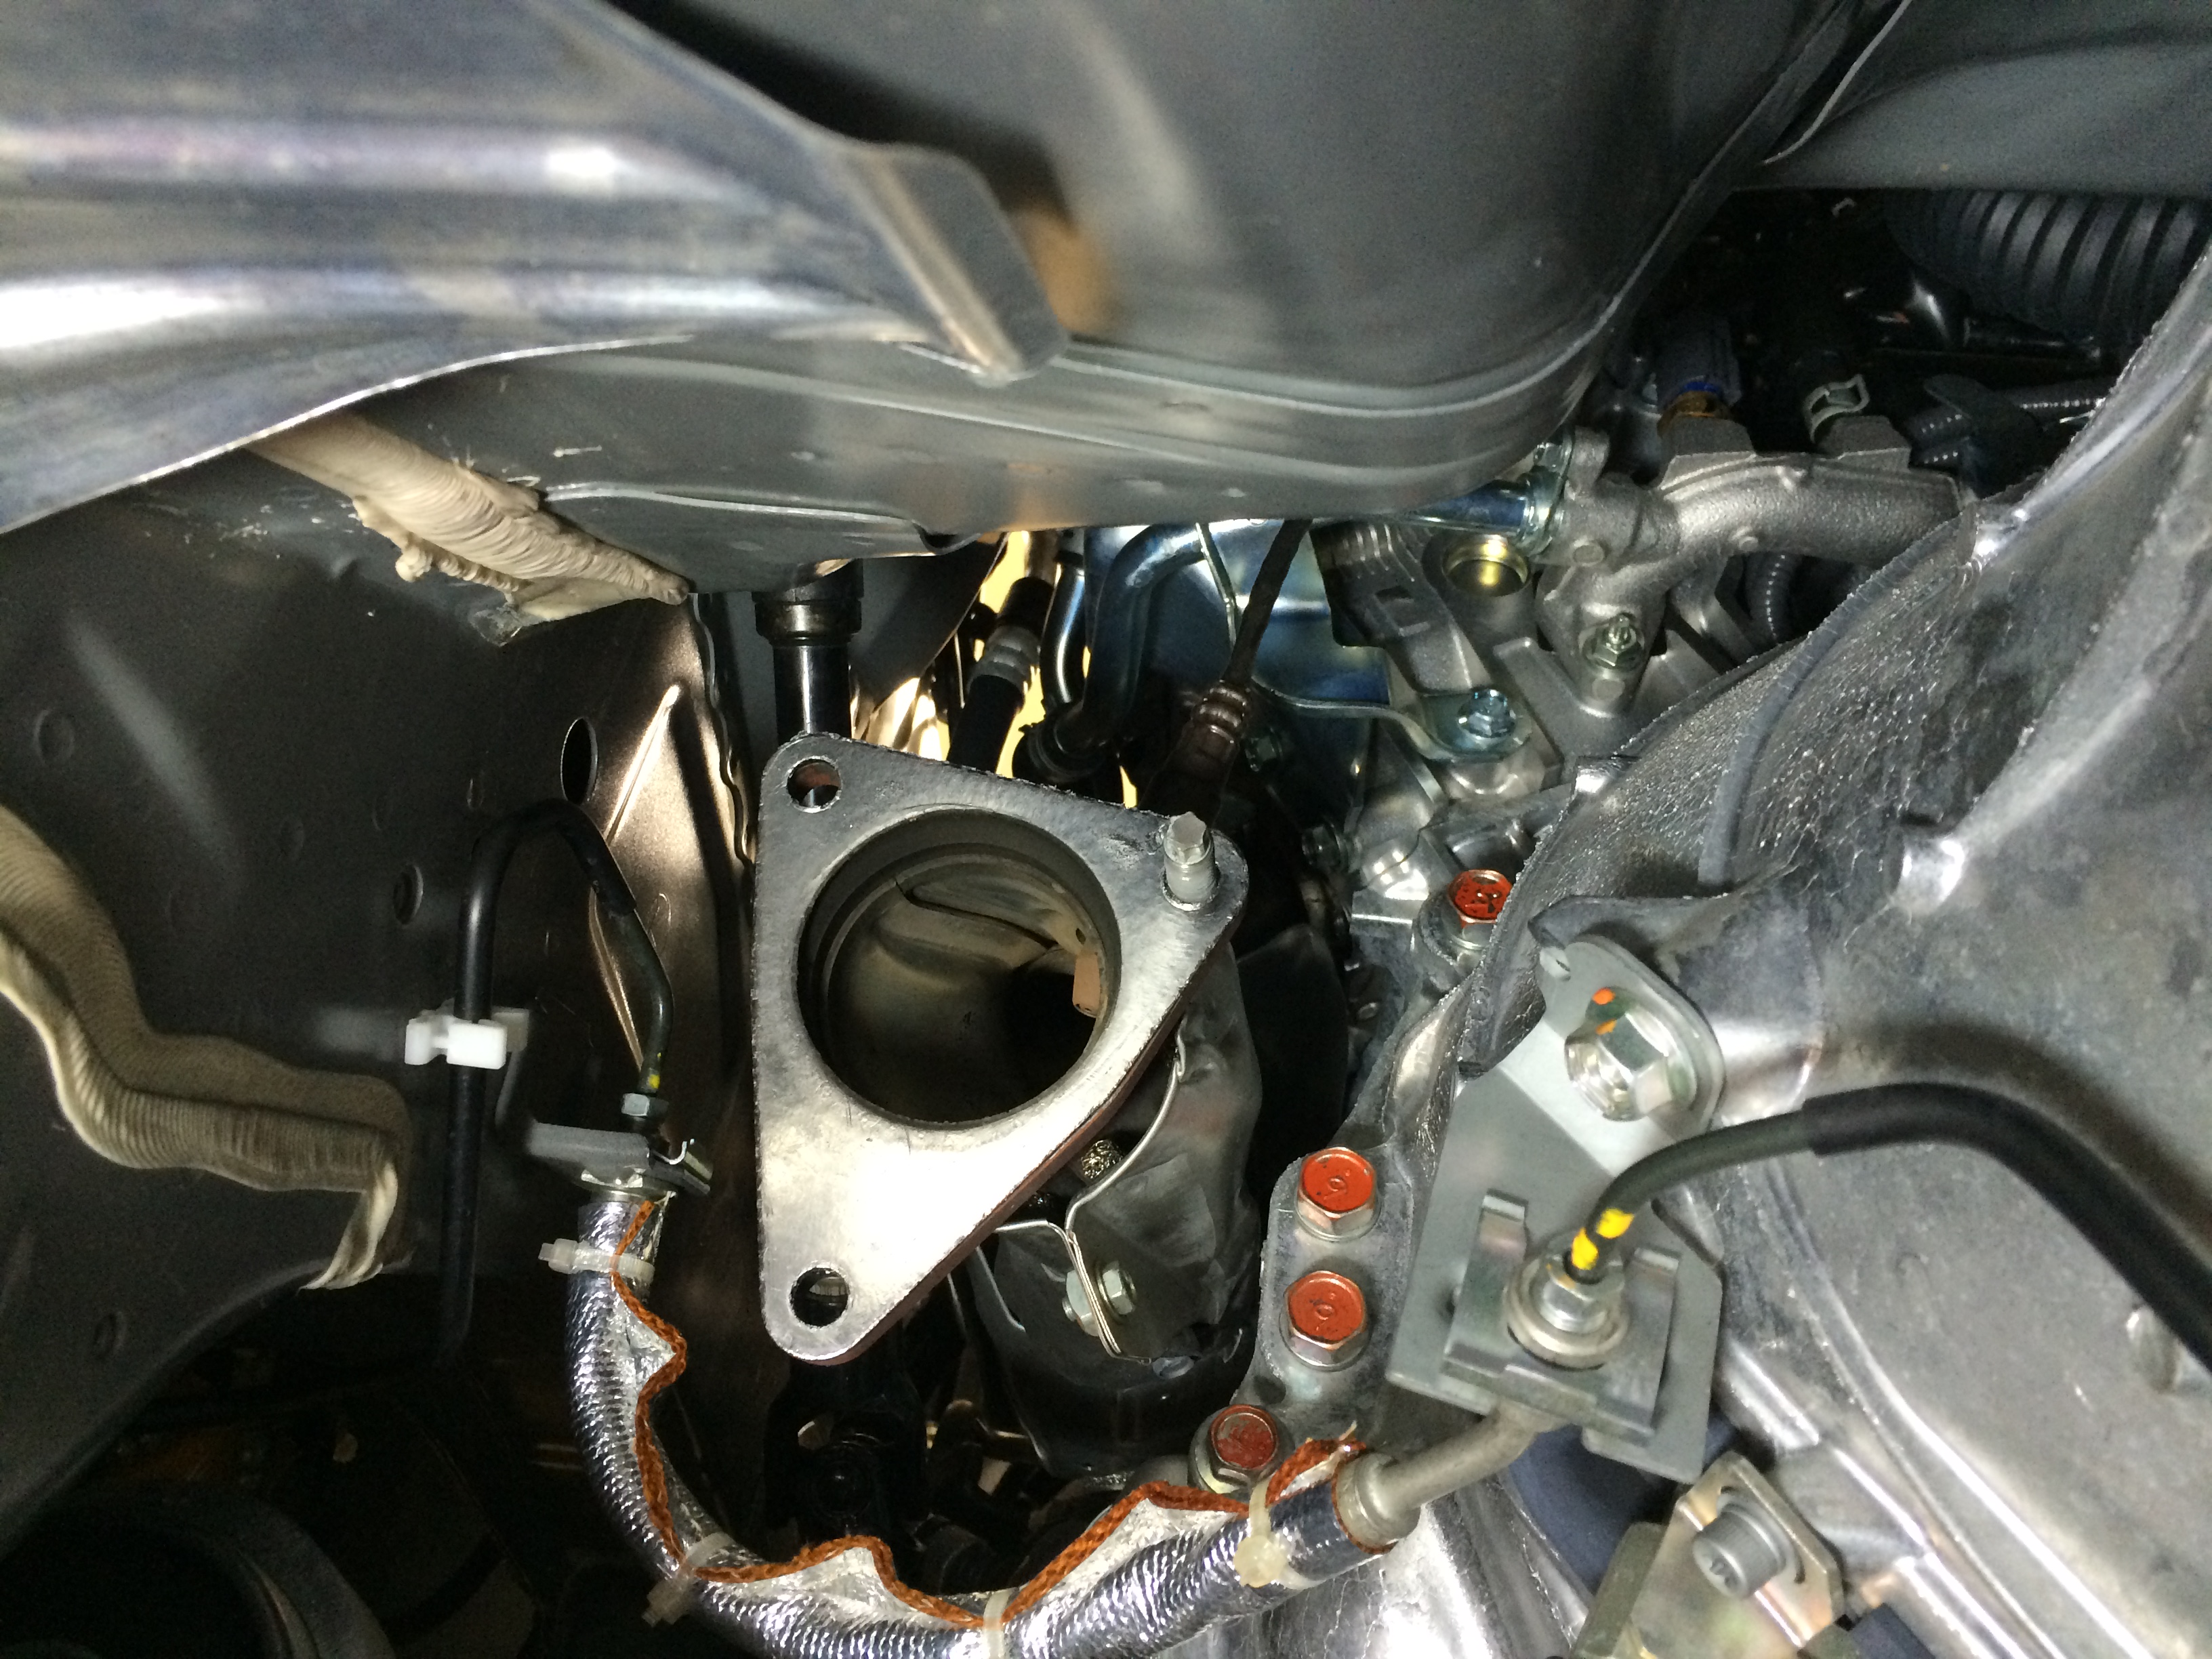
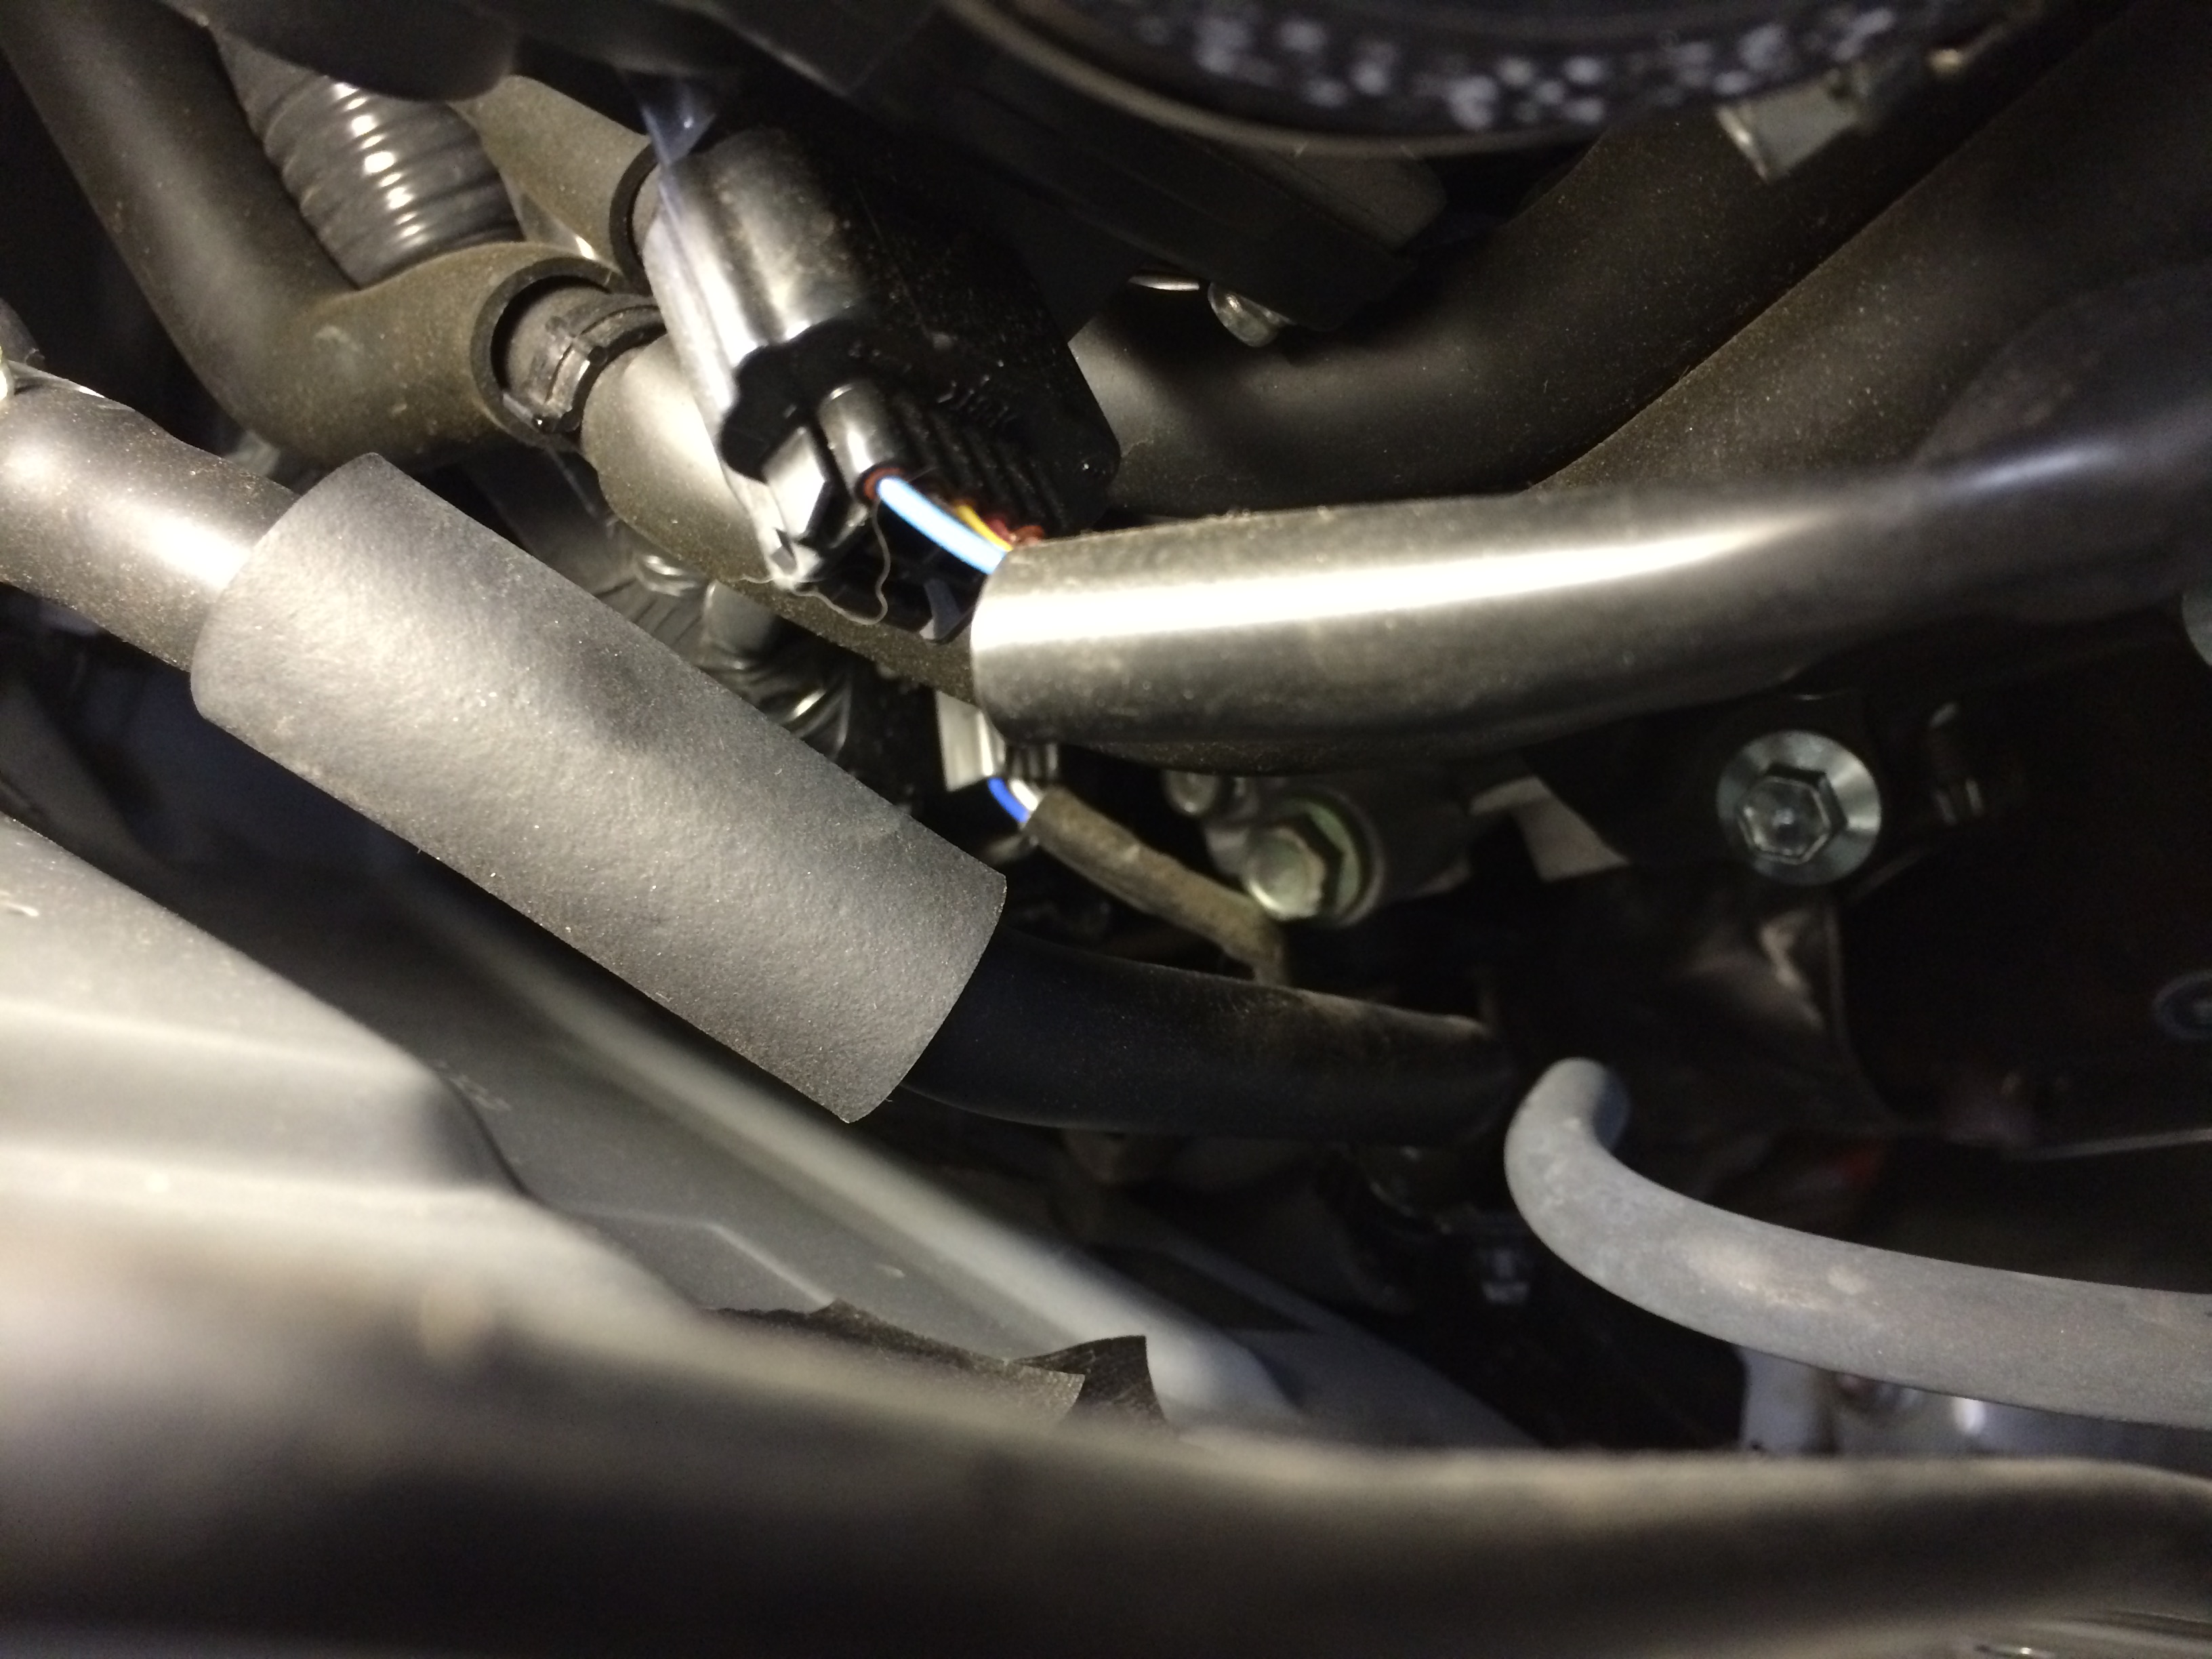
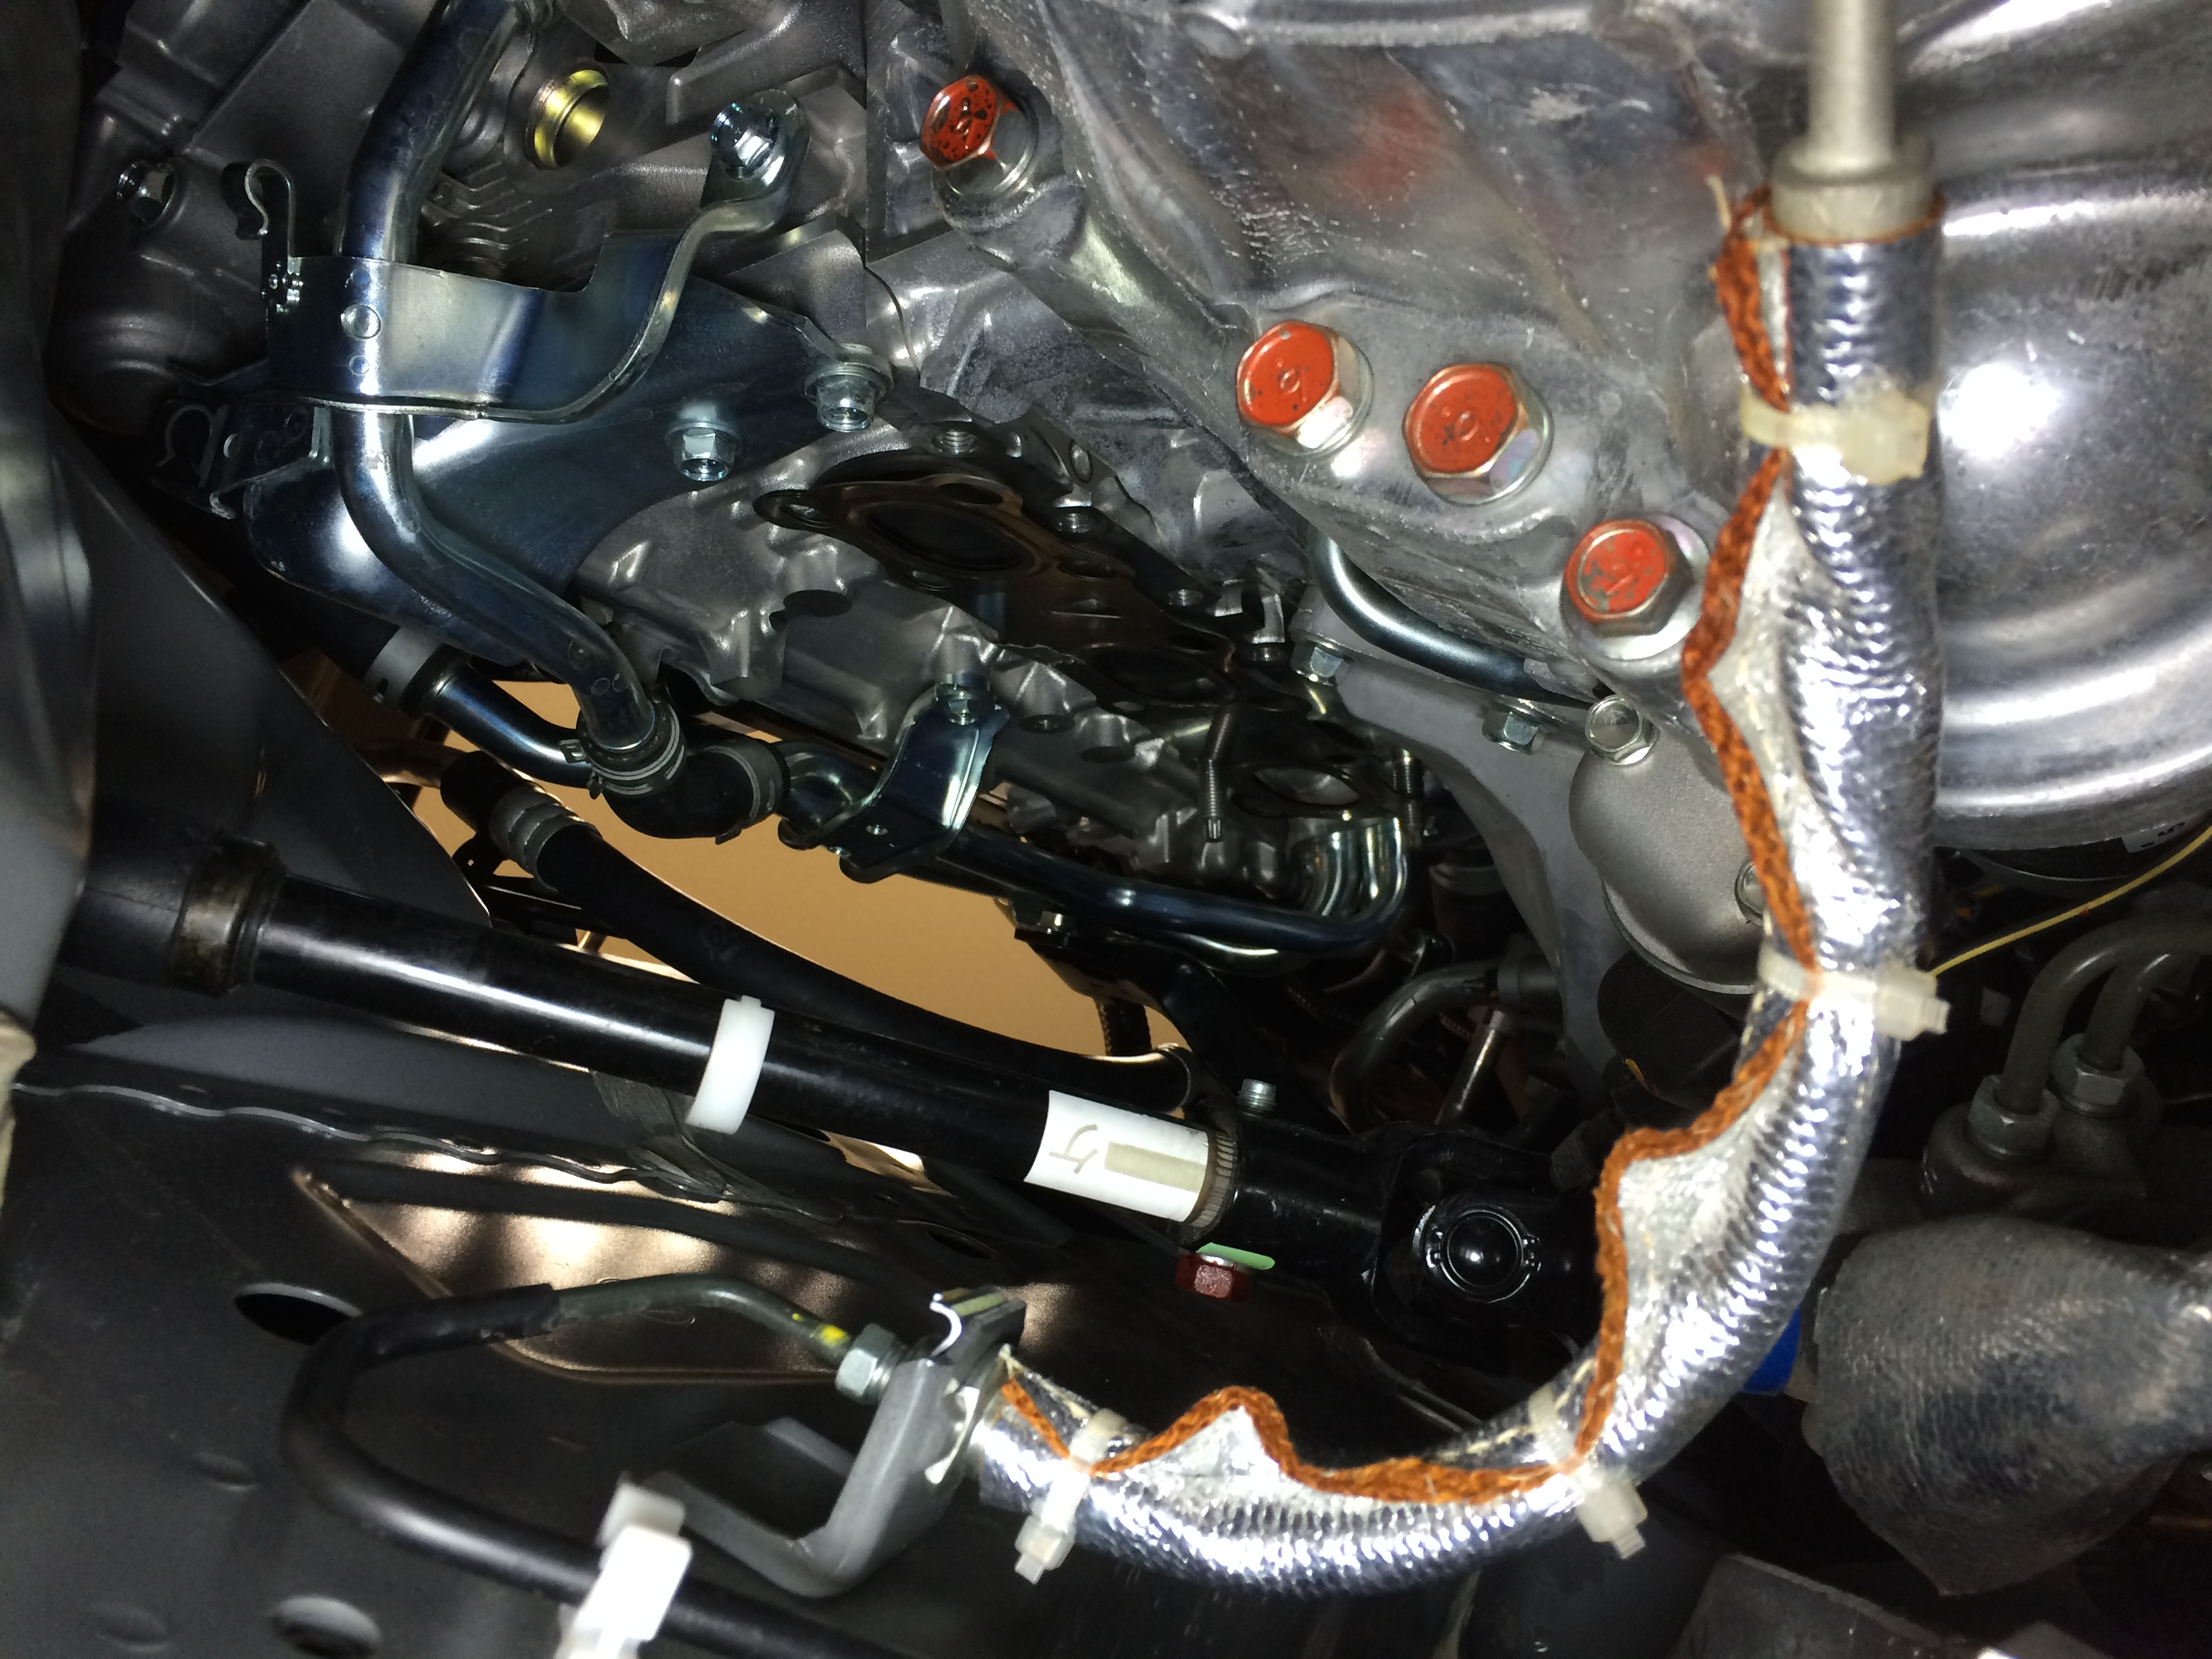
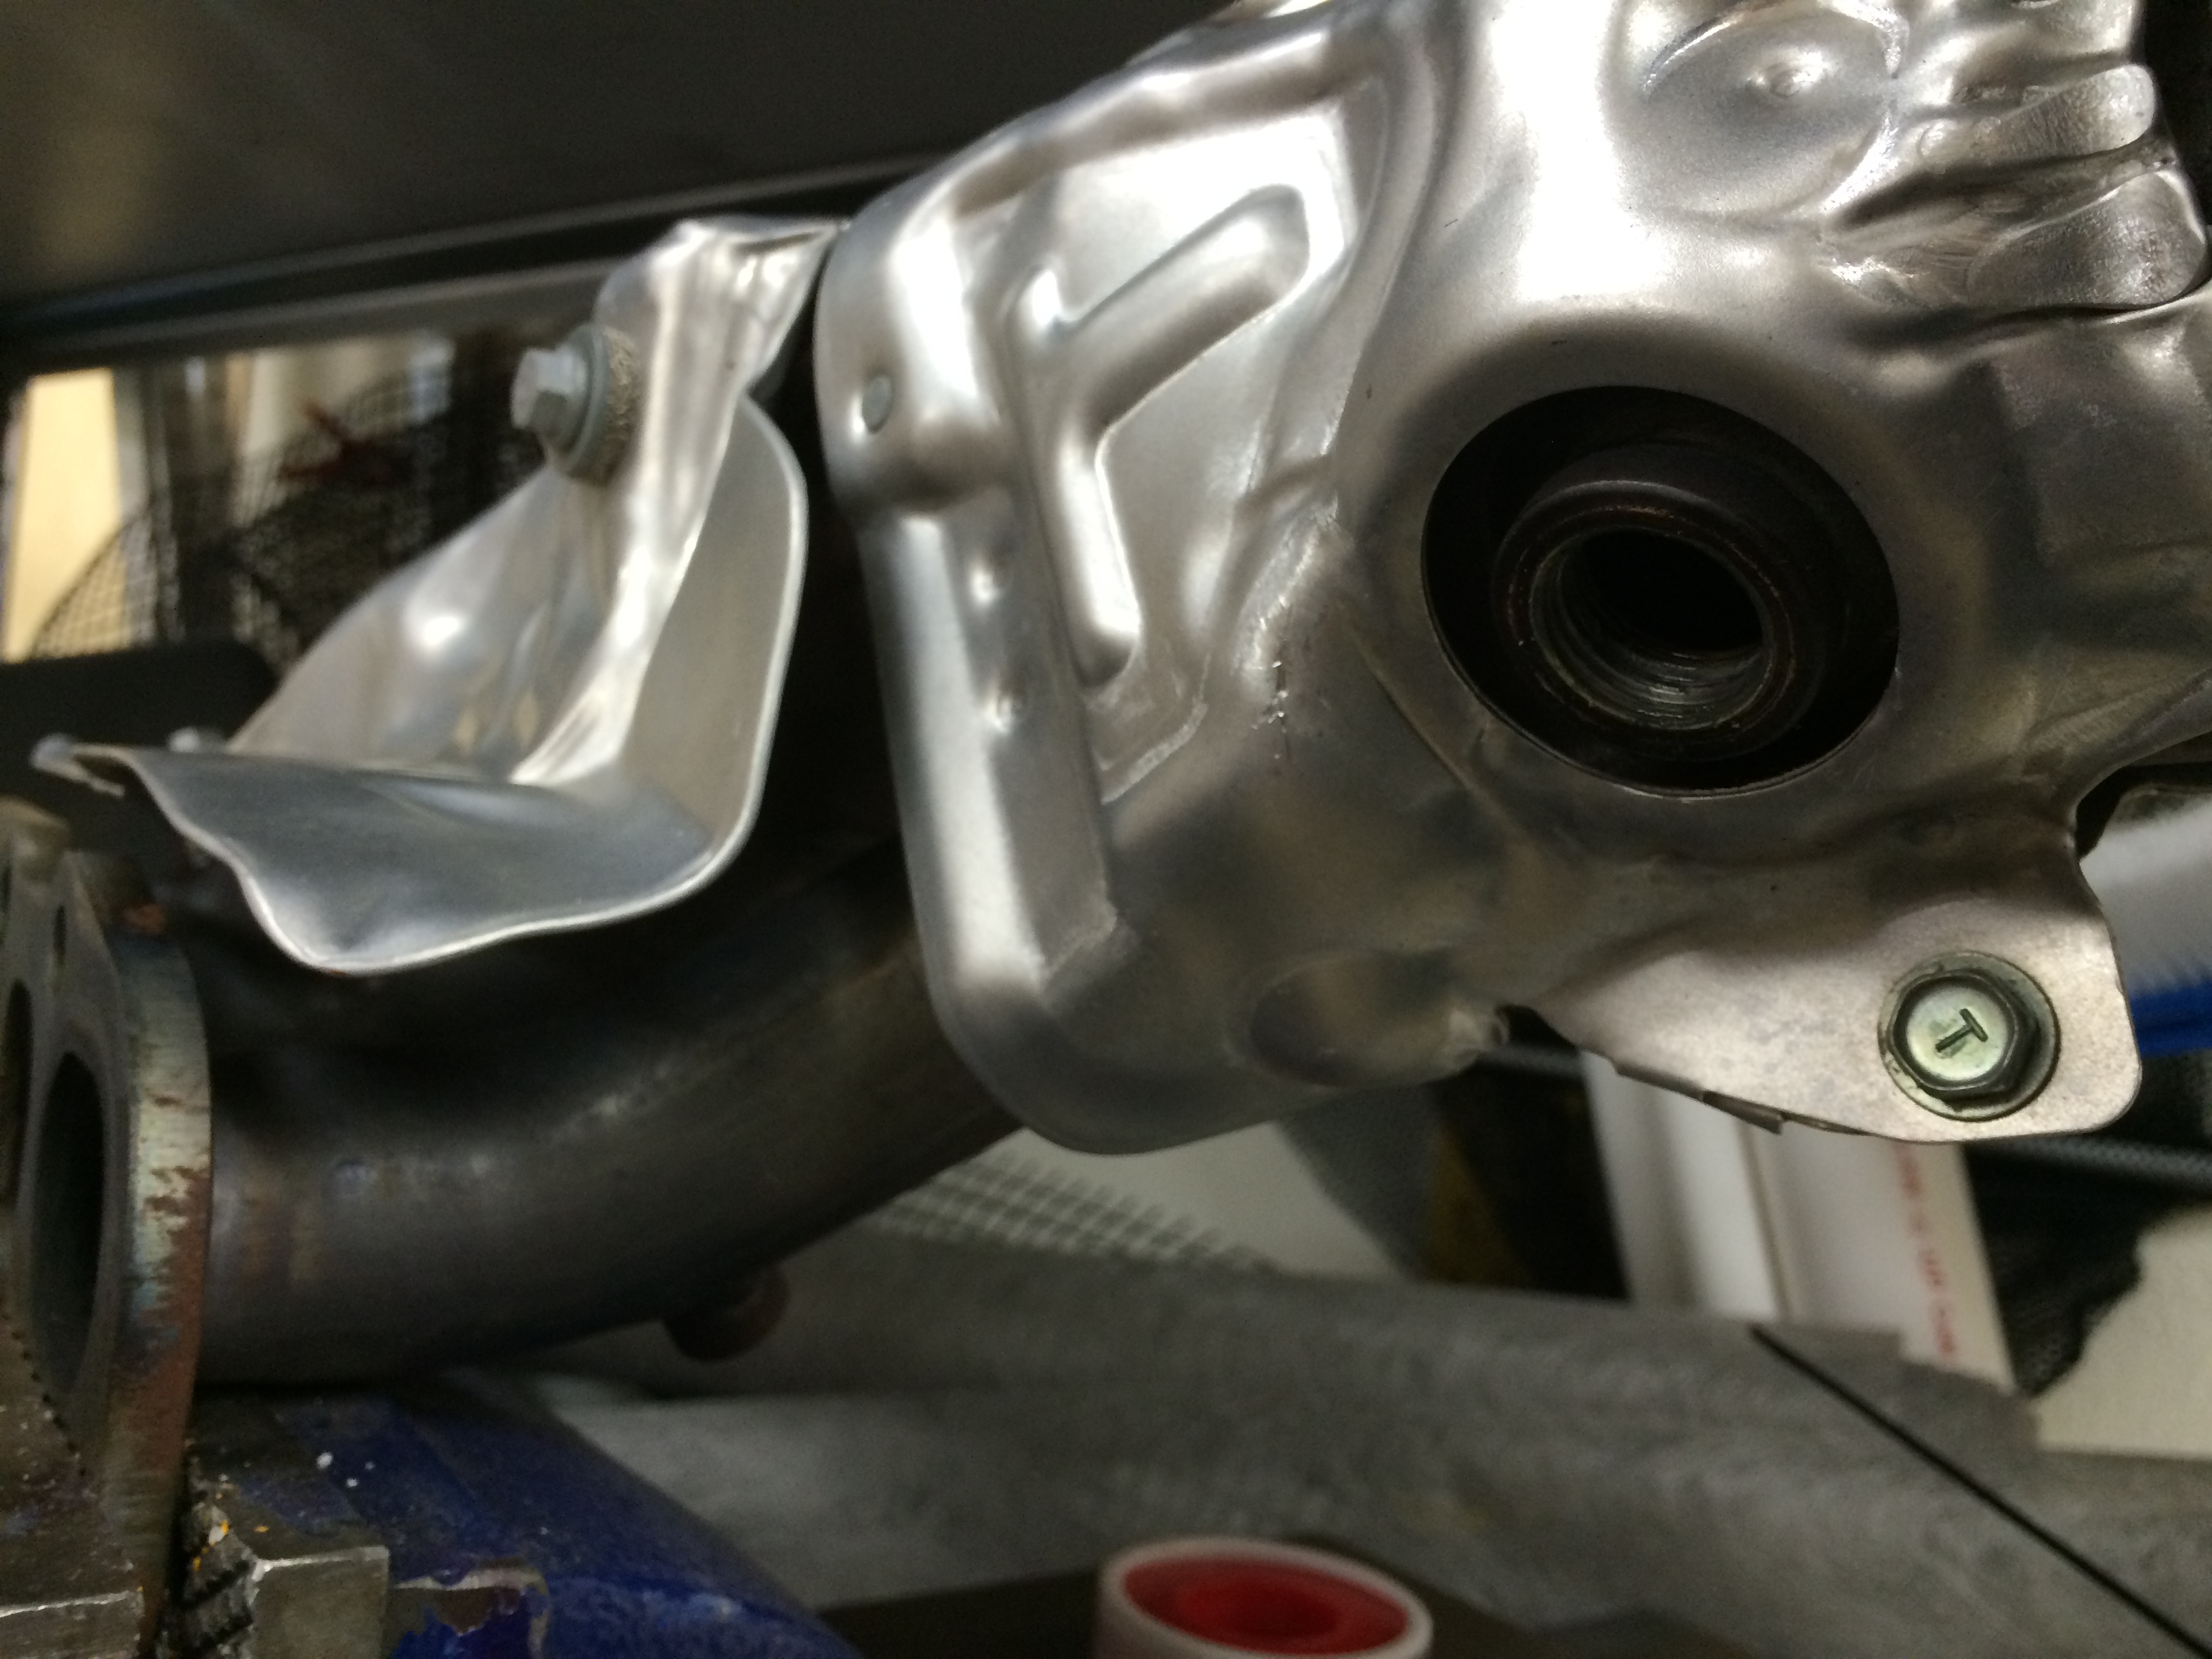
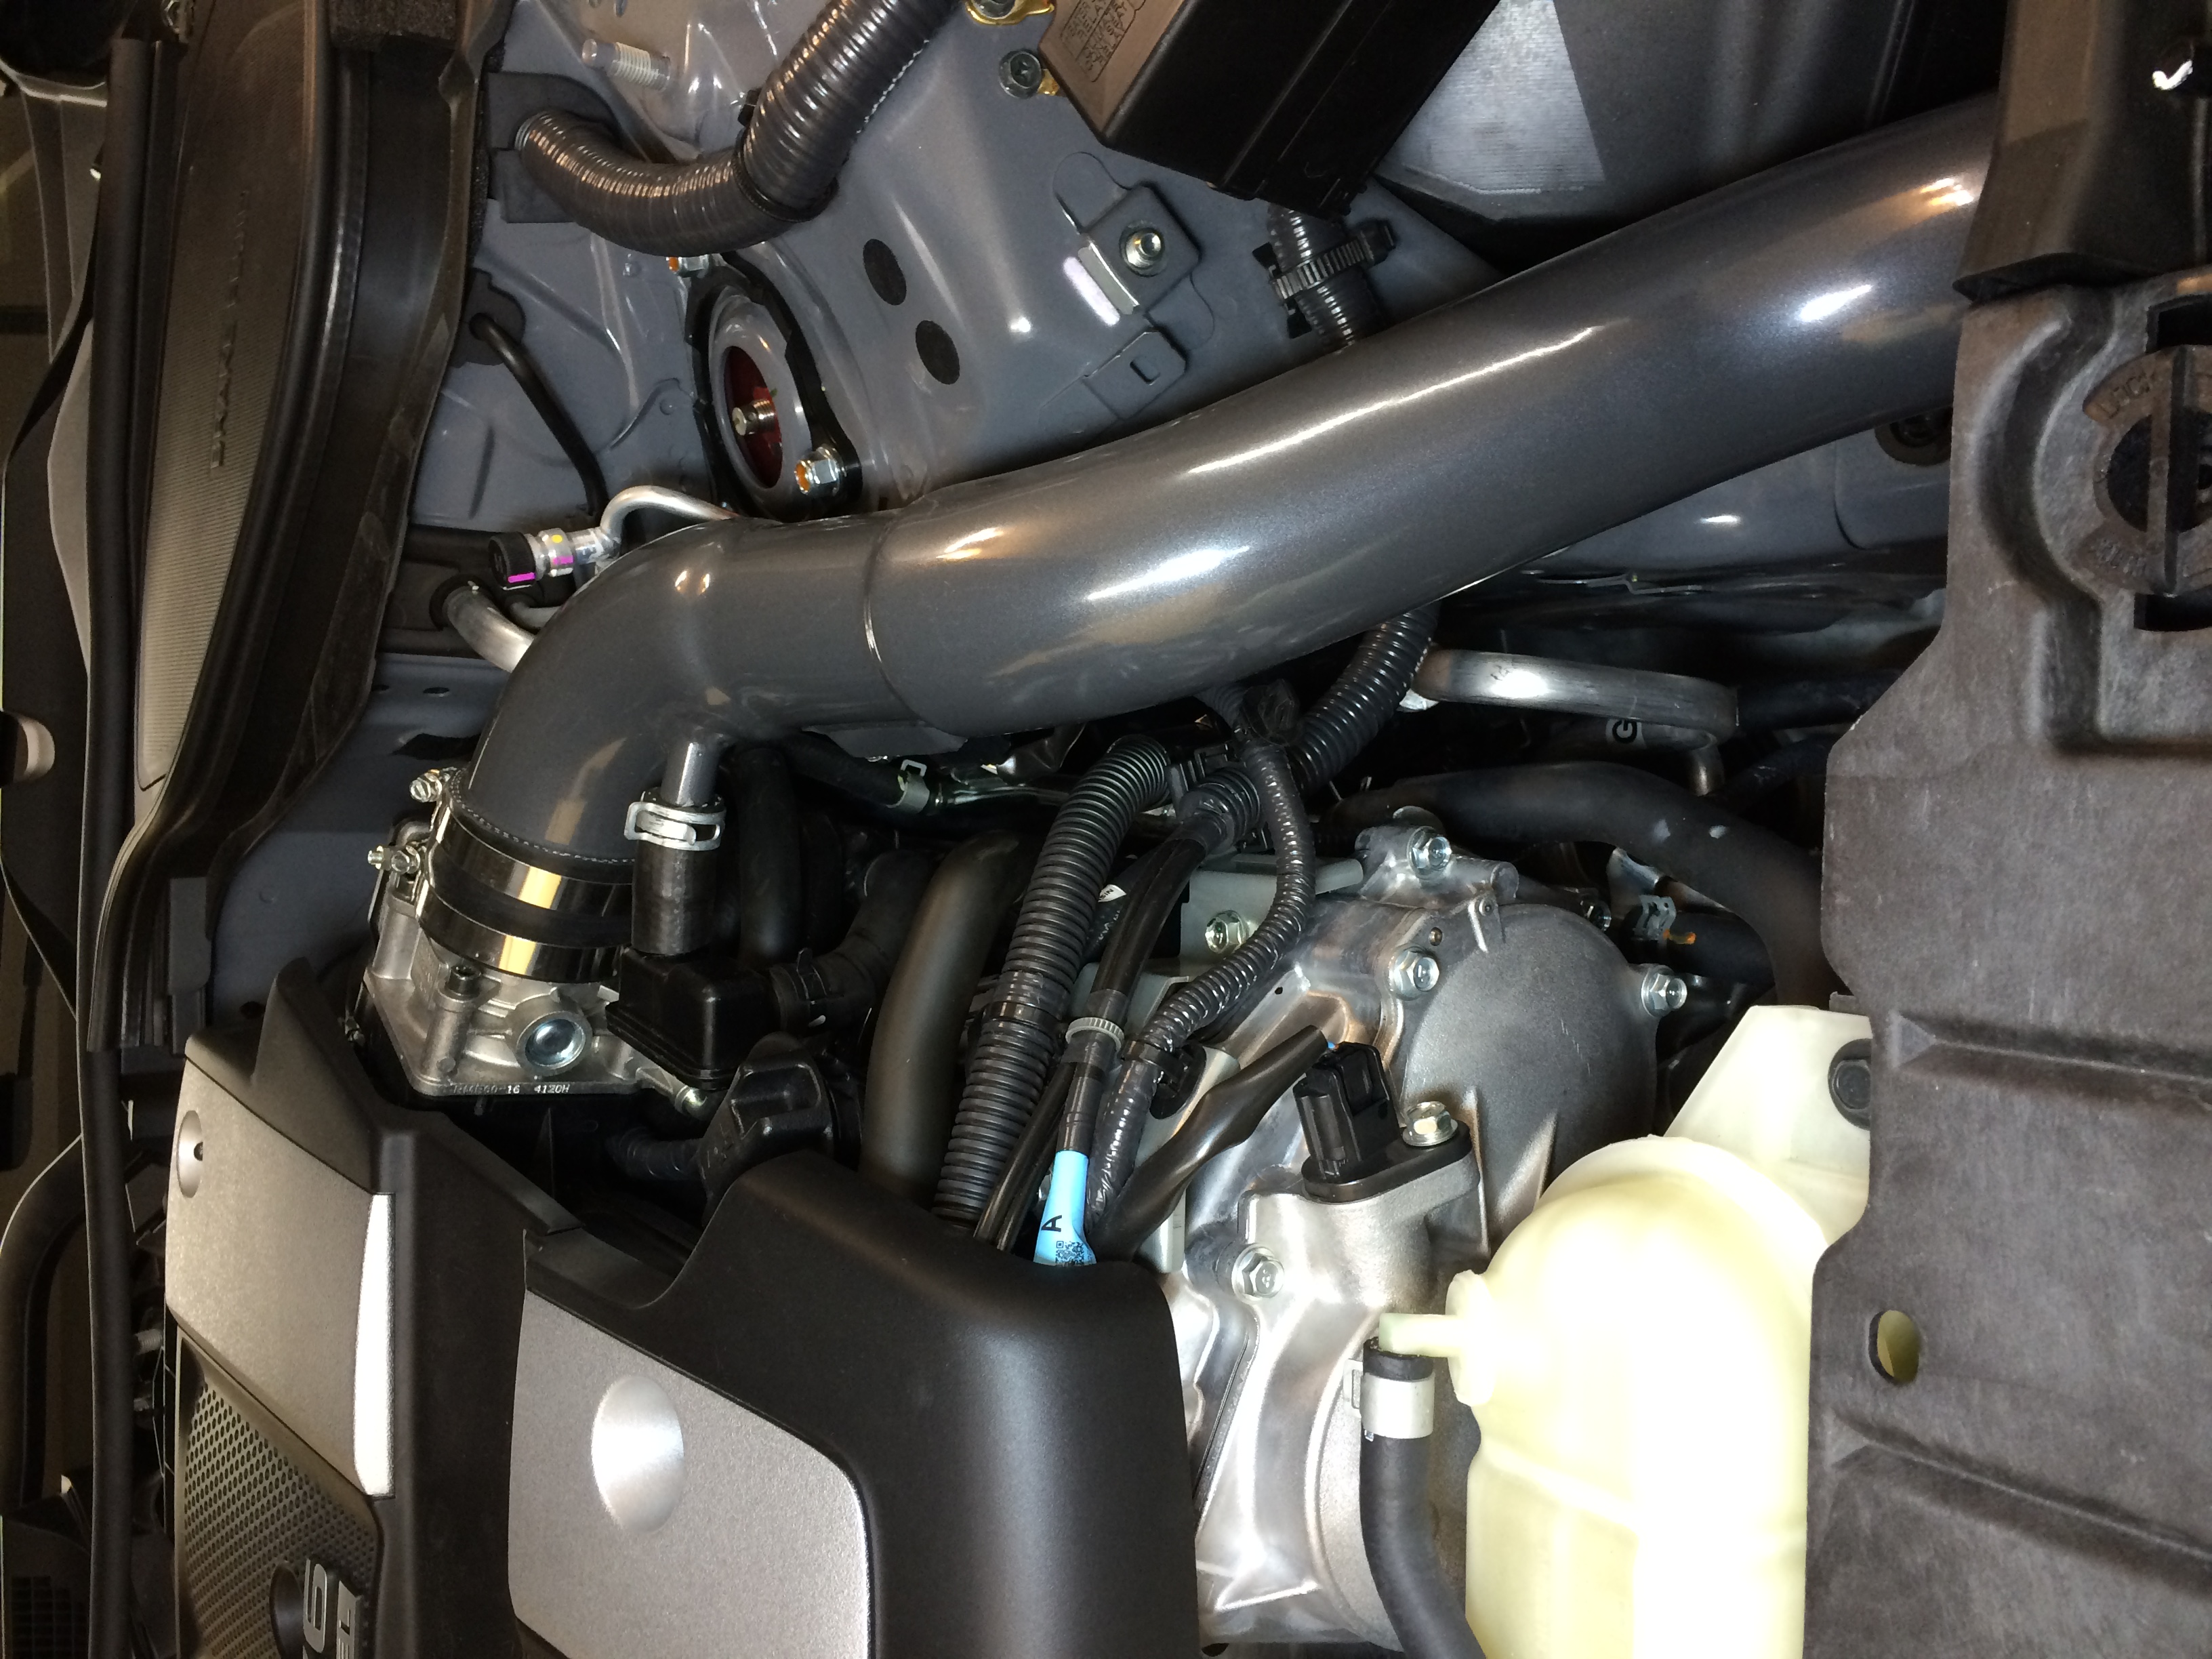
11: View of the passenger header before removal. Both sides are held in with 6 nuts on studs. The studs are diagonally opposed across each cylinder’s exhaust port.
12: View of the driver’s side header. Also in view are a big coolant tube (shiny metal), clump of electrical (black plastic), and A/C lines (black and silver at bottom). For this project you spend a lot of time trying to squeeze in between those things – it pays to have small forearms here. In addition to the squeeze there are some sharp parts which will slice you up.
13: To remove all 12 nuts (14mm), I used a deep 6-point 1/2″ drive socket on a swivel-head ratcheting breaker bar thing. Been working on cars a long time and only bought it recently for some other project, glad I had it here.
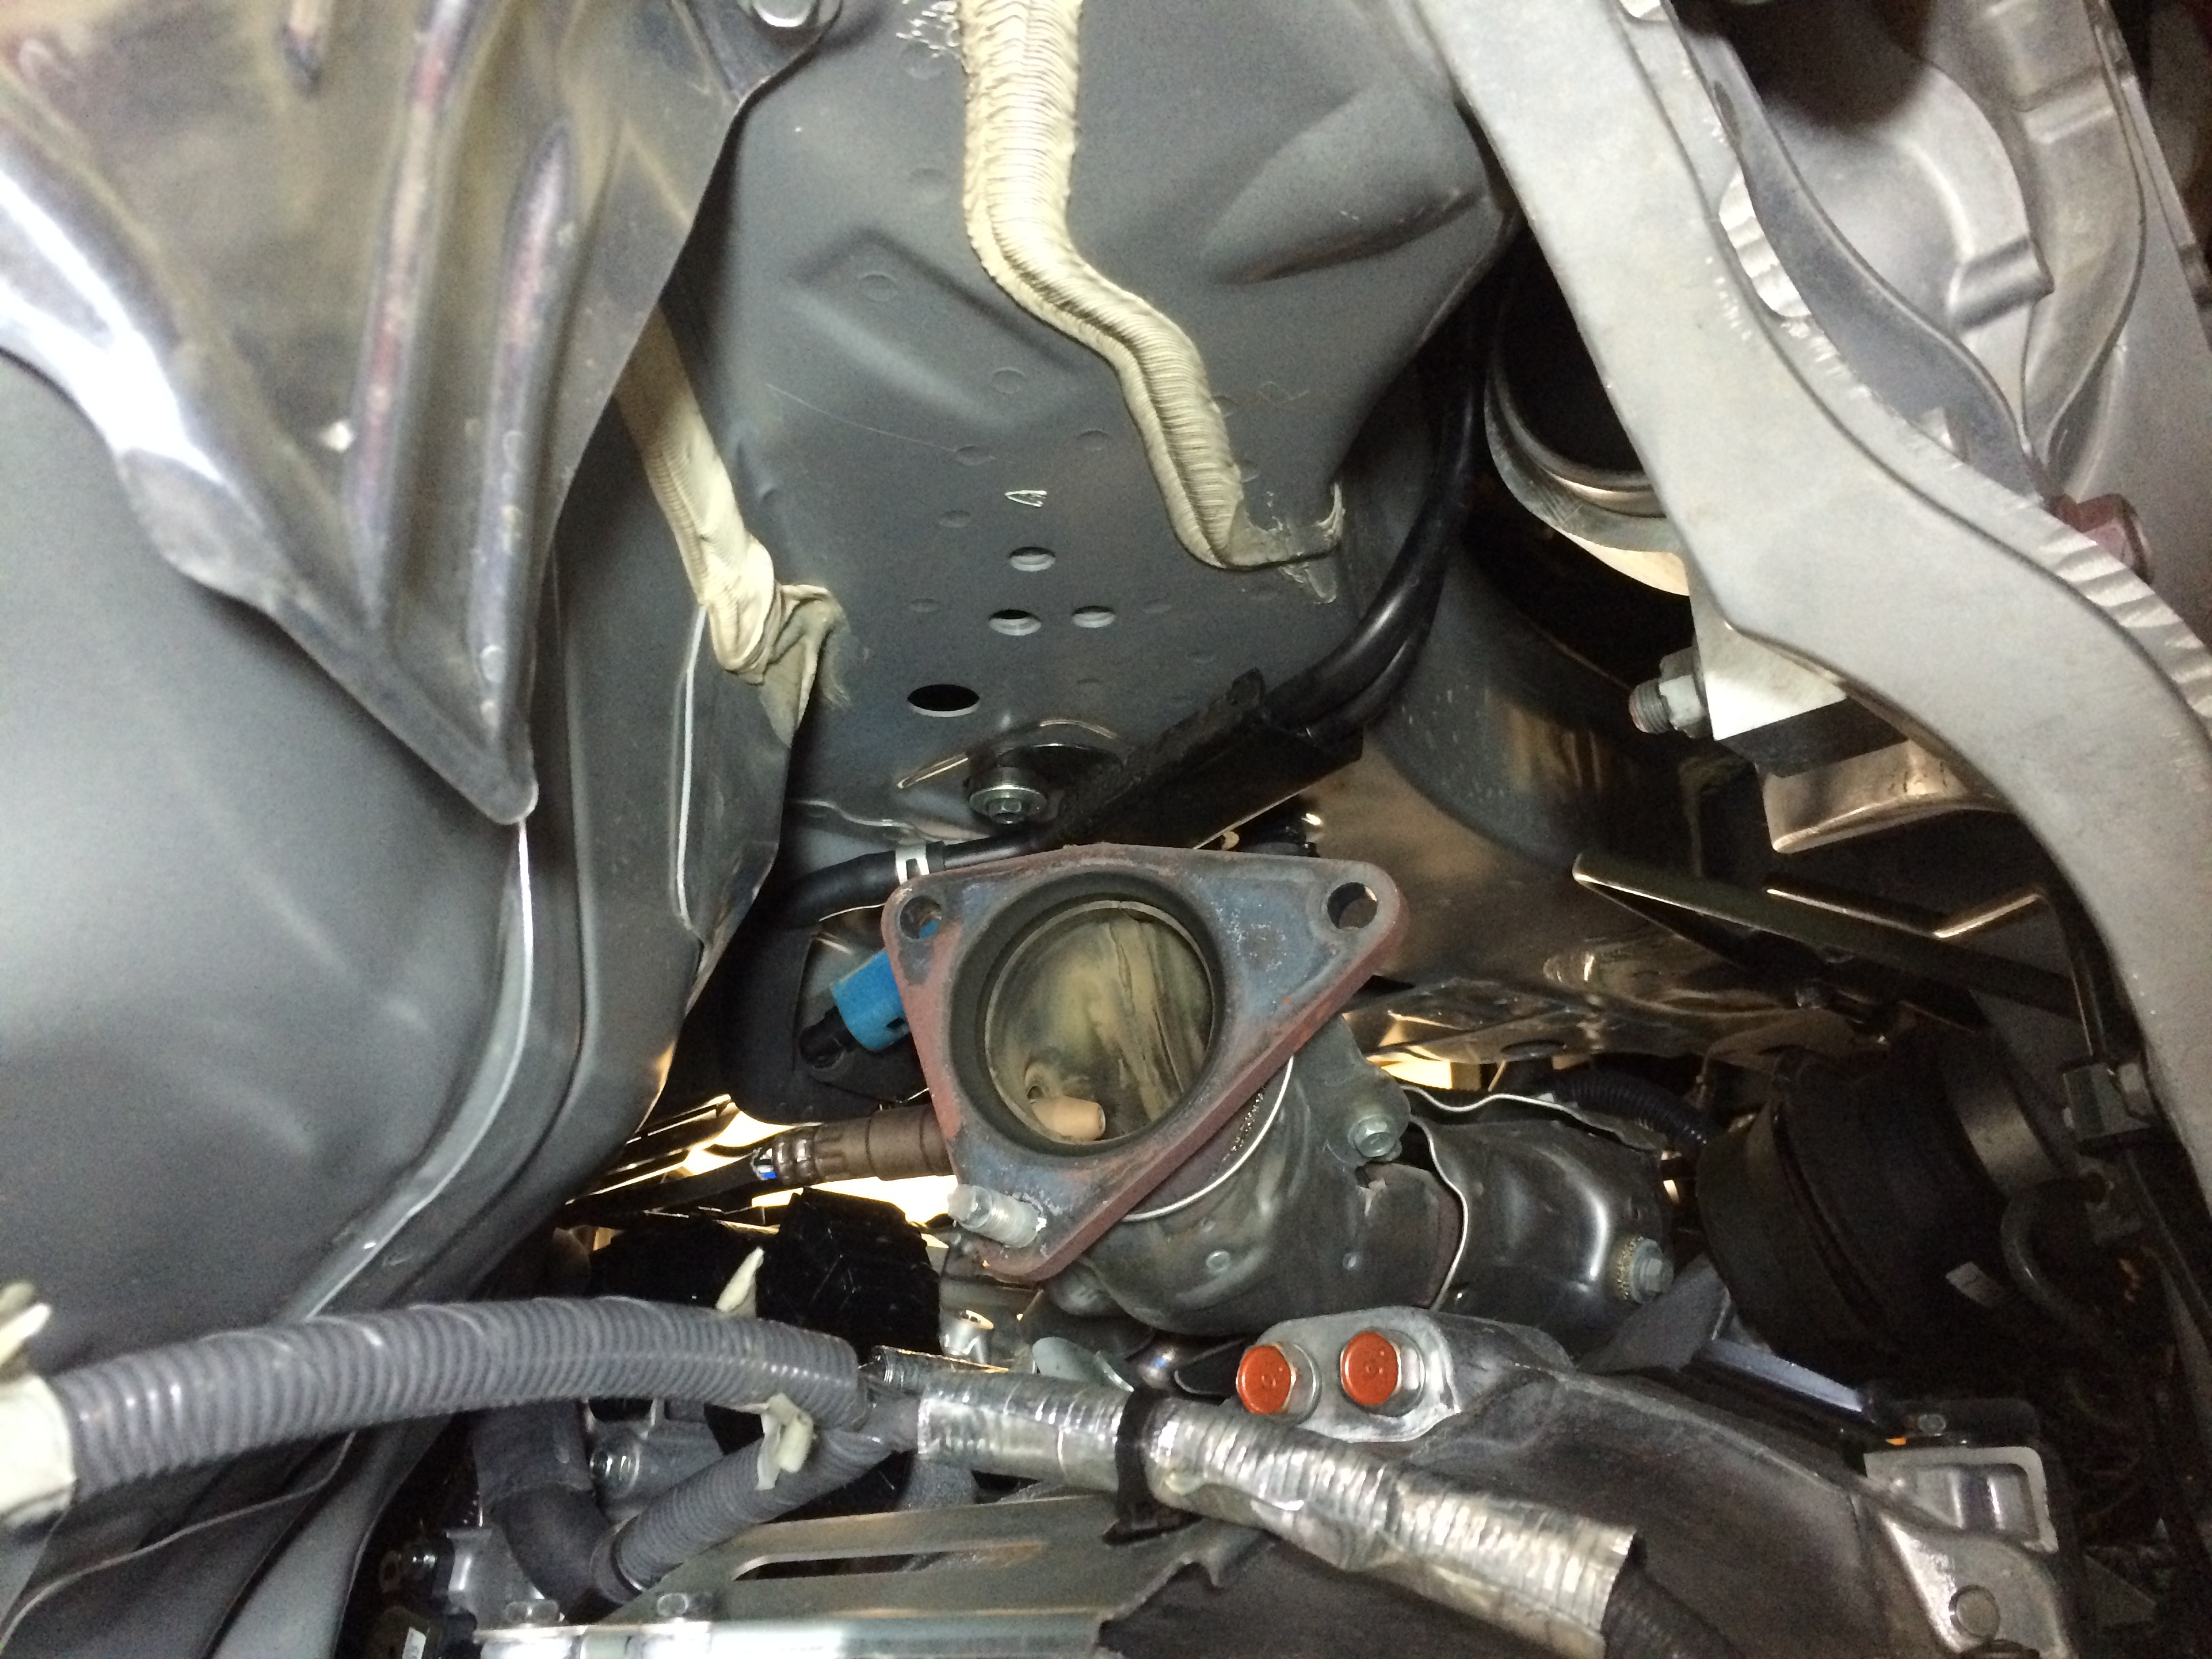
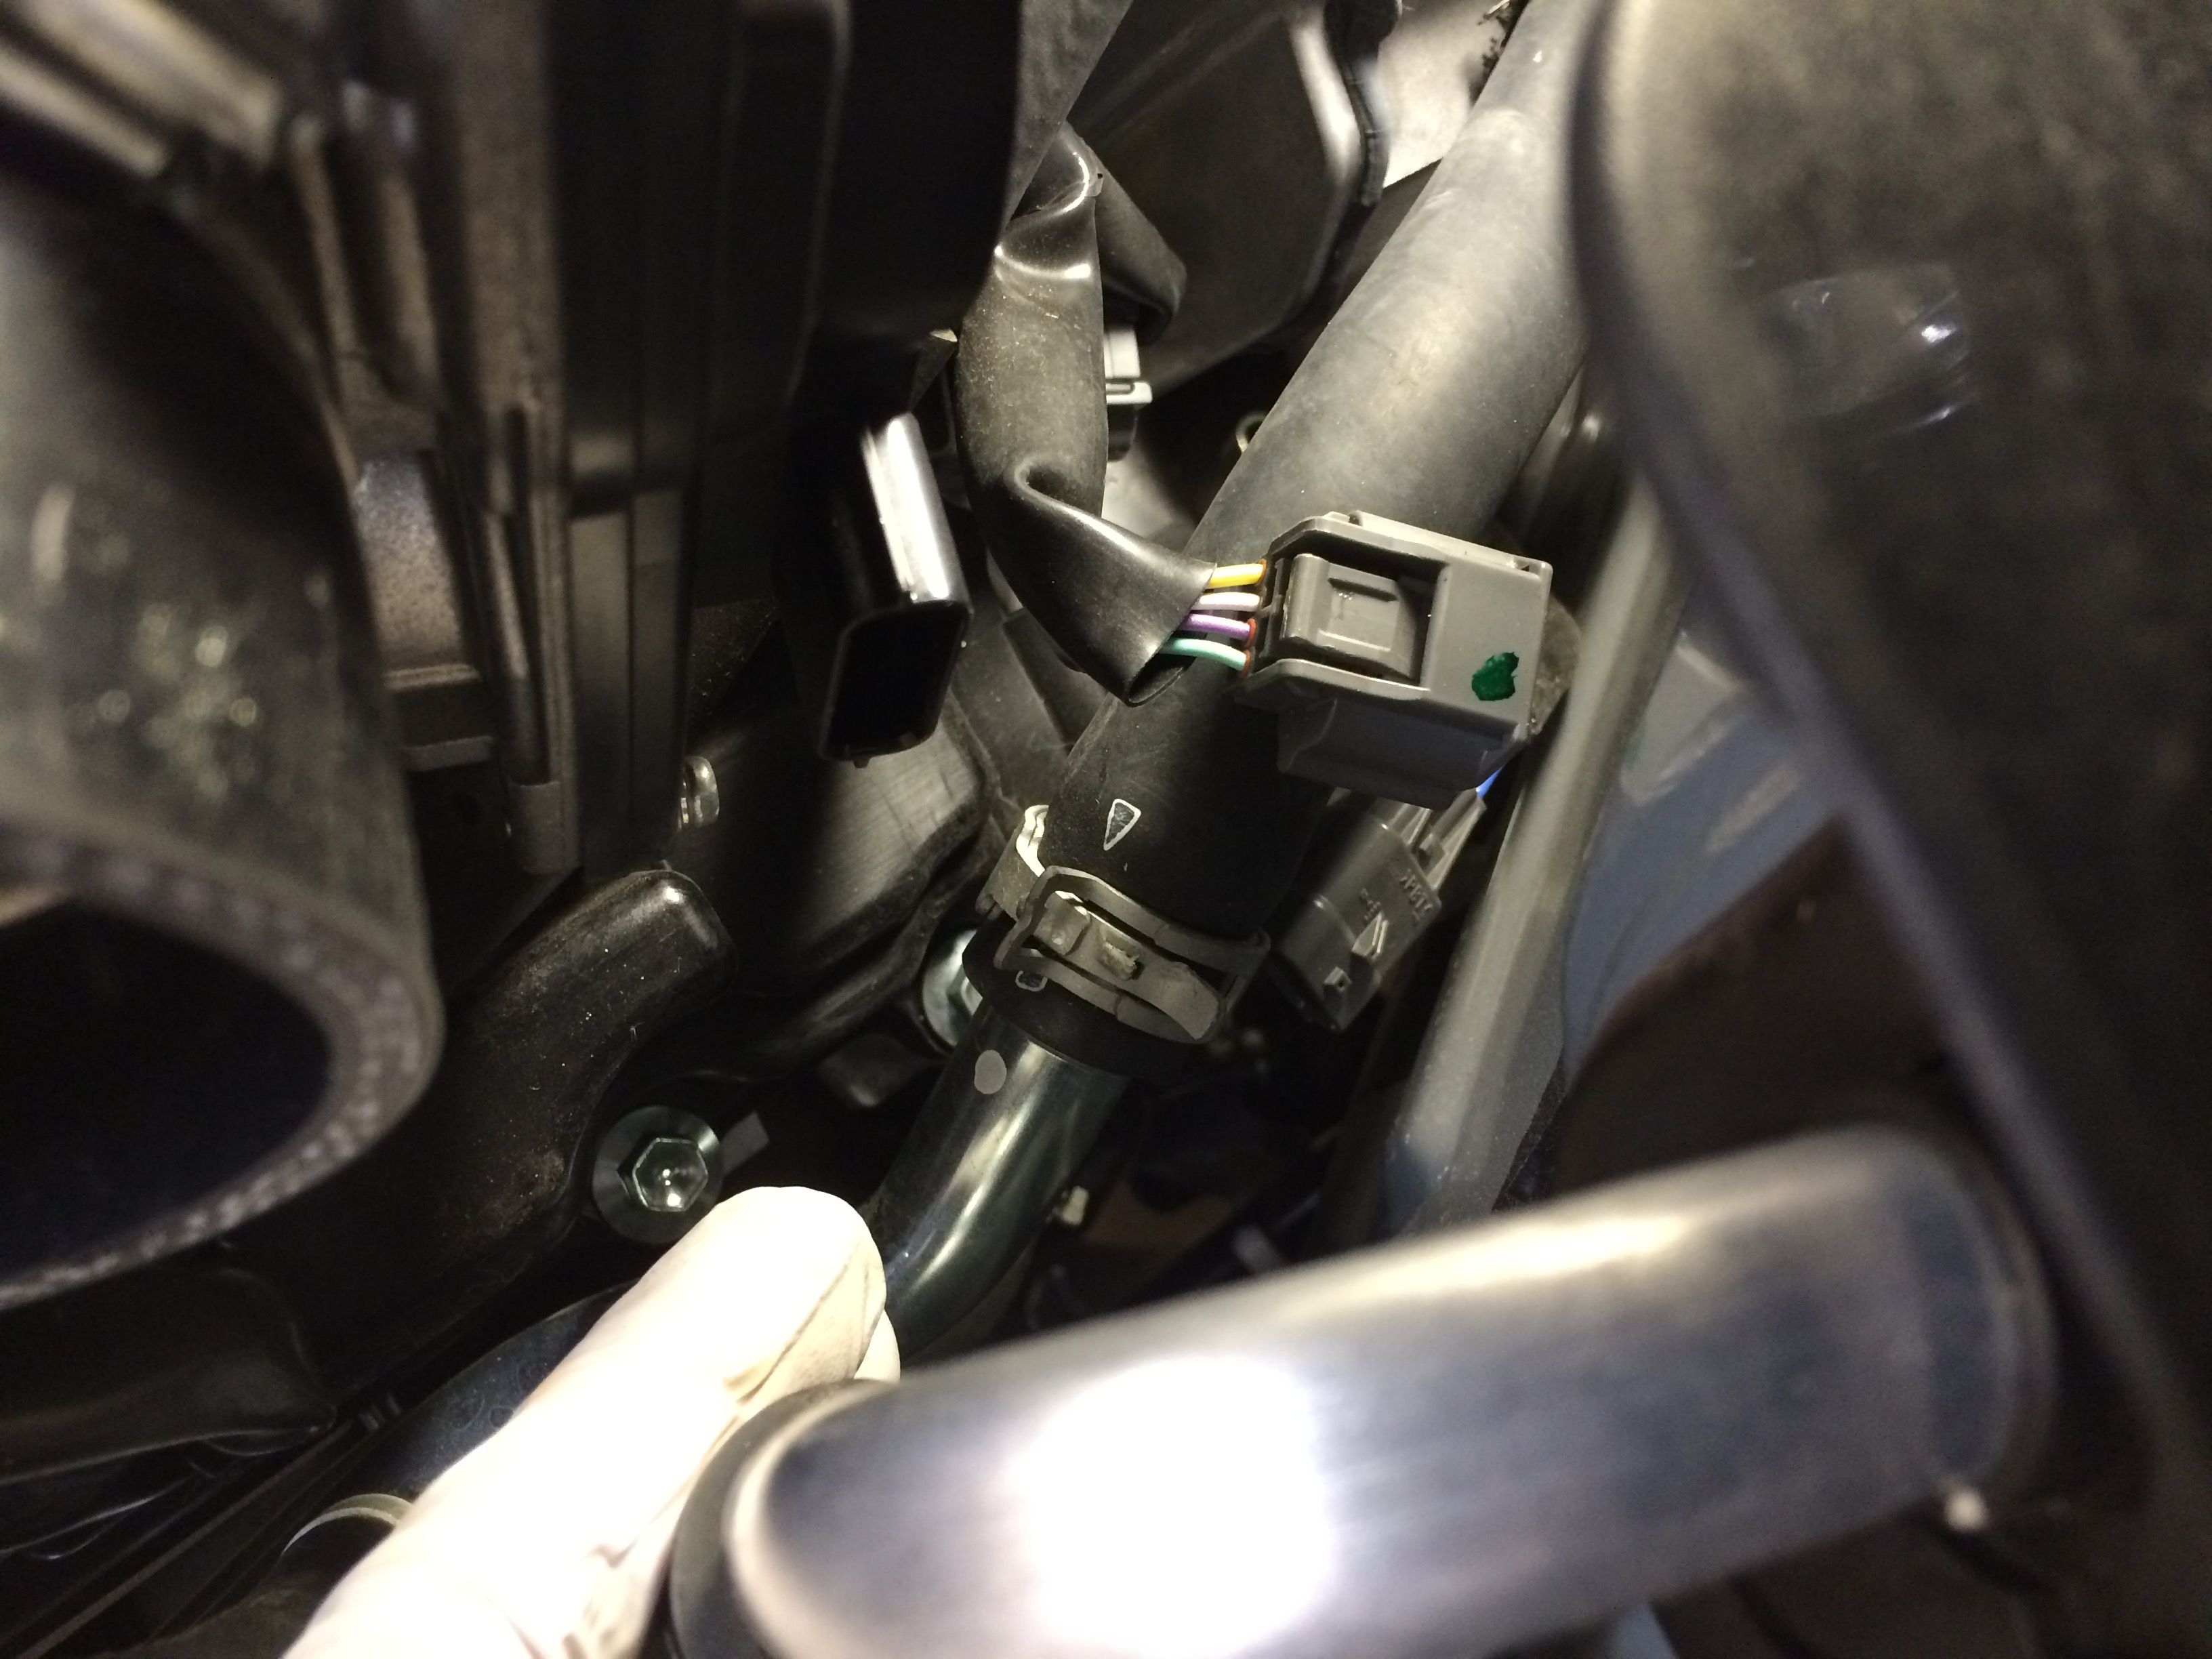
14: Before you can pull the headers you need to disconnect the o2 sensors. I thought it’d be easier to unbolt the sensors after the manifolds were removed to I unplugged the sensors up top and undid them from their little guide brackets on the back of the block. The passenger side, it’s buried back in there.
15: Passenger side stock manifold out! yay!
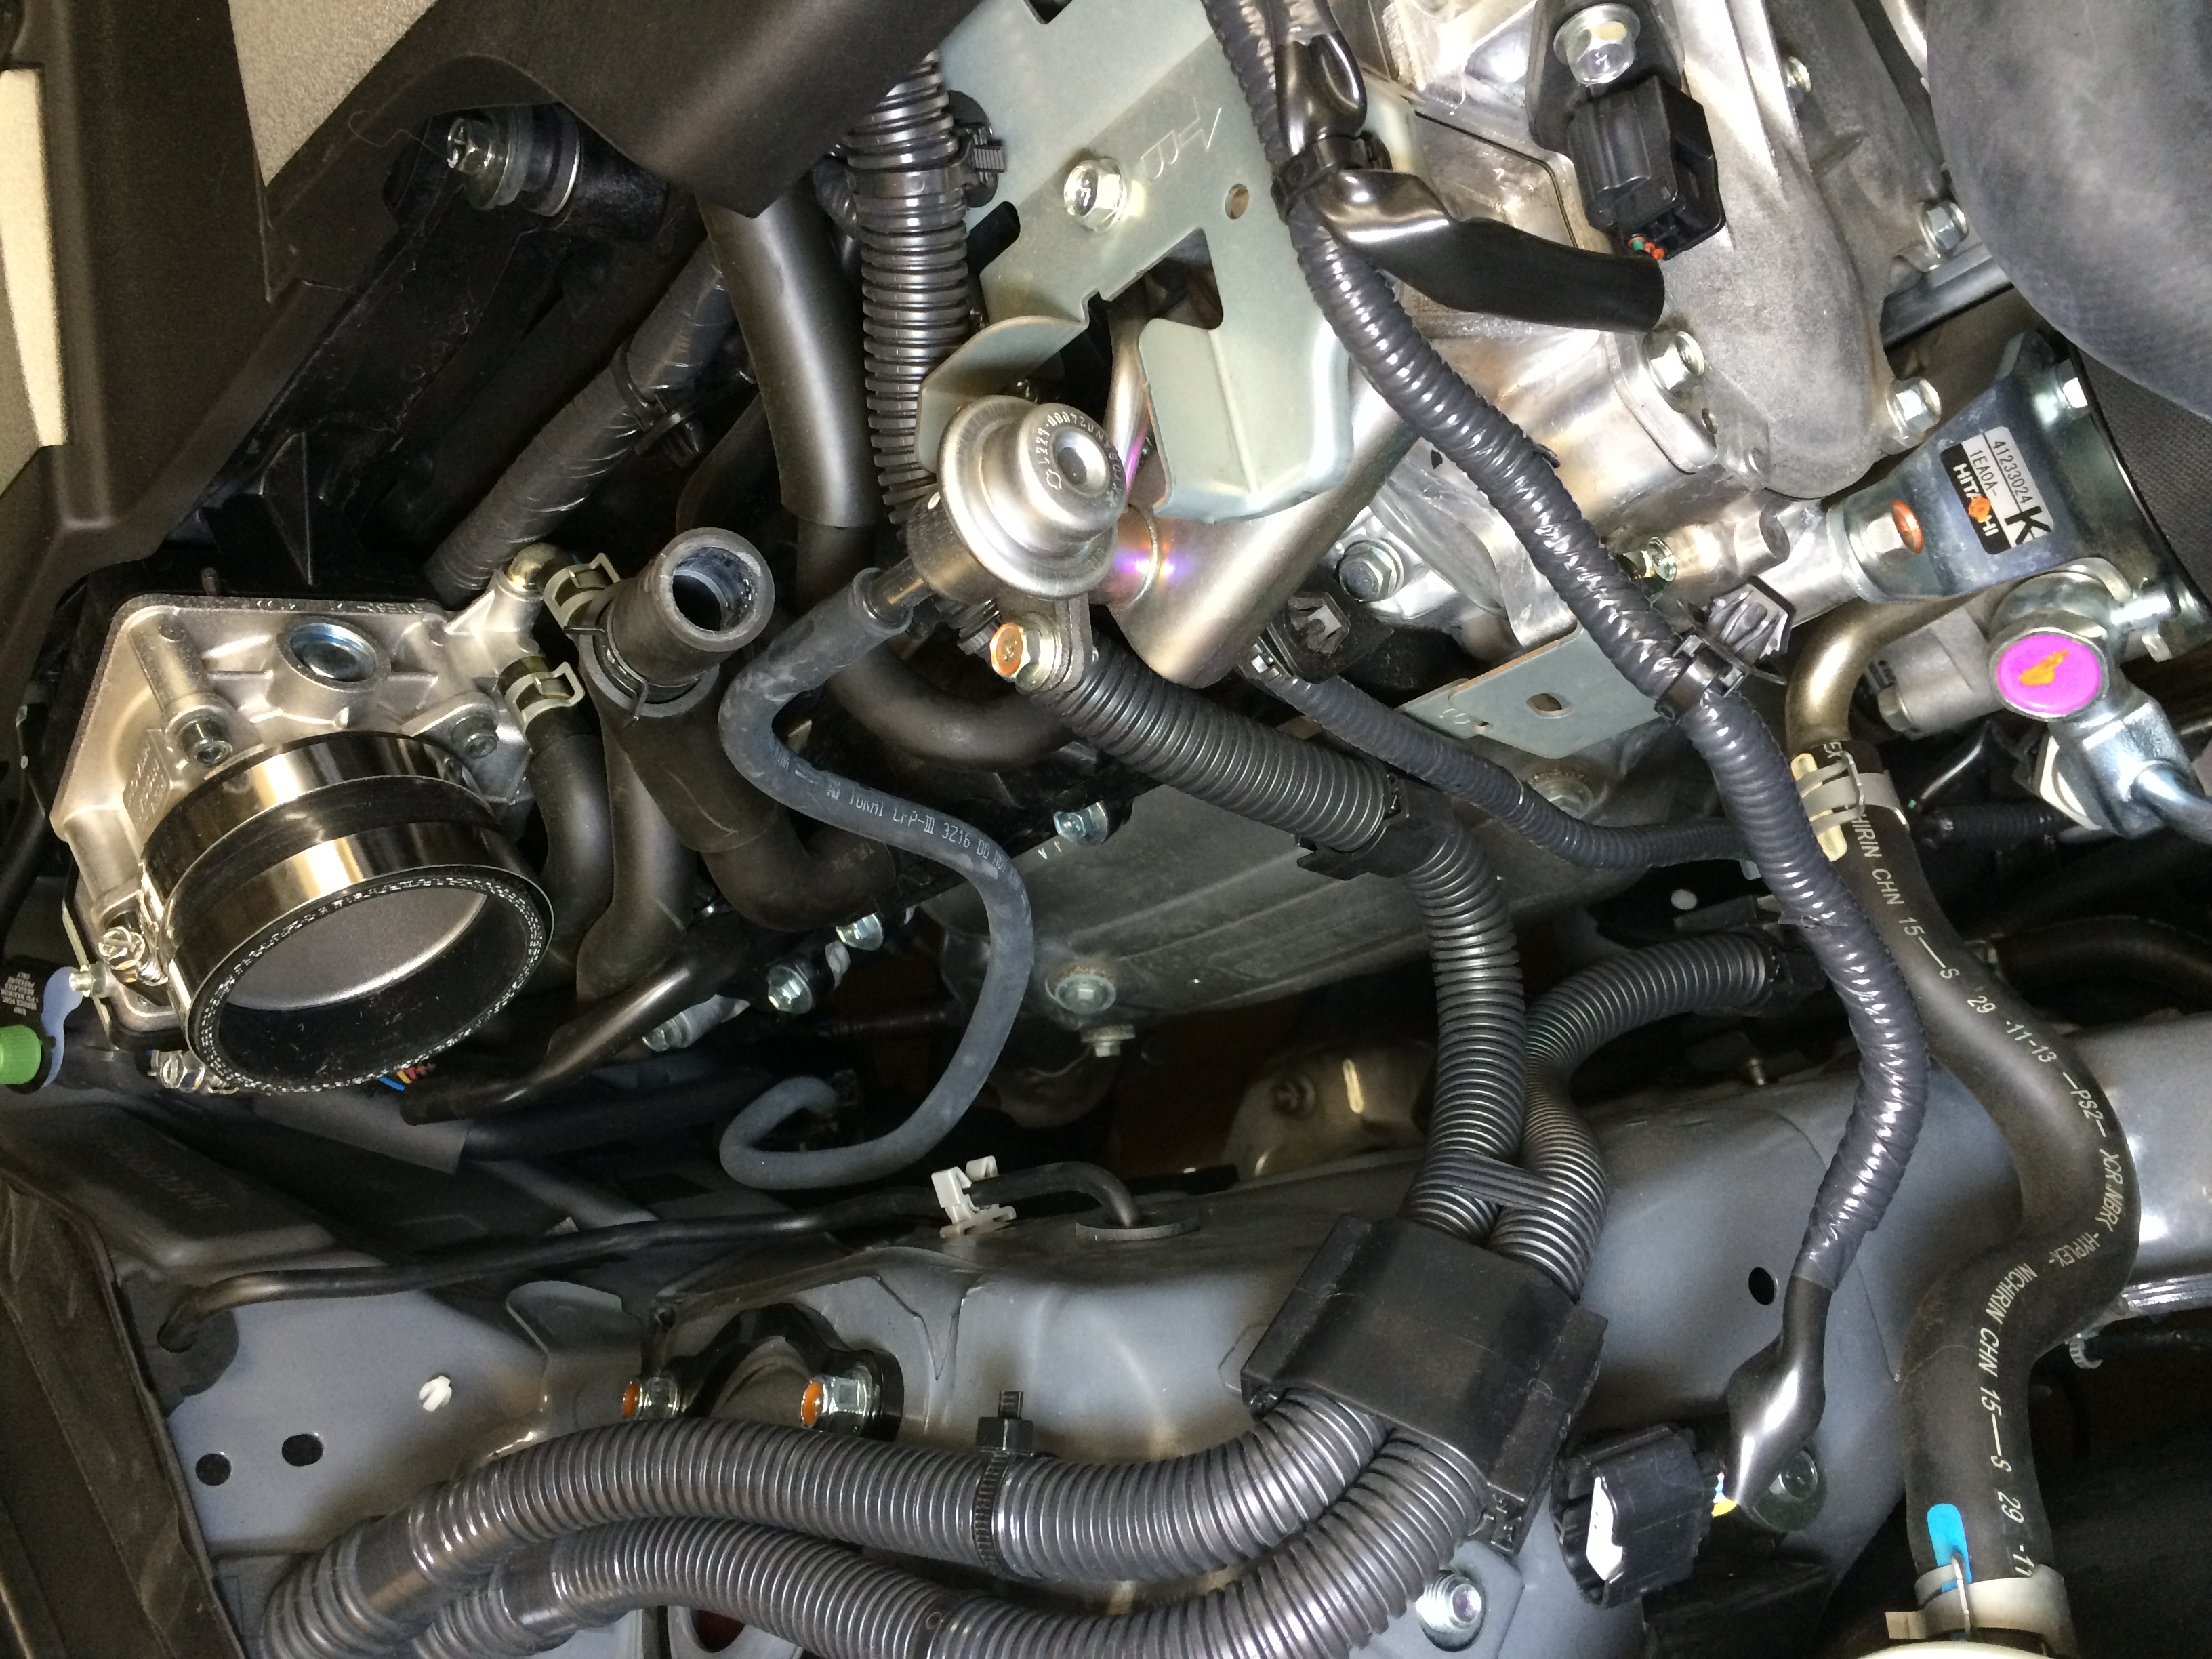
16: View of the passenger cylinder head with the manifold removed. Unlike the black hole of the driver side, light can travel into this space to illuminate its shape 🙂
17: The driver’s side o2 sensor plug is harder to get to (a consistent theme). It helped to unplug the connector going to the throttle body.
18: Driver side o2 sensor slid off its little post and unplugged
19: Driver side – out! Got it out without having to remove the studs, or mess with the steering.
20: Is there a manifold in there still? Eh, can’t tell…
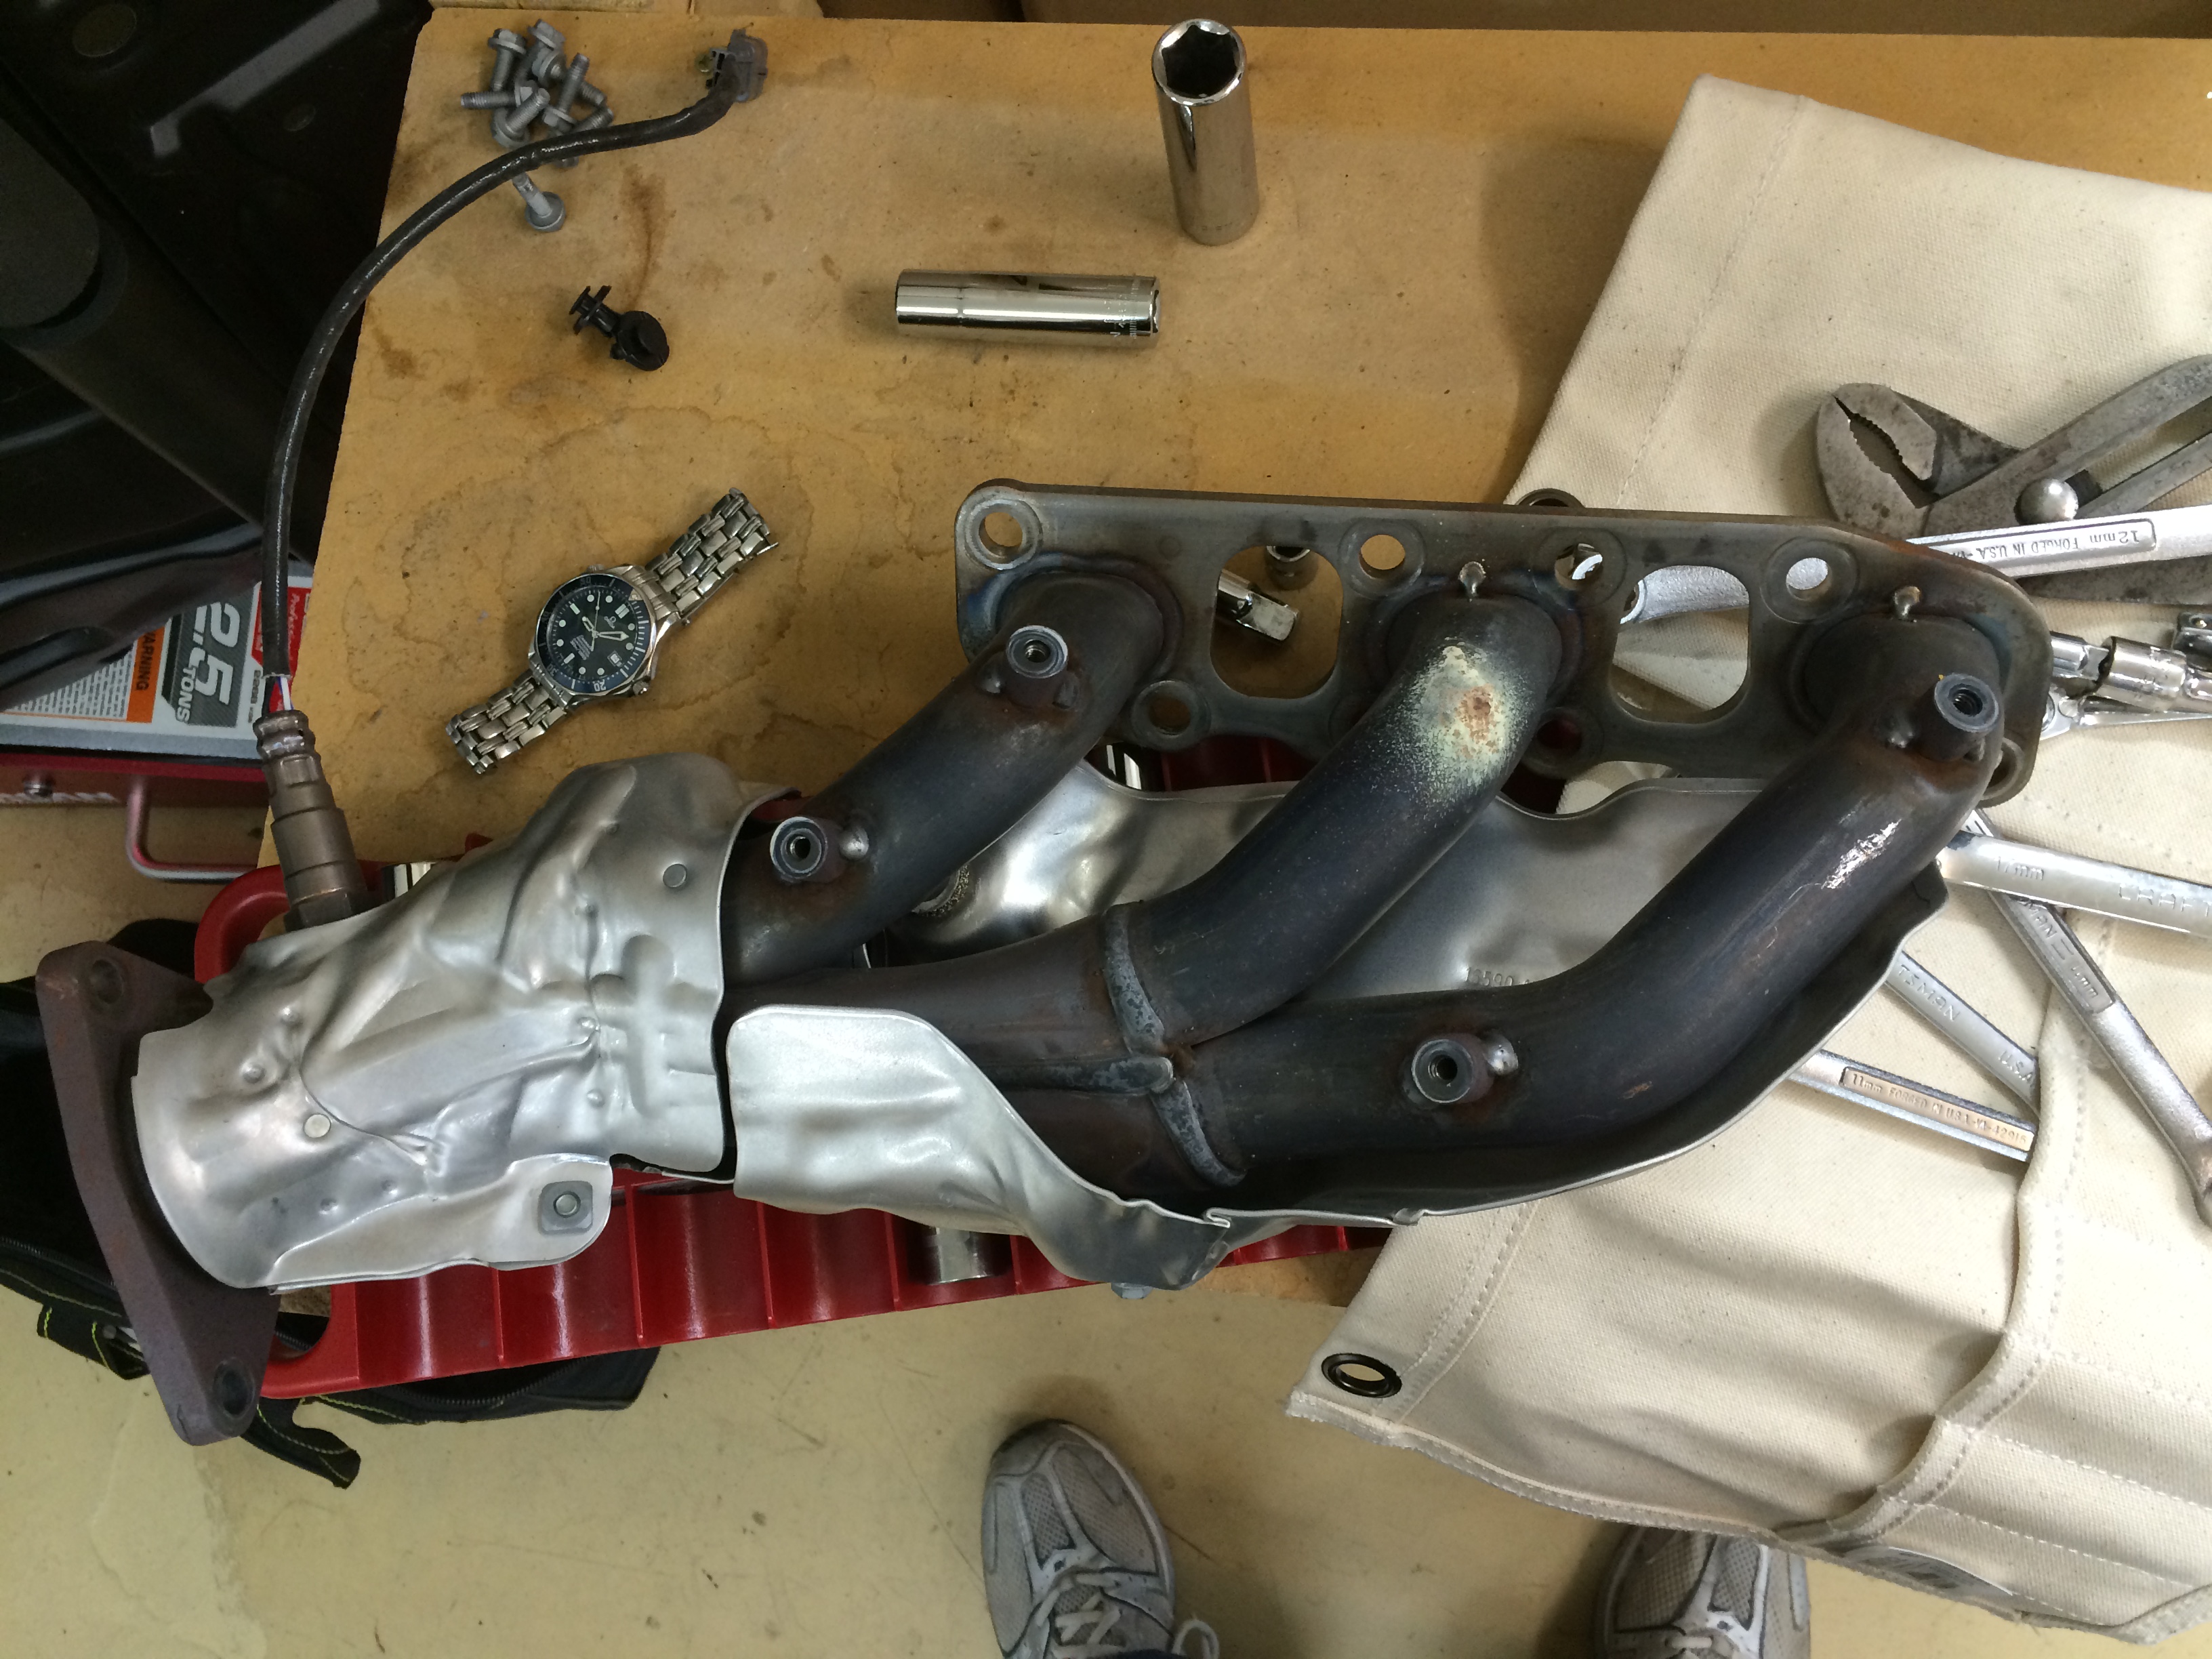
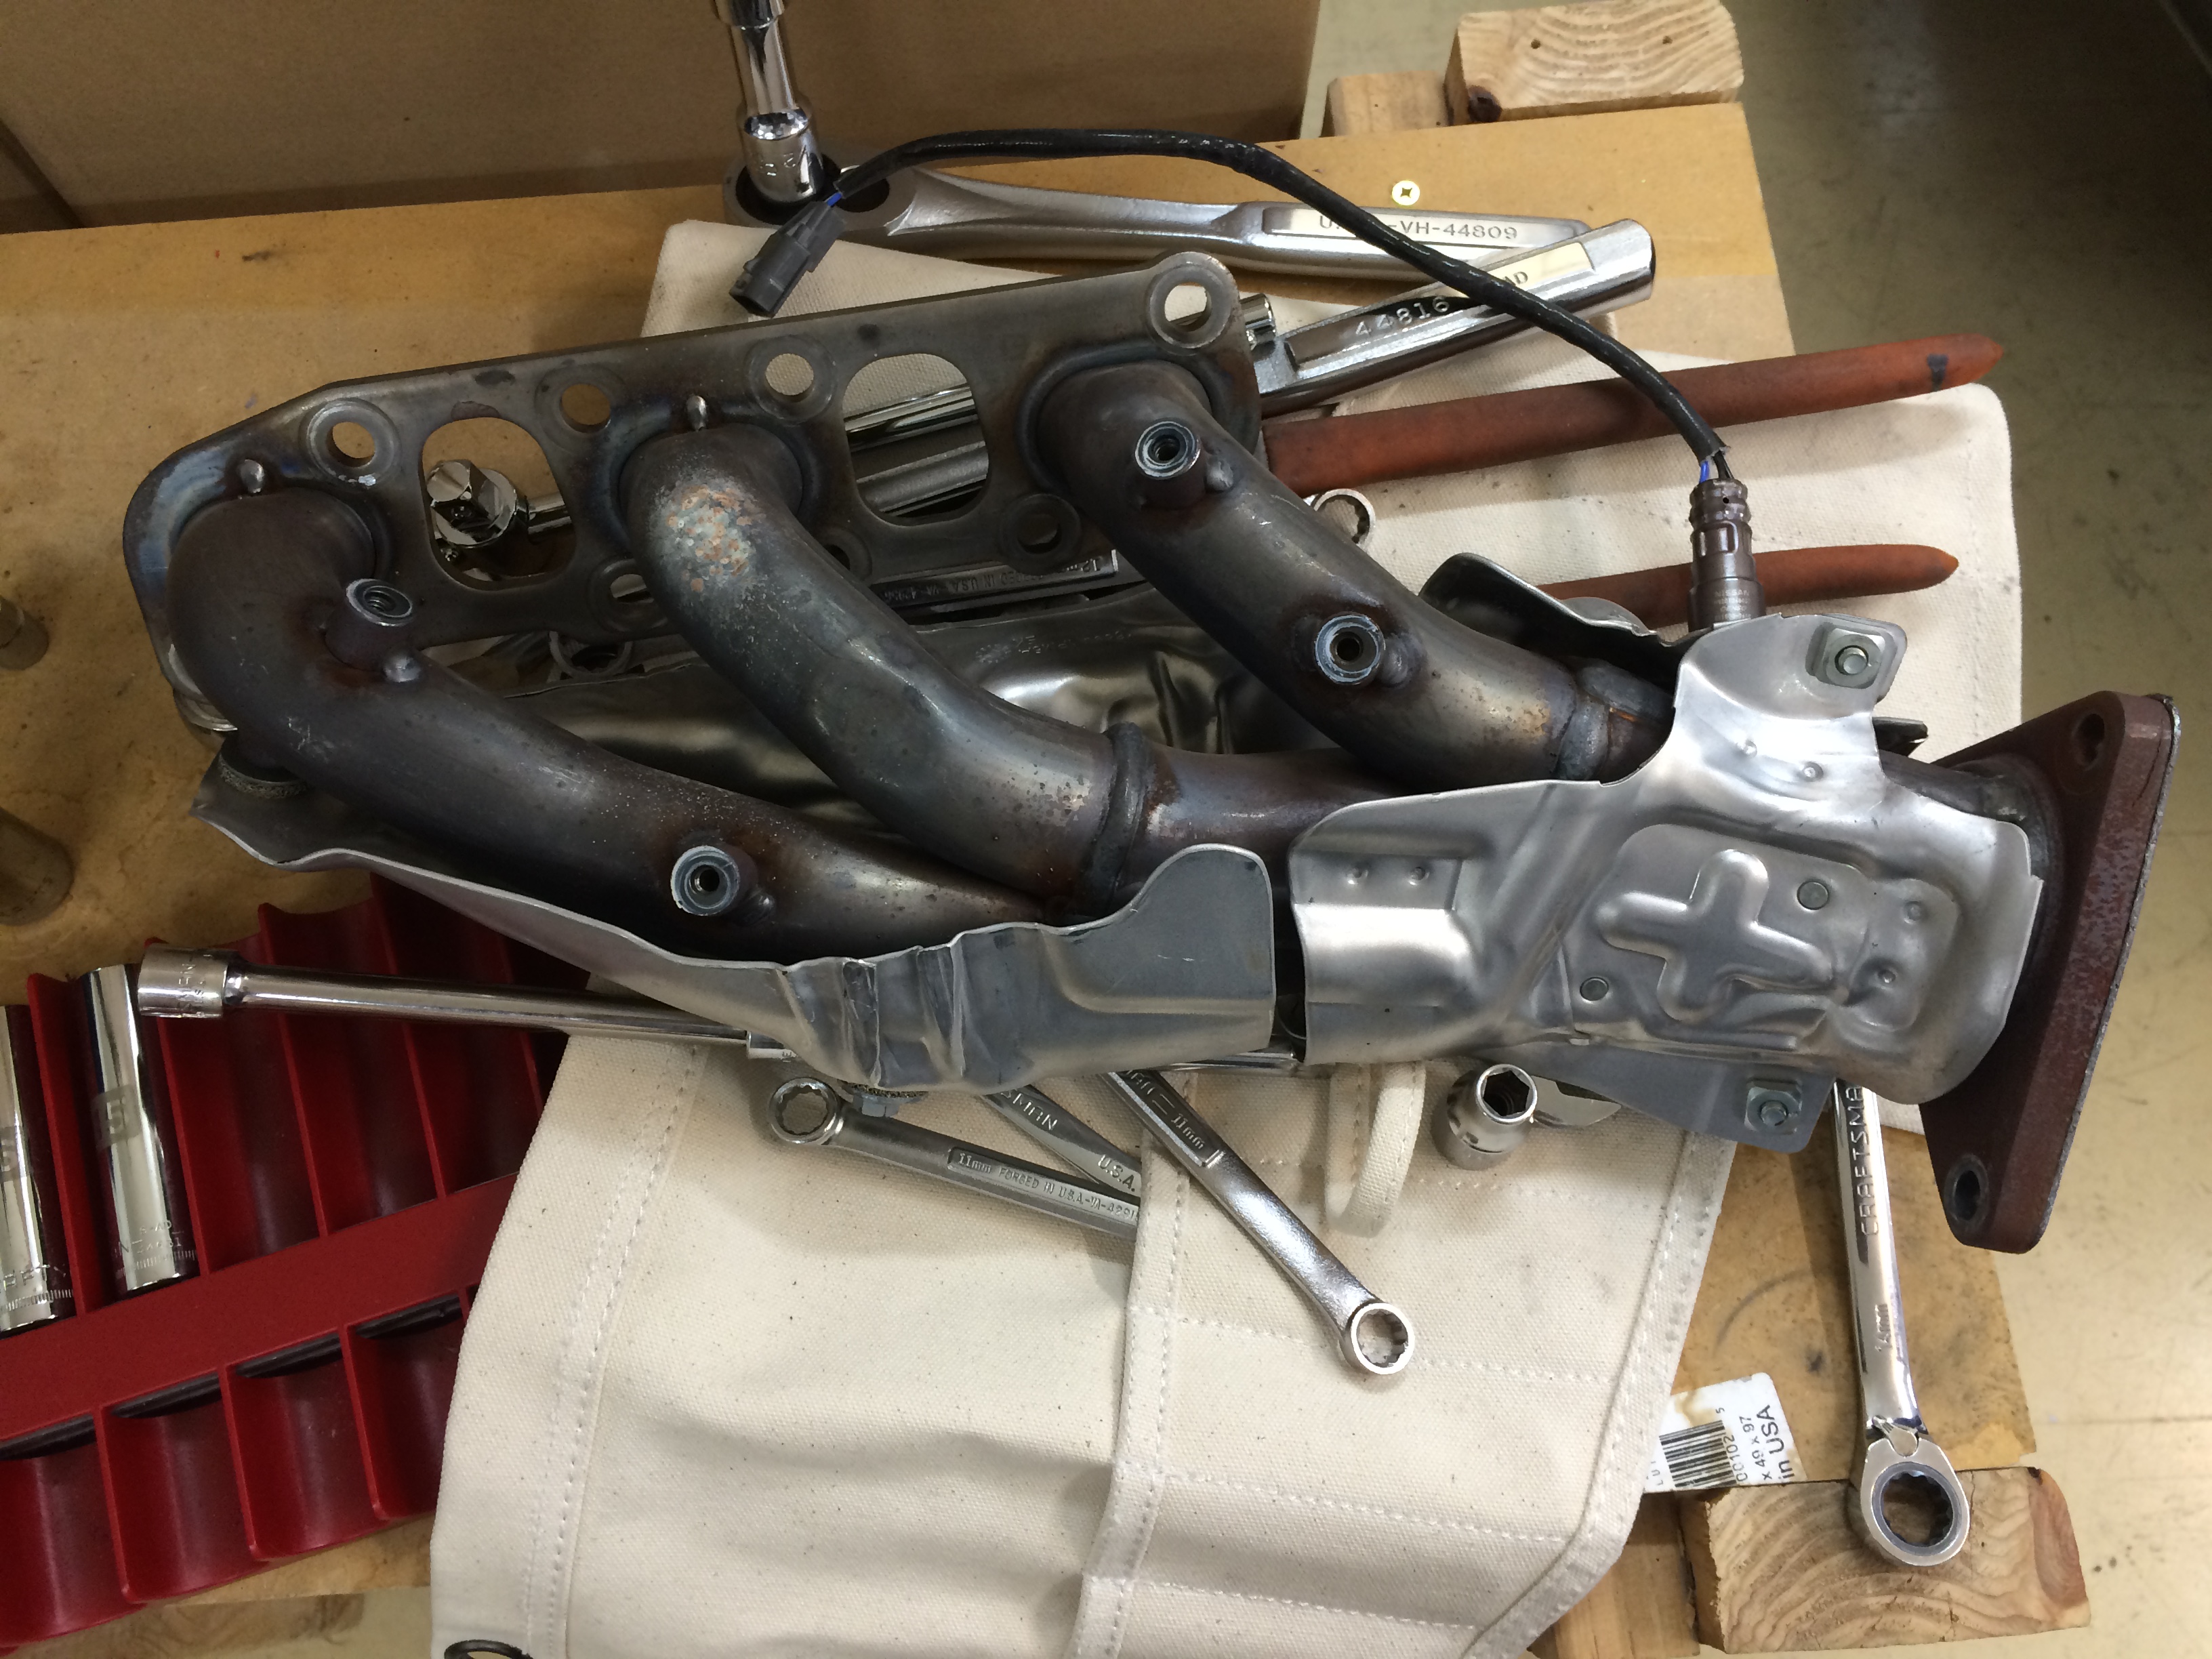
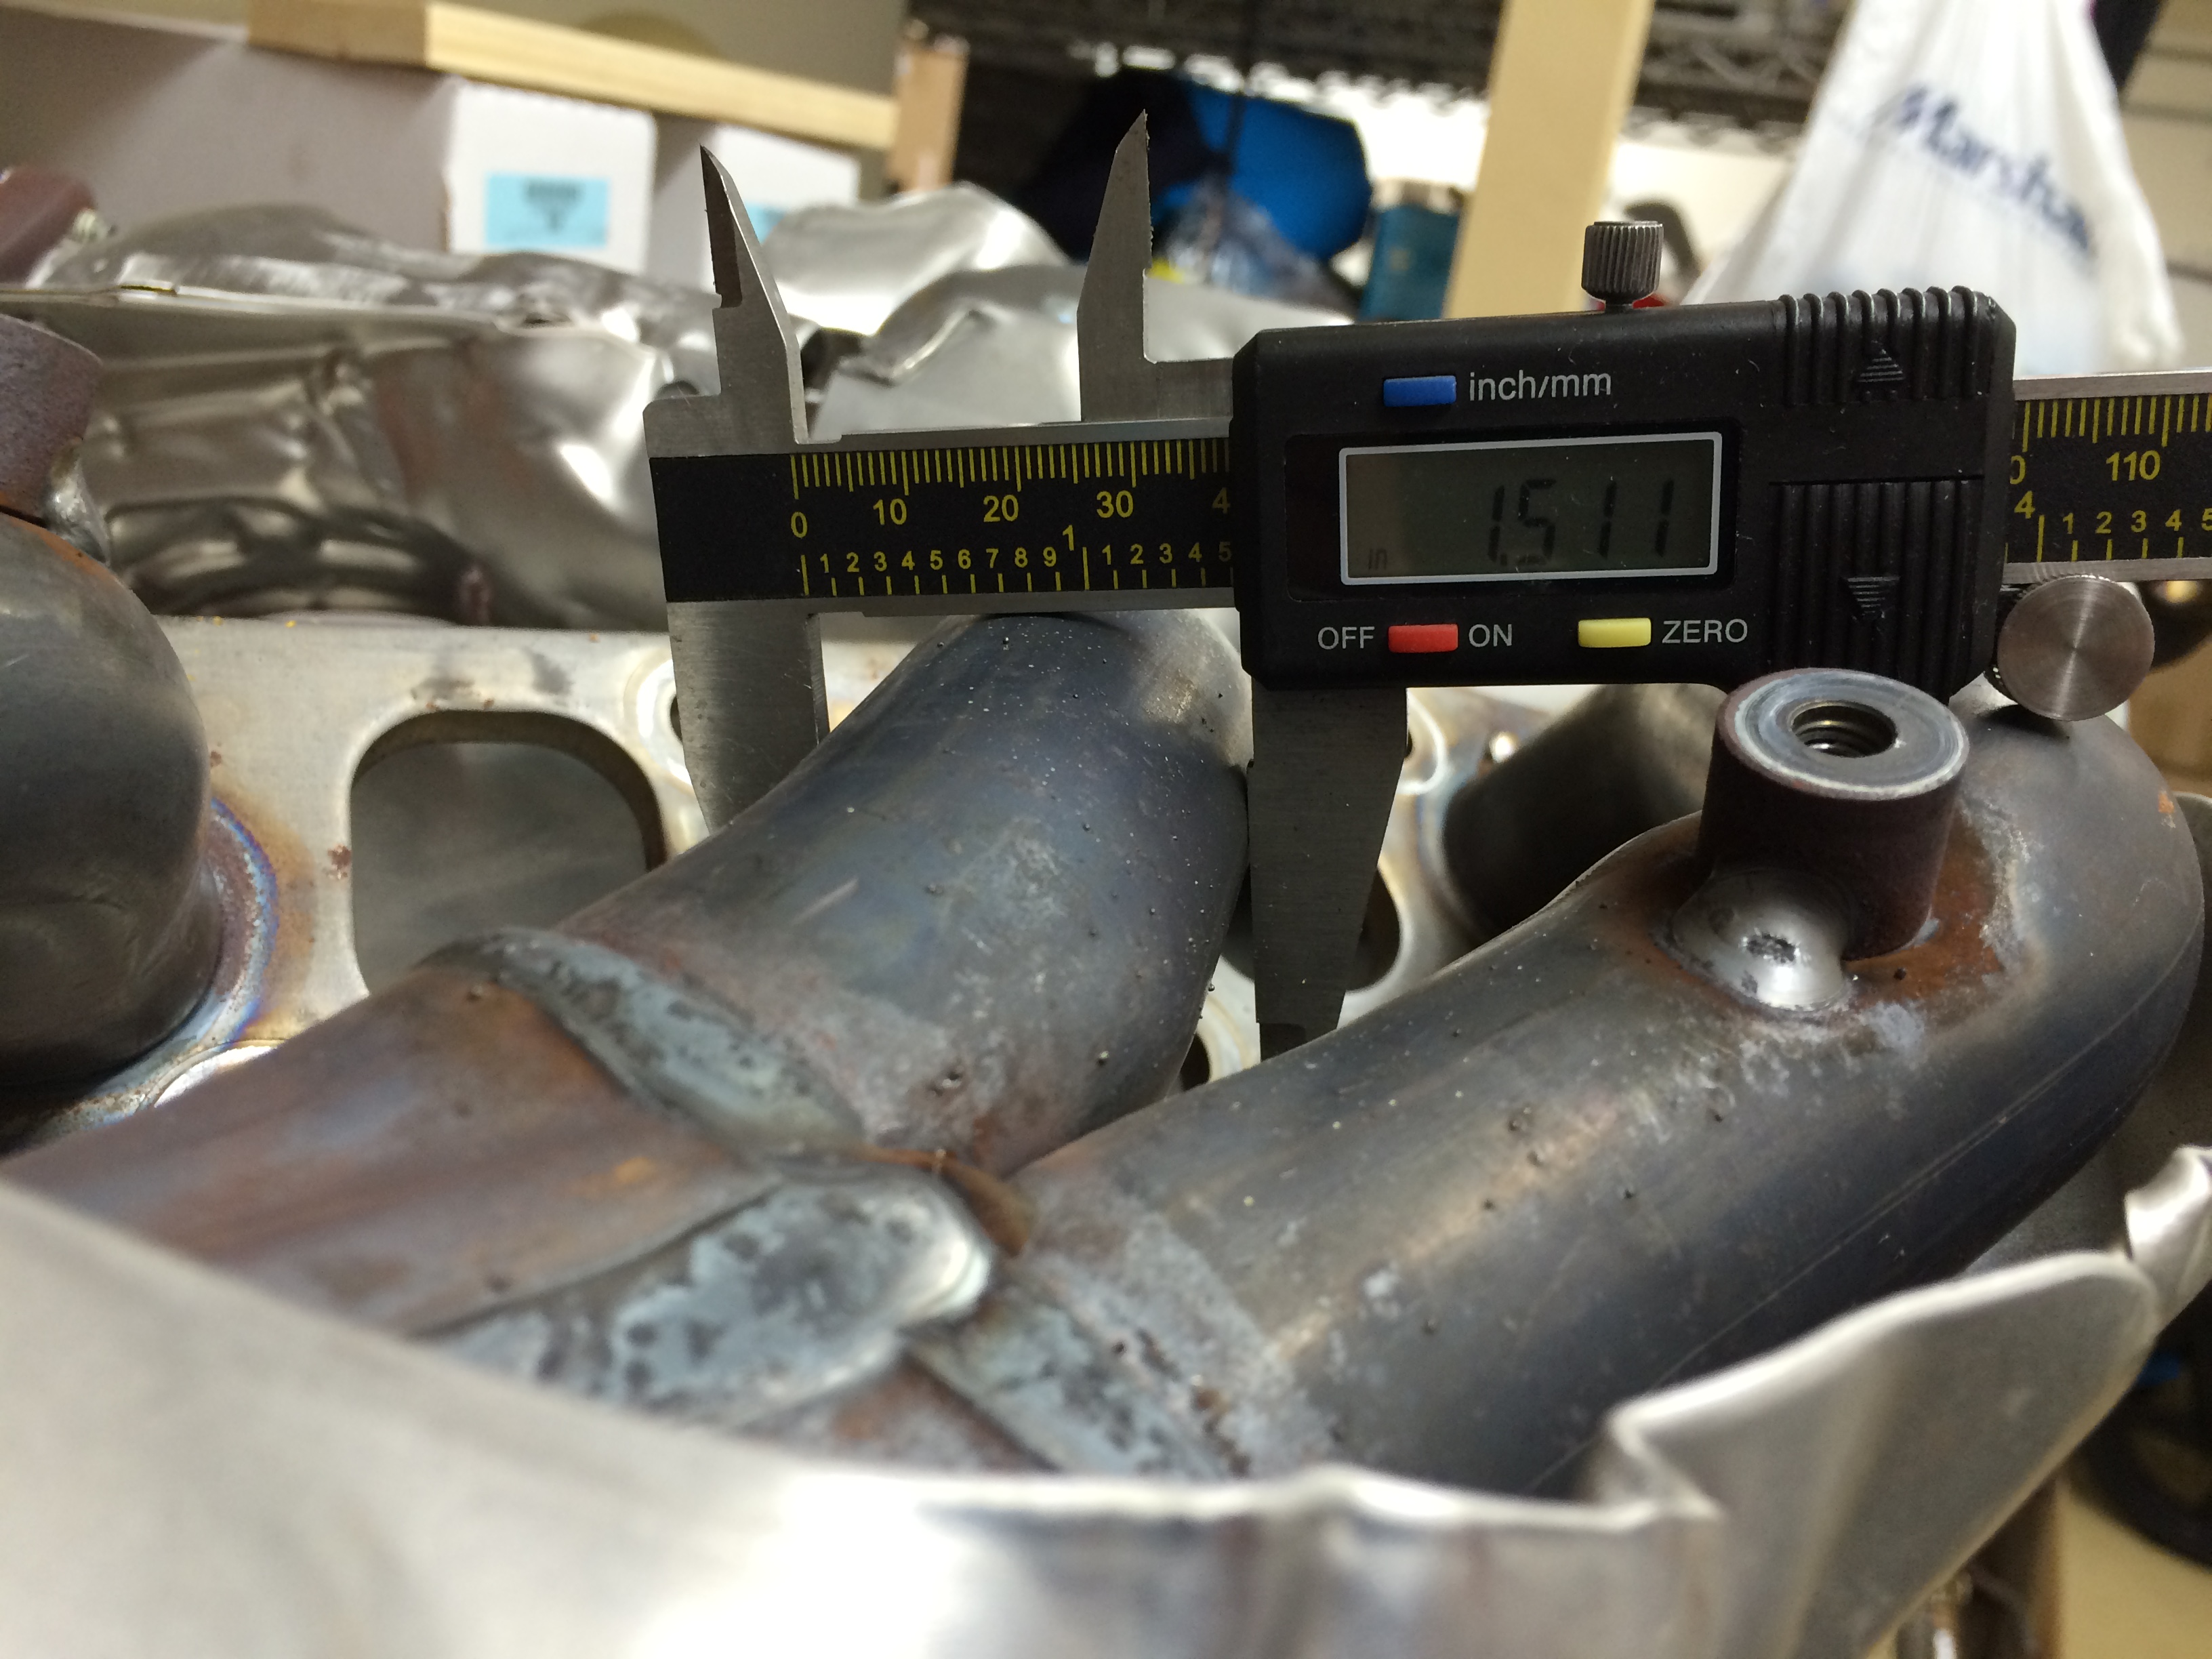
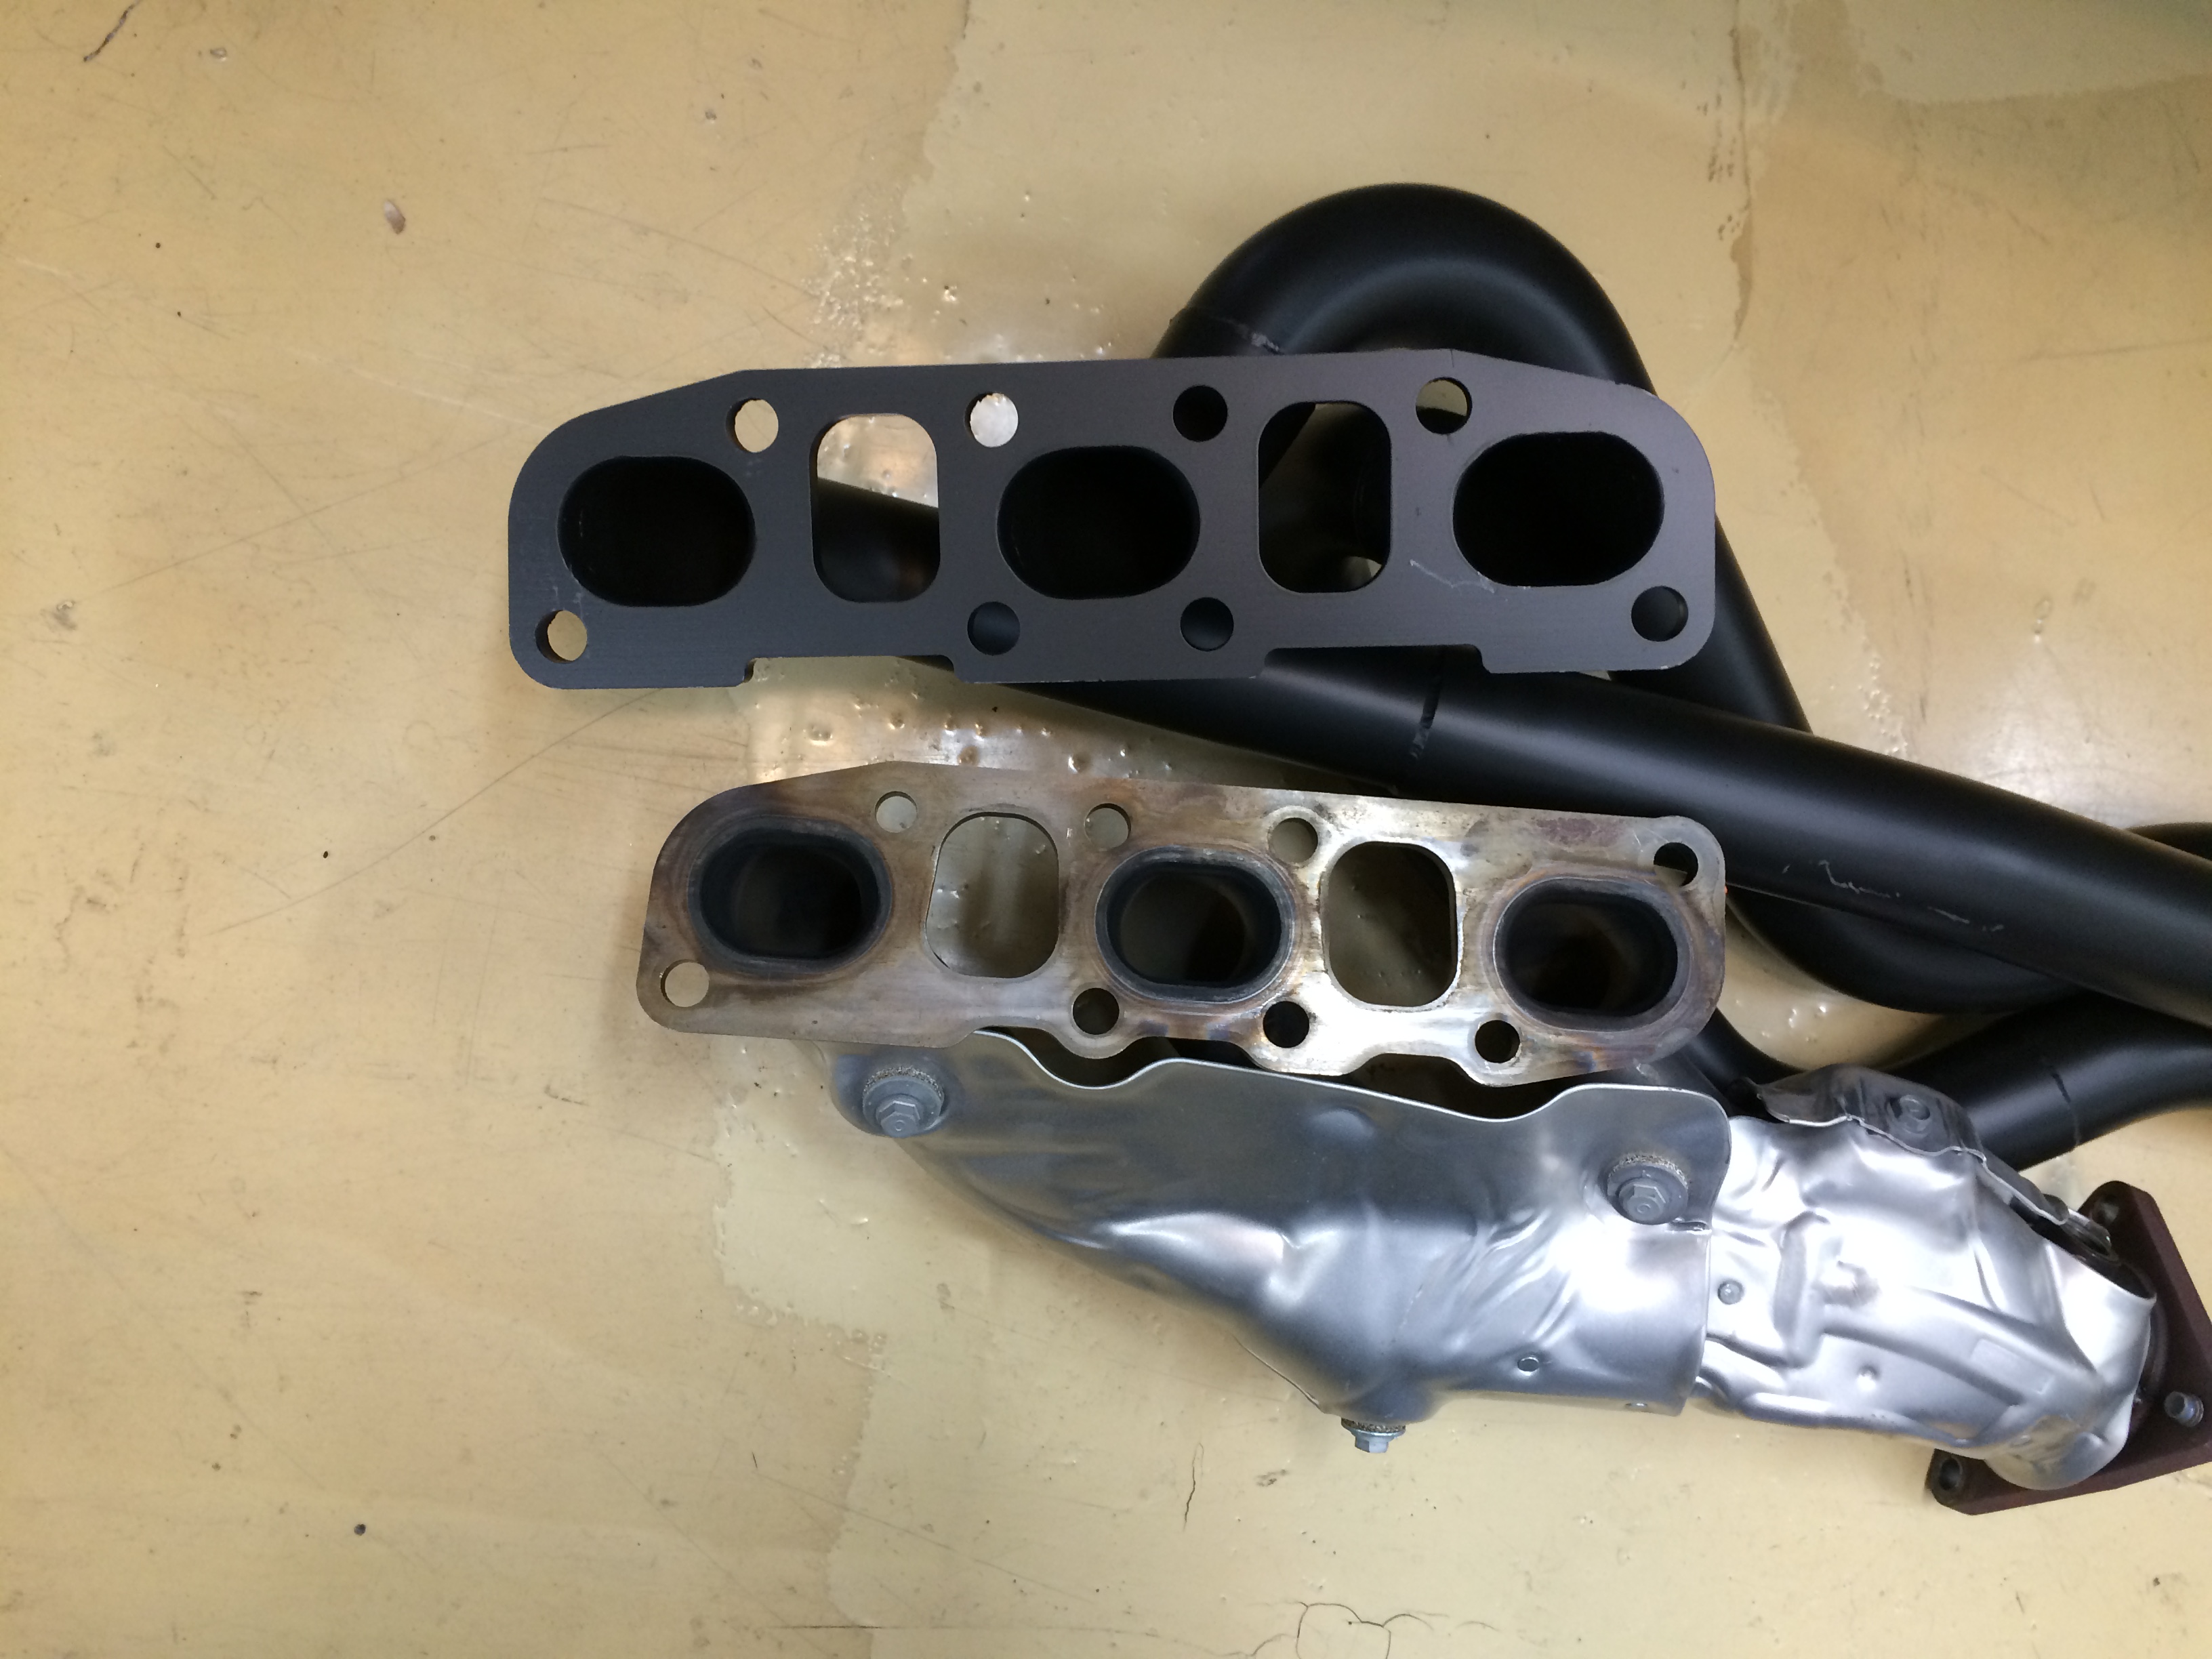
21: The factory manifolds are actually really nice looking for an OE piece. Some guy in Japan (or wherever they are designed) probably shakes his head when he sees people swapping headers.
Header primary diameter is a big factor in the shape of an engine’s power curve. Stock pieces are about 1.5″ – which in a super overgeneralized hand-wave, is a little “torquey/small” for an engine making 50-60 whp per cylinder.
22: Collector size is appropriate for the primaries but a little choked overall.
Evening 2 ends here, another 2 hours.
Evening 3 begin – this was the long one:
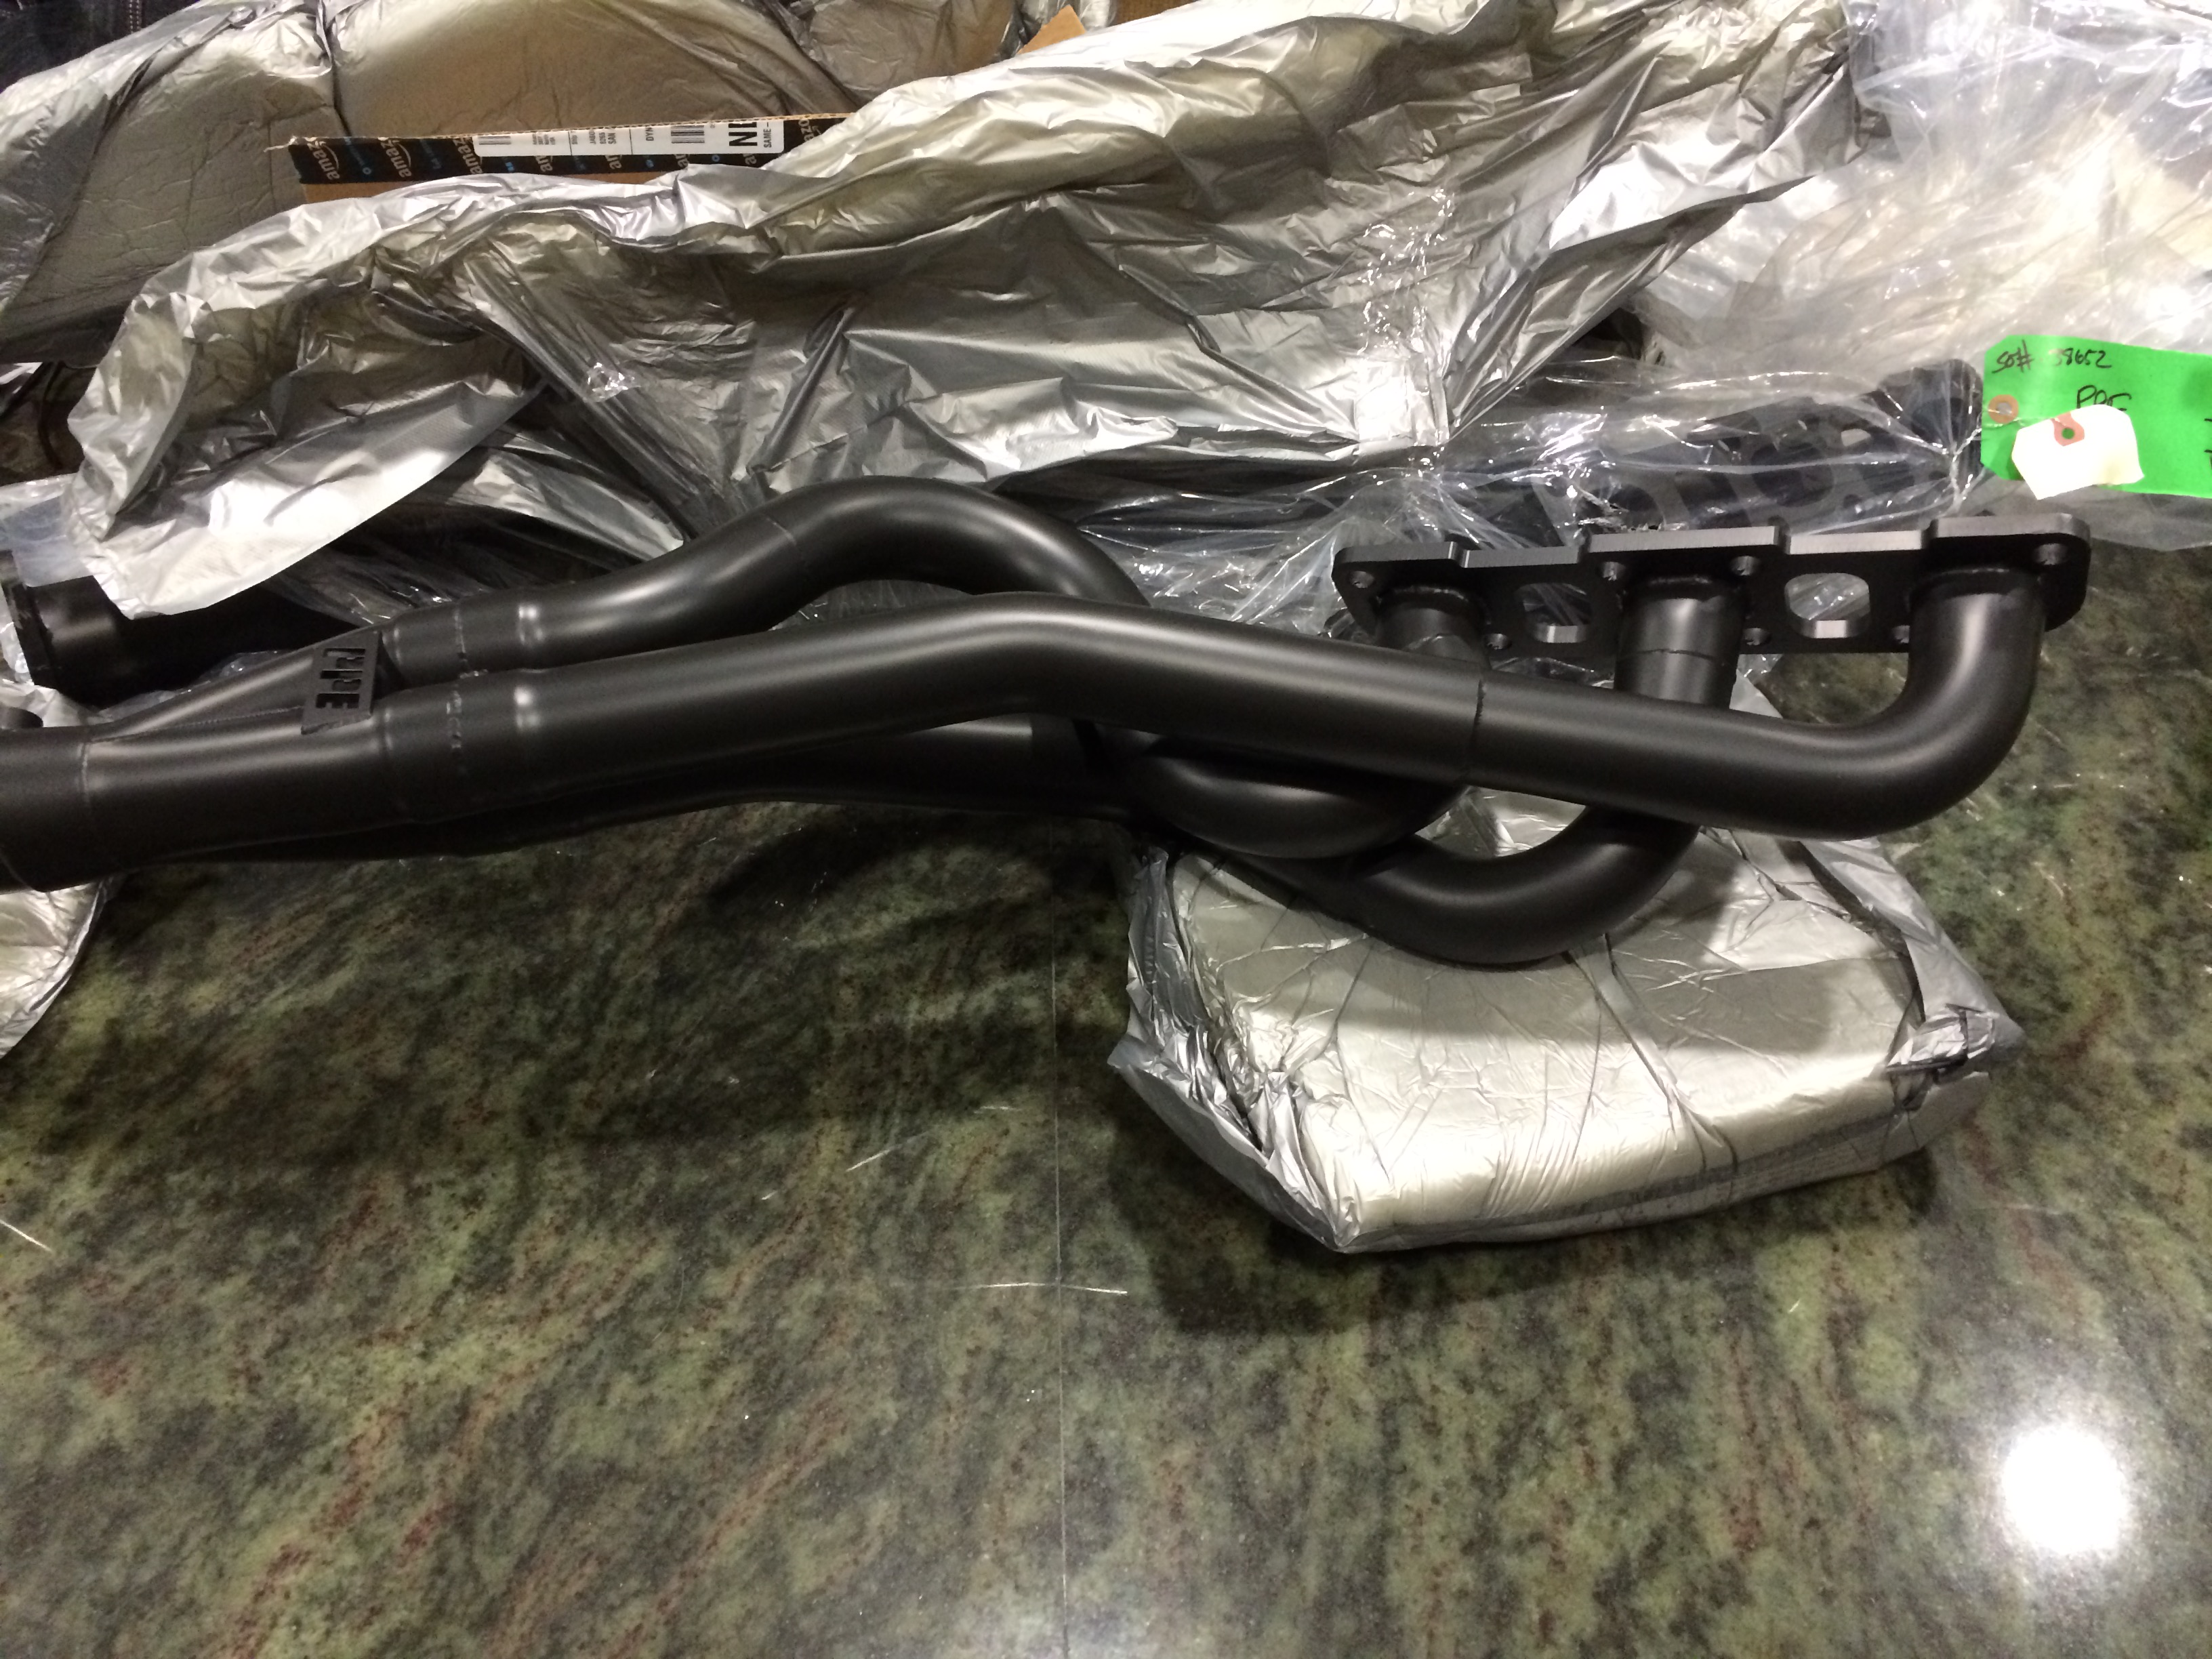
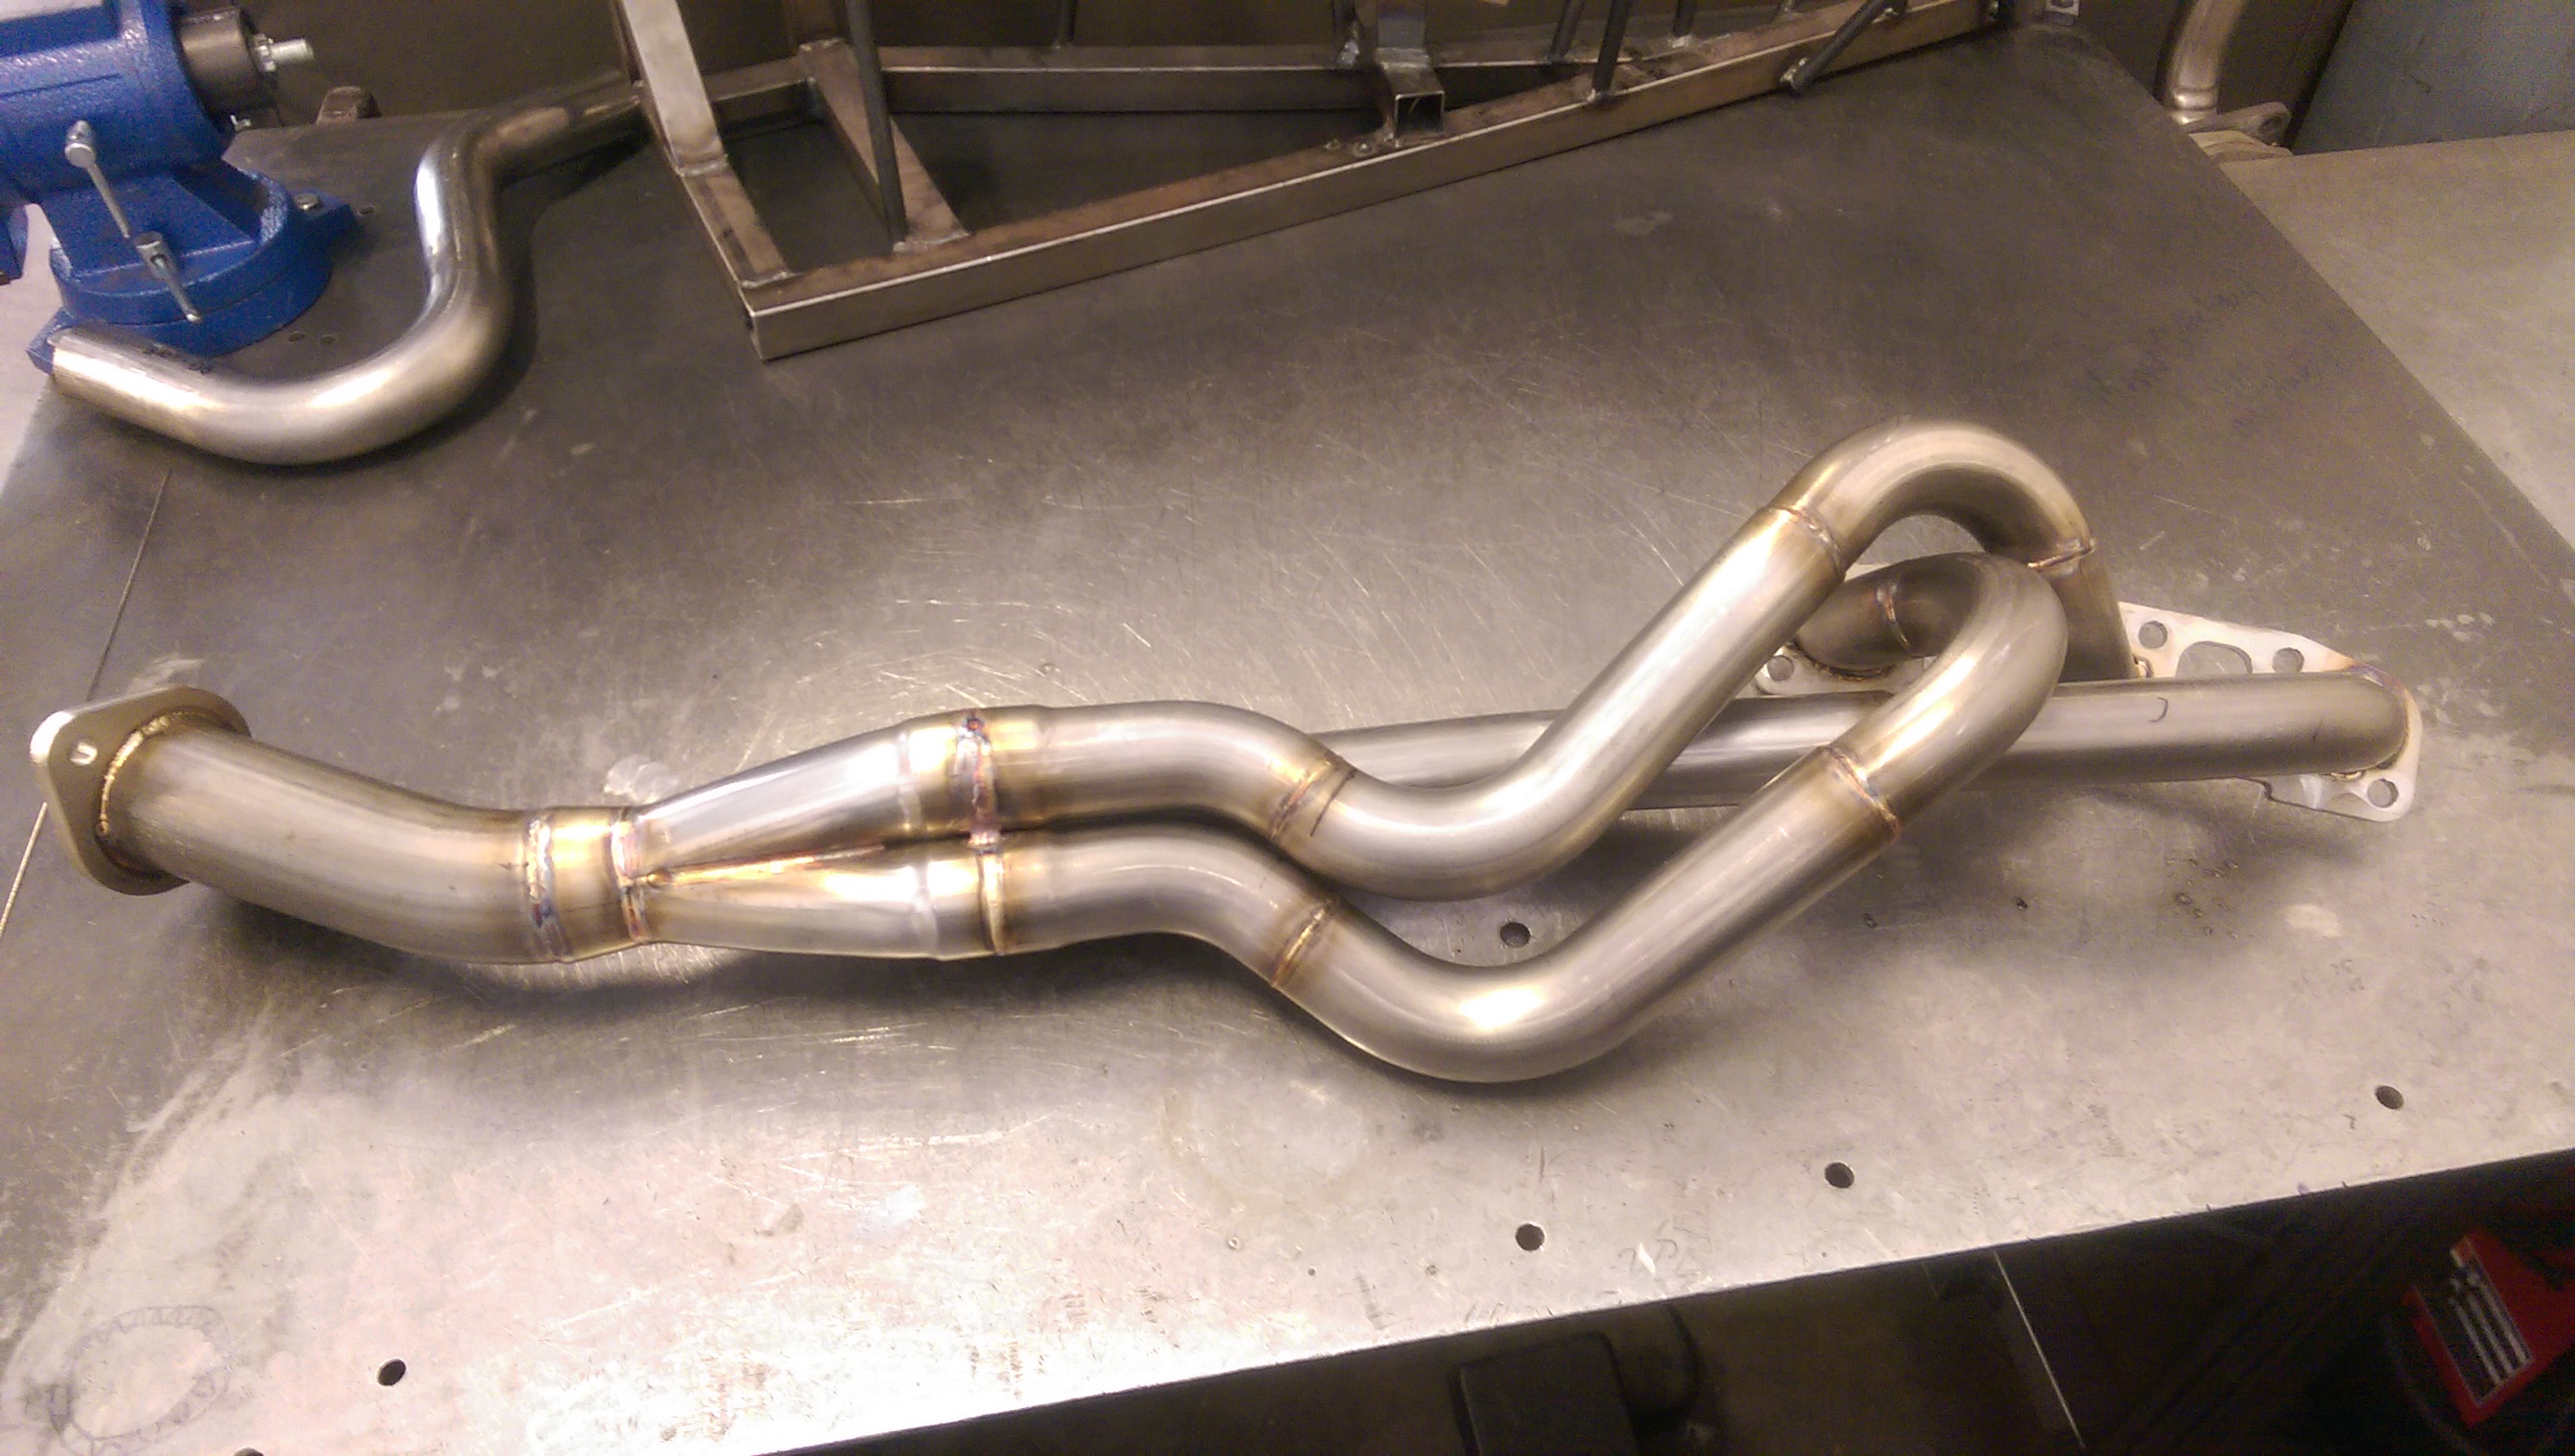
23: Unboxing the PPE’s
24: First to attempt install was the passenger side. I recommend doing that with everything because it’s a massively more accessible mirror image of the driver’s side. What you learn here without a ton of pain, you can apply to the other side.
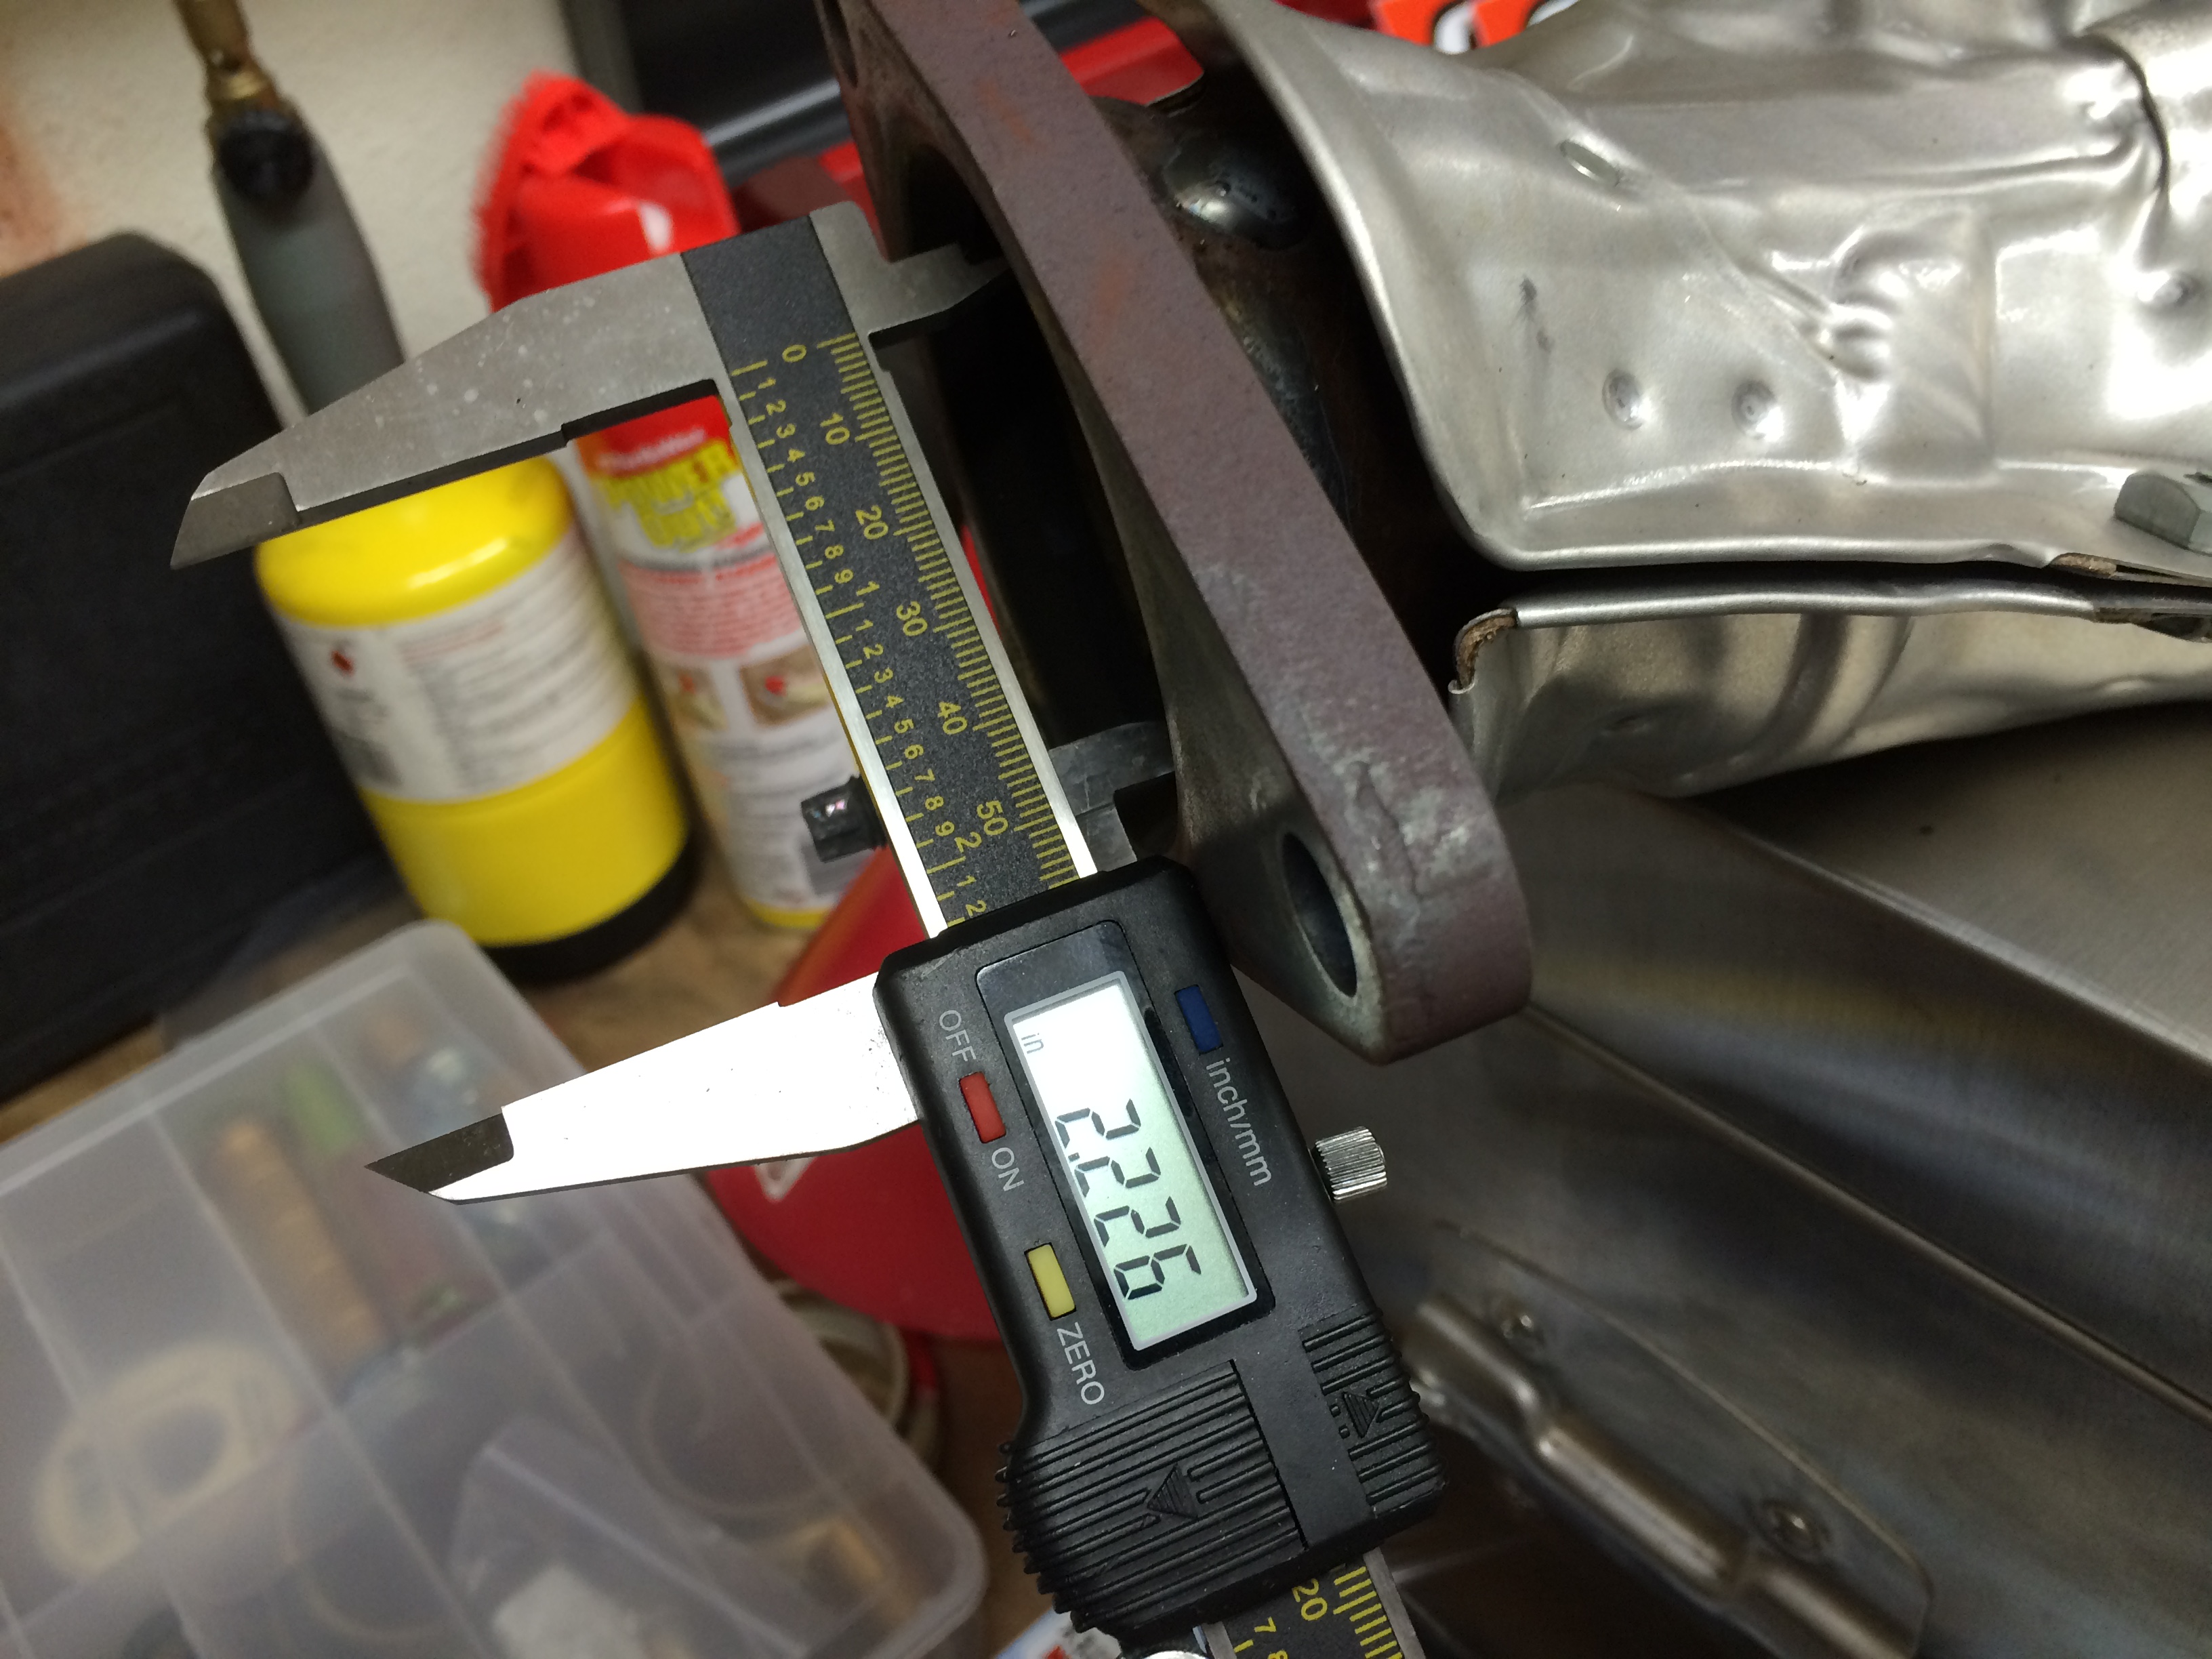
It wouldn’t go in and something seemed really wrong here. This was one of my first heart attack moments. Check out the flange compared to stock:
For a while I was surveying the shipping materials to be sure I could send them back. The flange seemed upside down, but then I saw the front (left-most in pic) cylinder was correct. Took me a while to figure out, the gasket had holes in the right places, but also the cylinder head had the holes already tapped in the perfect spots?!?
So I swapped the diagonal positioning of the rear ones – it still wouldn’t go in, but now because of a lack of room.
Left the middle cylinder’s studs in (original holes) and got the header on, and re-installed the other studs. A ways into securing things I realized the middle would have to be swapped too..
Eventually got it in, studs in (they have a 6-point star end that needs a 1/4″ wrench or socket – 6mm too small, 7mm too big) and nuts tightened.
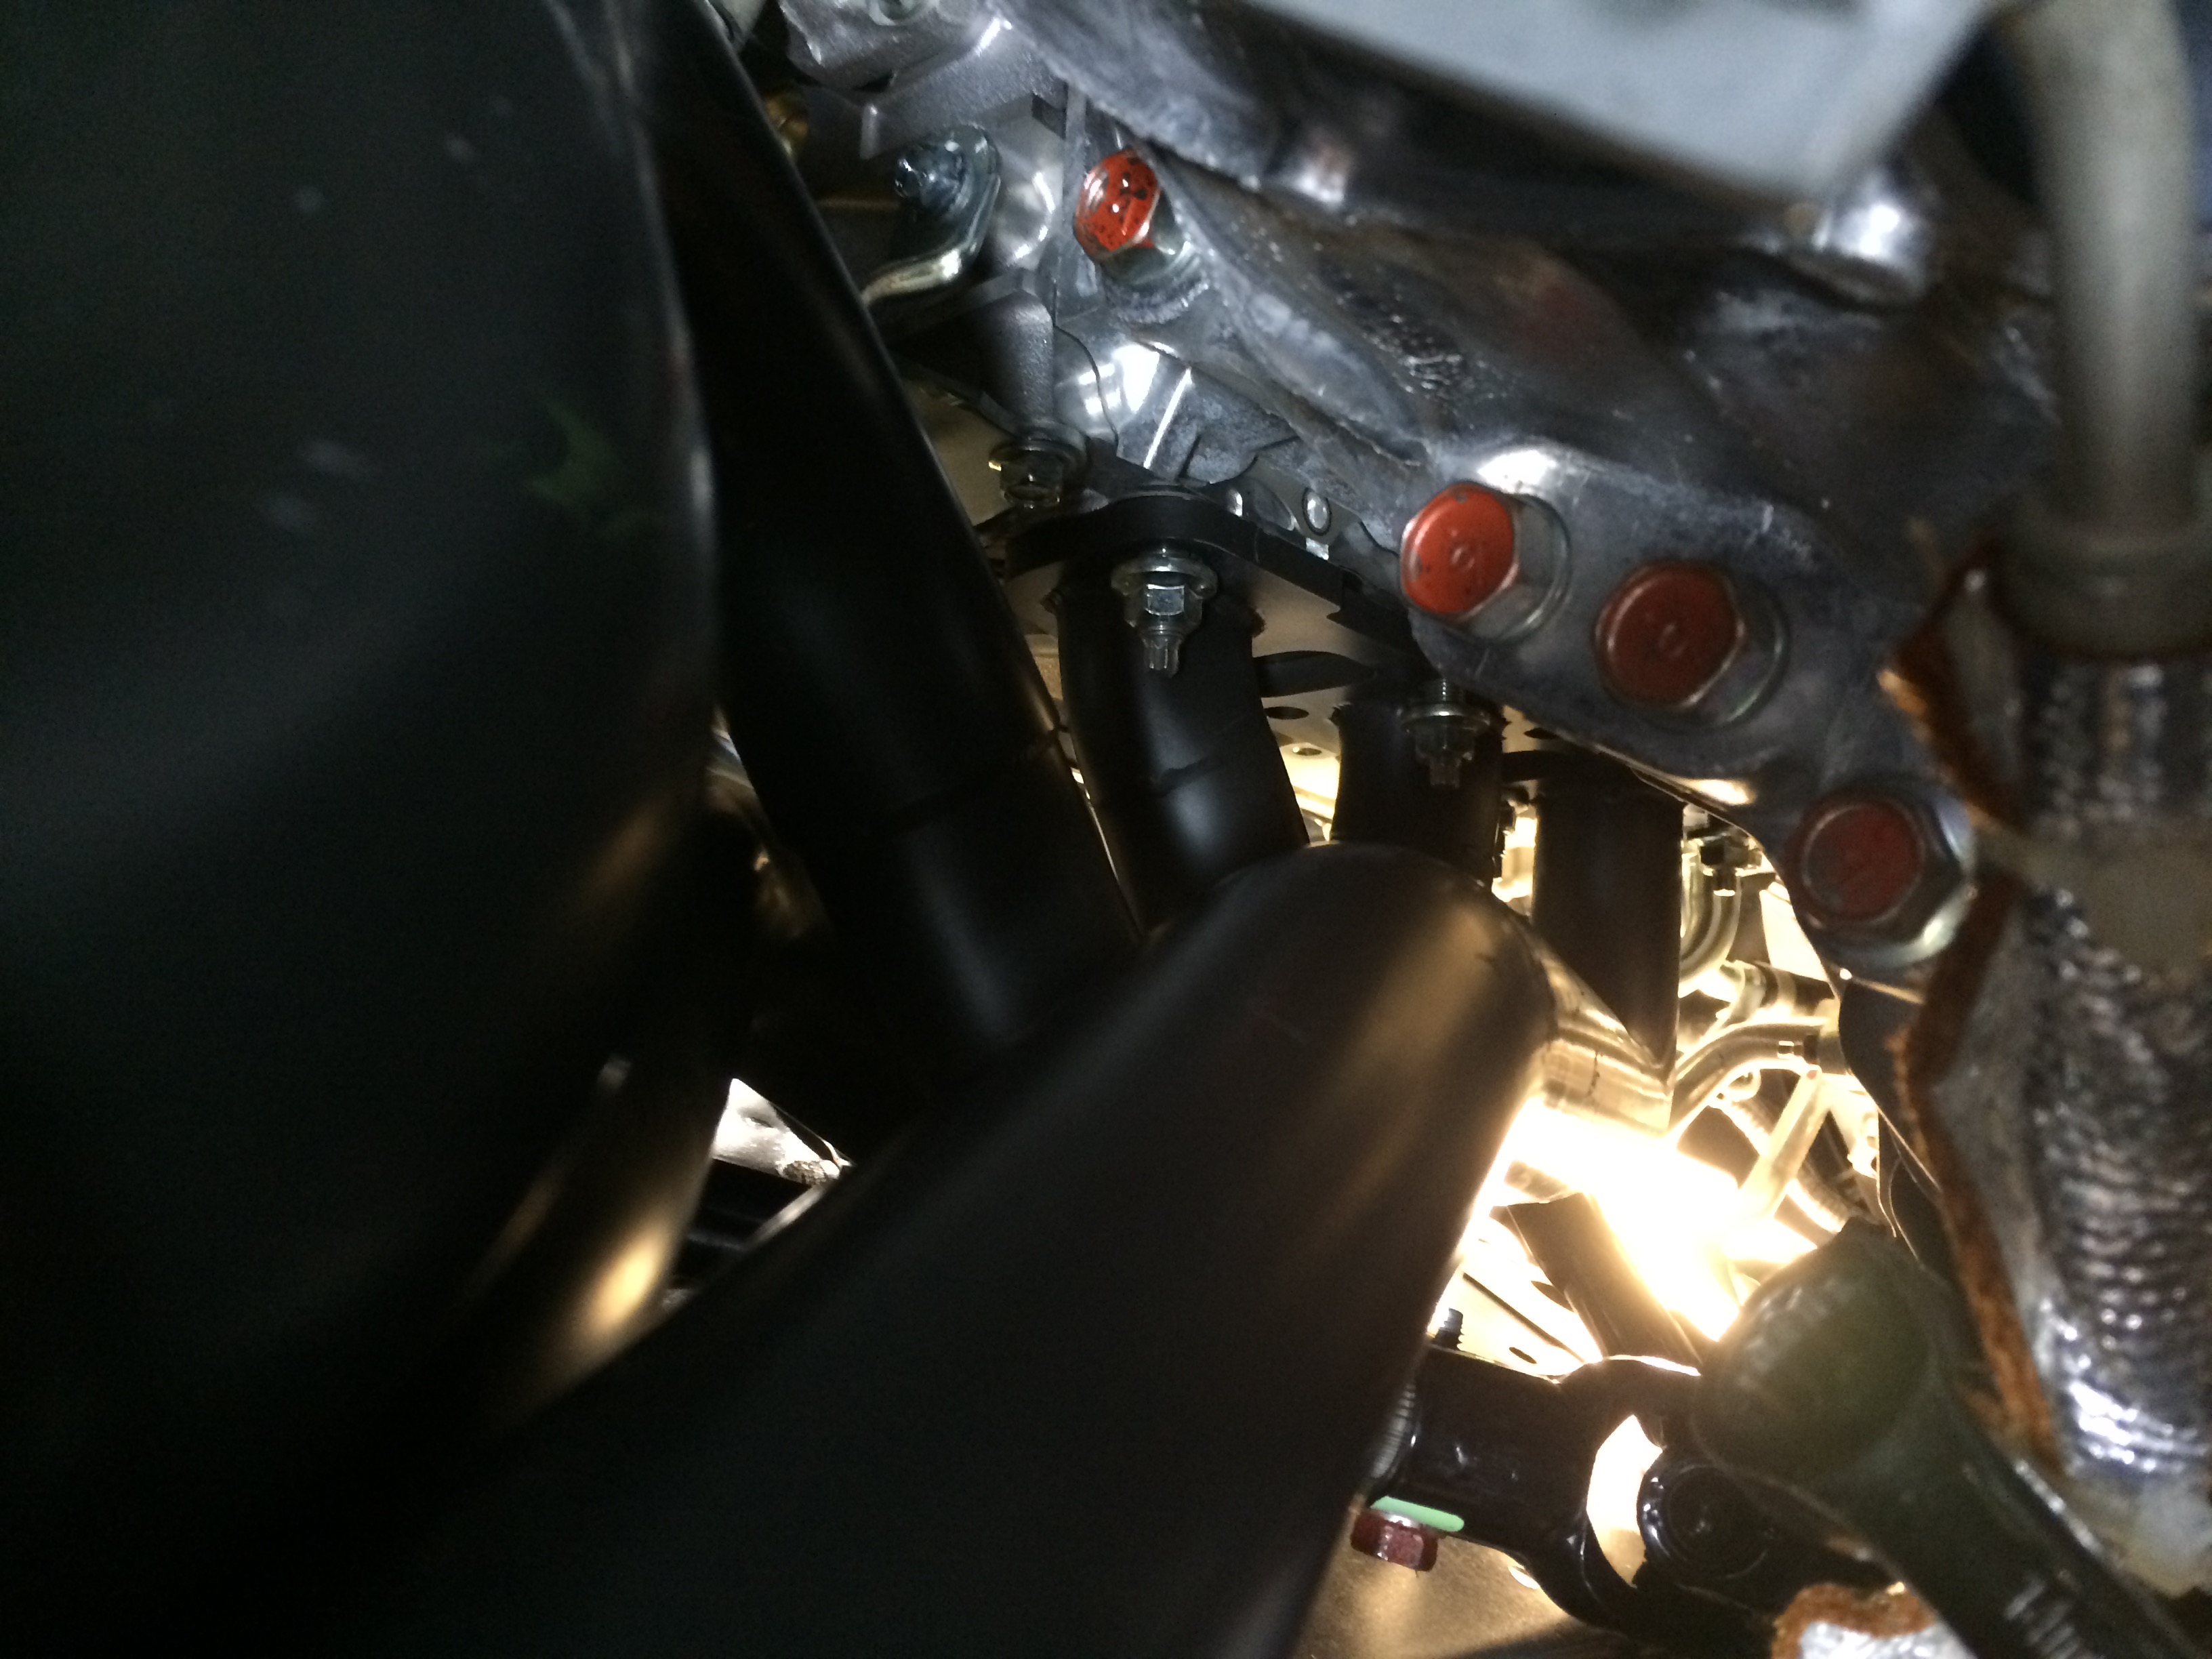
25: Passenger side header in. Three top nuts and forward lower tightened from above. Middle and rear lower tightened from below with wrenches.
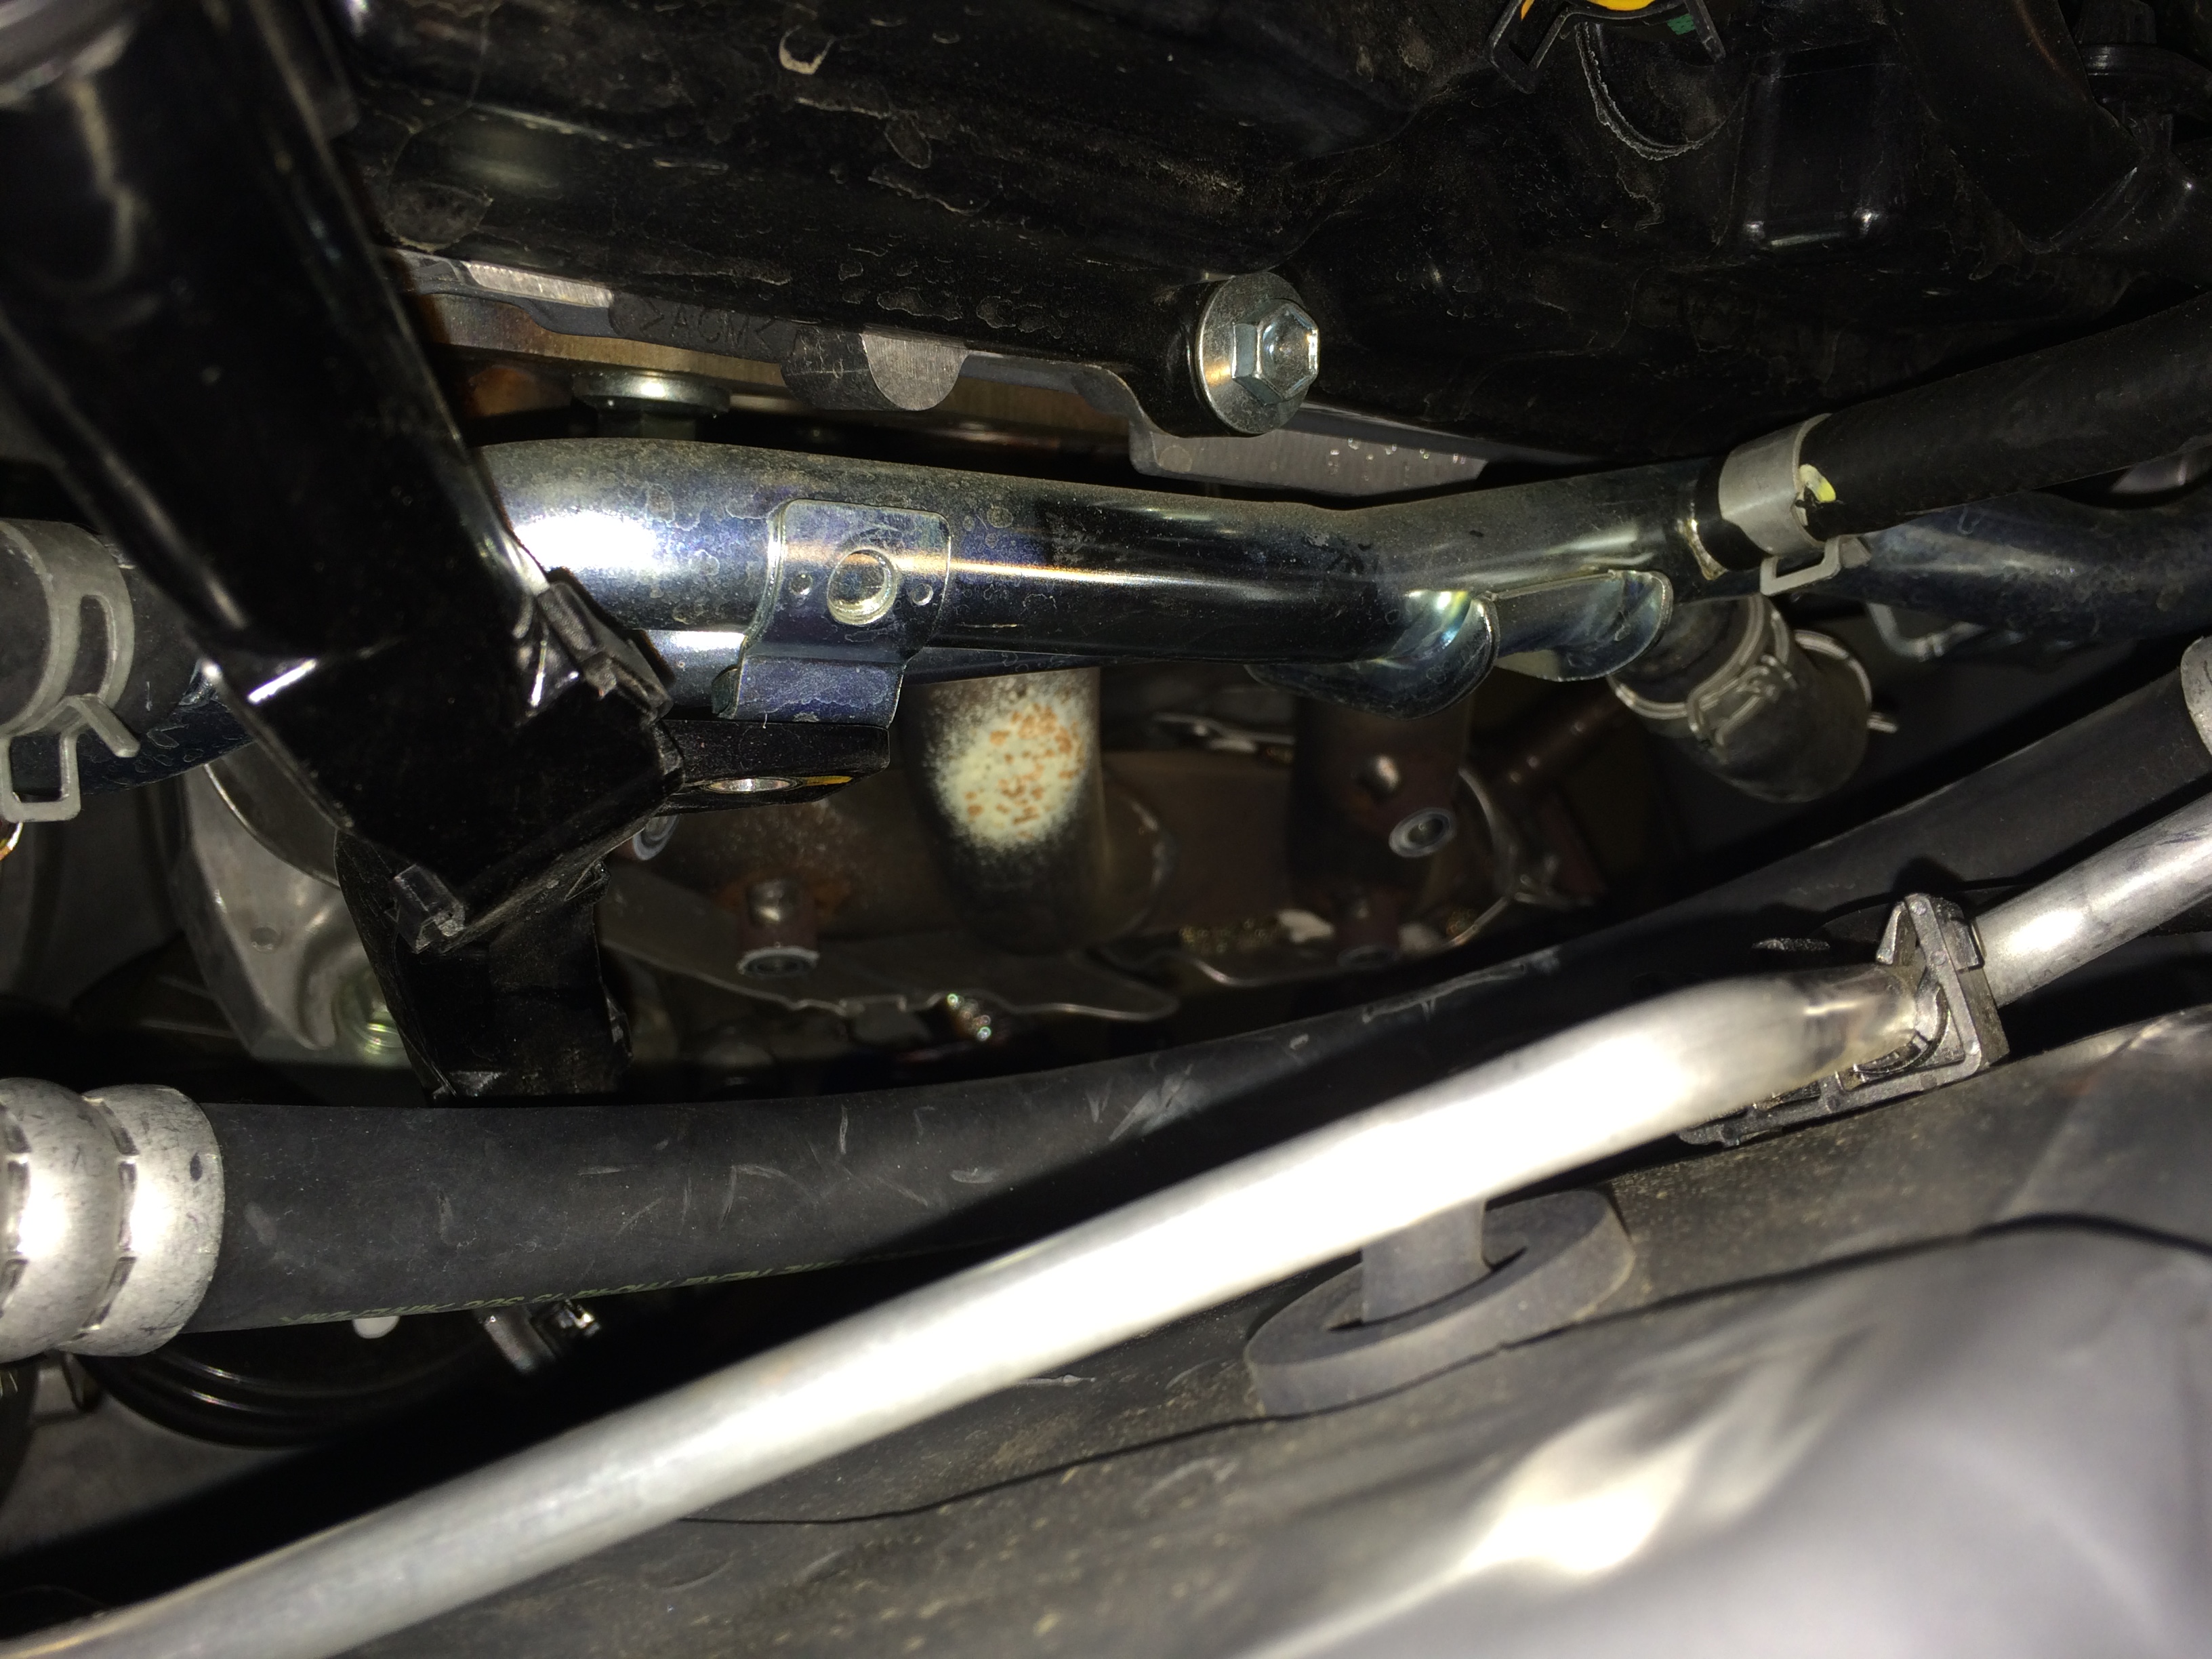
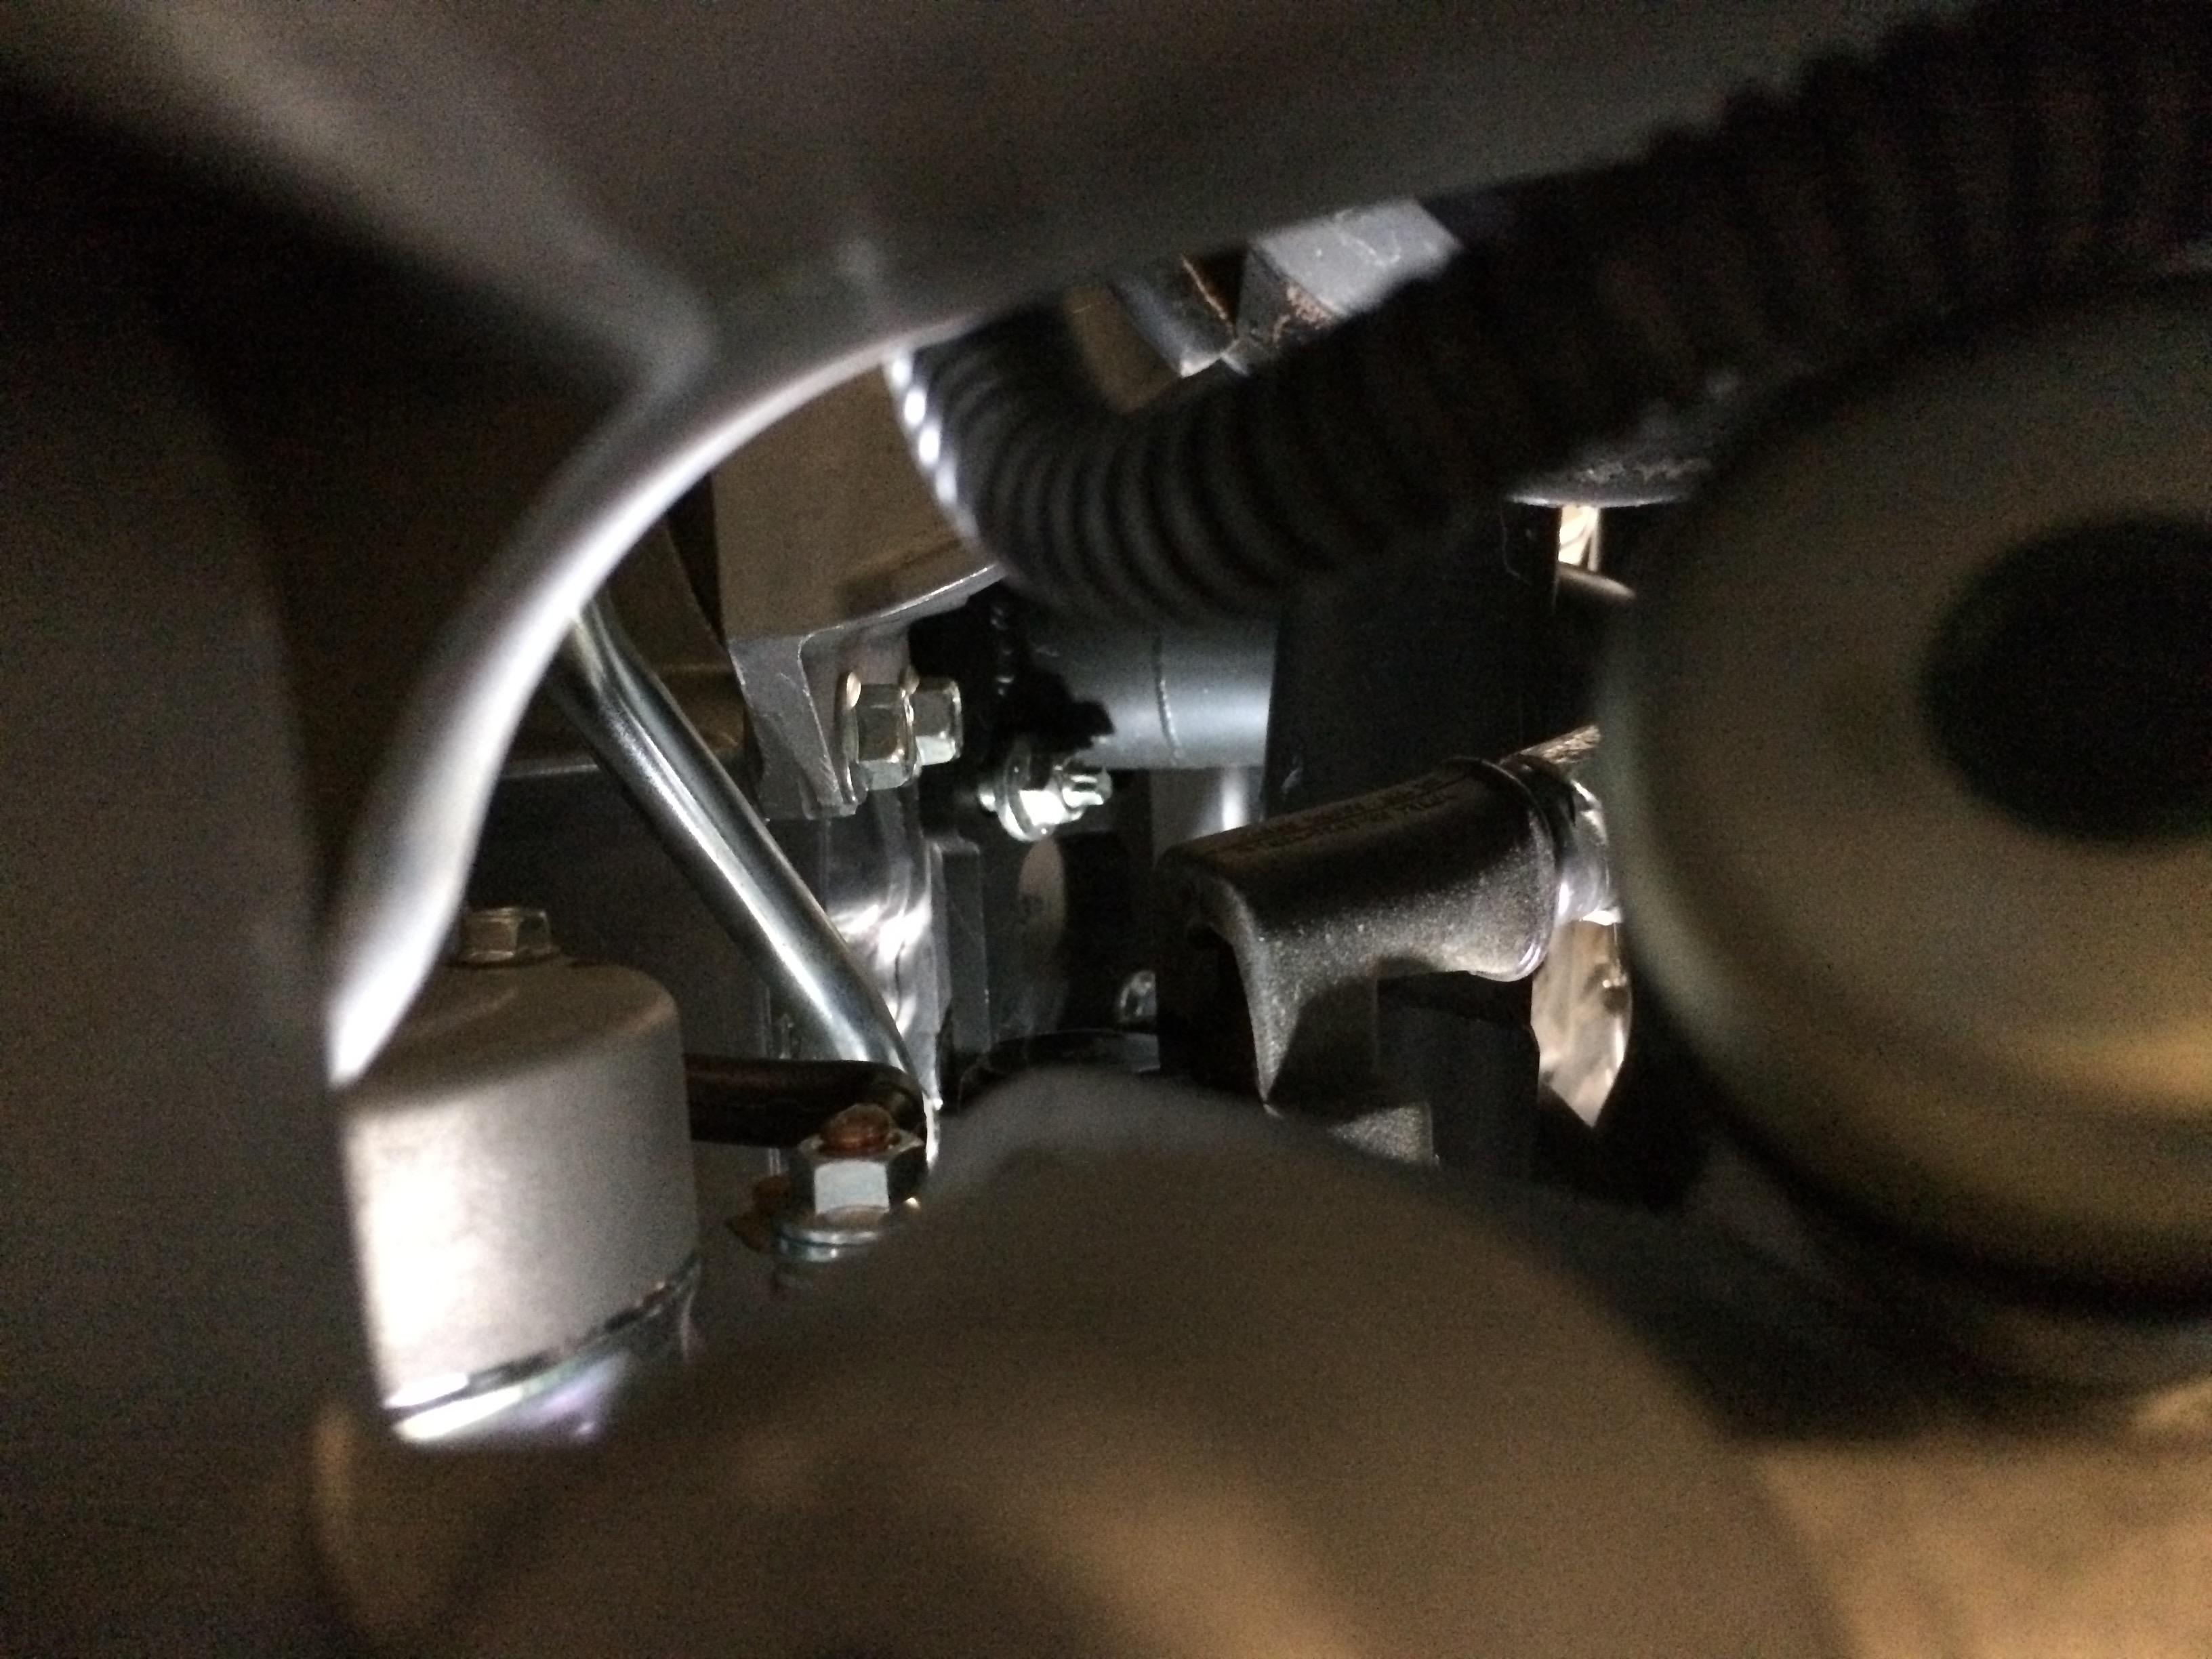
26: Starting point for driver’s side install. Lots in the way. Had to raise the front of the car a bunch more to allow it to be angled past the clutch parts. The steering shaft MUST be disconnected and slid way up inside the column. To do that, remove the red-headed 12mm bolt, and remove the white plastic clip thing on the shaft. The splined end of the column is keyed to the receiving end on the rack. The problem is once you slide the shaft up past where the white plastic piece is, it becomes unkeyed internally up in the steering mechanism. Take care to not alter the relative clocking of these components!
27: The lessons from the passenger side helped but getting this far is awful. To get the very tip of your fingertips holding the exhaust studs to the place they need to be, requires sacrificing your forearm in the jaws of the surrounding tubes and things. It’s extra painful because as you are moving your fingers, it makes the forearm area hurt more, as your finger’s tendors try to move while clamped in a vice.
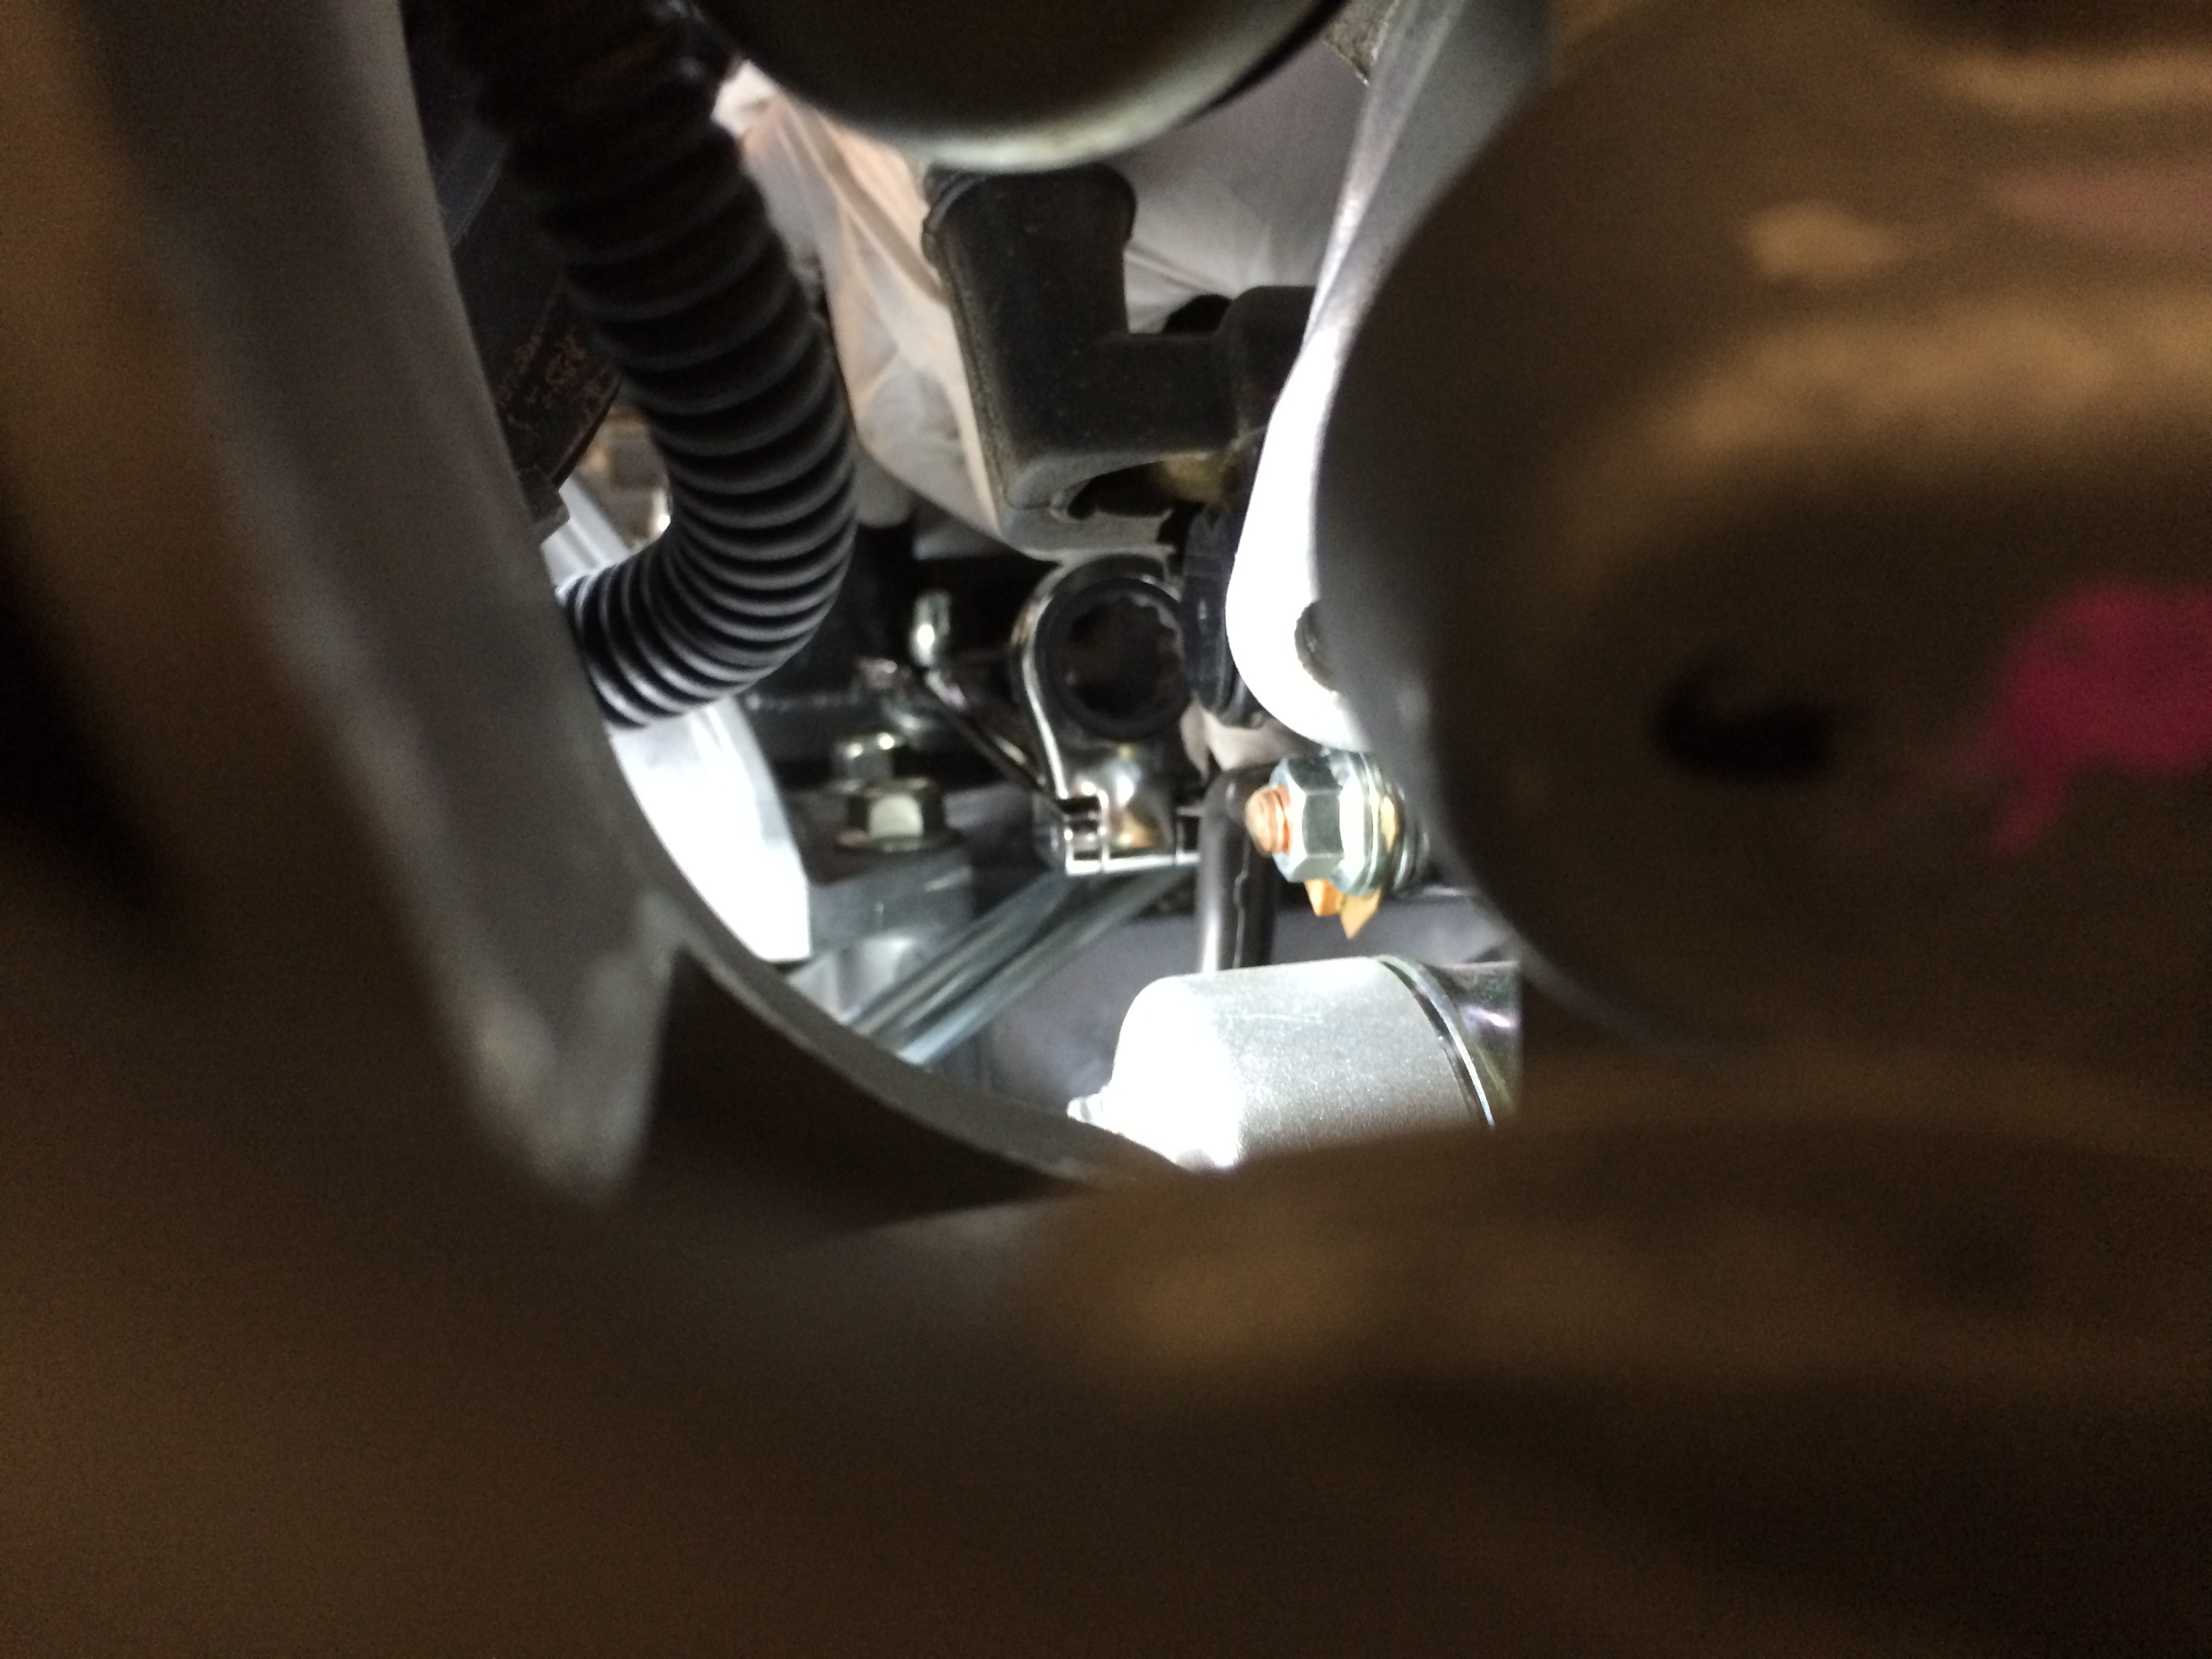
28: The three top nuts aren’t too bad, same for lower front. The rearmost lower is accessible with a wrench from underneath (again way harder than passenger side) but the middle lower nut…well, all I could picture in my head is IMPOSSIBRU
That is the single toughest fastener to deal with in this whole project.
This is a view from directly underneath, an unobstructed column way too narrow to allow for any tool angularity. Making it worse, I was too lazy/dumb to bring the front of the car lower again after raising in step 26. That meant doing anything from underneath meant holding an abdominal crunch to get the arms/shoulders high enough to reach stuff. I’m a typically beer bellied american so I called it a night at this point so I could look at it fresh the next day – was past 2am, a 5 hour work session.
Evening 3 (Friday night) done, evening 4 begin.
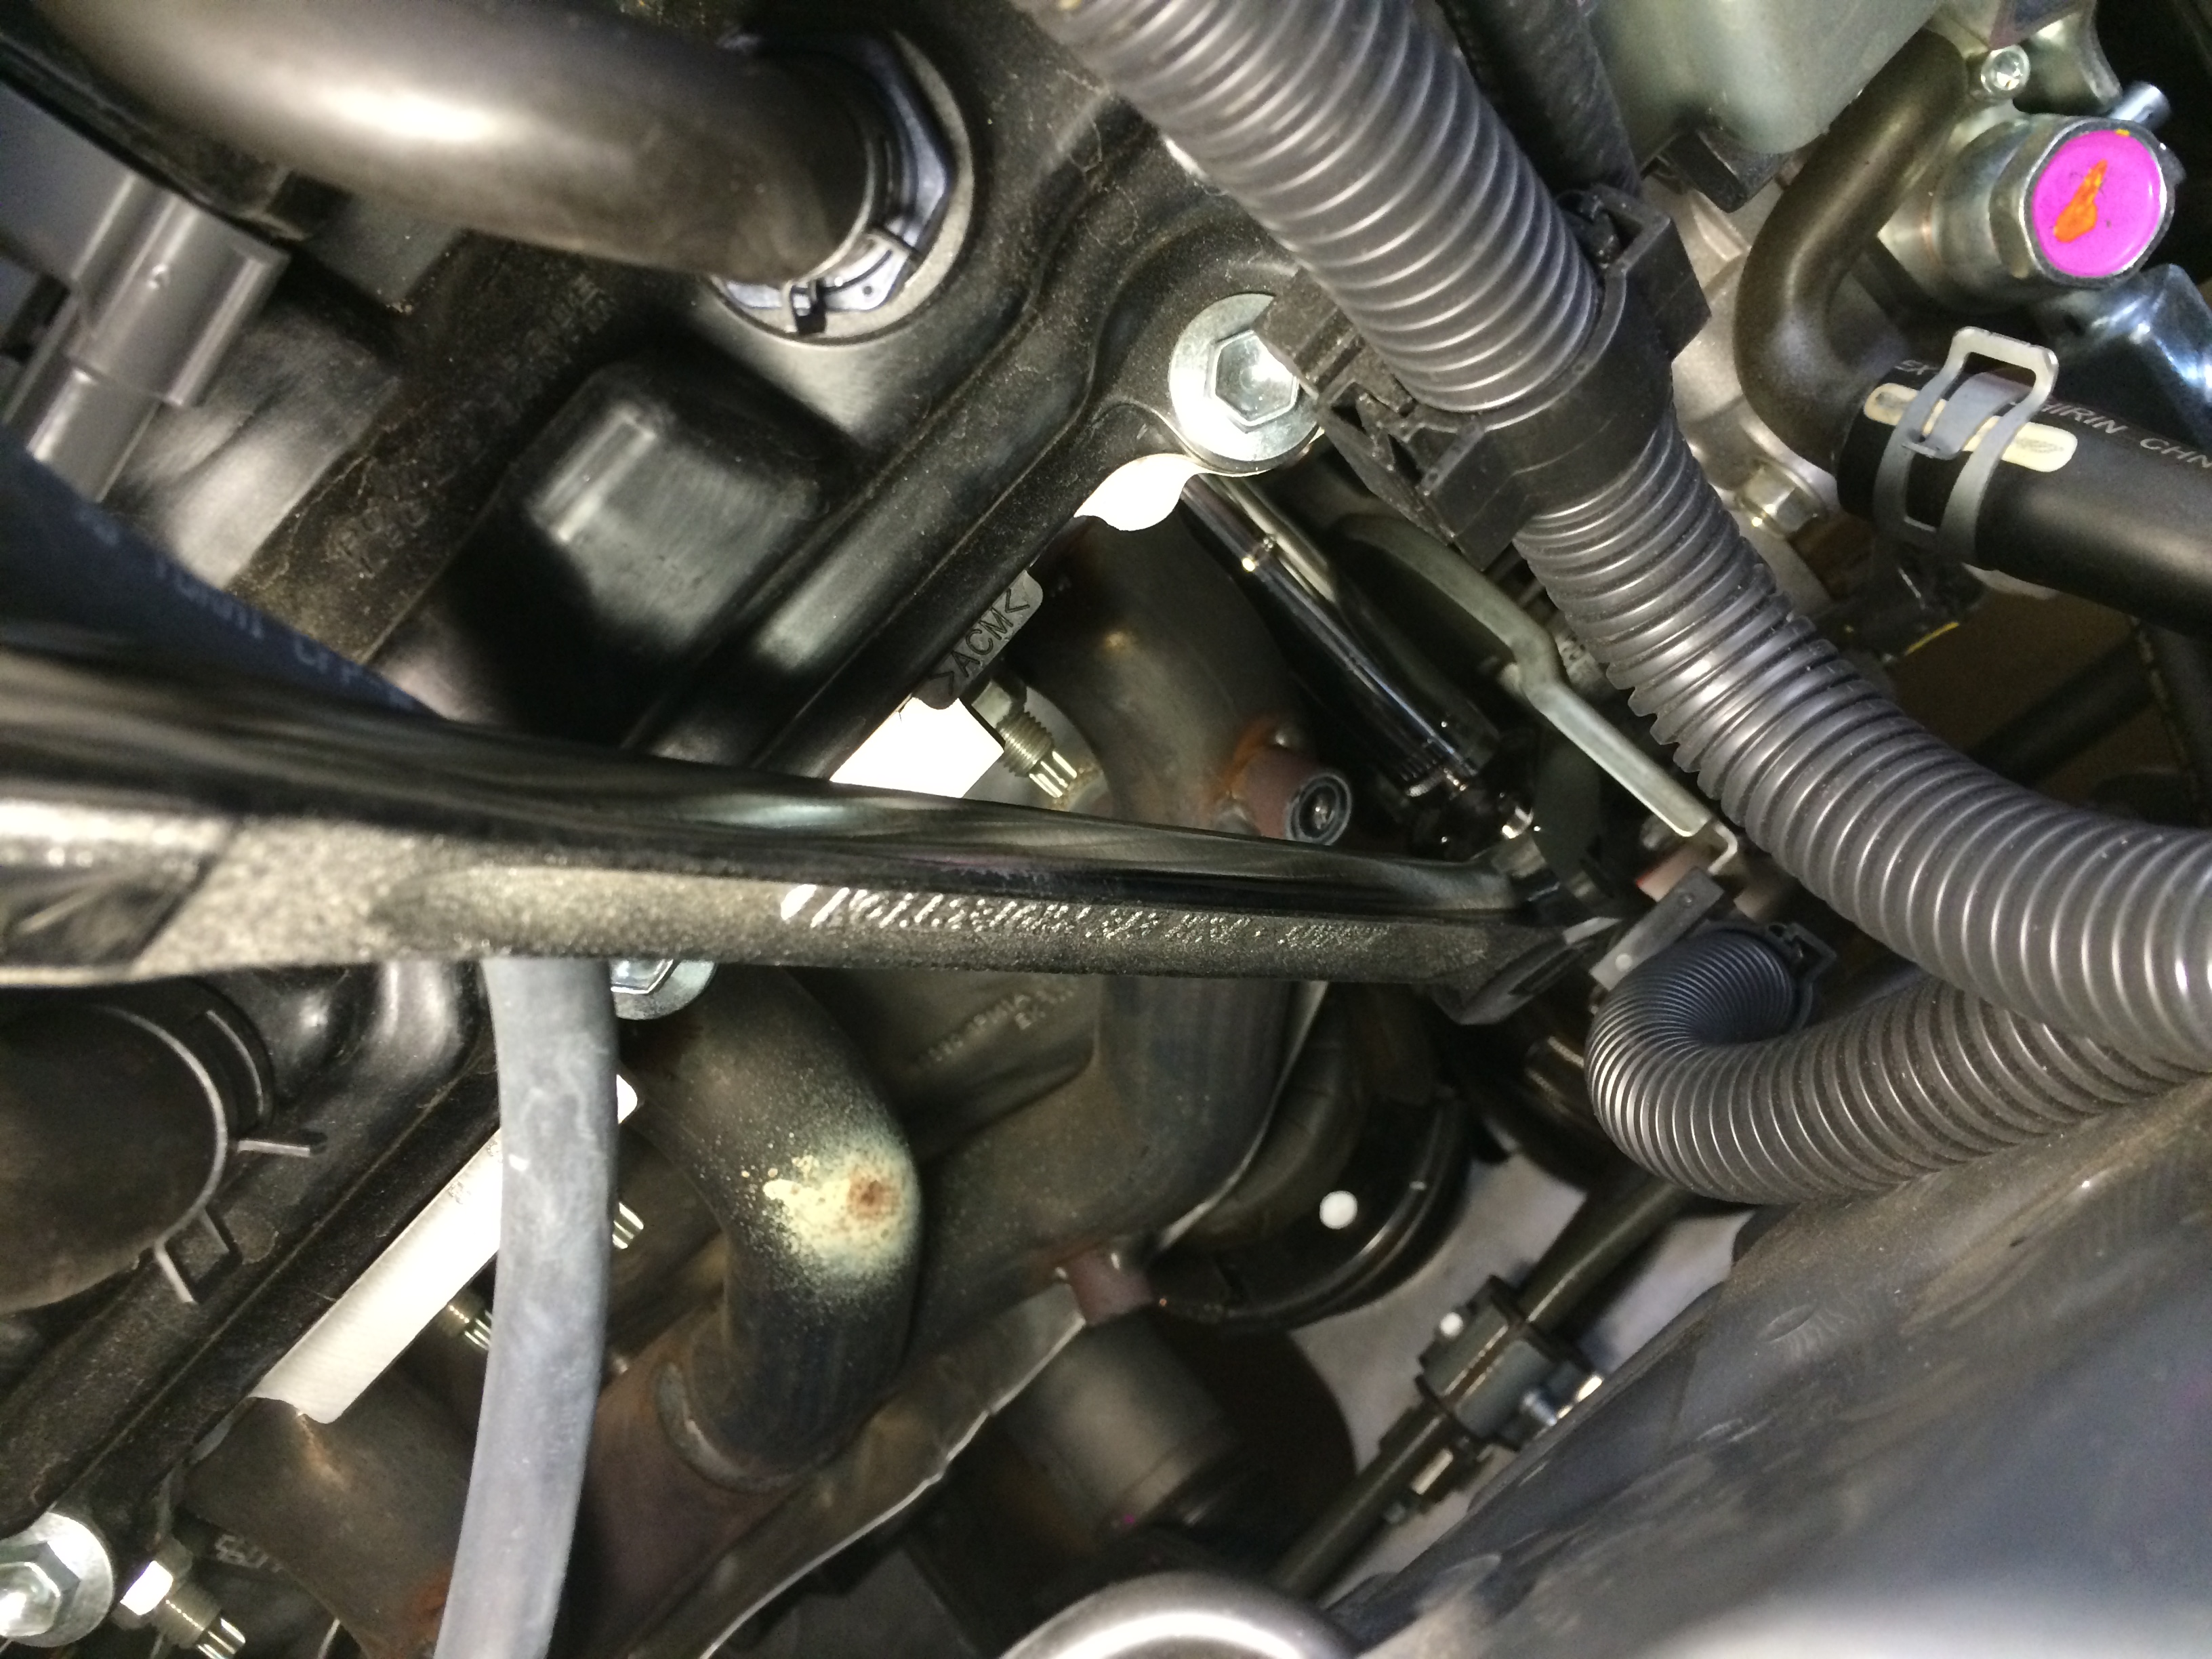
29: Contemplating the problem, I thought I’d get some swivel-head wrenches, on the hopes I could find some plane that would allow me to tighten it. Because of the V shape of the motor, tools want to fall off if not held in place. But there’s not much in the way of access to hold in place, not to mention allow for any installation motion.
The other problem was the nut was close enough to the primary tube, not enough room to fit the closed end of a ratcheting wrench (at least my mediocre-quality gearwrench stuff) on it.
What I ended up stumbling into, was to use the open end of the swivel-head wrench like so:
This shortened the effective length of the wrench enough that I could move it 1 “flat” (1/6th of a turn) at a time within the space available. At the same time, the flex head being in that perpendicular plane allowed me to both hold it onto the fastener, but also torque it, with one hand.
After a few complete revolutions I had to keep stopping every 4-5 flats to let the blood flow back into my arm. Access was from above the lower control arm and up through the maze of tubes. But at last, the hard mechanical part was done.
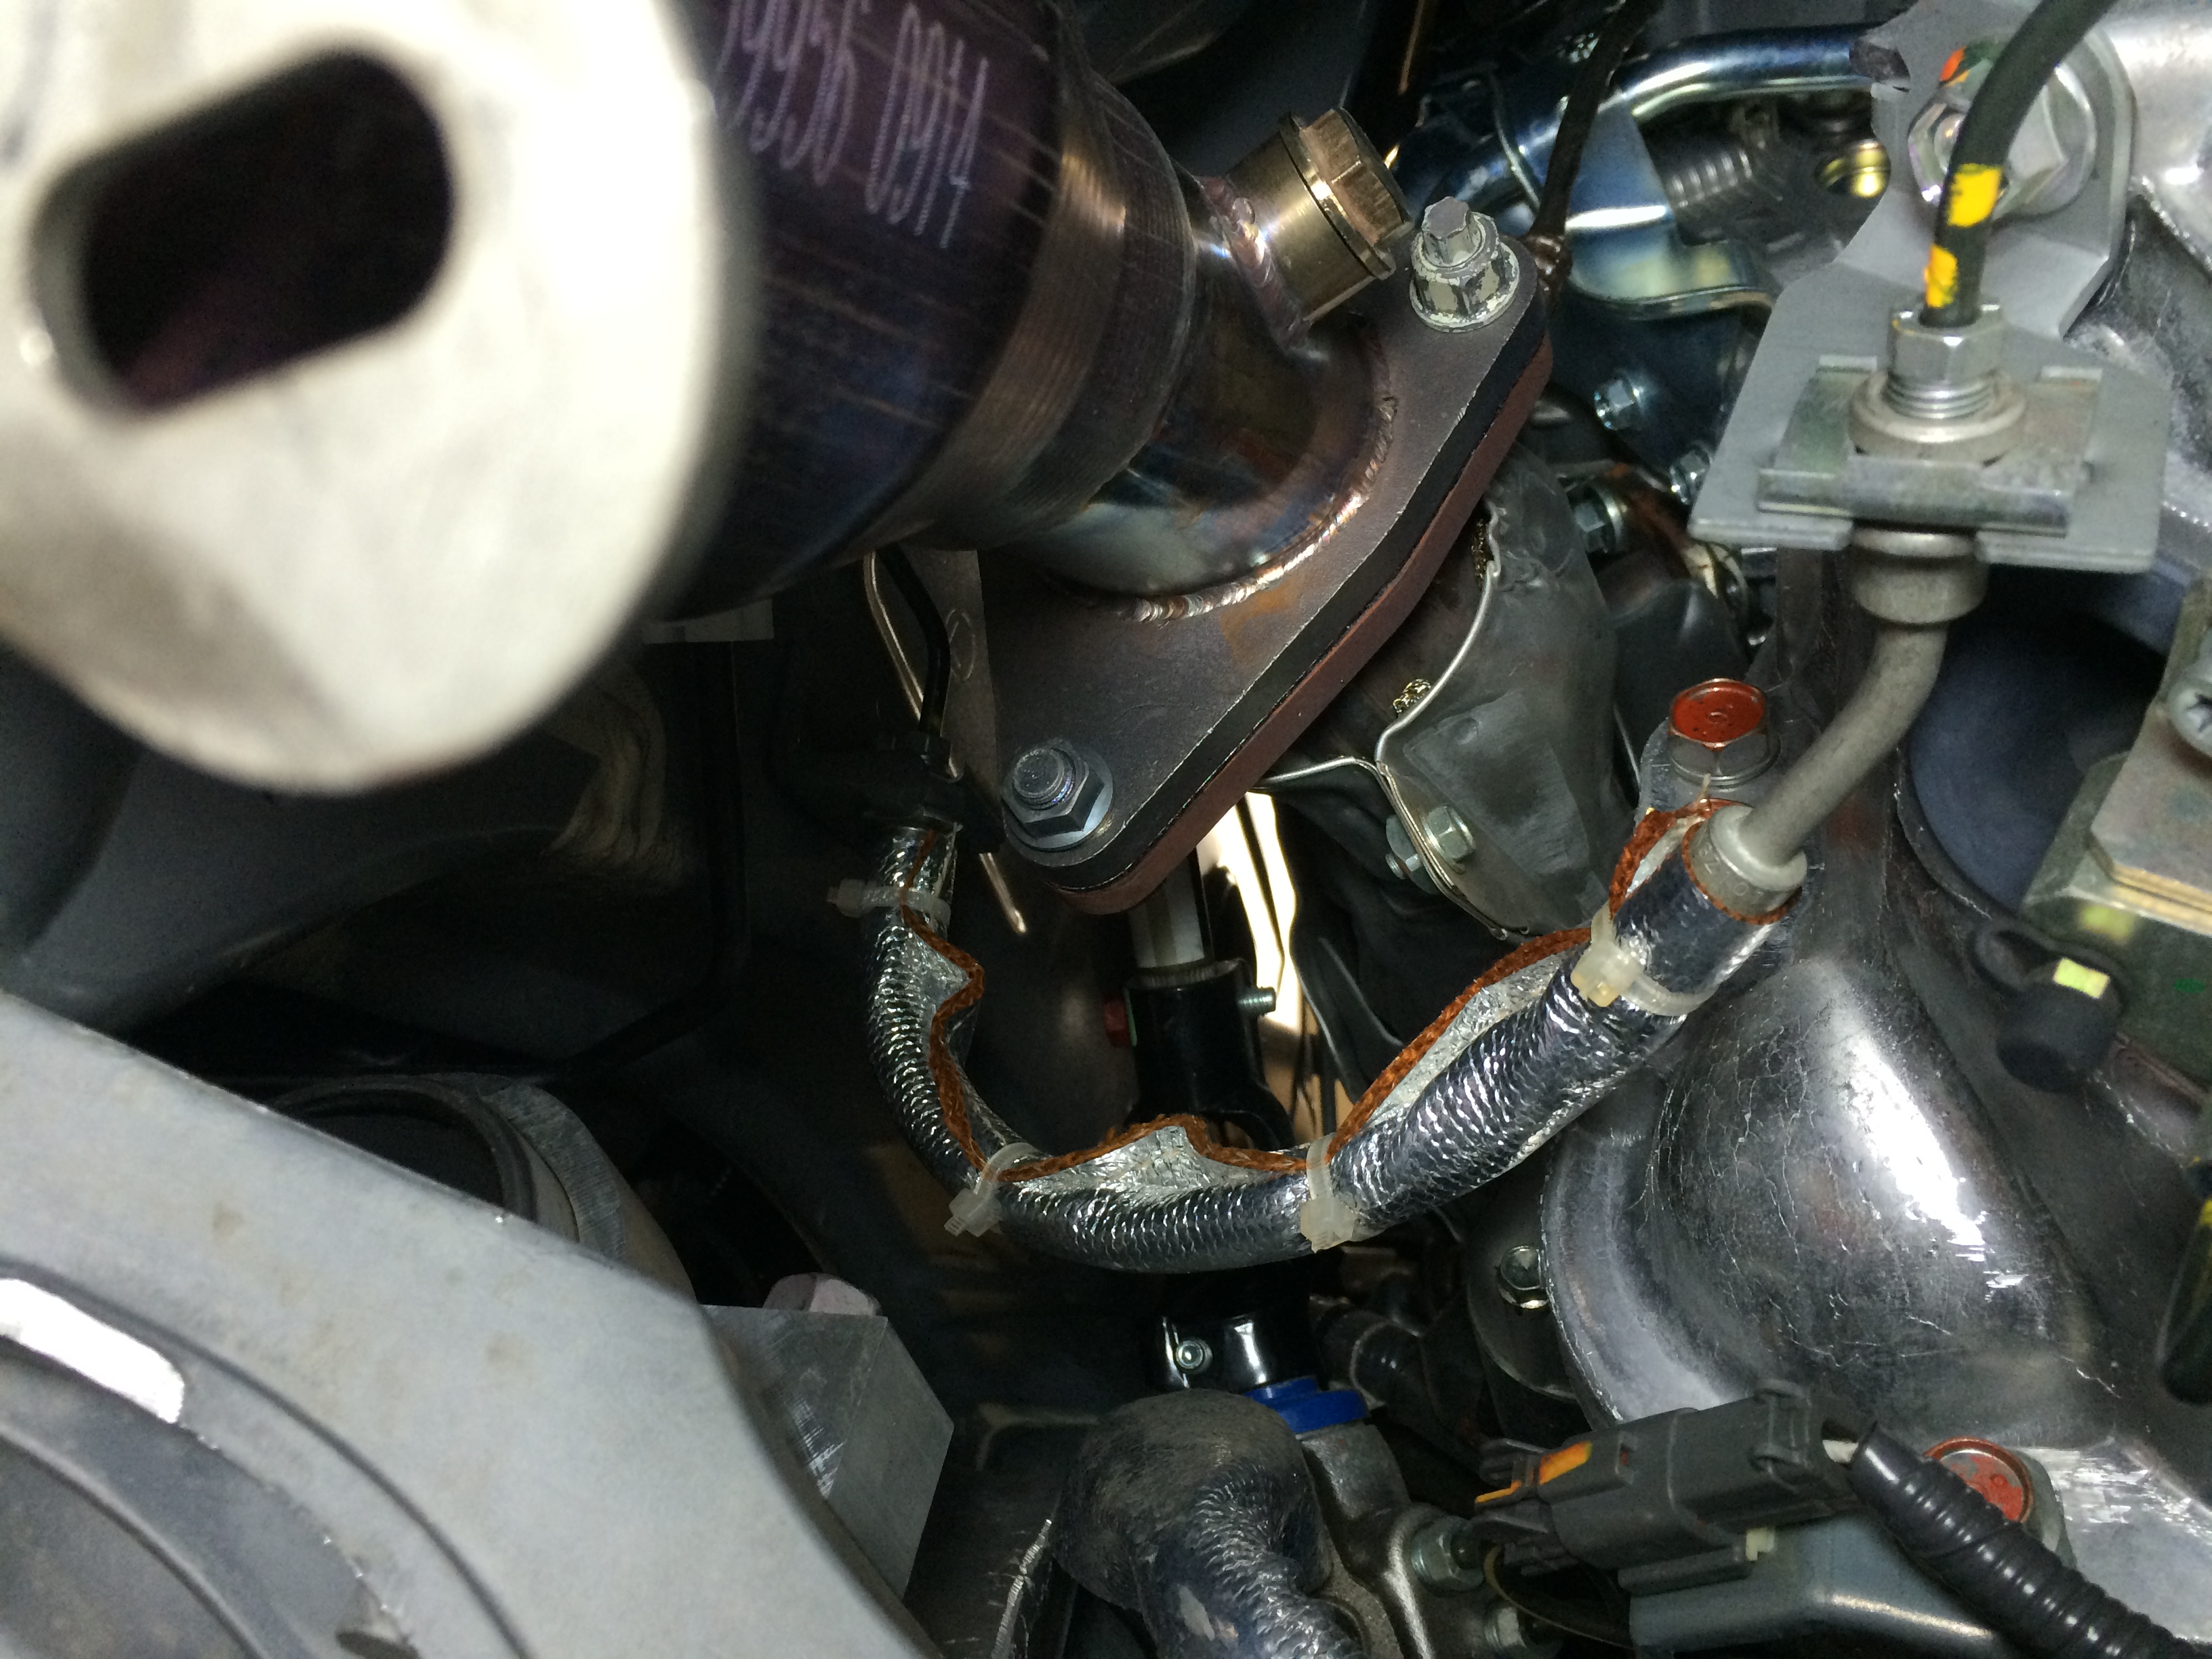
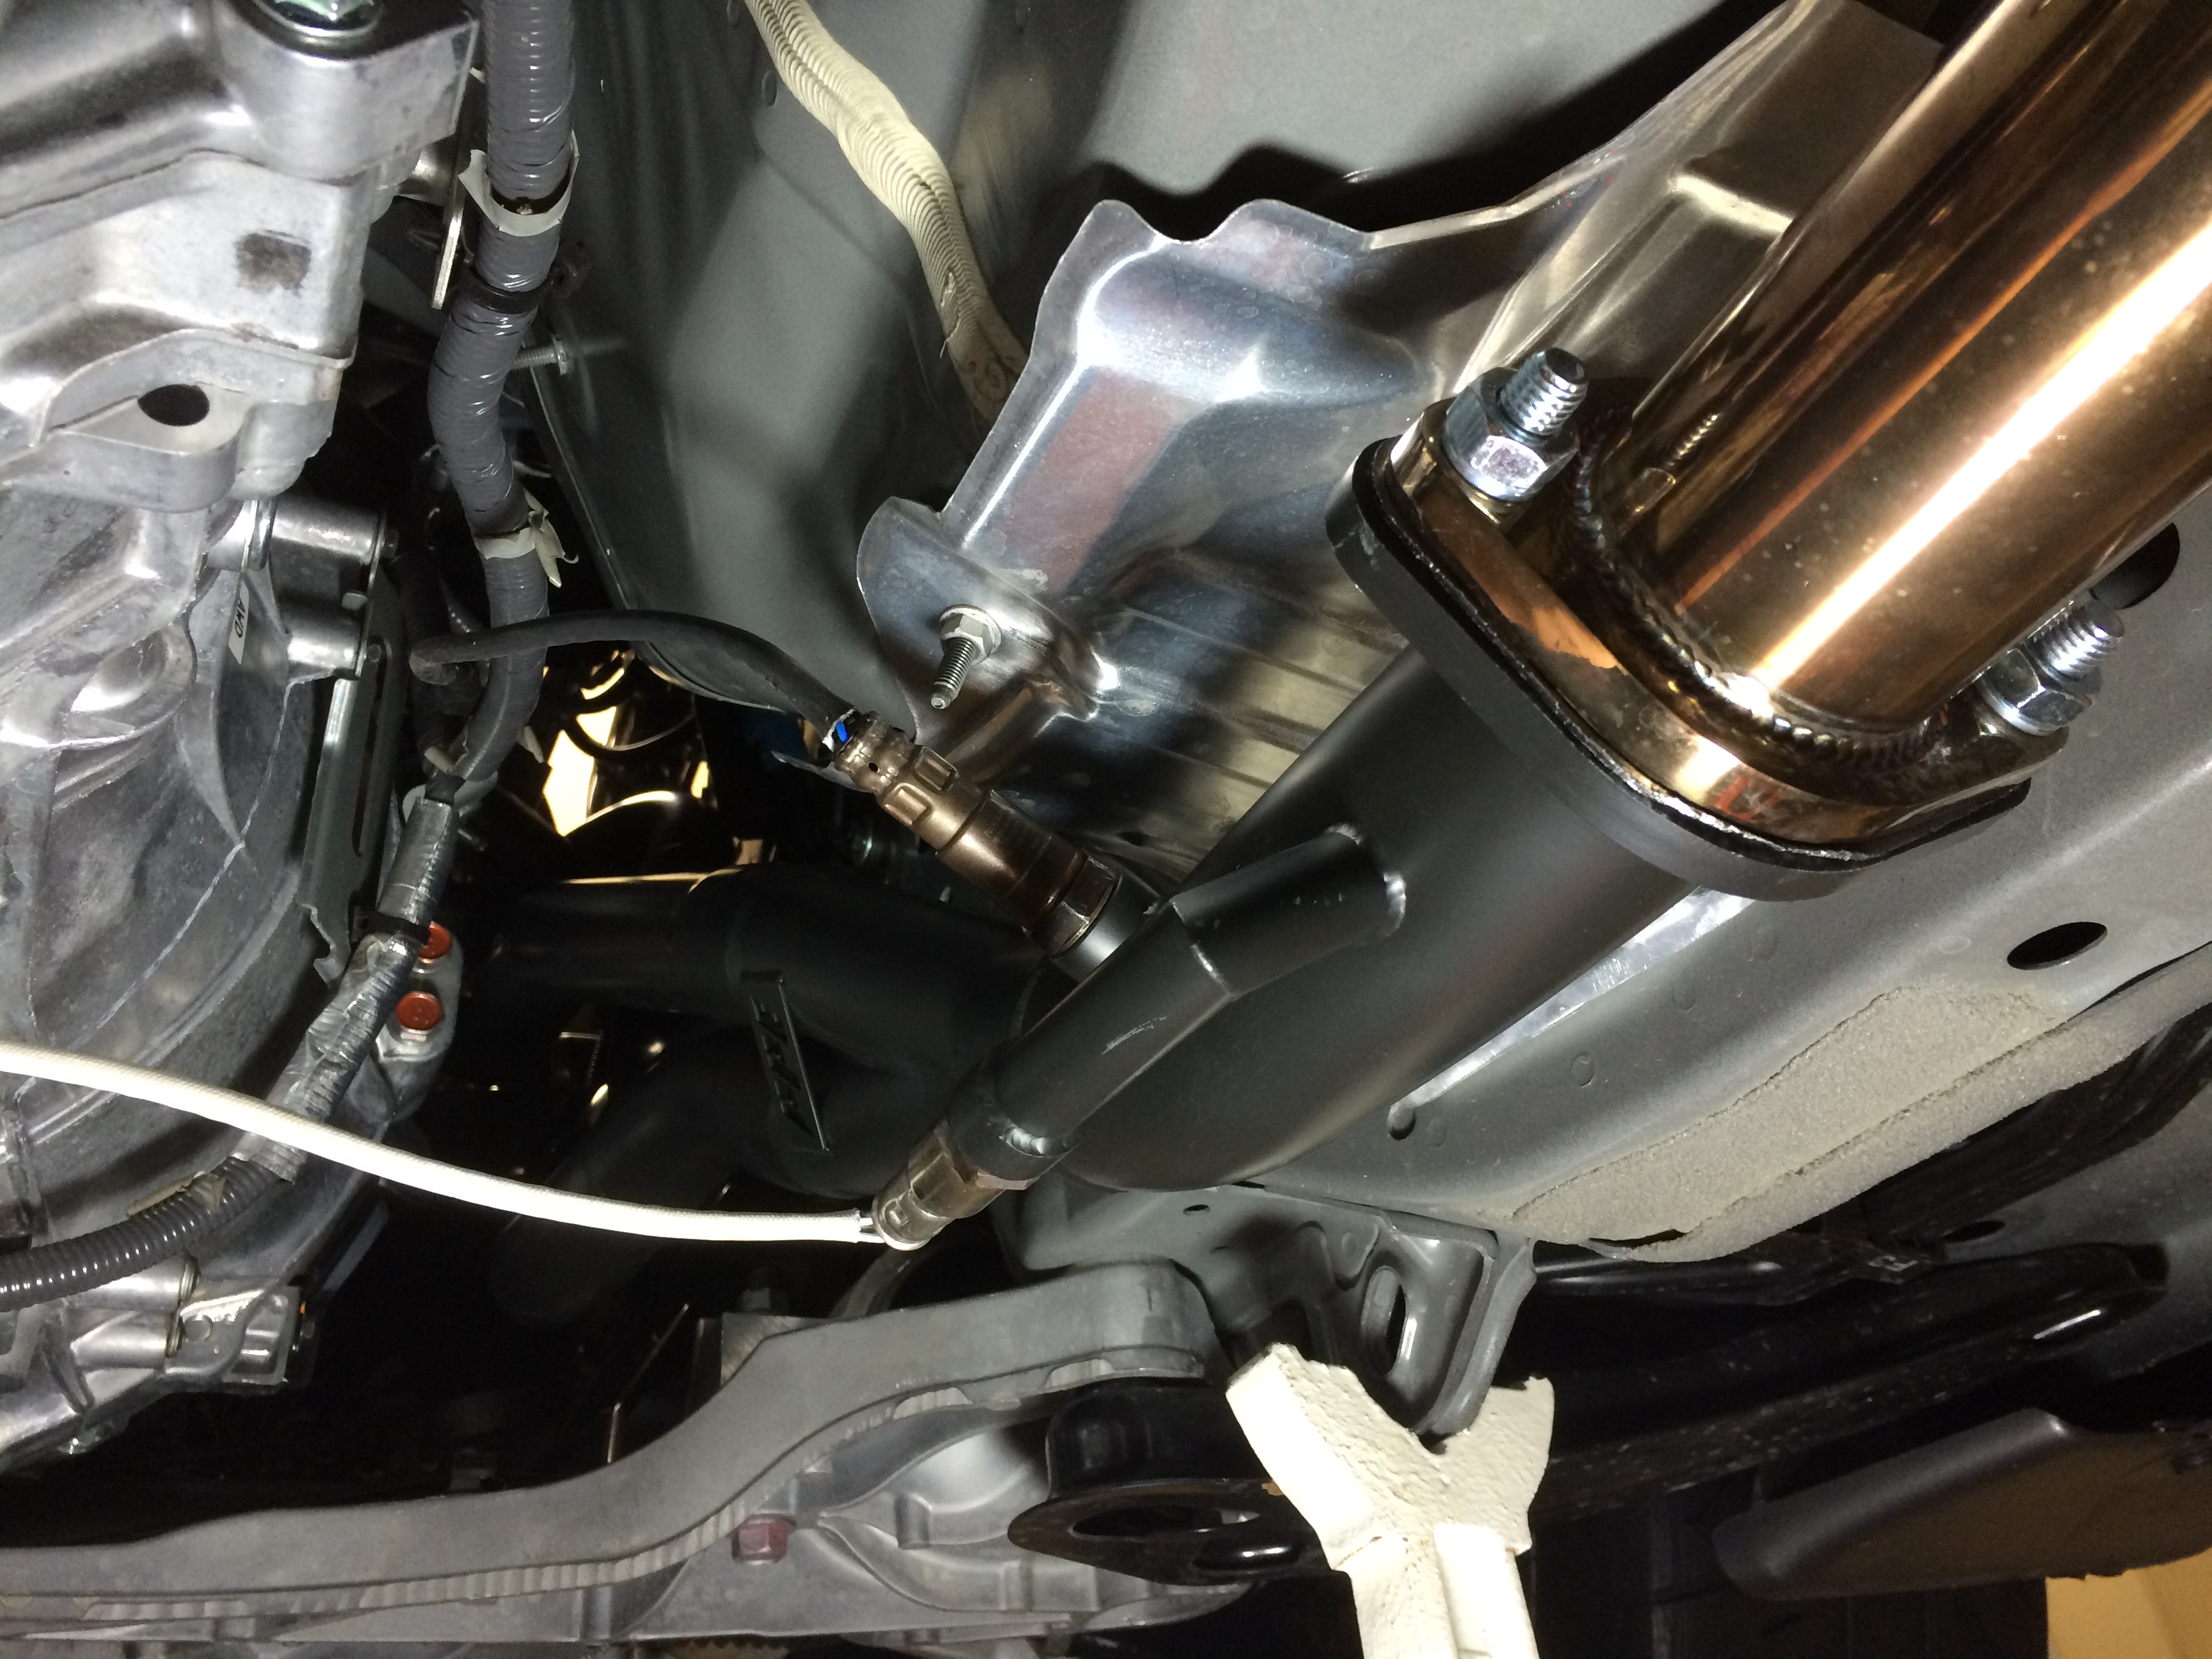
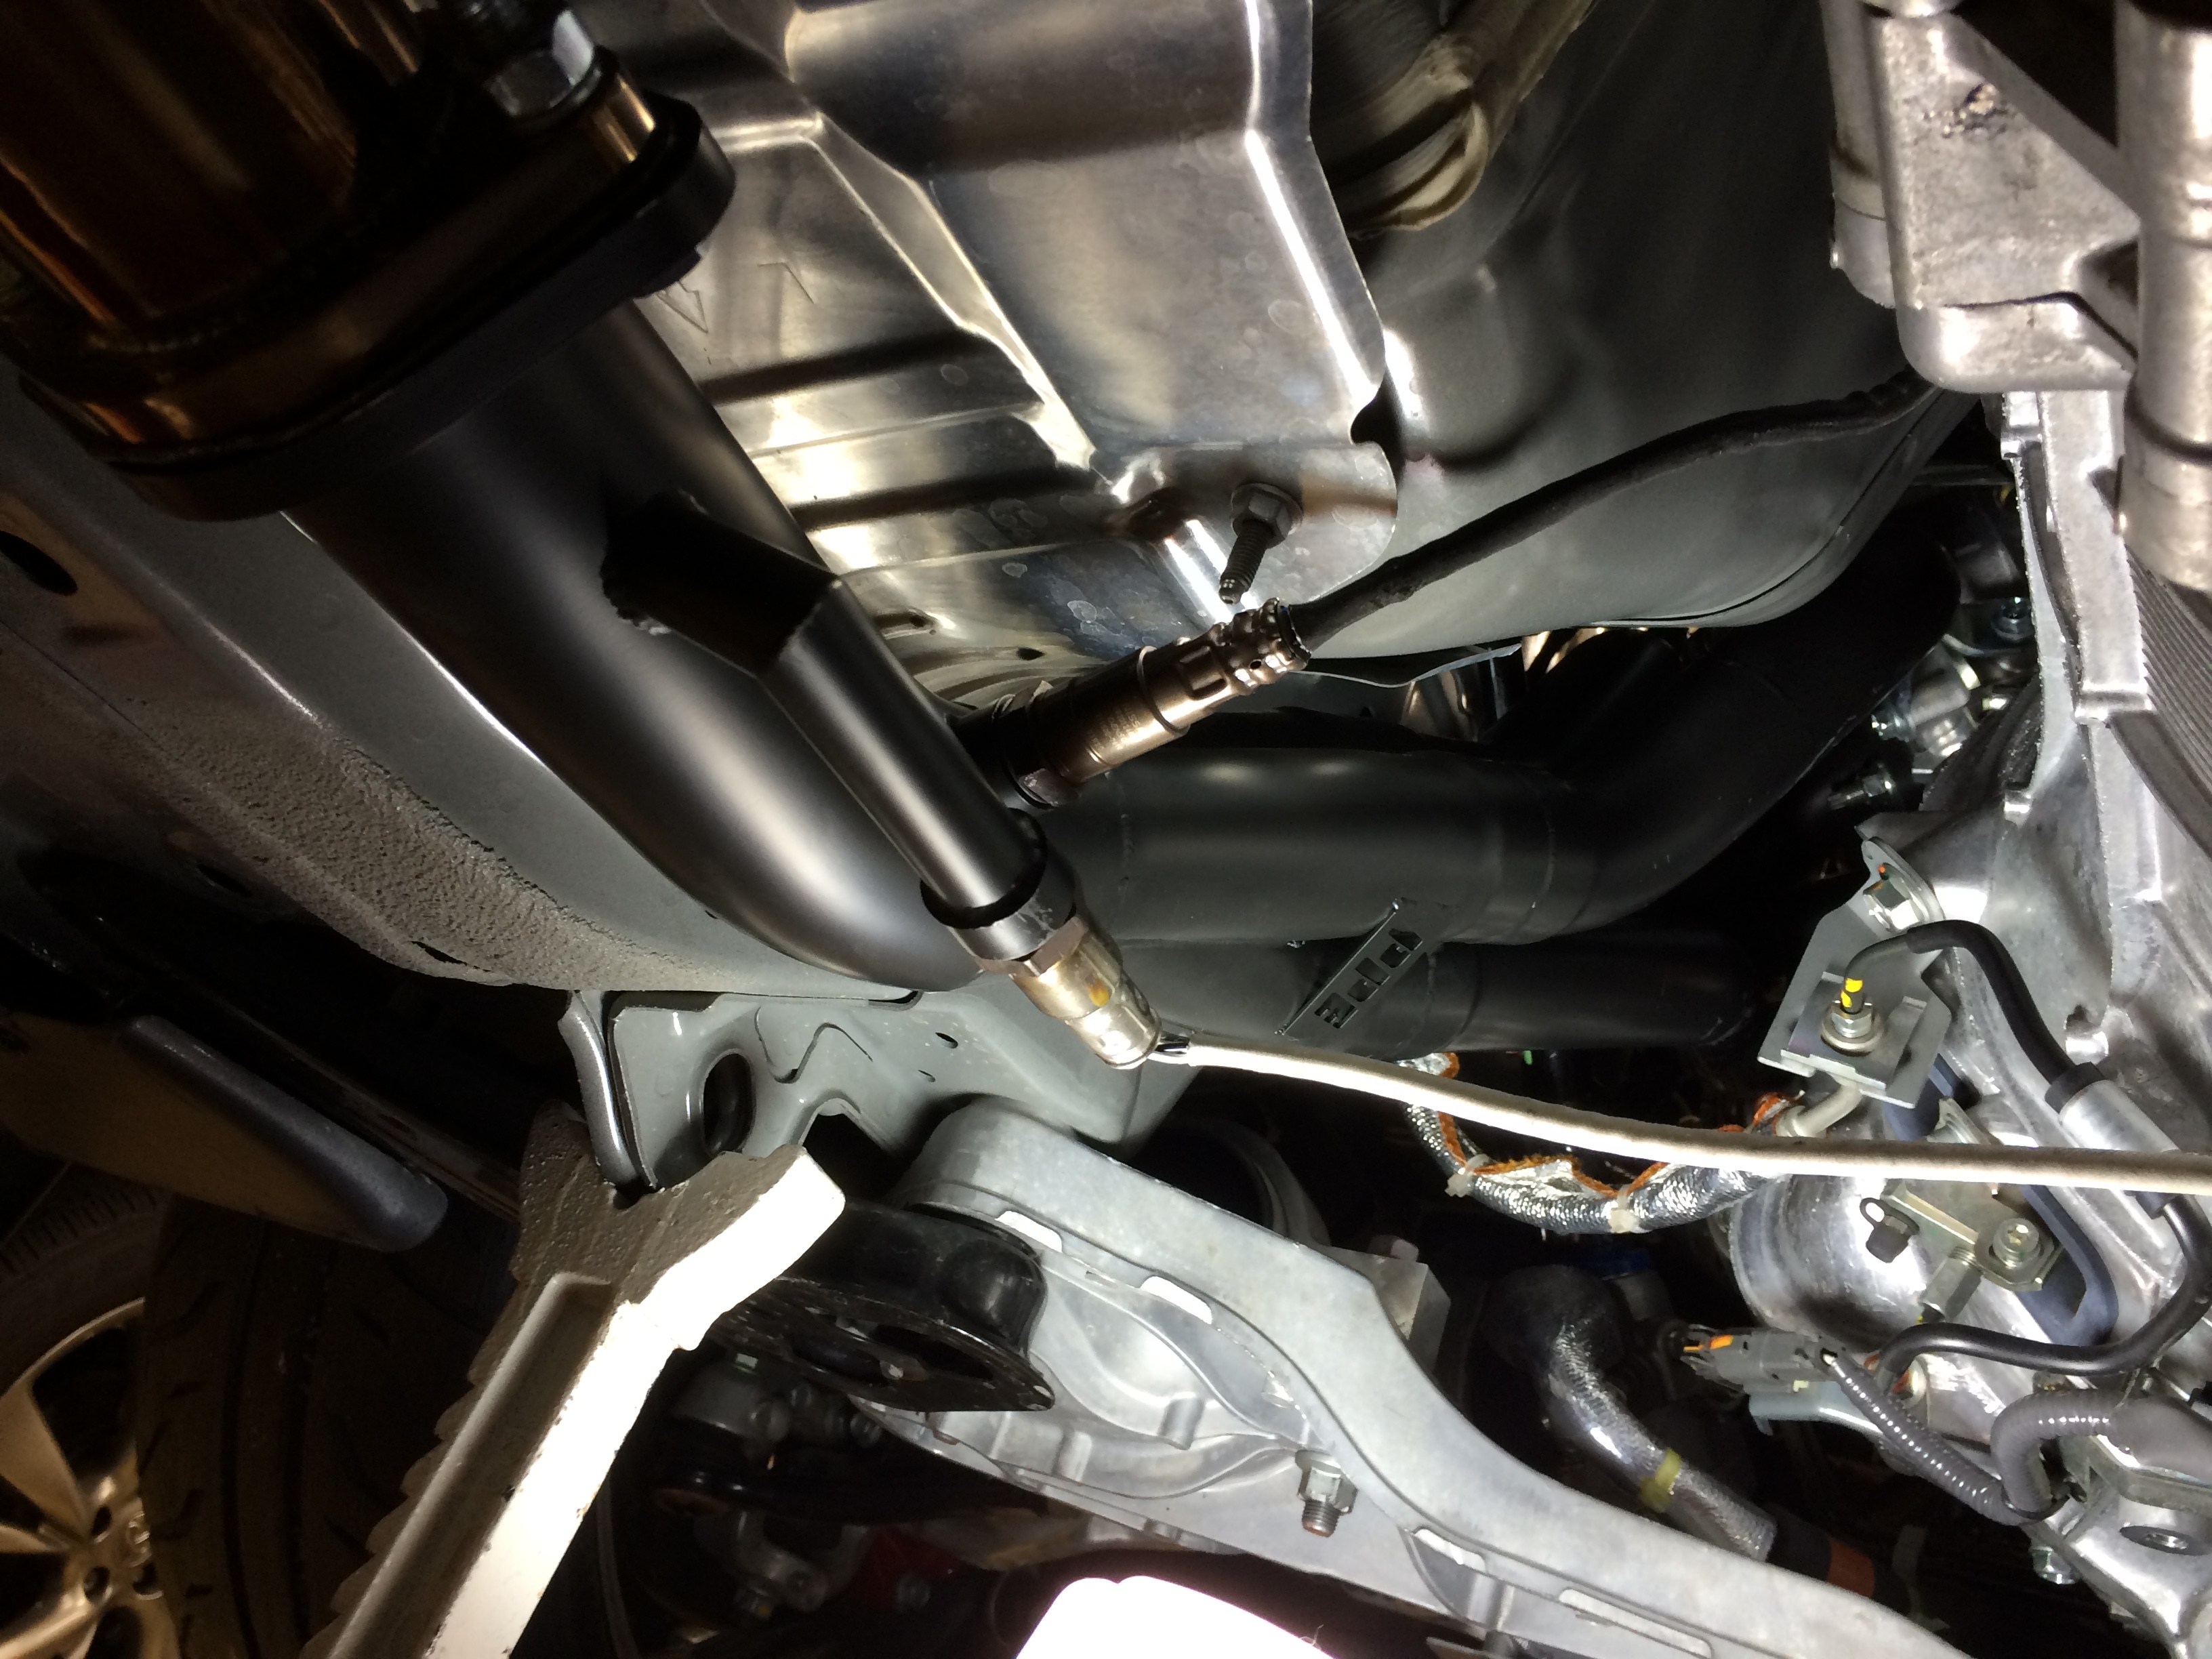
30: An unprepped o2 sensor extension
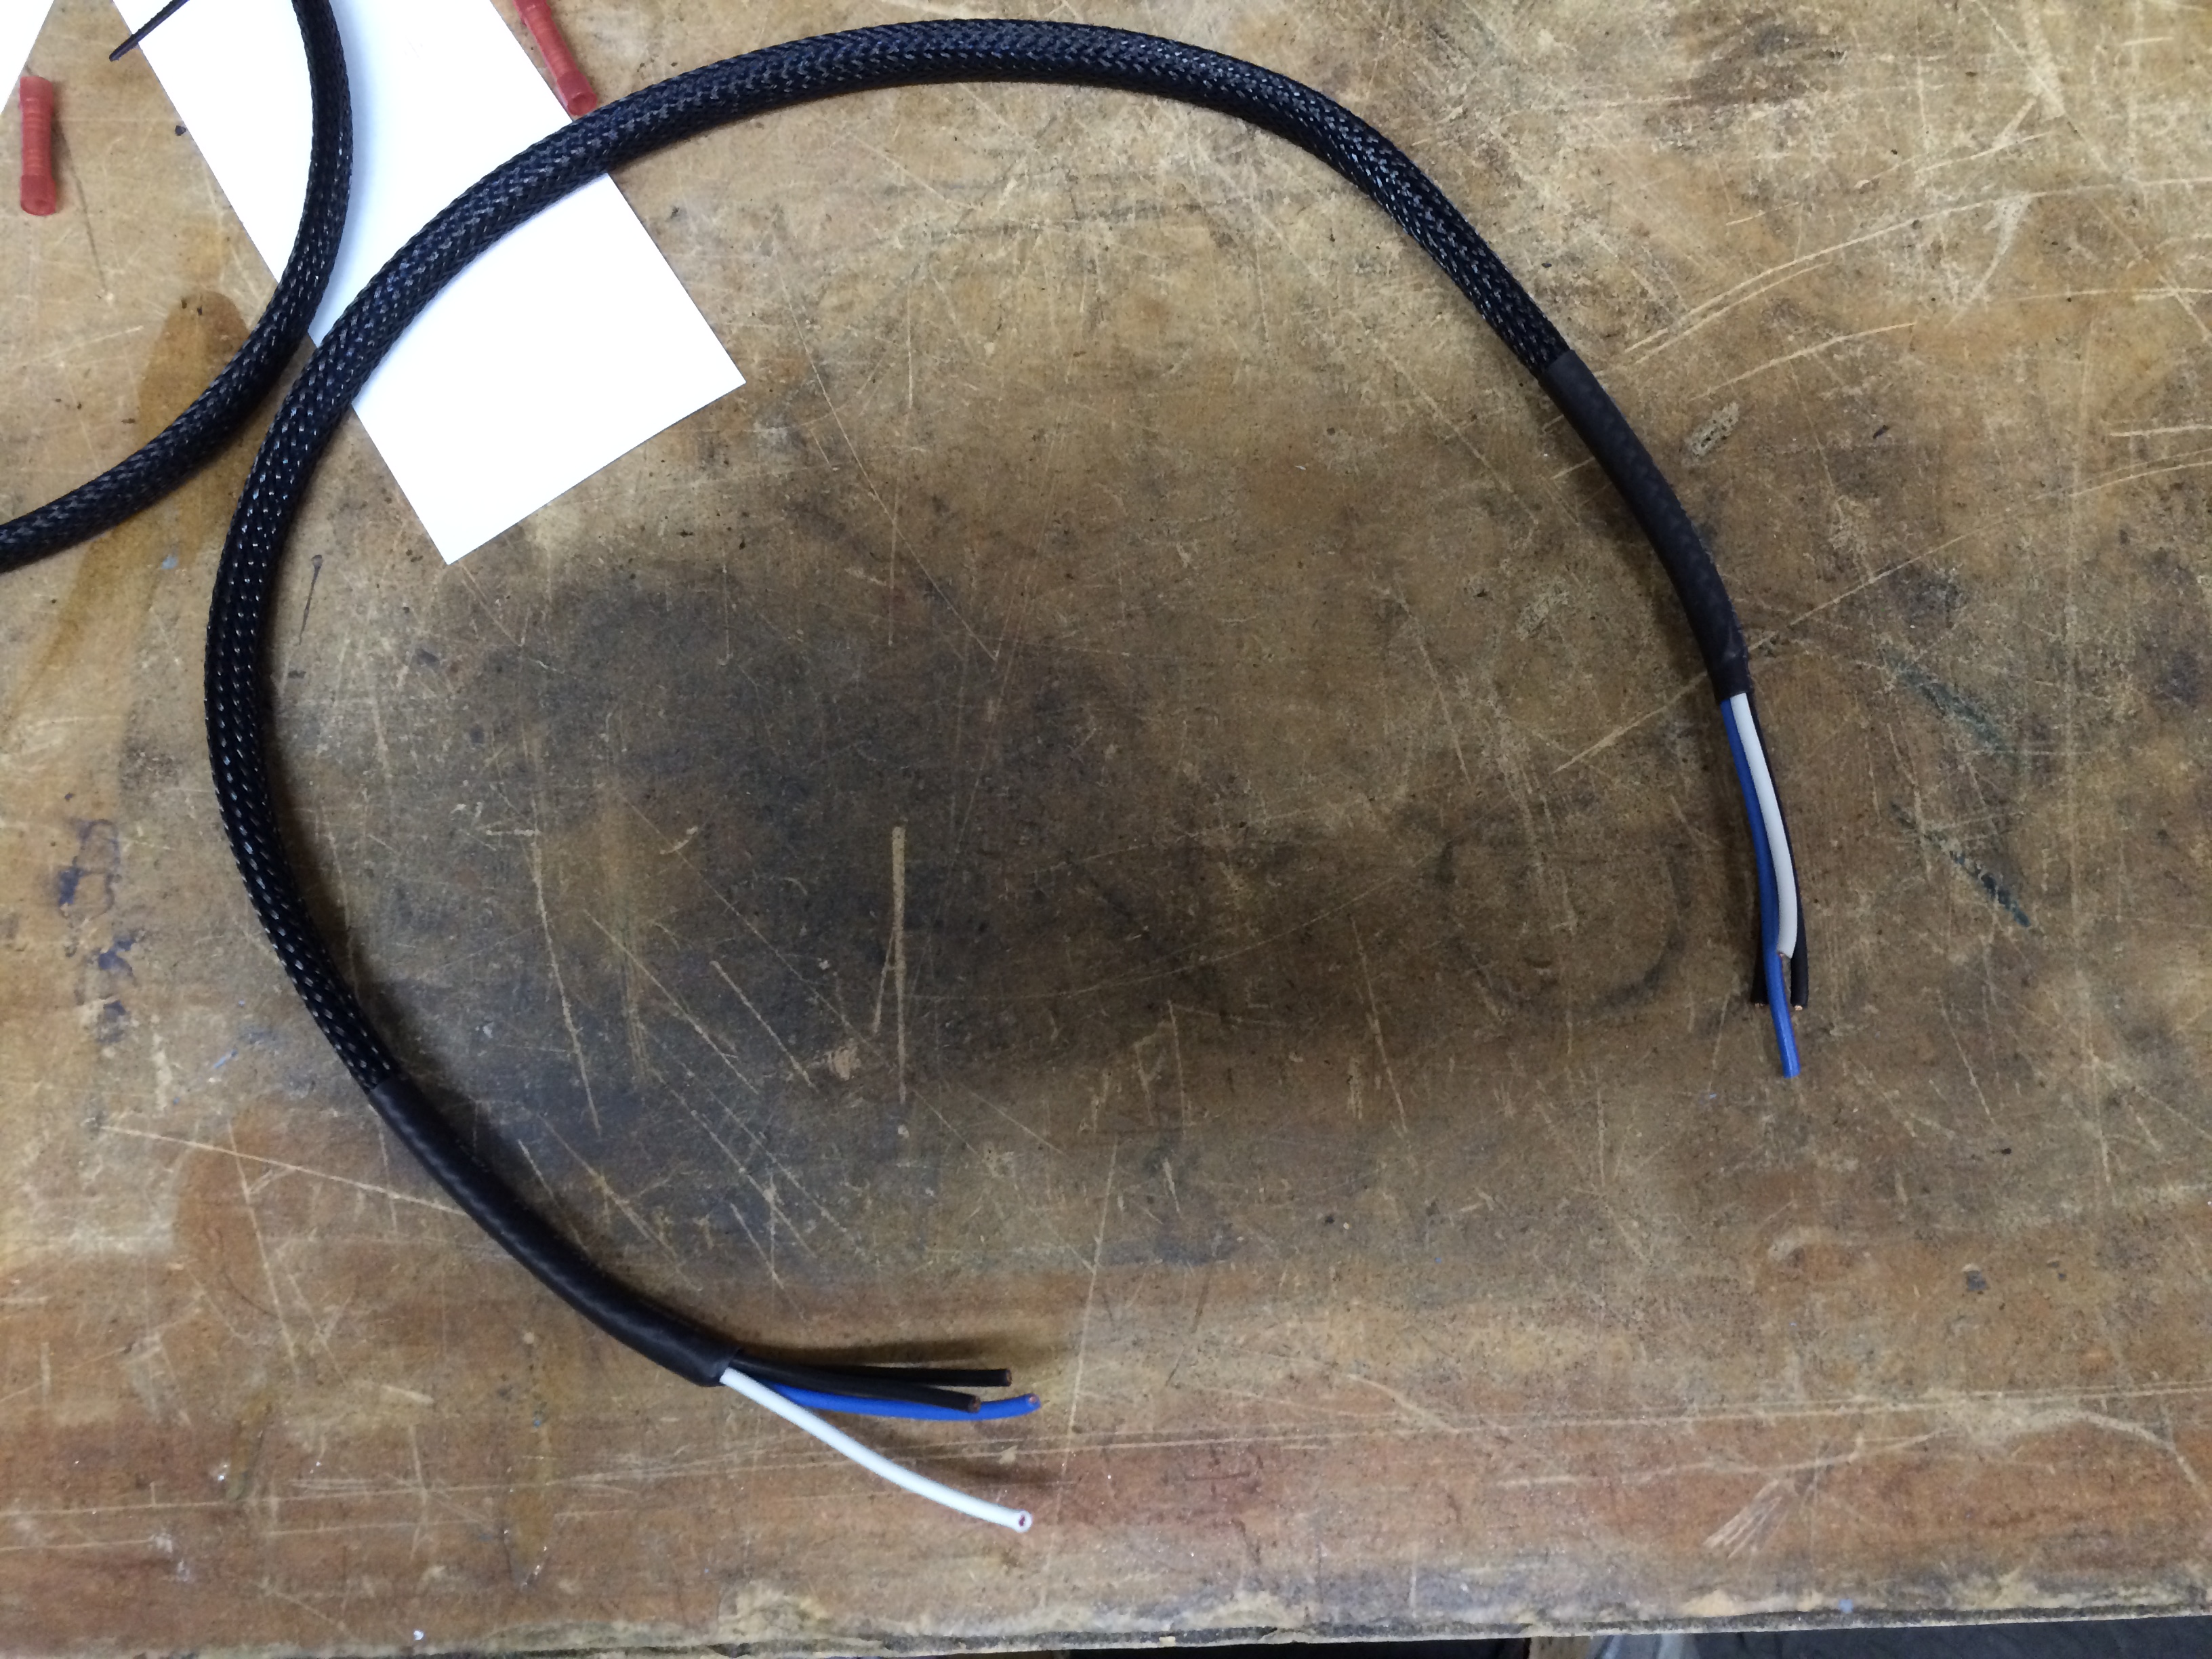
31: Ends stripped and crimped
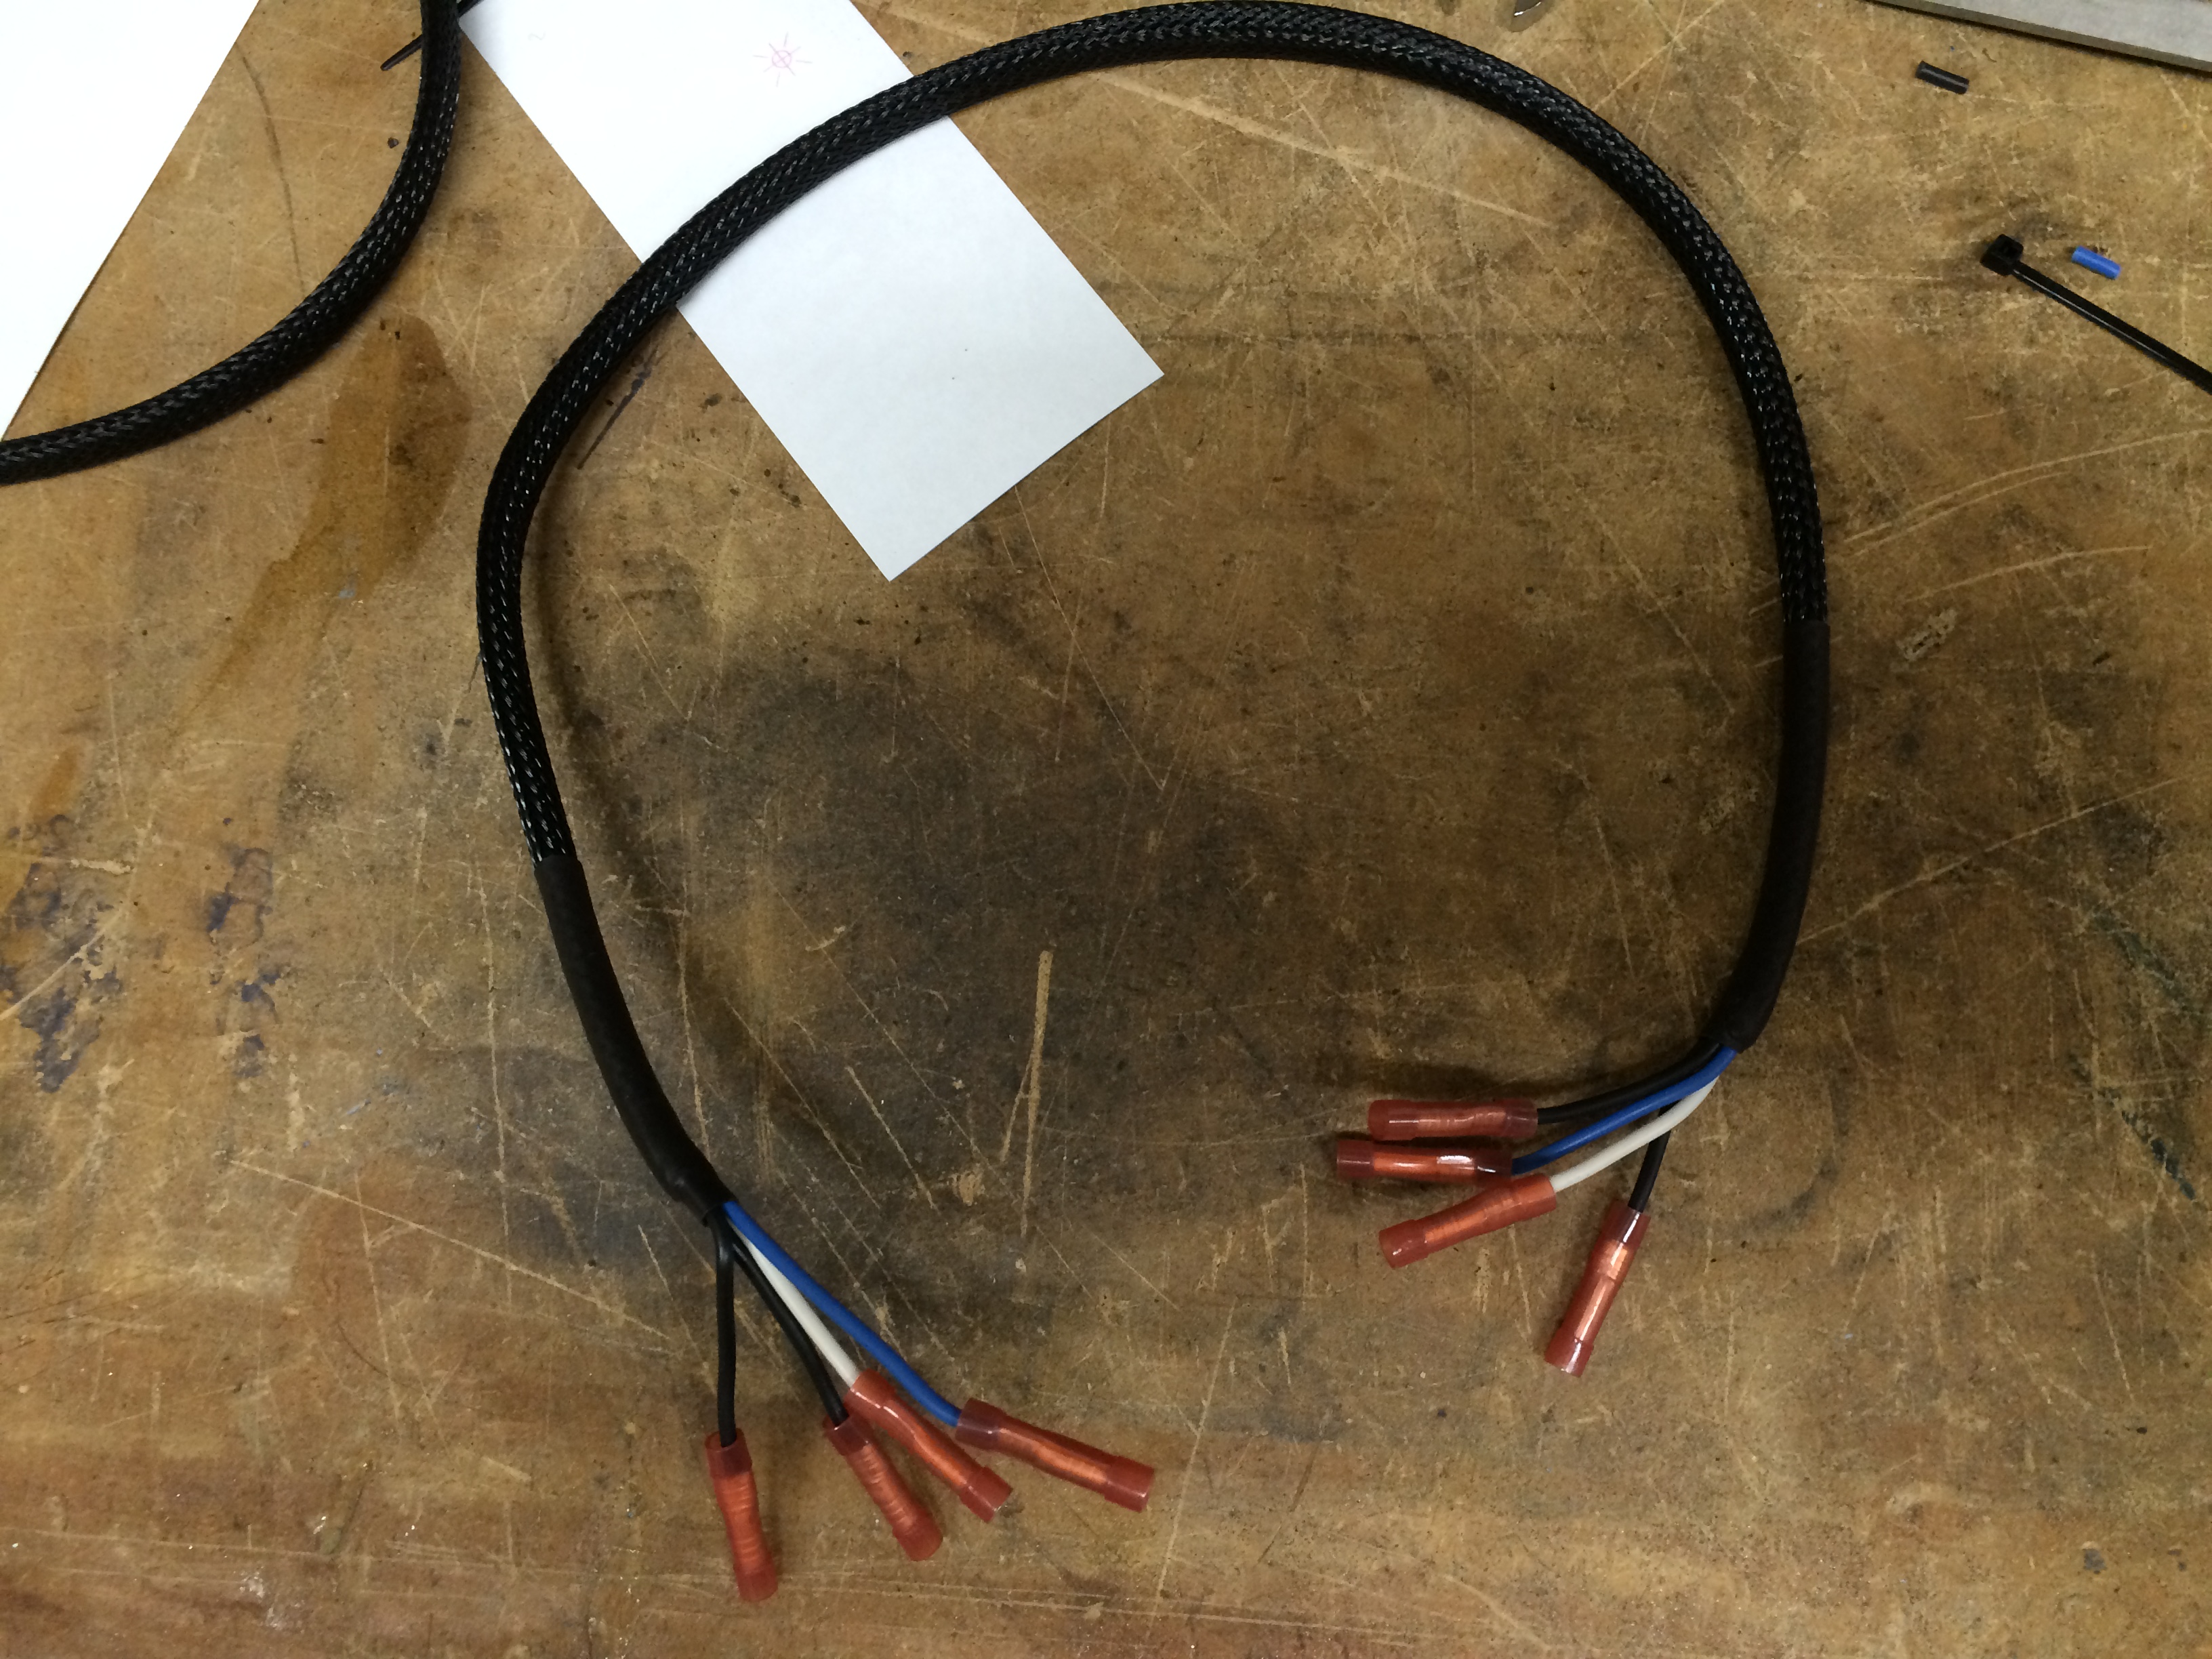
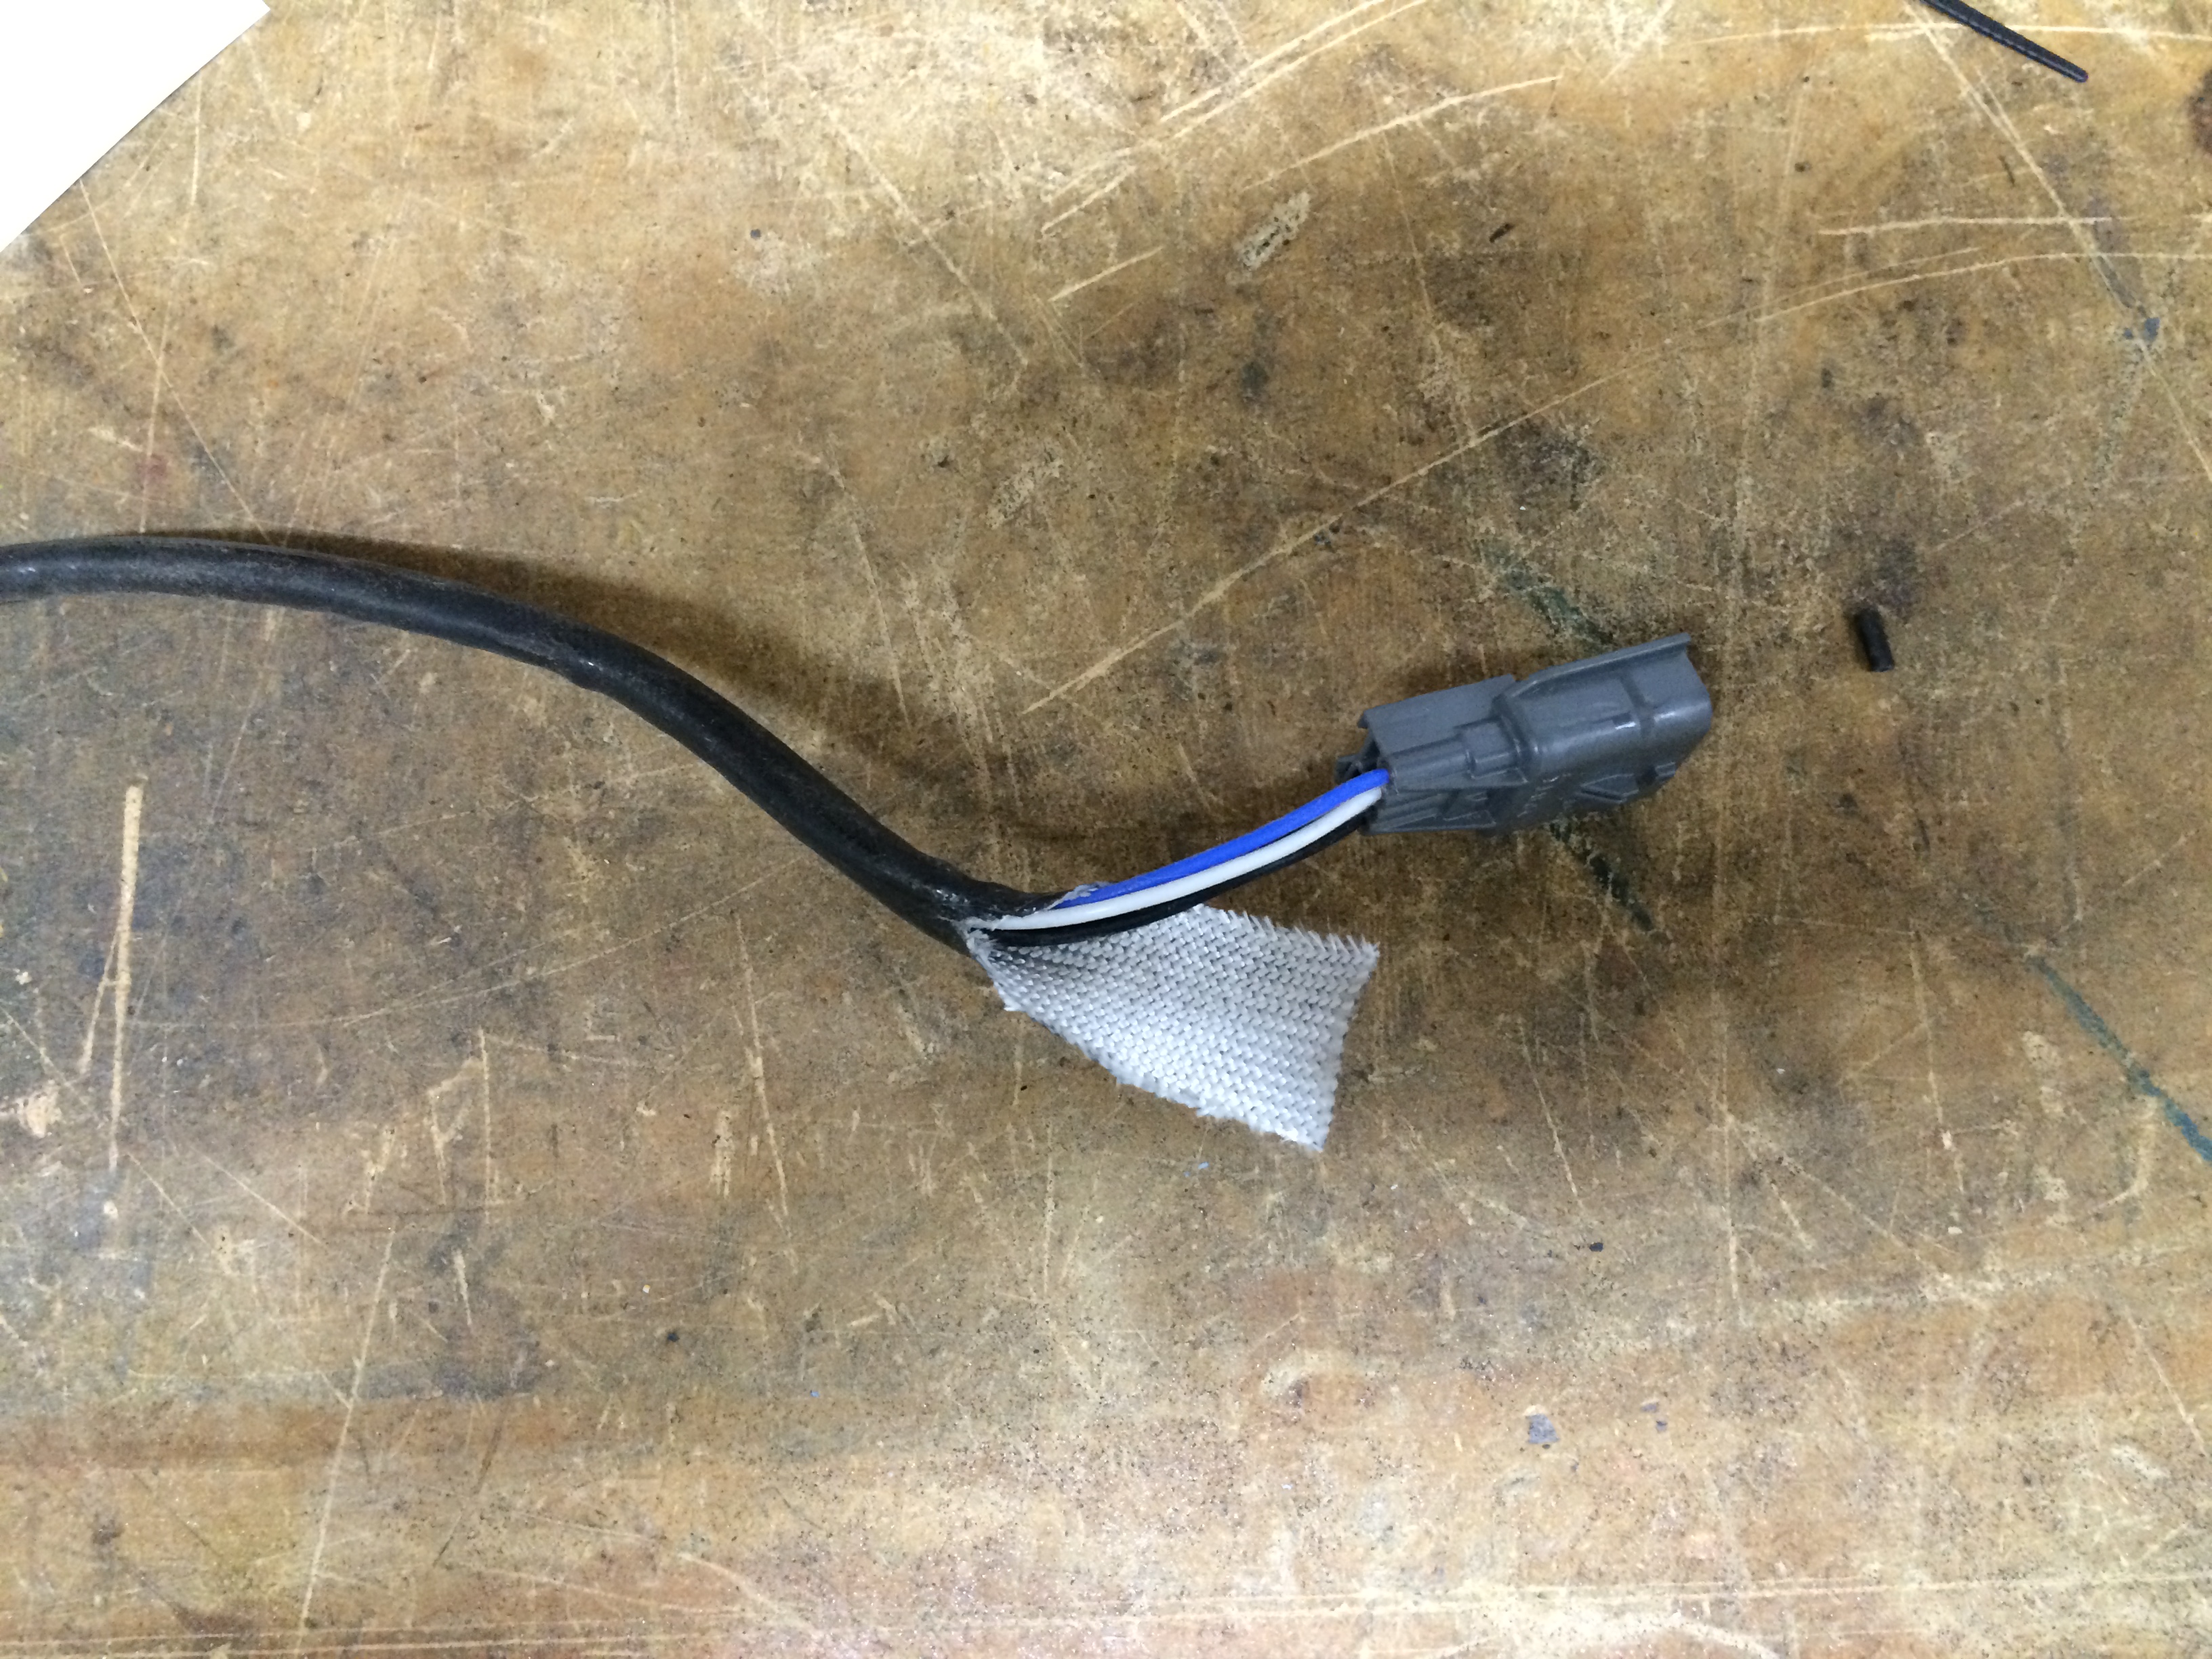
32: I extended up near the factory plug to keep the nice factory head shielding in place down at the header end.
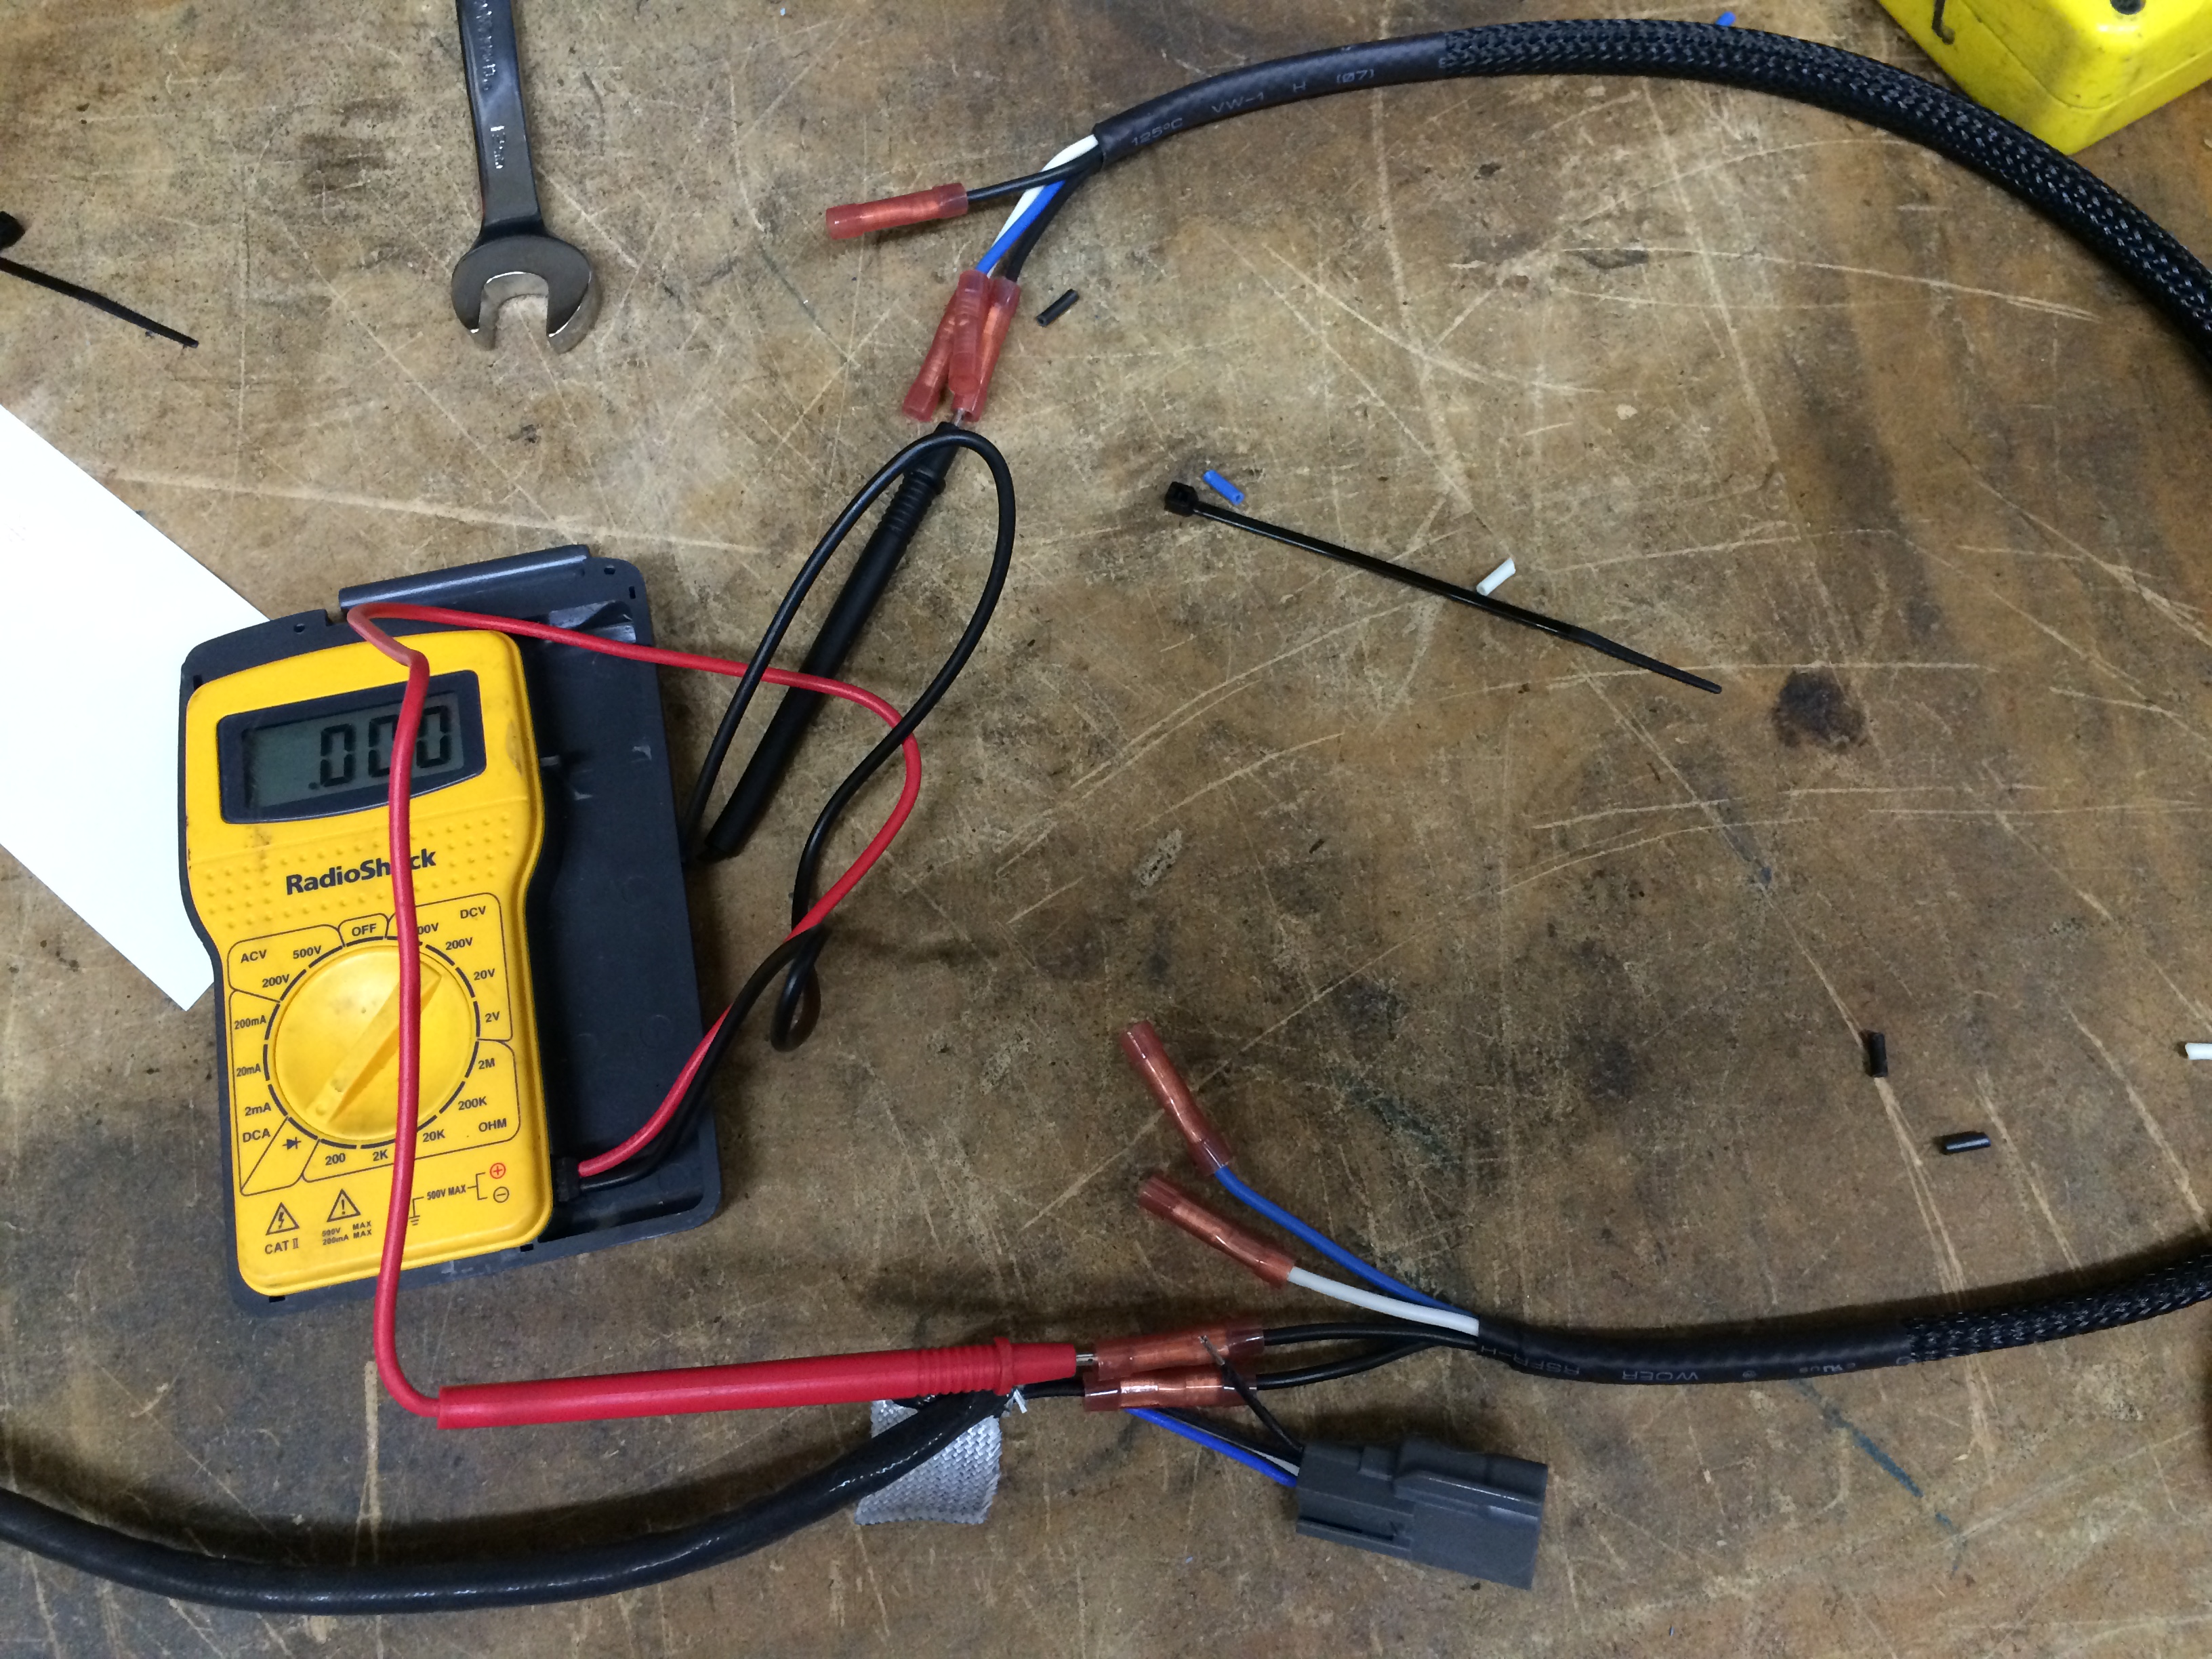
33: Some people have had trouble with this. There are 2 black wires, 1 blue, 1 white. I recommend cutting 1 black wire, crimping on one side, then checking continuity to ensure you’re attaching the correct end on the other side. Once that’s done, you can cut the other 3 (since there’s now 1 of each color).
34: One of my forward o2 sensors boogered its threads upon removal from the factory manifold, even though I treated it nicely on the bench. It wouldn’t thread into the PPE header, and it was midnight on a Saturday night – exhaust shop and dyno appt Monday, leaving for big race Wednesday, no time to wait for a new one, and I don’t have a tap/die tool in that size. What to do?
What I did was use the other factory manifold where the sensor had come out cleanly. Lubed it up a little and with some finesse, was able to use it to repair the o2 sensor’s threads enough to get it to tighten and seal nicely in the new header. Heart attack #2 averted!
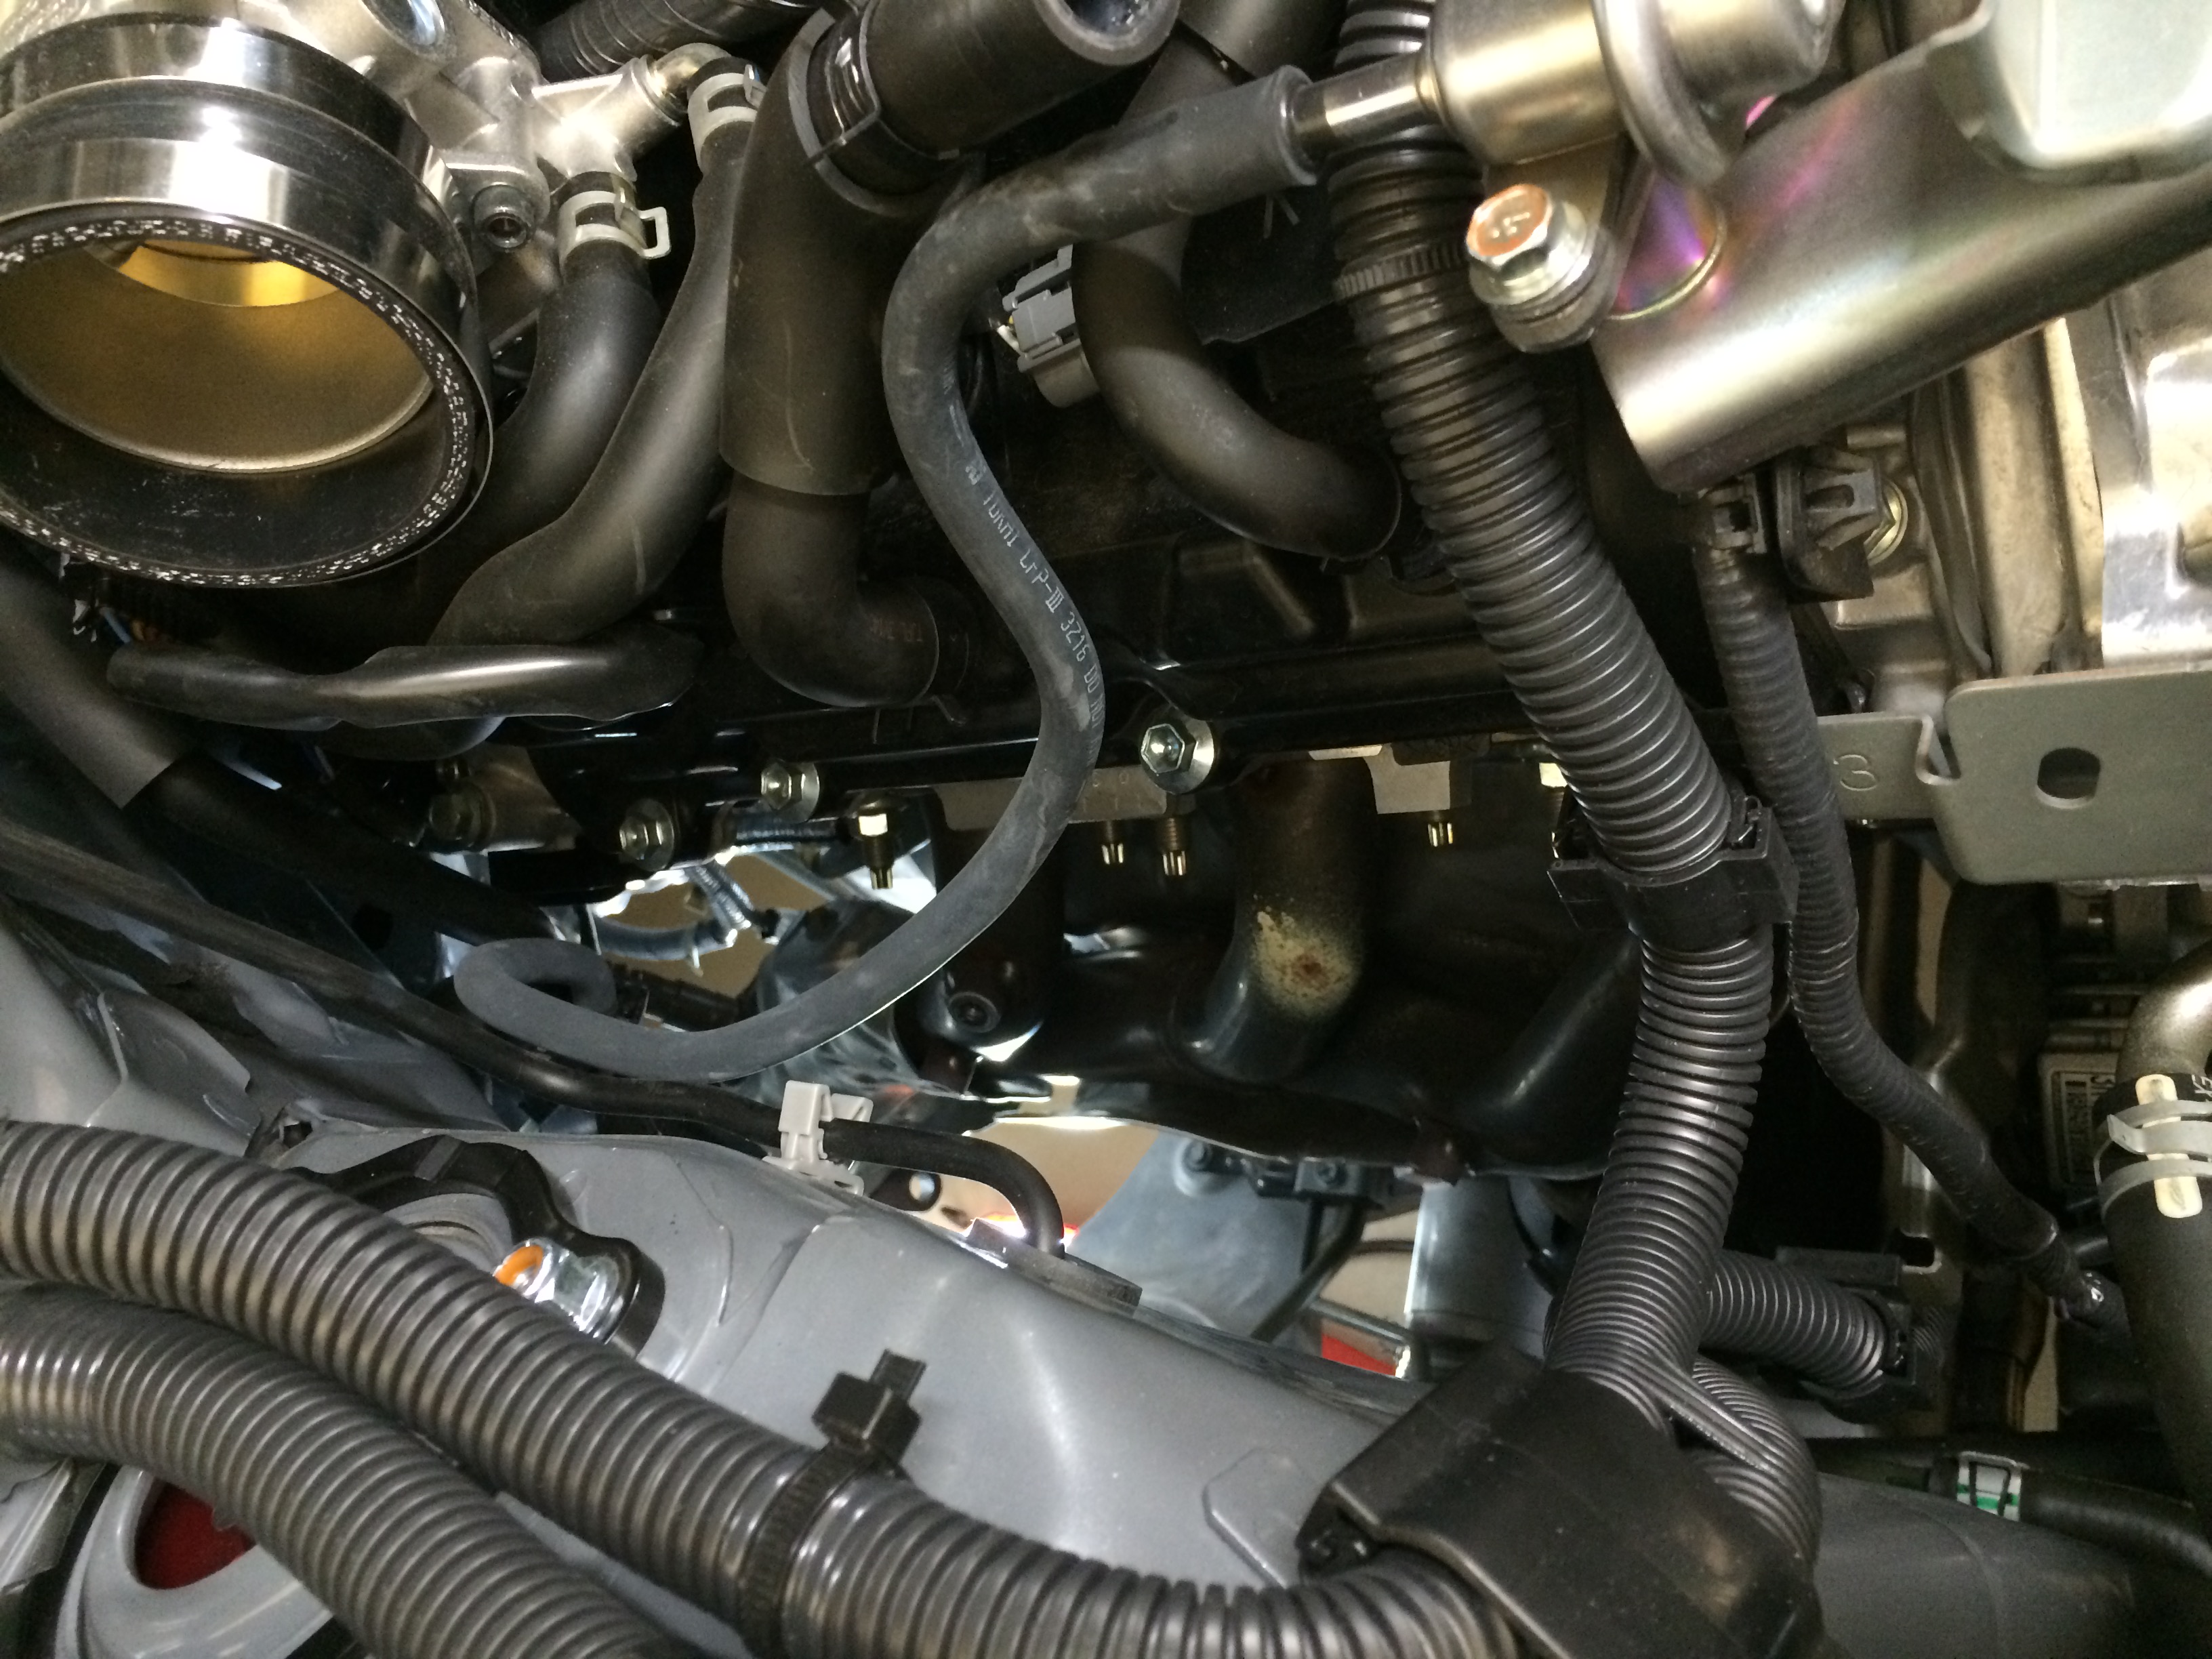
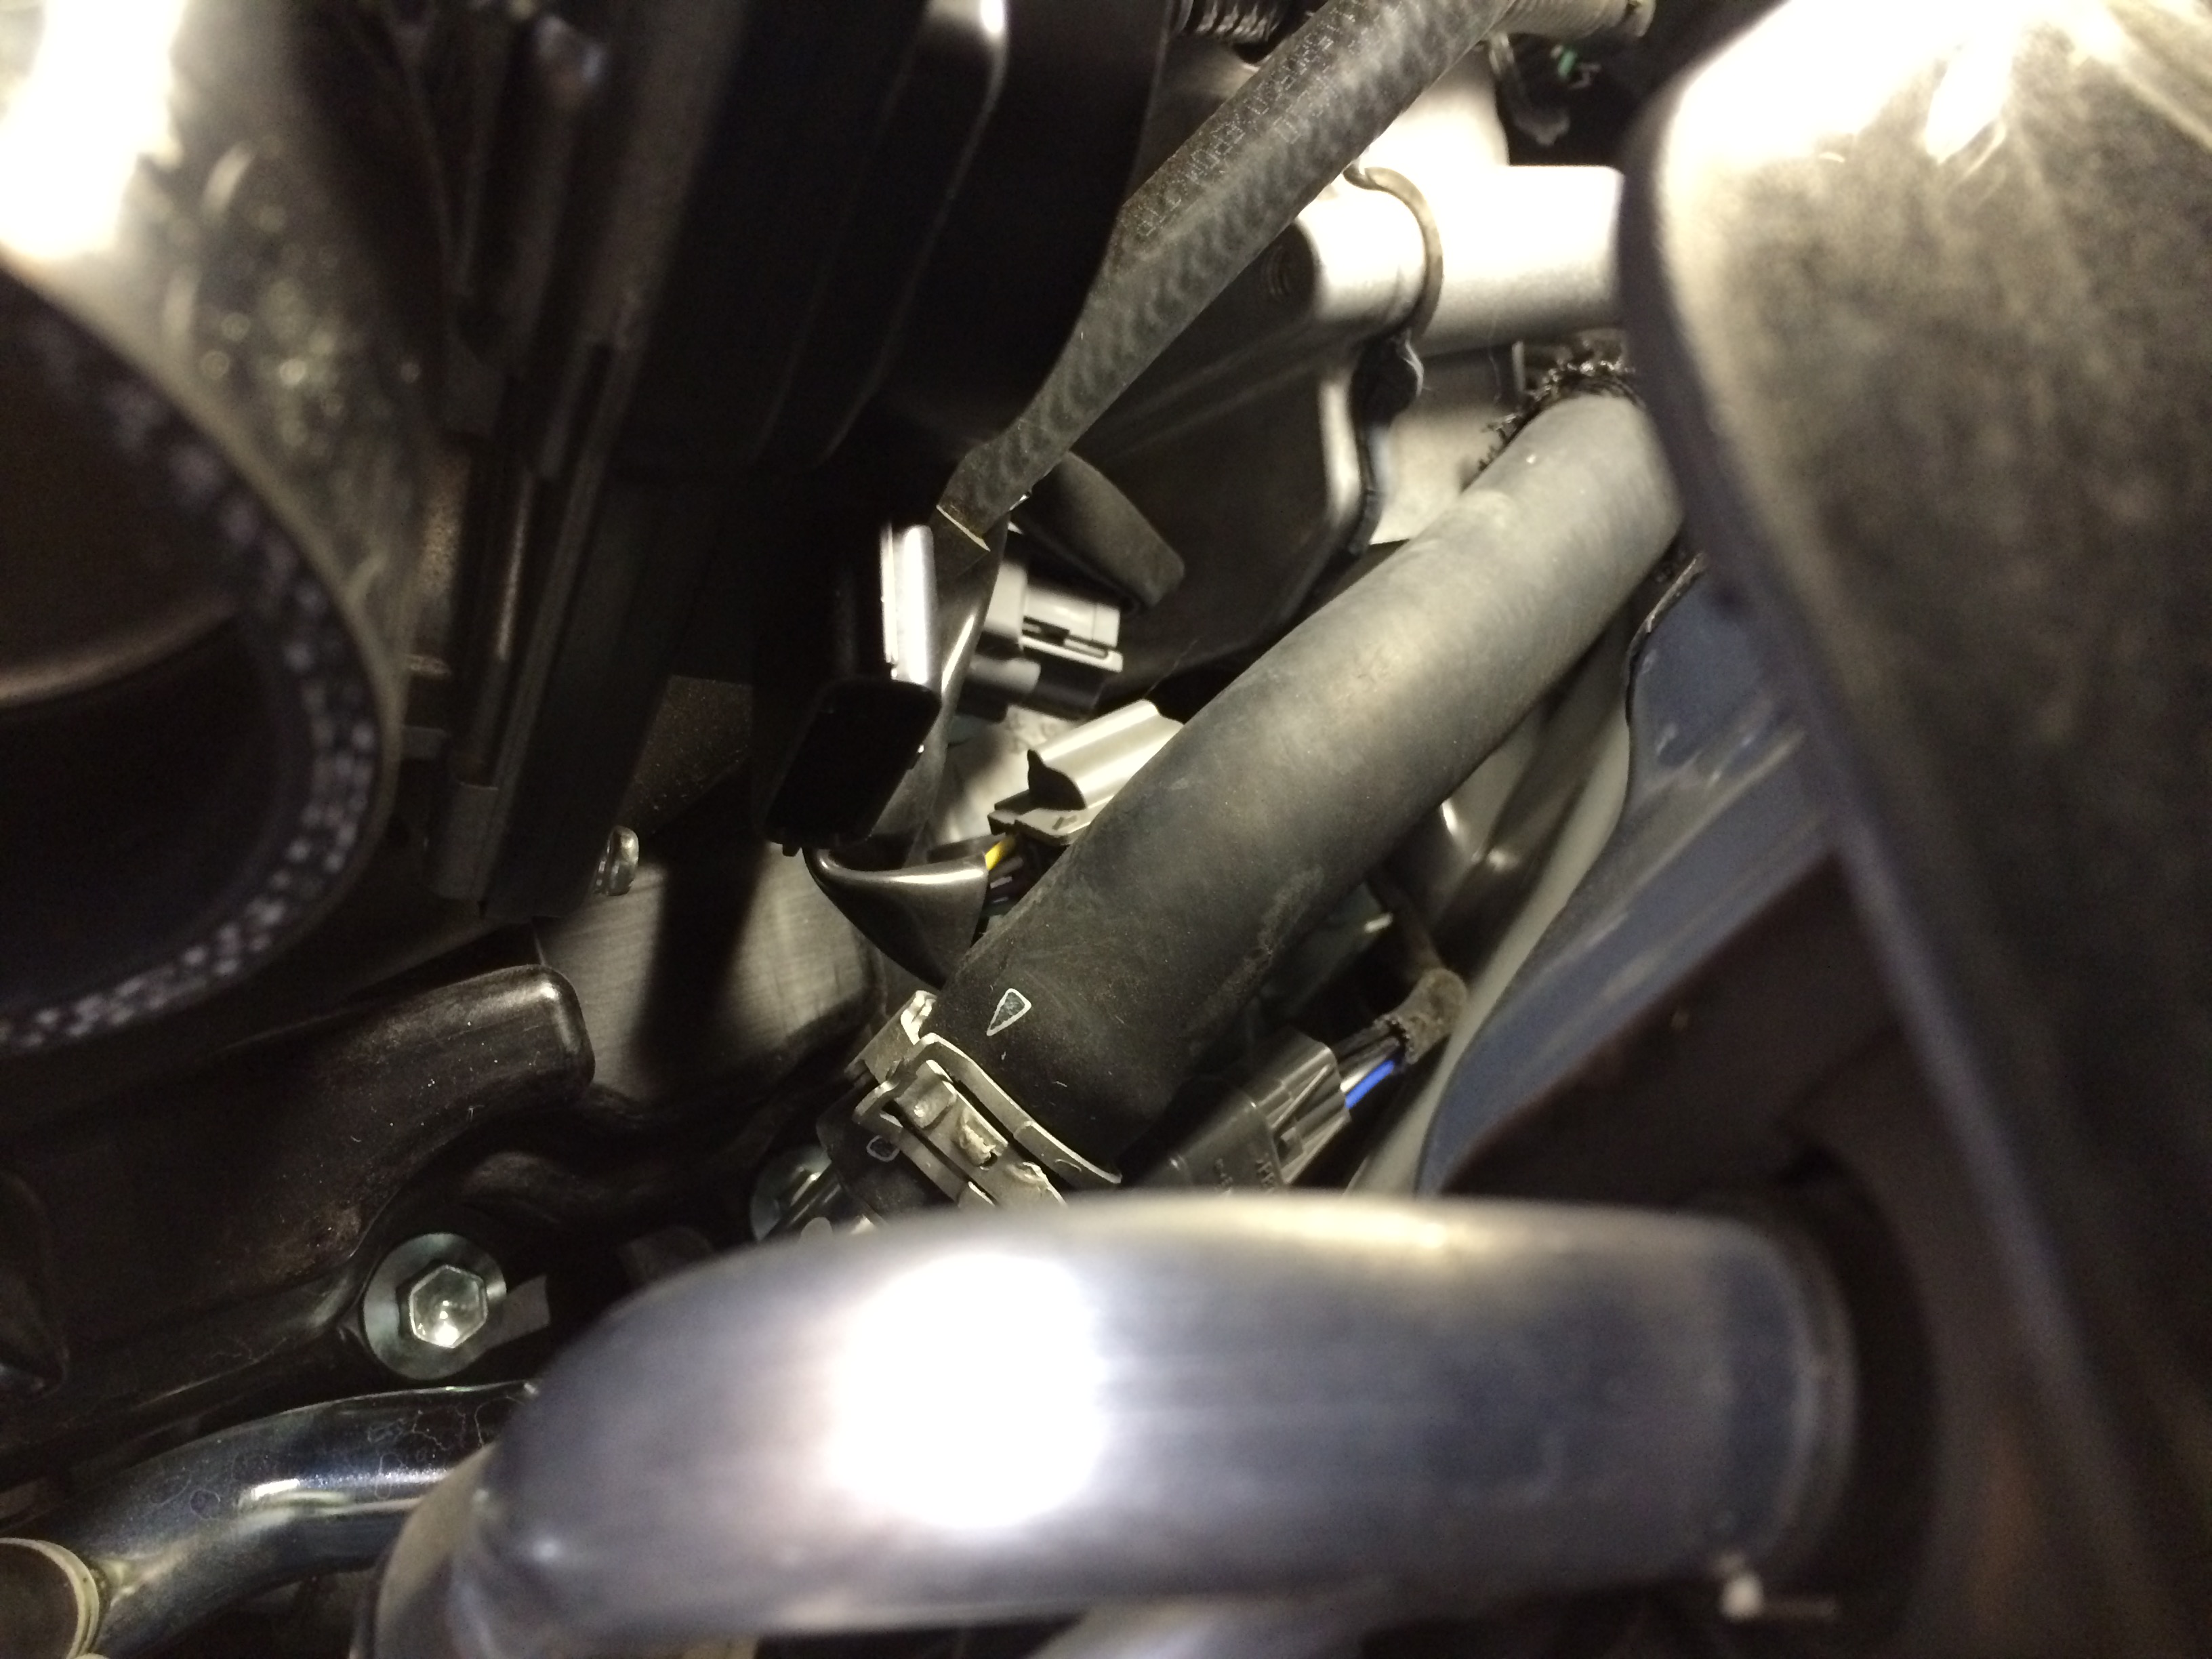
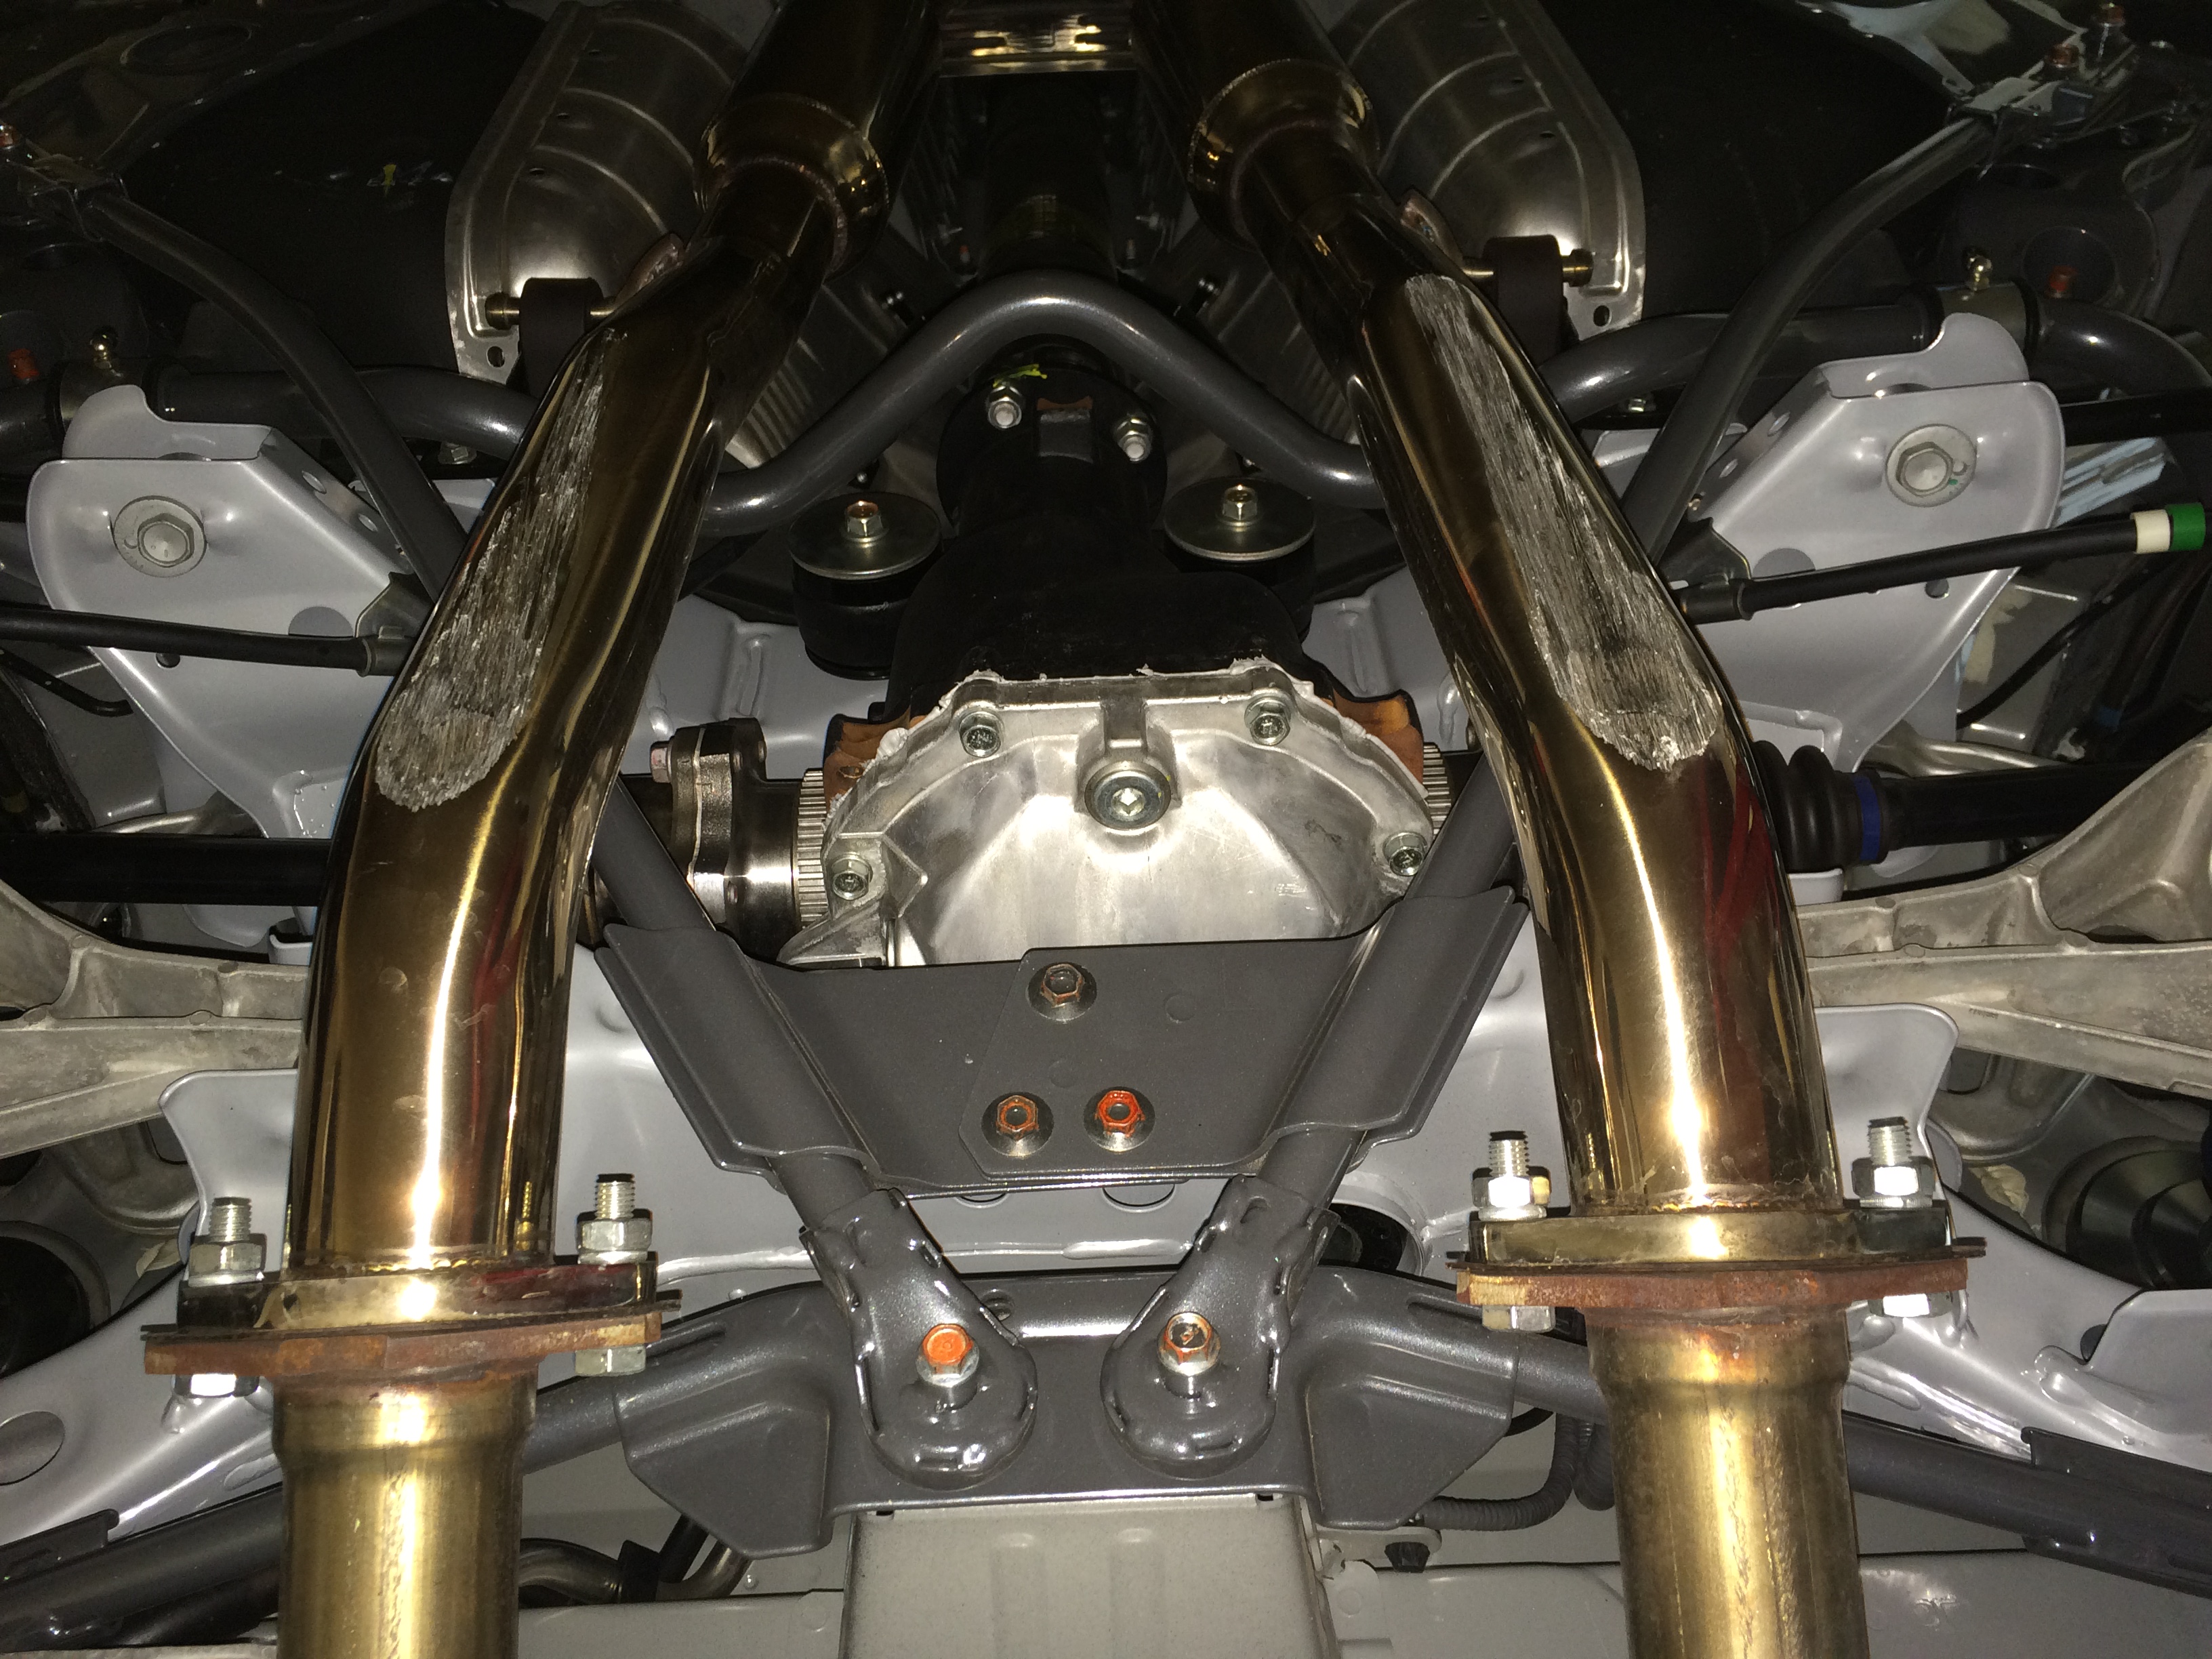
35: Passenger side installed and wired up.
36: Driver’s side installed and wired up. The o2 sensor wires on both sides need some help getting secured in a way that keeps them from getting melted. This wasn’t too hard but at this point I discovered the transmission (which is right there and you’ll contact at this step) has some weird casting bumps that are extremely painful to touch, much less rub against. It feels like 20 grit sandpaper that also delivers an electric shock!
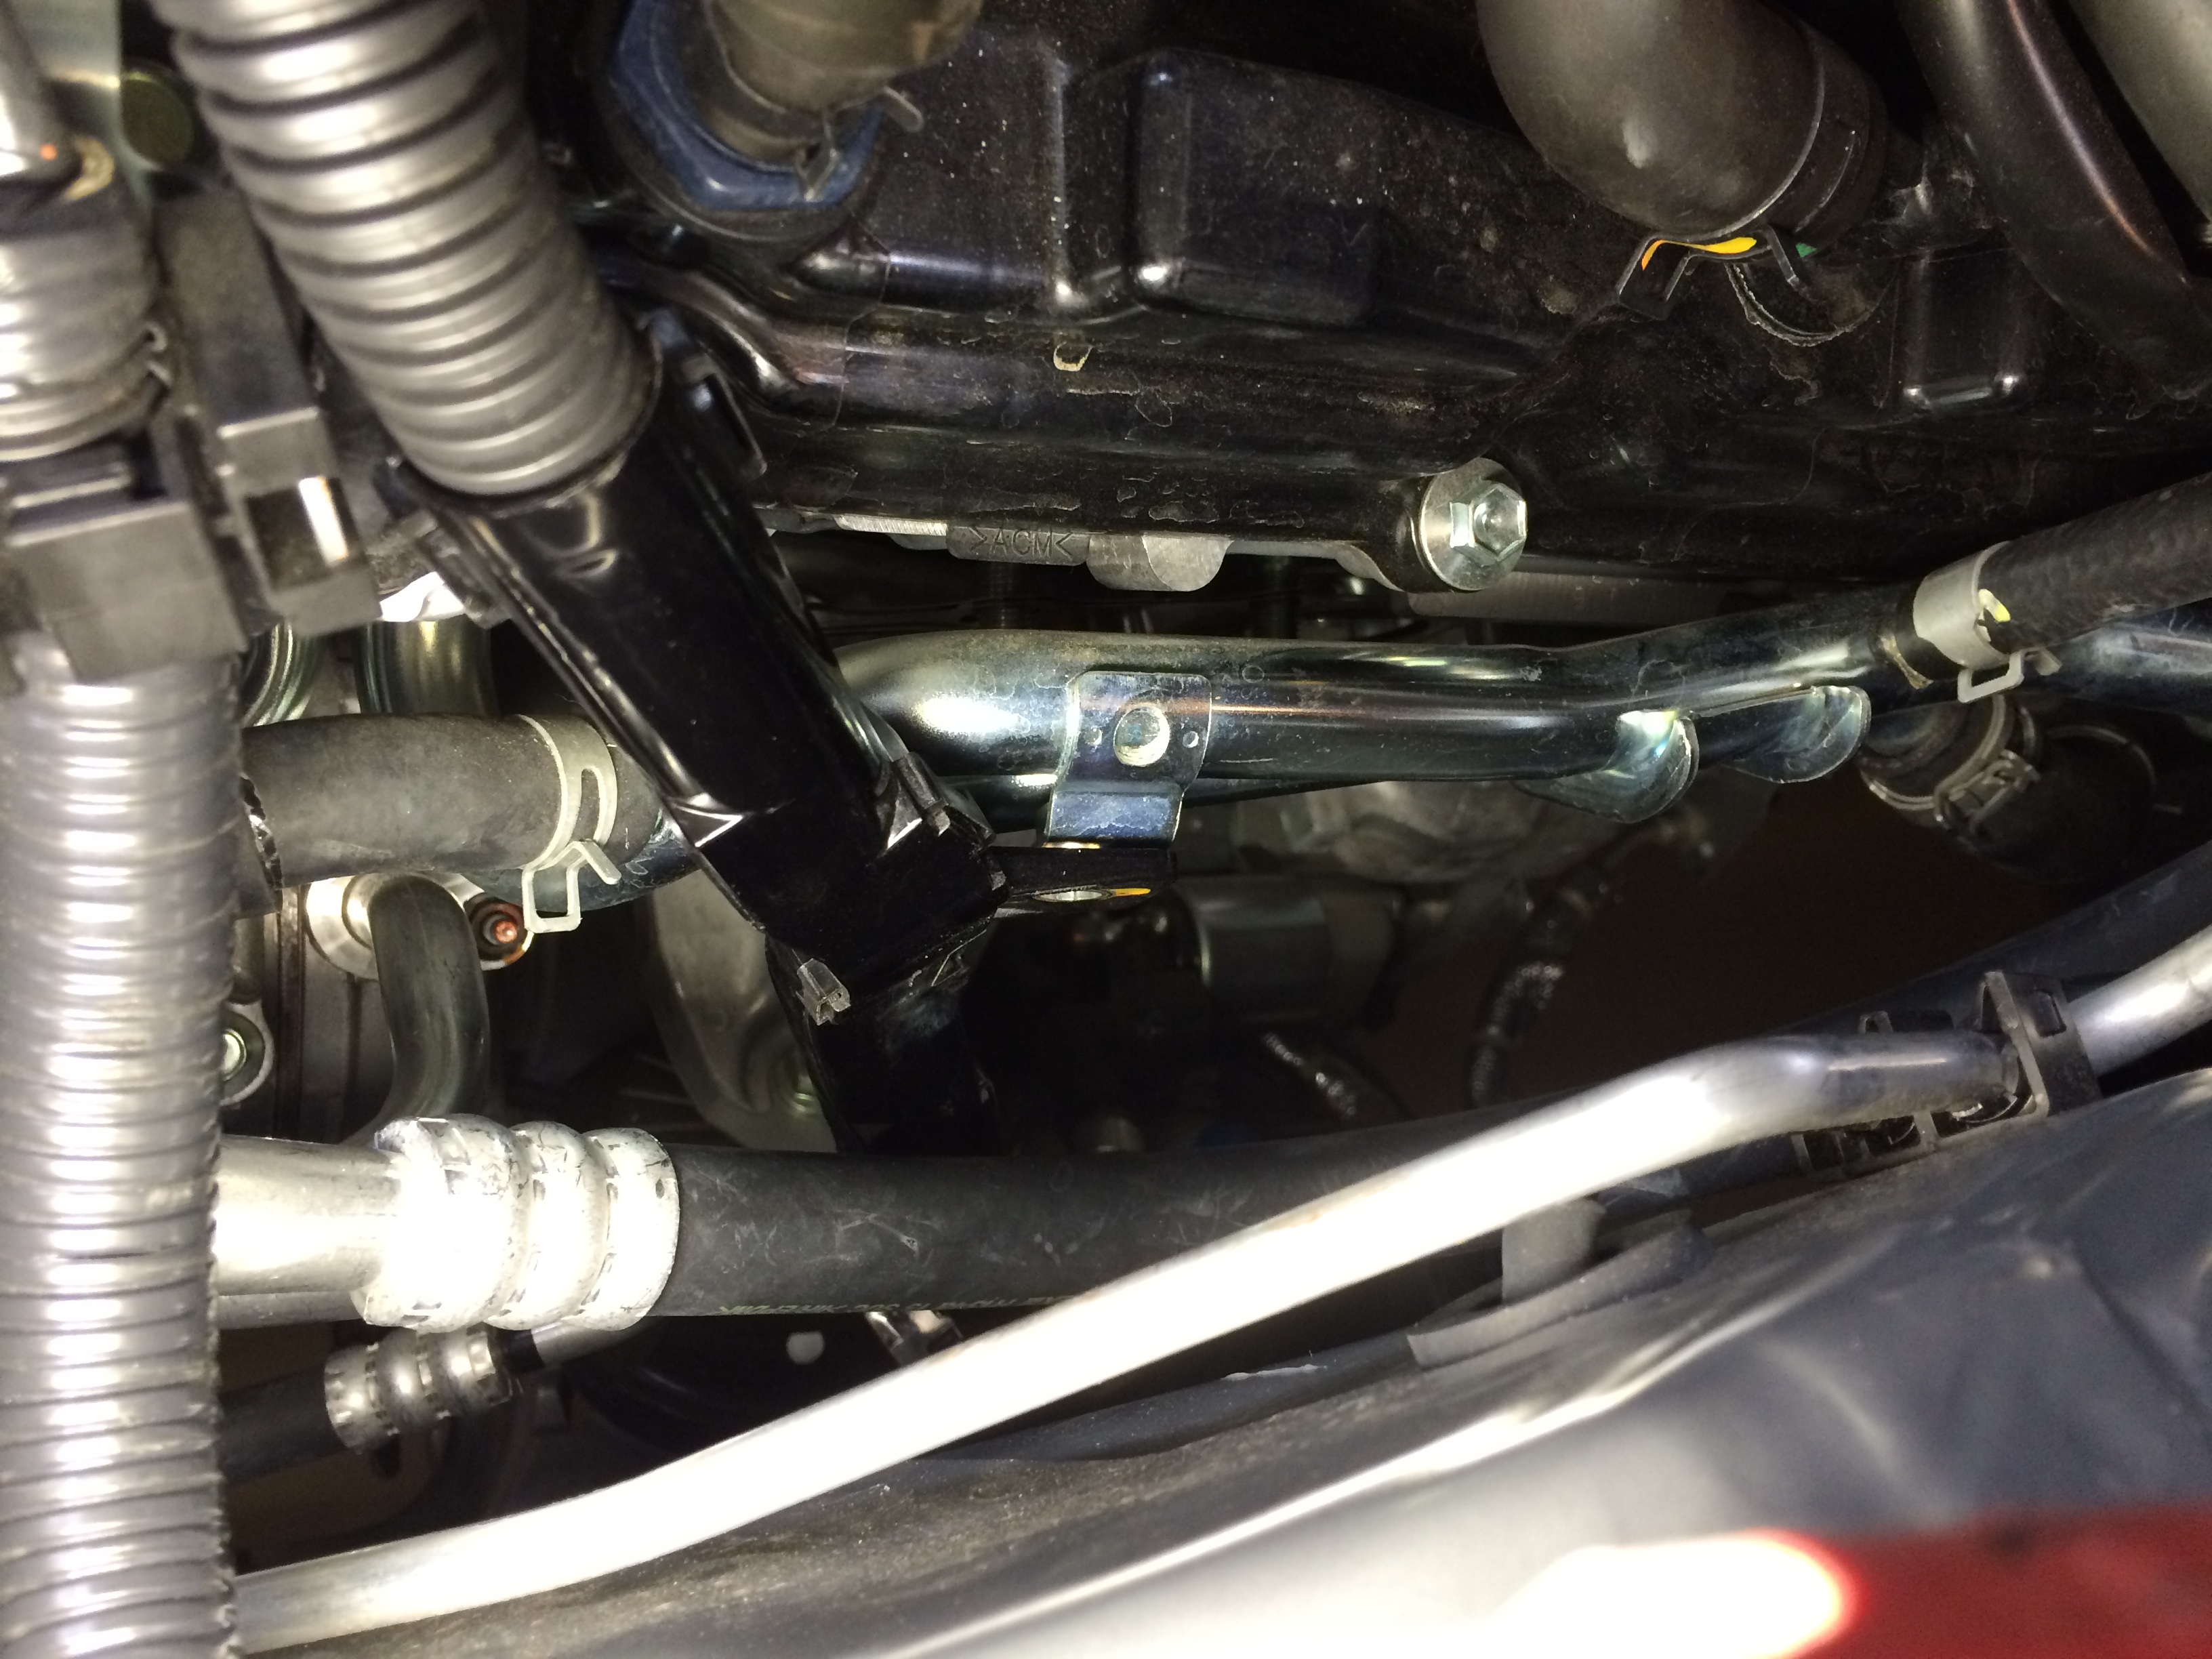
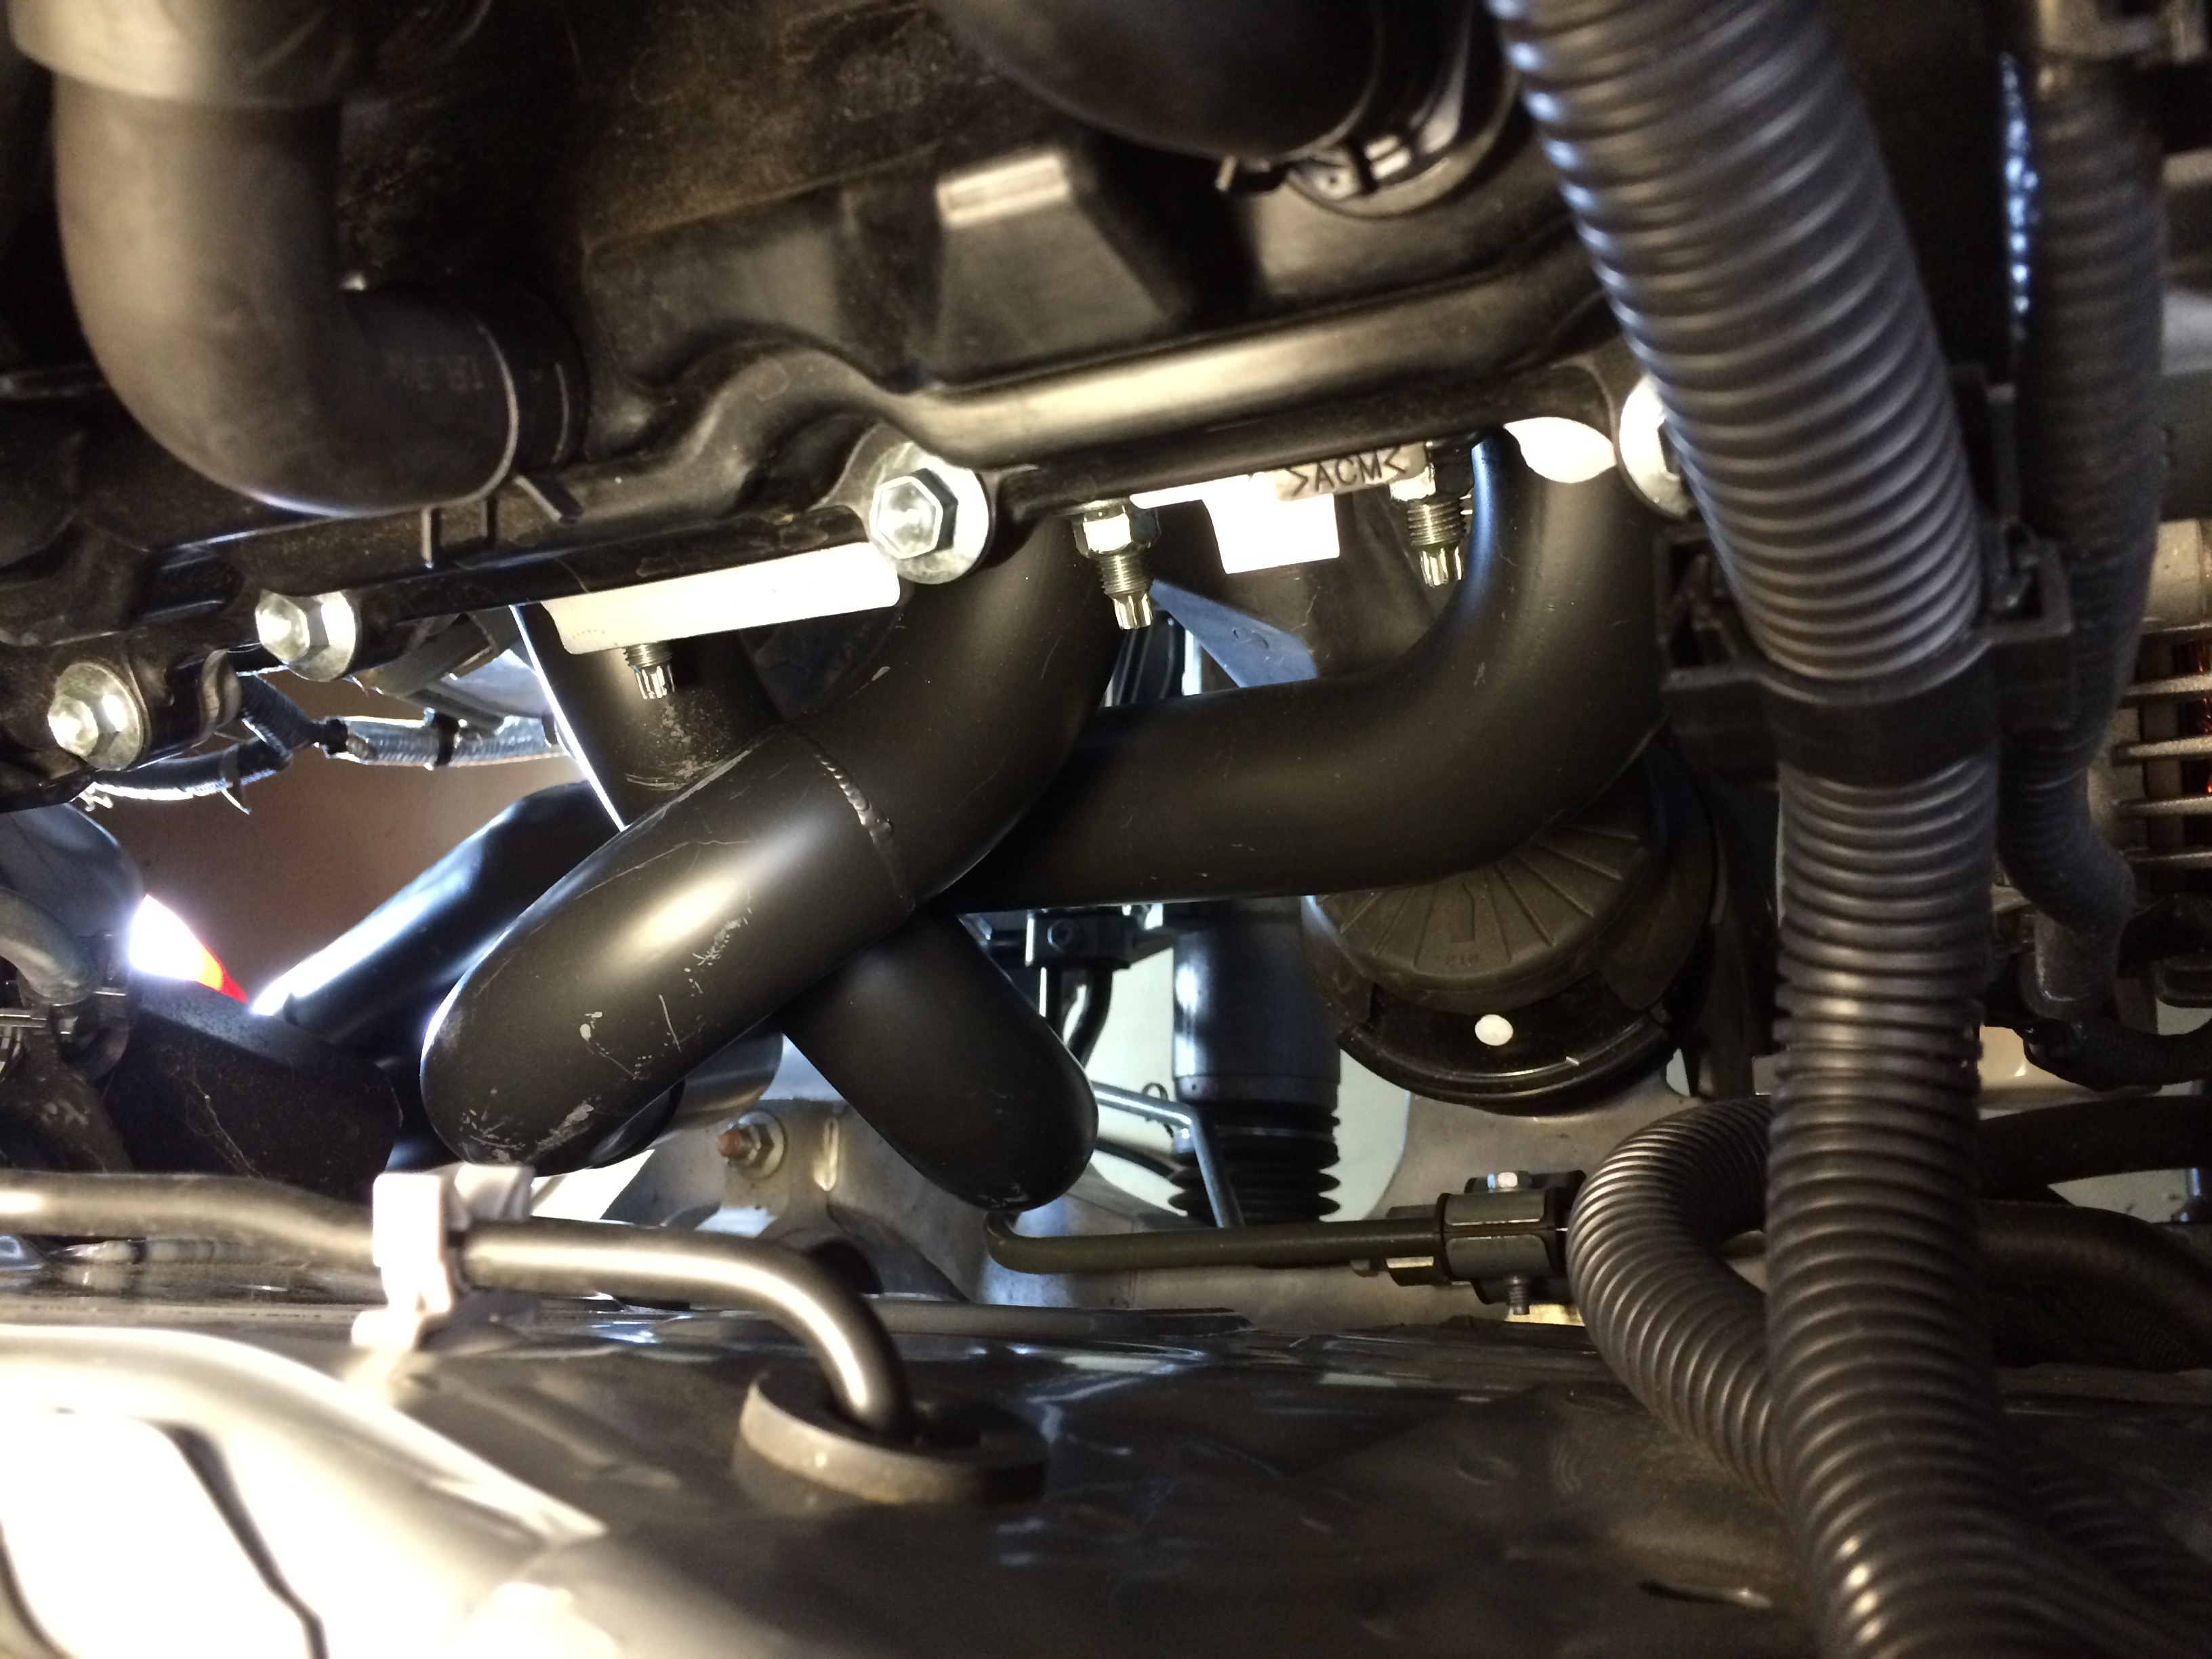
37: From above, you can barely see the header in place once the intake is reinstalled.
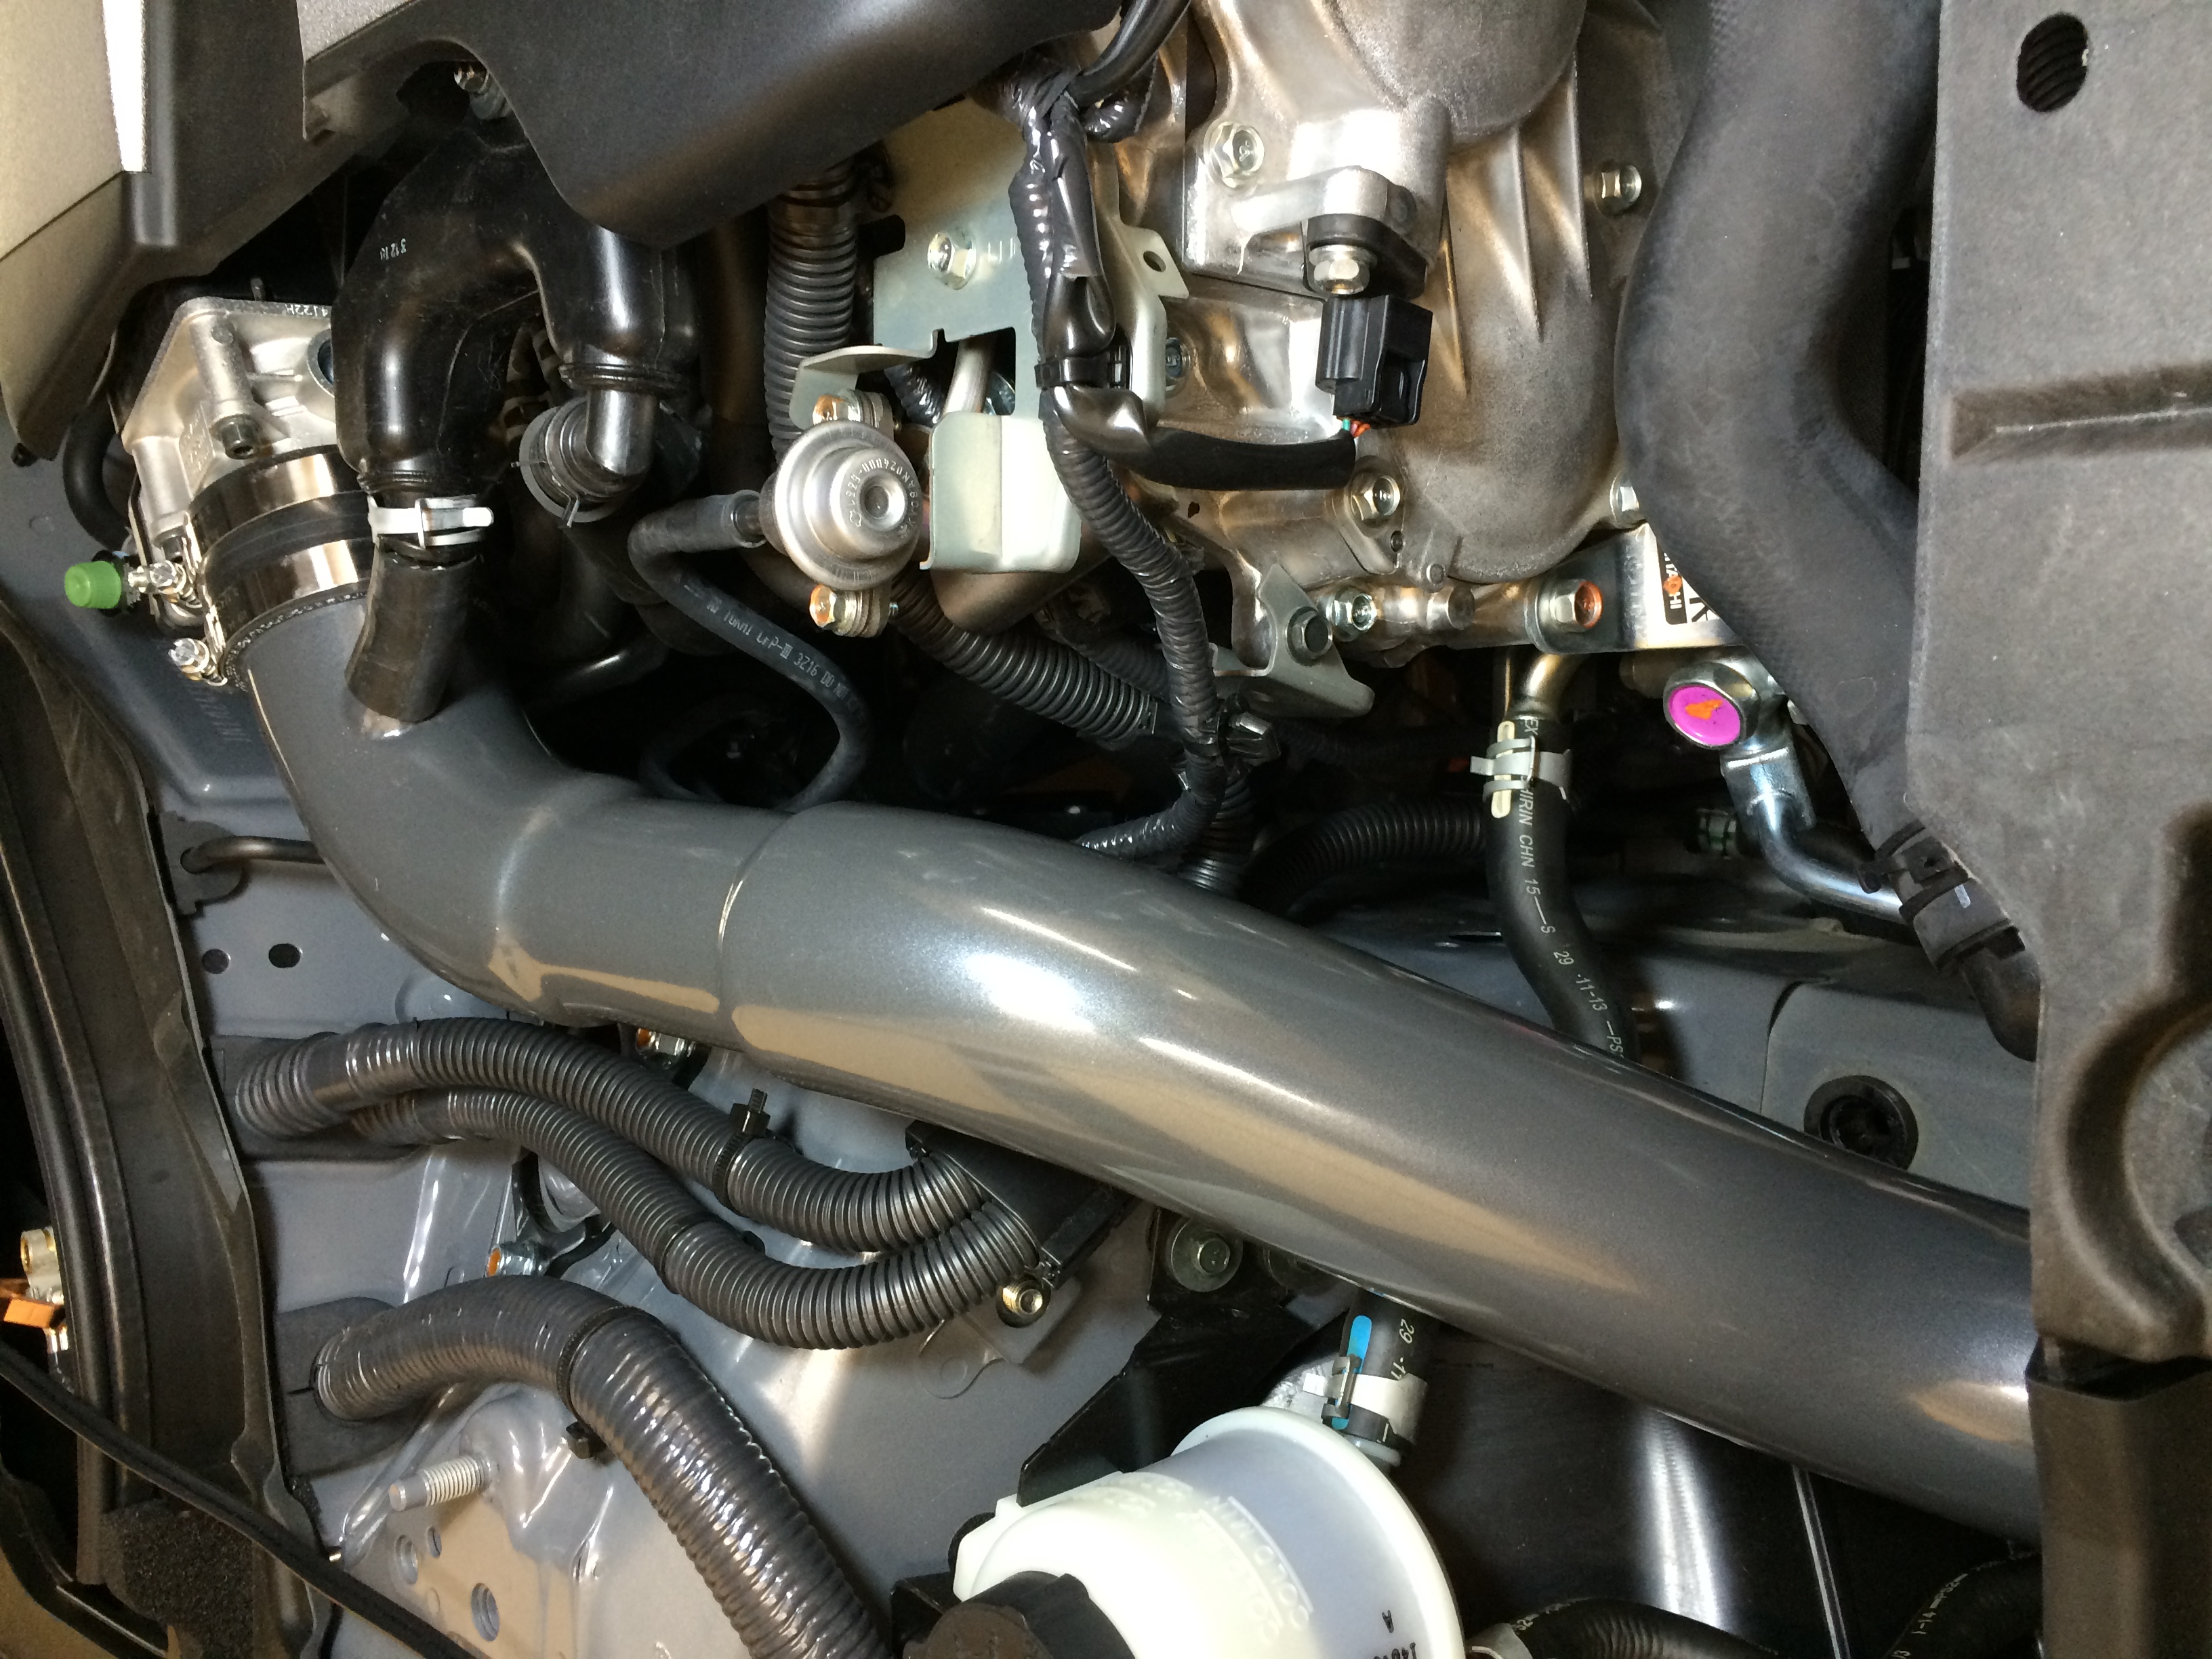
38: Driver’s side you can’t see it all, despite all the suffering!
That was evening 4 which included buttoning up the rest of the things, about 2.5 hours.
Drove it the next day (today, Sunday 5/17) and the steering was clocked about 20 degrees left. A minute into the test drive the car freaked out and applied abs in a wacky way, then threw a light.
Evening 5 (tonight) was spent re-clocking the steering, which mercifully can be done without having to remove anything else.
……….
Test drive was short. My car has the Takeda CAI, garageline midpipe, and stock muffler. Compared to stock manifolds + Berk HFC, it was a fair bit louder on cold start, but maybe only a little louder at normal idle. Louder on the street and it sounds quite a bit different now at high RPM. Dyno’ing tomorrow and seat of the pants it feels like there was a gain in top end – the car always felt a little “choked” up there before (even with HFC) but that seems gone now. However before that I’m having some super-high-flow cats installed just aft of the headers (per SCCA class rules) so the sound may be changing somewhat.
More to come soon, stay tuned!
Bring the Noise
The Bridgestone RE71R tires made it so I could no longer spin the tires everywhere, which means more power is needed.
PPE stepped, full stainless, tuned equal-length with 15 degree racing merge collector headers underway – hope to have them on the car next week, with a follow-up tune done before the trip to Spring Nats (Nebraska) over Memorial Day weekend.
Paul @ PPE snapped a pic for me, before they go out for ceramic coating.
Have some other exhaust work that’ll be coinciding, will cover that in a future update.
SD Tour and ET Pro 2015
The Tour went poorly! Could have been worse, but a lot went wrong. As the car’s first event in STR trim I knew not to expect too much – I think a lot of people have results like that early on with their projects and get discouraged. Gotta keep looking up!
Videos:
Speaking of up, decided to raise the rear of the car after the Tour. The exhaust scraped over everything-
Raised it one turn, and upped spring rate from 650 to 700. The car felt a little too soft in the rear, and some of the handling problems I’d been experiencing were based on understeer. Curiously the rear bar had become disconnected on one end, must not have tightened that endlink nut enough – oops!! Hooked it back up at full soft. With 650’s the car was “cushy”, 700’s is still a good ride, but no longer what I’d call cushy – hopefully the car can be made to work well at this rate, suspect it will get less comfortable as rates go up from here.
Took Friday before the Pro off work to get some things done with the car. Started in the morning with a proper alignment at Clarence Brown in San Diego.
The crew there helped me out. Left there with -2.5 camber rear and 1/8″ toe in (had been ~-2 camber and zero toe) and -4 camber front with 1/16″ toe out (had been -3.5 and zero toe). Caster is about 5.5 degrees, wish it was more.
From there, up to Long Beach to see Shawn Church – Church Automotive Testing. Hadn’t been there in years (the SM build on the 240sx in 2007!), but glad to see he and his business doing so well. Shawn started out mostly with Hondas but the popularity of tuning Evos, Subarus, Nissans, and lately the domestics, has increased demand for his services tremendously.
Tuning session was quick and went well. The process produced a solid gain through the midrange and a bunch over 6700 or so. The factory program went really rich up there; by flattening the AFR to just under 13.0, the car saw a huge jump in top-end power, moving peak up to 7350 rpm.
Redline was raised from 7500 to 7700rpm, another 1.5mph or so of top speed in second.
Which would come in handy at the Pro, where I’d end up hitting the limiter just once or twice.
Car was much better at the Pro, largely due to a change to the new Bridgestone RE71R tires. They are a significant step up in capability from the Hankook RS3V2, especially in their longitudinal grip (braking/accel). The Z’s handling was much improved also, though there’s still a bit to do there.
Saturday the event ran behind and heat 3 was in impound for over an hour and a half.
If you’re going to be in the Impound of Eternity, it could be in a worse place than So Cal-
Videos:
Had a chance to weigh the car after Saturday afternoon’s runs-
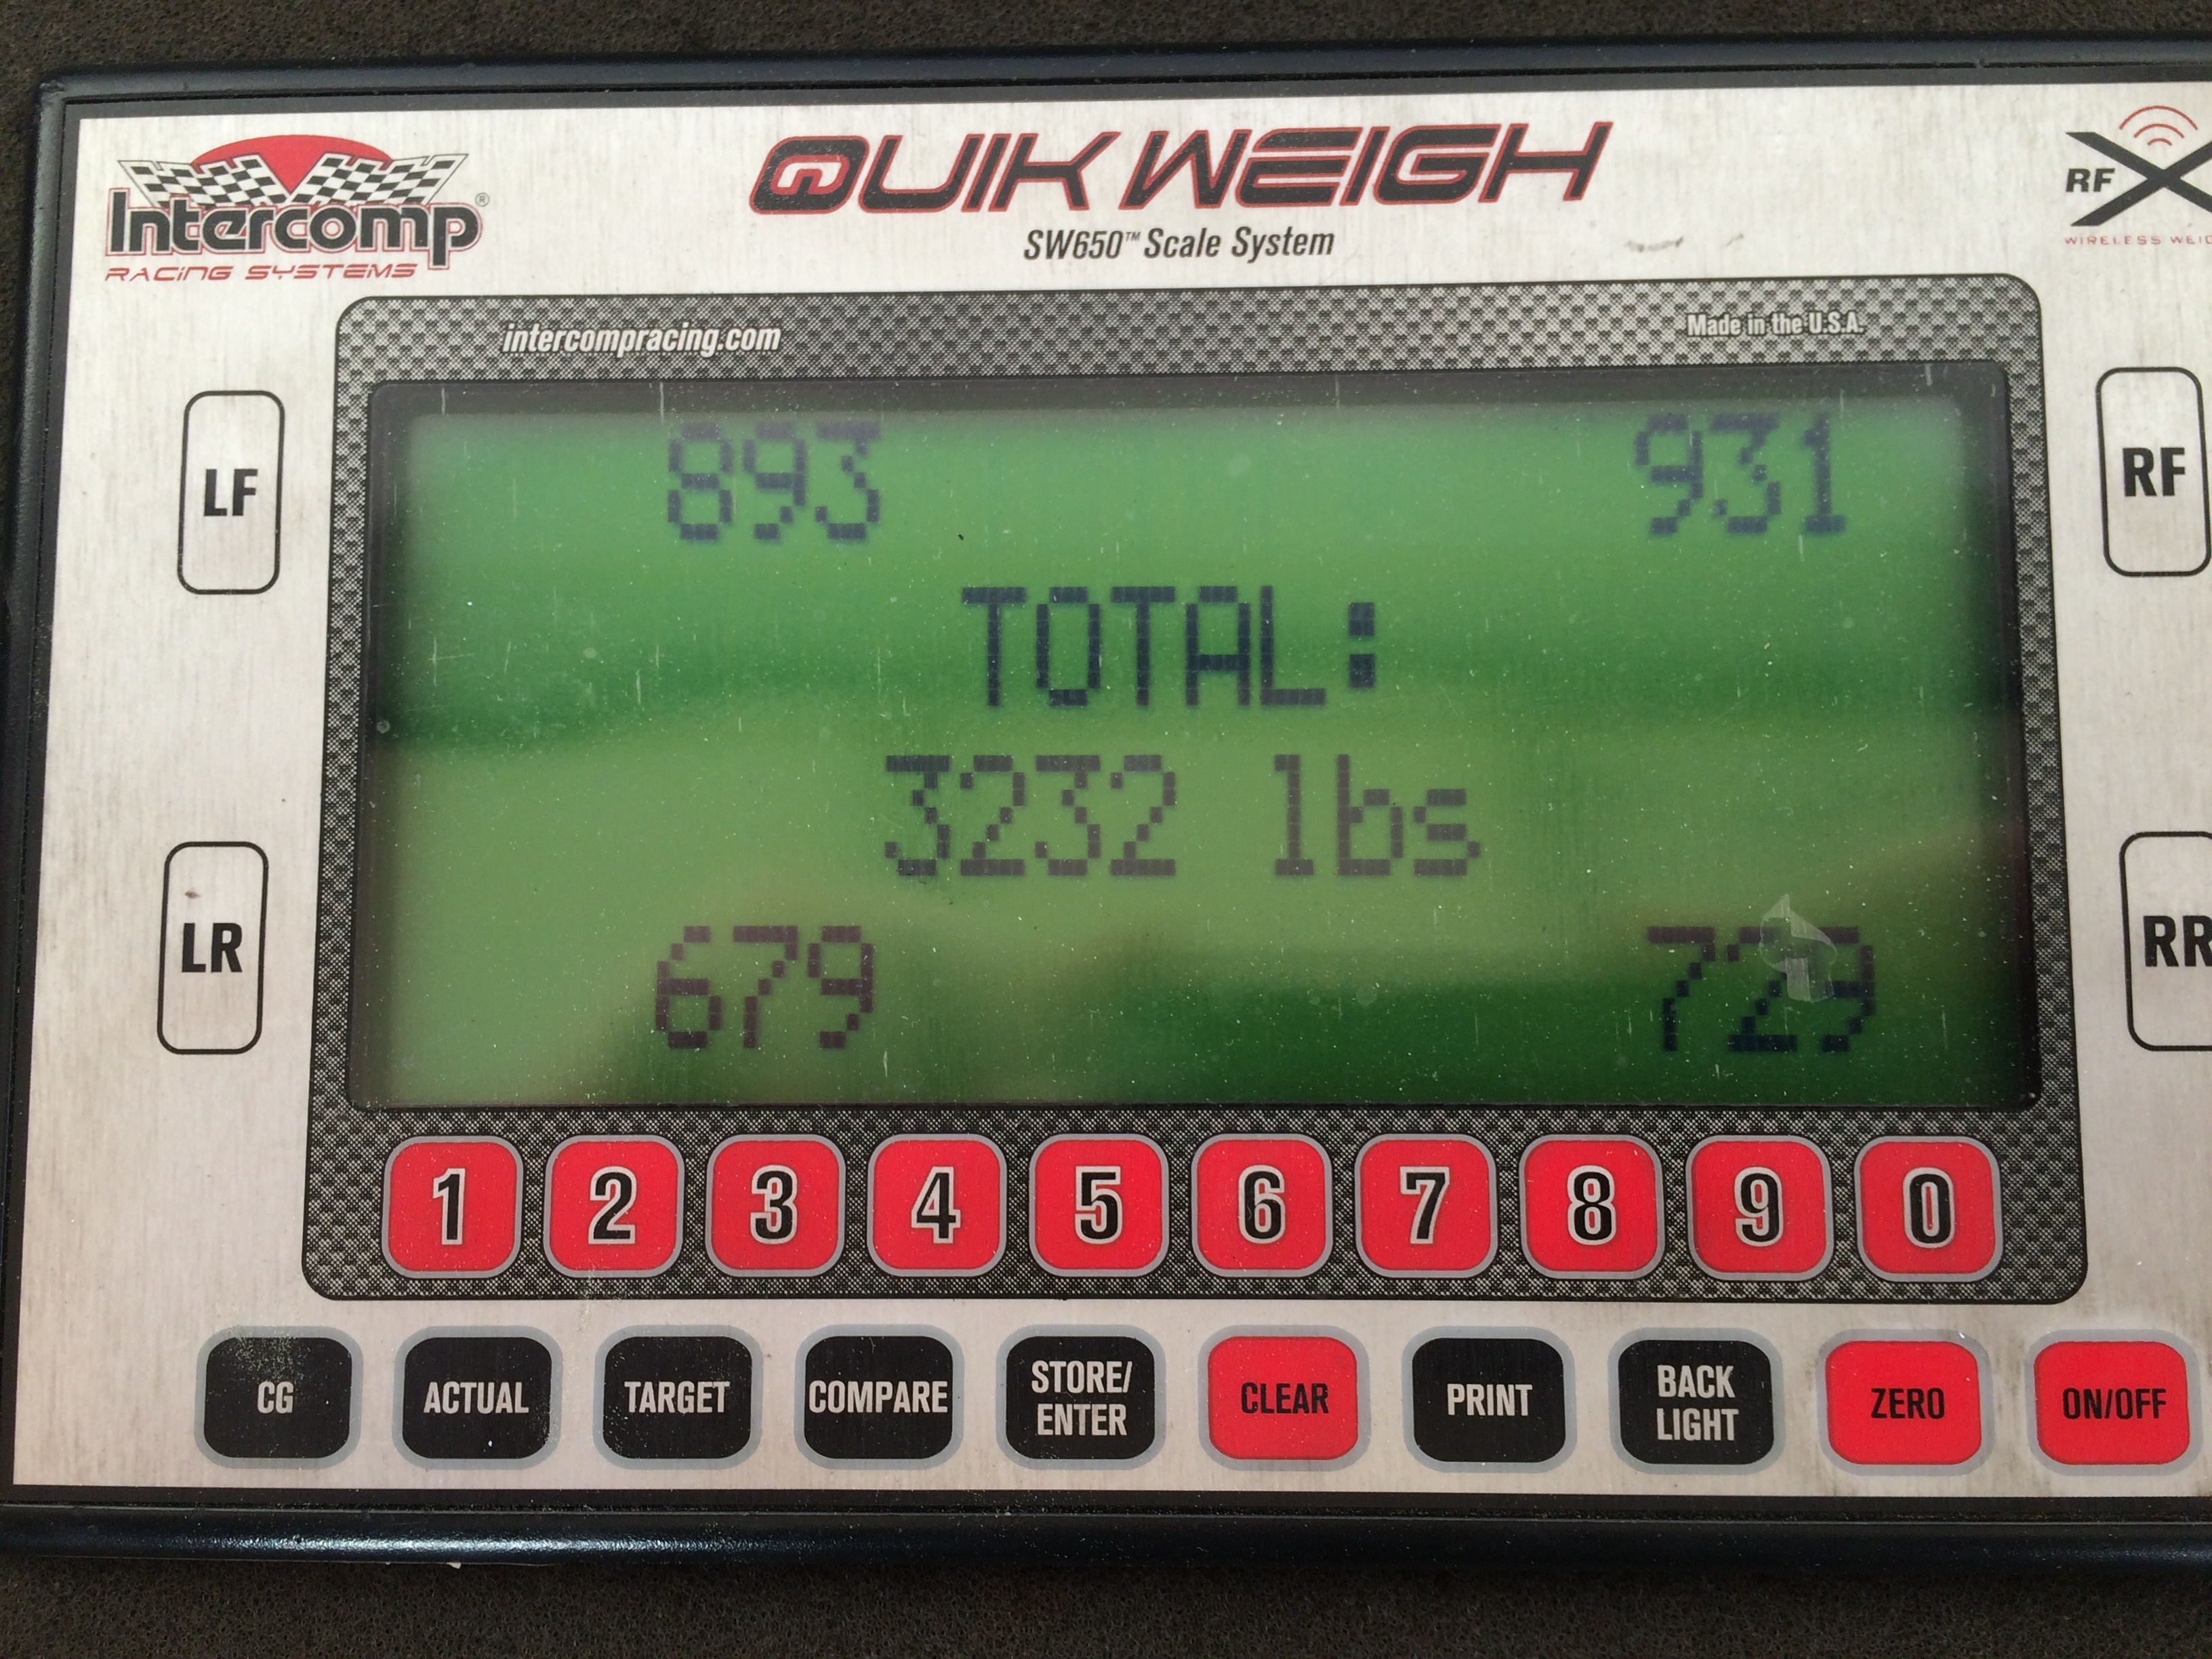
Not quite where I was hoping it’d be, but not far off. Have 20lb. lighter front brake rotors (10 per side) and am now looking at headers. So the car should ultimately get down under 3200, with a little less than 900 average on the front corners. 2 seats, extensive use of composites plus aluminum hood, doors, v6 engine…and it’s 230 pounds heavier than that all steel and cast iron, 4-seat V8 Camaro. Similar balance too, heh.
Even with all that weight, the skinny 245-width Bridgestones help up quite well. Couldn’t get 255’s in time, but that was ok, these were still a huge step forward.
It’s funny – before these tires, I’d felt the car made enough power, as I could spin them in second gear pretty much any time. Now with the Bridgestones, get the feeling another 20-30hp would be completely welcome. 🙂
Ended up second at the Pro, pleased with the result, considering I ended up only about a half second off the winner Nick Bjoin, who won the Pro Finale the year before. Especially when the data shows you left .6 seconds in one corner in the run you had to stand on 🙂
It was a good course for the car, but the result was encouraging enough (and the car so much fun!), will be proceeding with some of the phase 2 elements of the build this year.
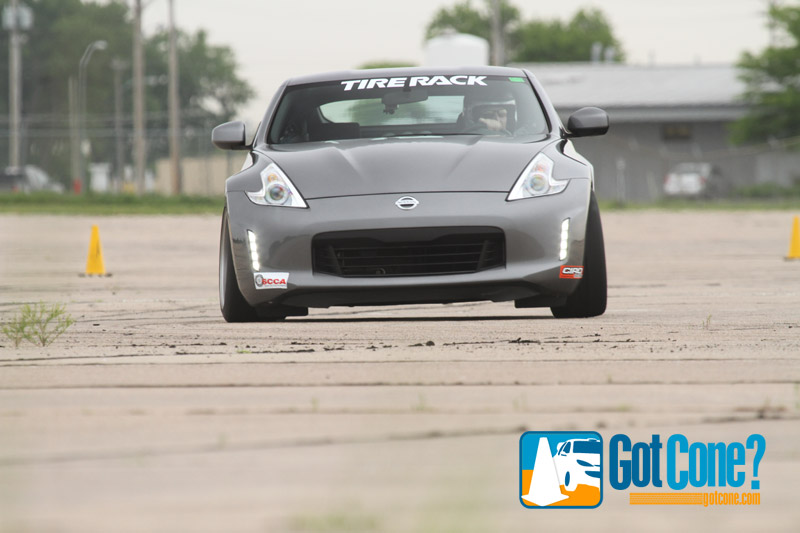
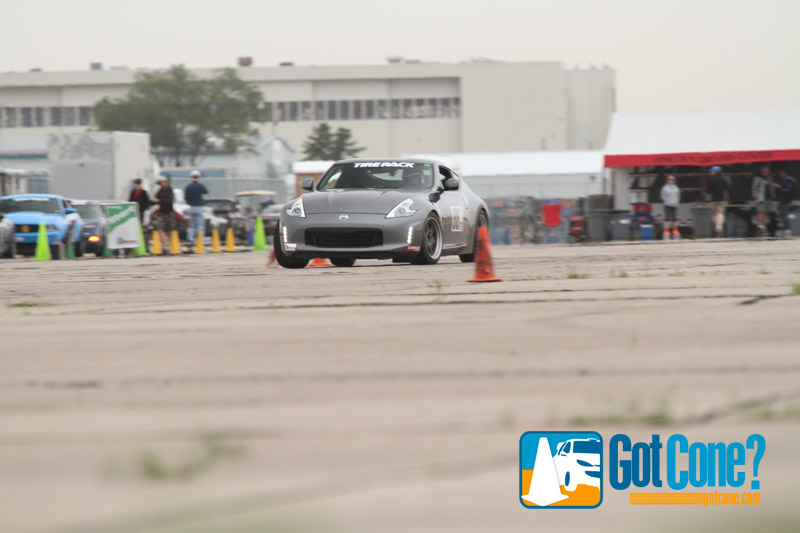
370z first runs in STR
Ran a local practice on the west lot of San Diego’s main autocross venue, Qualcomm stadium. First the video:
Overall it was a good day. As a driver there was a tremendous amount of rust to shake off, plus the challenge of basically a brand new car with a whole new setup, and not having driven on this (deteriorated asphalt) surface hardly at all in years. Dropped a second from run 1 -> 2, then stayed pretty flat time-wise for the next 6 or so runs, but finally broke through on the last couple with another 1.5 seconds. There weren’t any other top prep cars in the group to compare to, but had there been, suspect I’d have been about 1 second off the pace. The video is of my last run, which still had lots of big misses, but starts to show what the car can do.
How did the mods work?
Oil Cooler: Indicated temps were in the mid 90’s throughout the session (yay San Diego “winters”!) but the oil temp stayed in check. I took 9 runs all about 10 minutes apart. Leaving with temp around 180, would come back in with it around 220, but it’d be back to 180-ish by the time the next run started. Kept the car idling with hood open and fans on between runs. By the end of the session it was only dropping to 190-ish before the next run, but still not really going over 220.
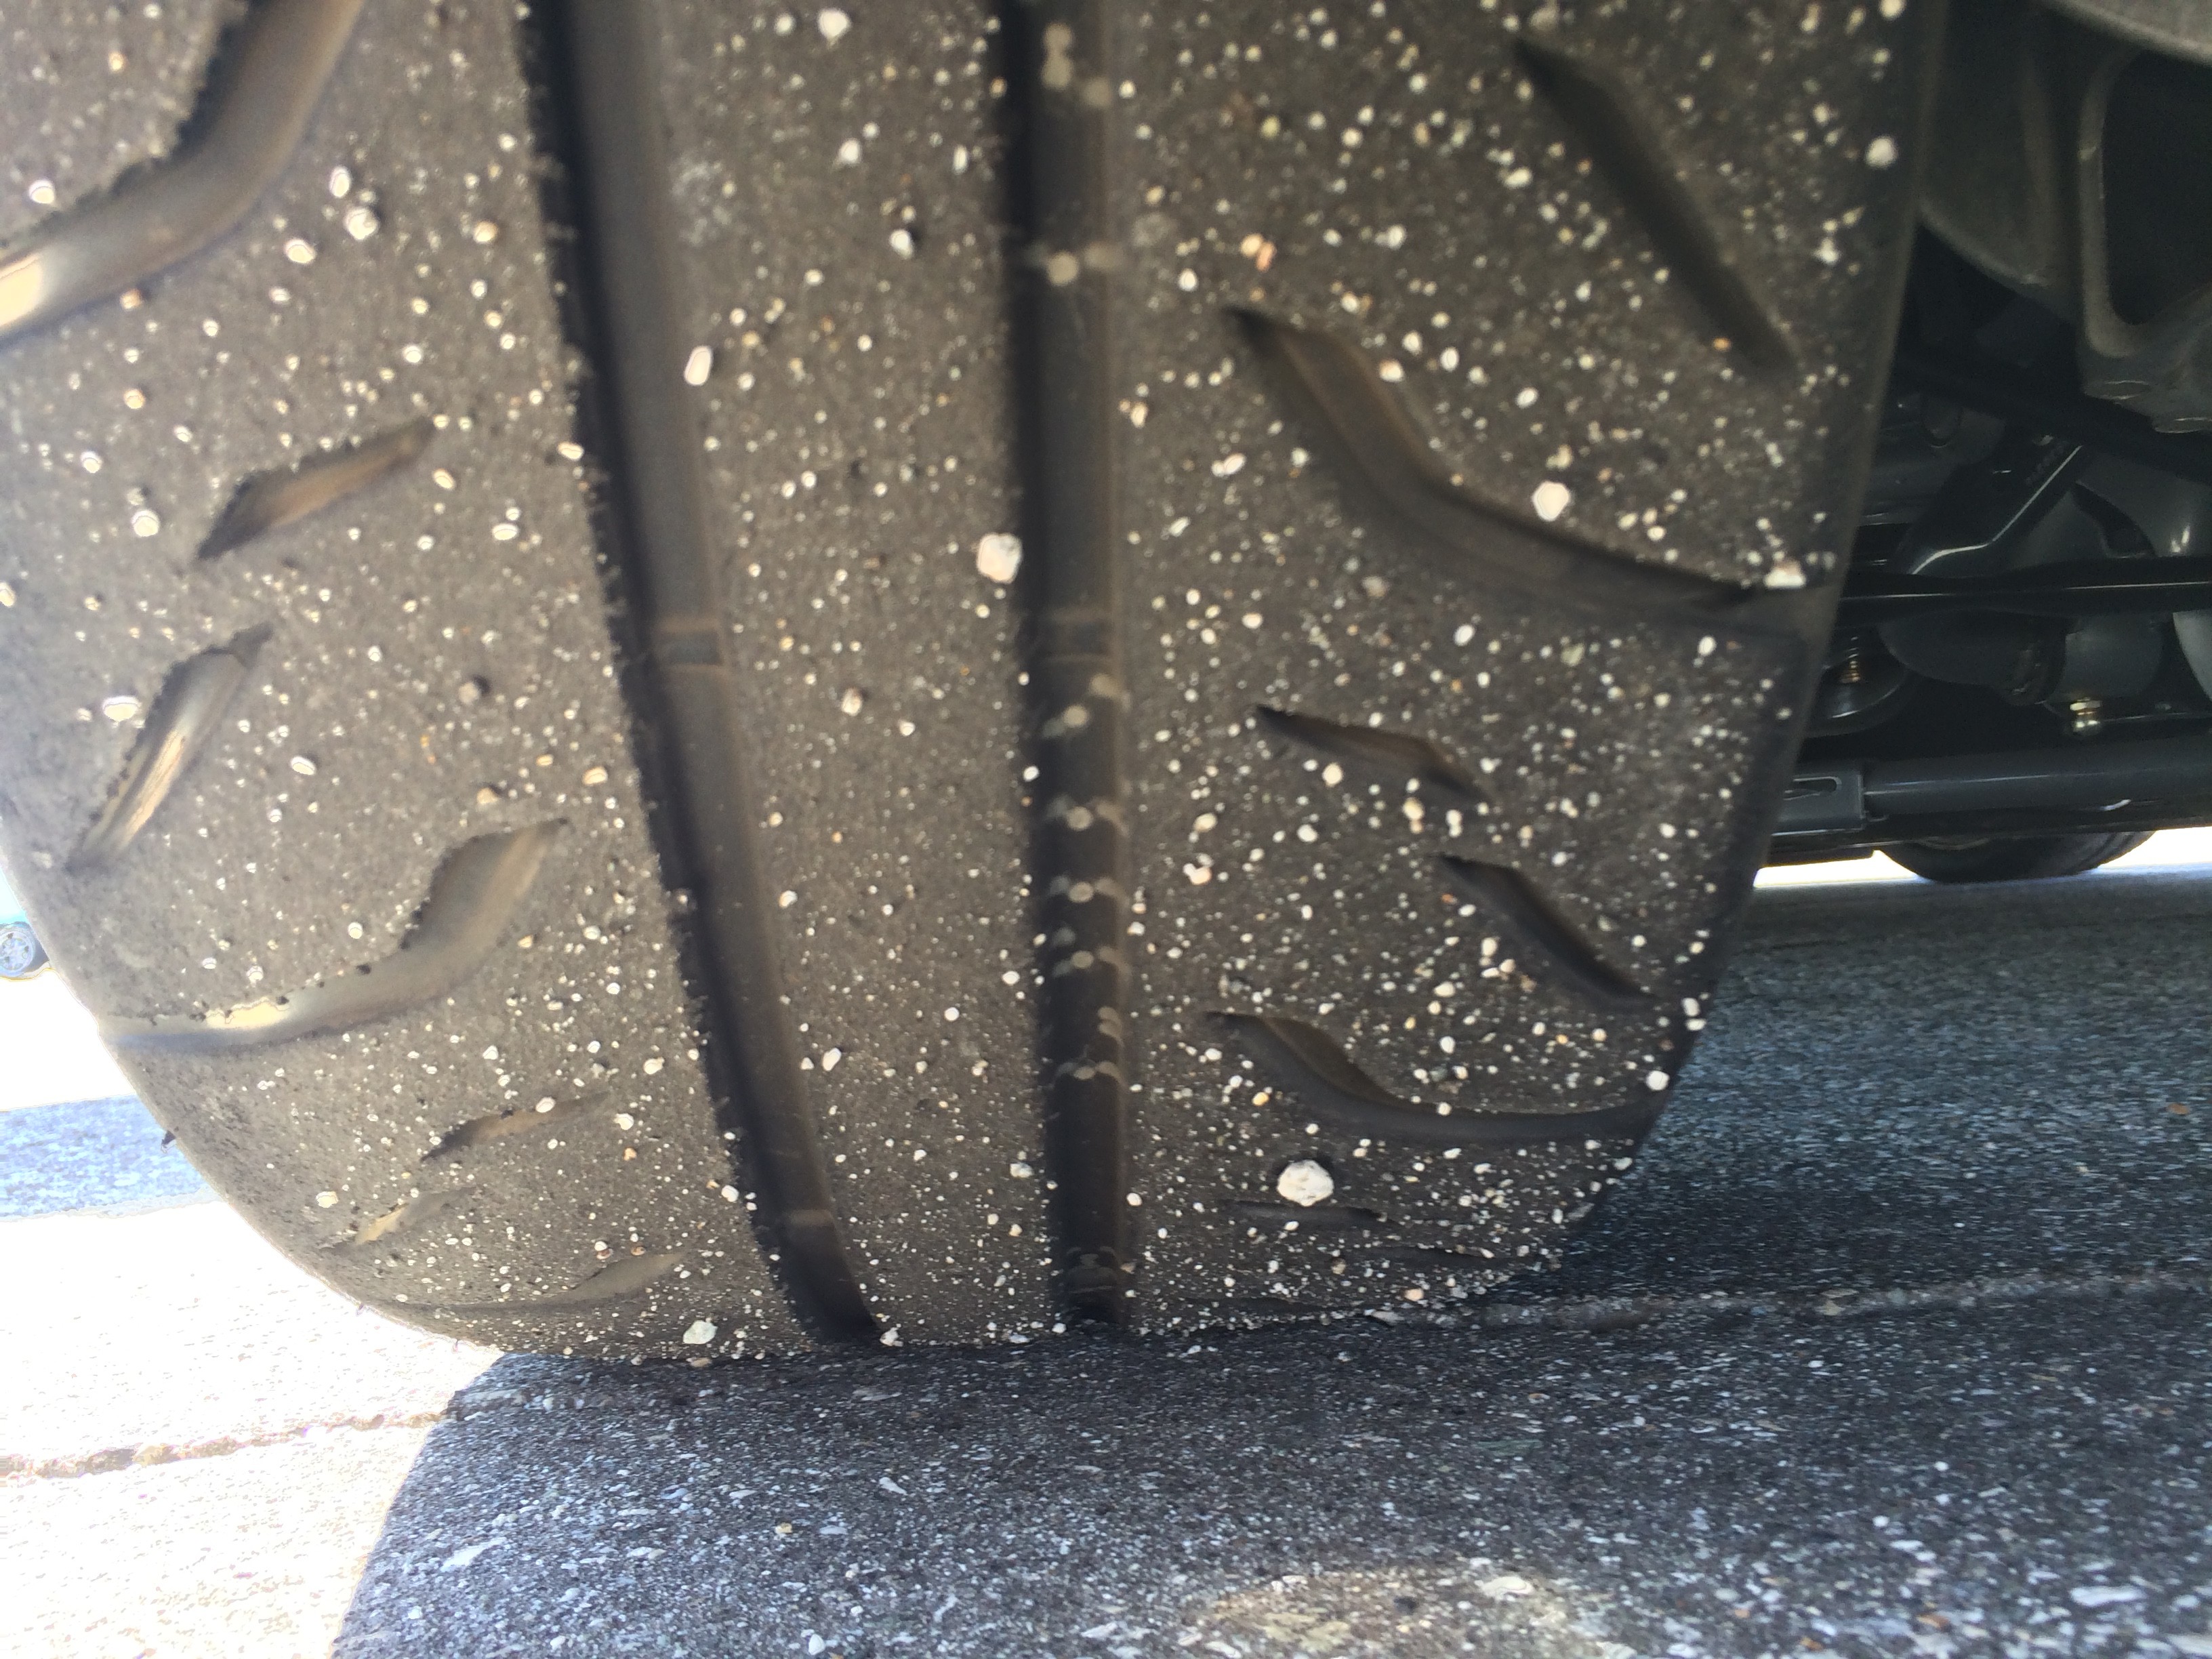
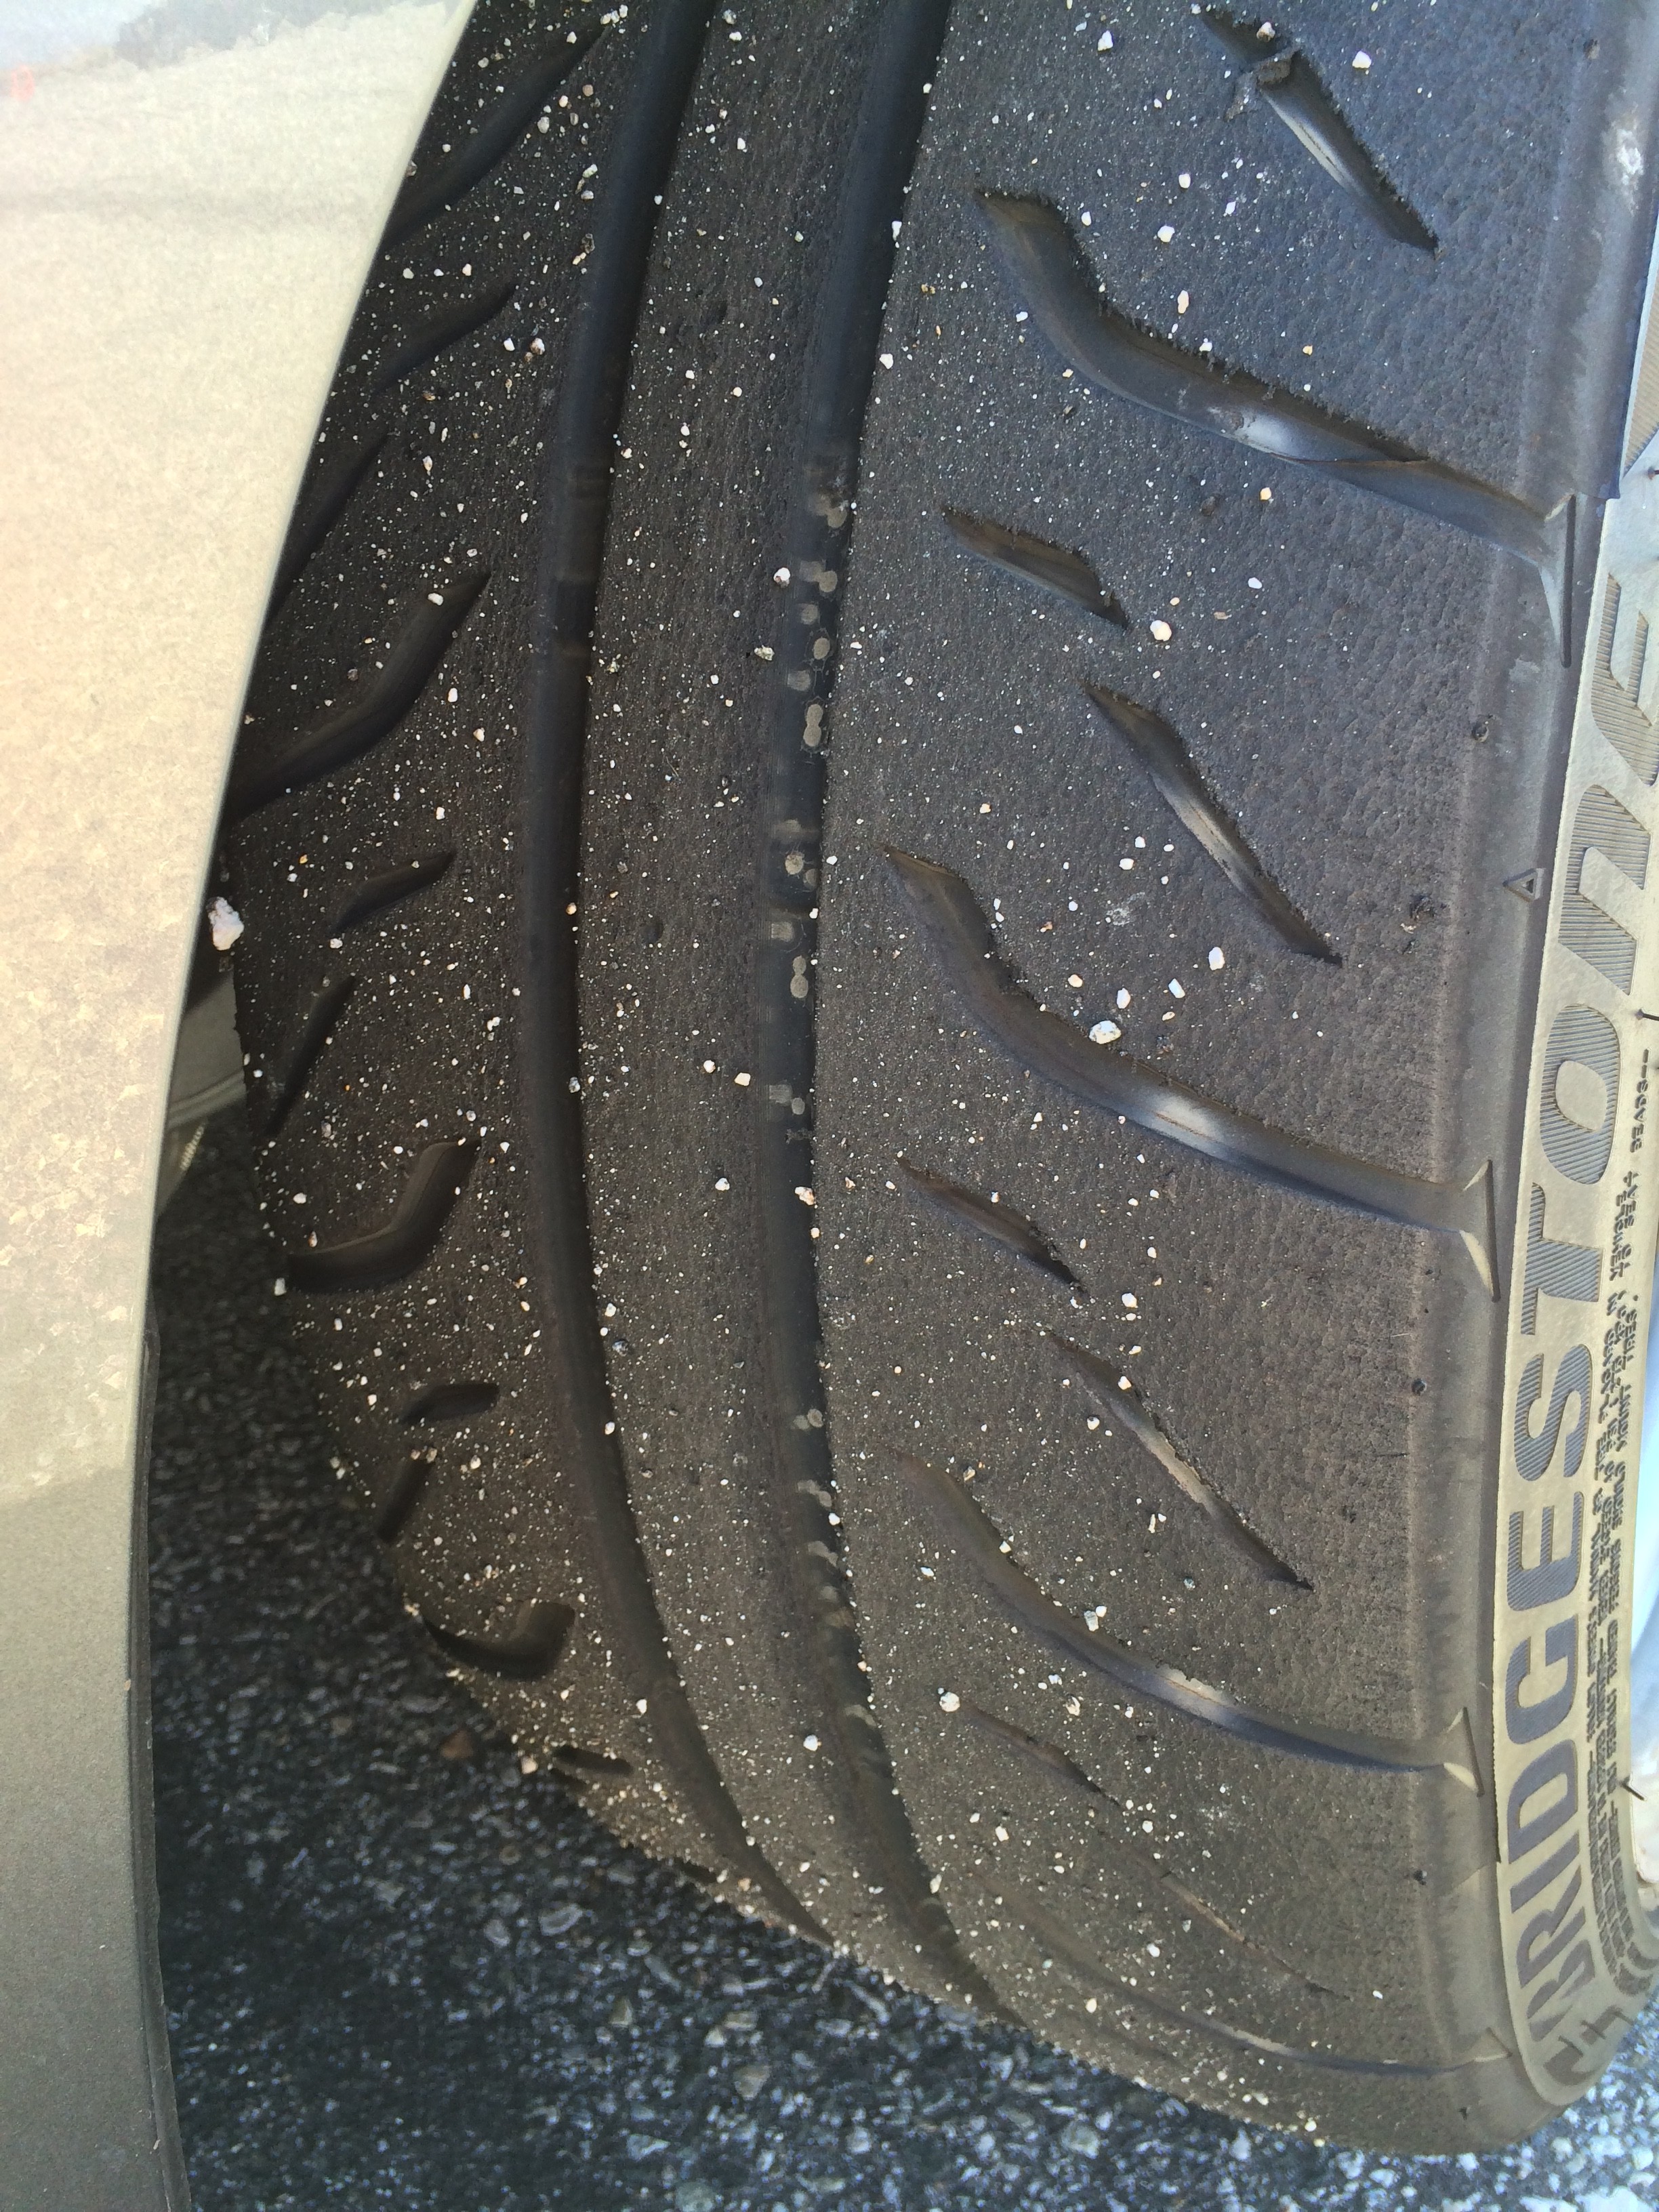
Wheels/tires: No rubbing, and grip was acceptable. Overall I was running too high of pressures for the surface, and kept having to lower and lower. Think I ended up at 36F, 32R, and still wasn’t getting the tire to roll all the way over. Some of that is the low grip asphalt, may need to go with higher pressures on grippier surfaces.
Suspension/handing: Surprisingly the initial handling balance was quite good. I didn’t adjust shocks or bars or anything all day, to give myself a chance to learn the car’s behavior, and find base tire pressures. What I found in the later runs where time was dropping, was that I had to be making inputs very early – early braking, early turn-in, early turn-out. Despite the much more racy spring rates and dampers, the soft-sidewall’d tires underneath it all still don’t provide the response of a good DOT R-tire. These tires require a much more gentle ramp-up to their limits to keep from shooting over. The mid-corner balance seems good, and exit is good, but there’s a little push on entry, and I’m not thrilled with the way the car feels in transitions – but haven’t put my finger on root cause yet. Might try softening front bump damping a little.
For the Z crowd, this is my initial setup:
FRONT
1100lb. springs
Custom Koni 30 series at 8/13 clicks of bump (13 = full stiff) and 1.5/2.5 turns of rebound (2.5 = full stiff)
Hotchkis non-adjustable front swaybar
Approx -4 degrees camber, zero toe
36 psi on 255/35-18 Hankook RS3v2 on 18×9 wheel
REAR
650lb. springs (stock location, not coilover)
Custom Koni 30 series at 3/13 clicks of bump (13 = full stiff) and 3/9 “sweeps” of rebound (9 = full stiff)
Hotchkis adjustable rear swaybar on full soft
Approx -2 degrees camber, zero toe
32 psi on 255/35-18 Hankook RS3v2 on 18×9 wheel
Shock damping curves were provided in an earlier post.
Engine/Power Car ran strong. Still haven’t had it dyno tuned yet, based on others’ experiences there’s a lot on the table in a tune. Gearing is a lot shorter, acceleration is lively enough to be entertaining. Exhaust gets pretty loud at high RPM and throttle openings, car blew 92.0db on the best run past the meter. If it’s cold/foggy out for other SD events, may have a problem with sound. Should be fine elsewhere though.
One place where the tune interacts with the handling is in the realm of lift-throttle behavior. Whether it’s for emissions or a byproduct of Nissan’s VVEL (throttle butterflies are almost always wide open) – or both – the car hesitates to cut power when you lift the throttle suddenly. It’s maybe only a half second or so, but the delay is there, and at the pace things happen in an autocross run, it could be contributing to some of what I’m not liking about how the car enters transitions. For a left-foot-braker it may not be as noticeable, but for right-foot-only me, there may be room to increase handling consistency by having engine braking more closely follow pedal position.
Quaife diff – no problems with inside wheelspin here. Based on the handling and power-on/off characteristics of the car, I’m happy with the choice. Haven’t really done much in the way of diff mods before, and it was interesting to feel how it changed the behavior of the car – on course and on the street.
Seat/Interior The seat held me in great, and the position is nice and low which I like. There is one problem however – it’s hard to see out! Between the wide base of the driver’s side A-pillar, and the big side view mirror tucked right next to it, it is very difficult to see cones approaching from the left where the radius dictates a speed of 30-40mph. Above that speed you can see them coming through the windshield, and below you can see them out the side. In the video you’ll see me lean forward and move around trying to find the cones in a couple left-handers. I also tend to miss those left-hand apexes the most. Had this problem with the stock seat too so I don’t think it’s a height thing, so much as where I sit fore/aft. I tend to sit further back than most people my height, may have to try sitting a bunch closer… or just get used to it.
Next event will probably be the SD Tour in about a month…should have it tuned and aligned by then, but it was “close enough” probably won’t change much beyond maybe that slight shock tweak.
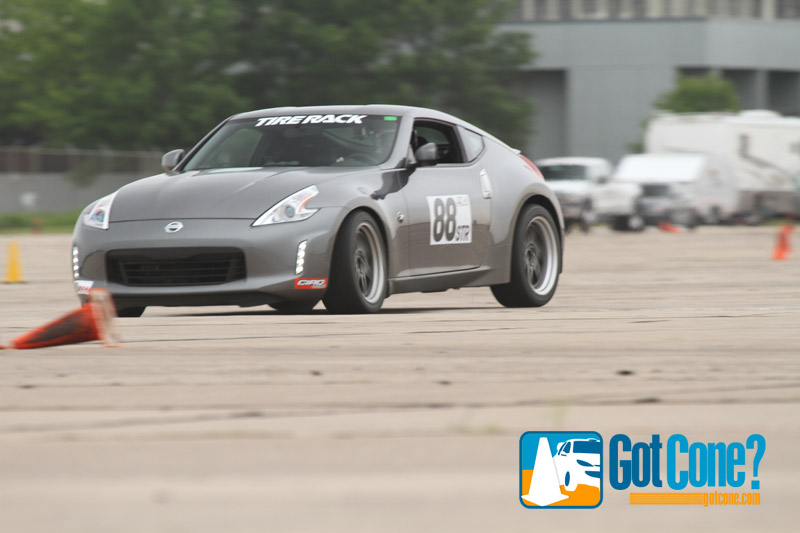
First event in STR trim
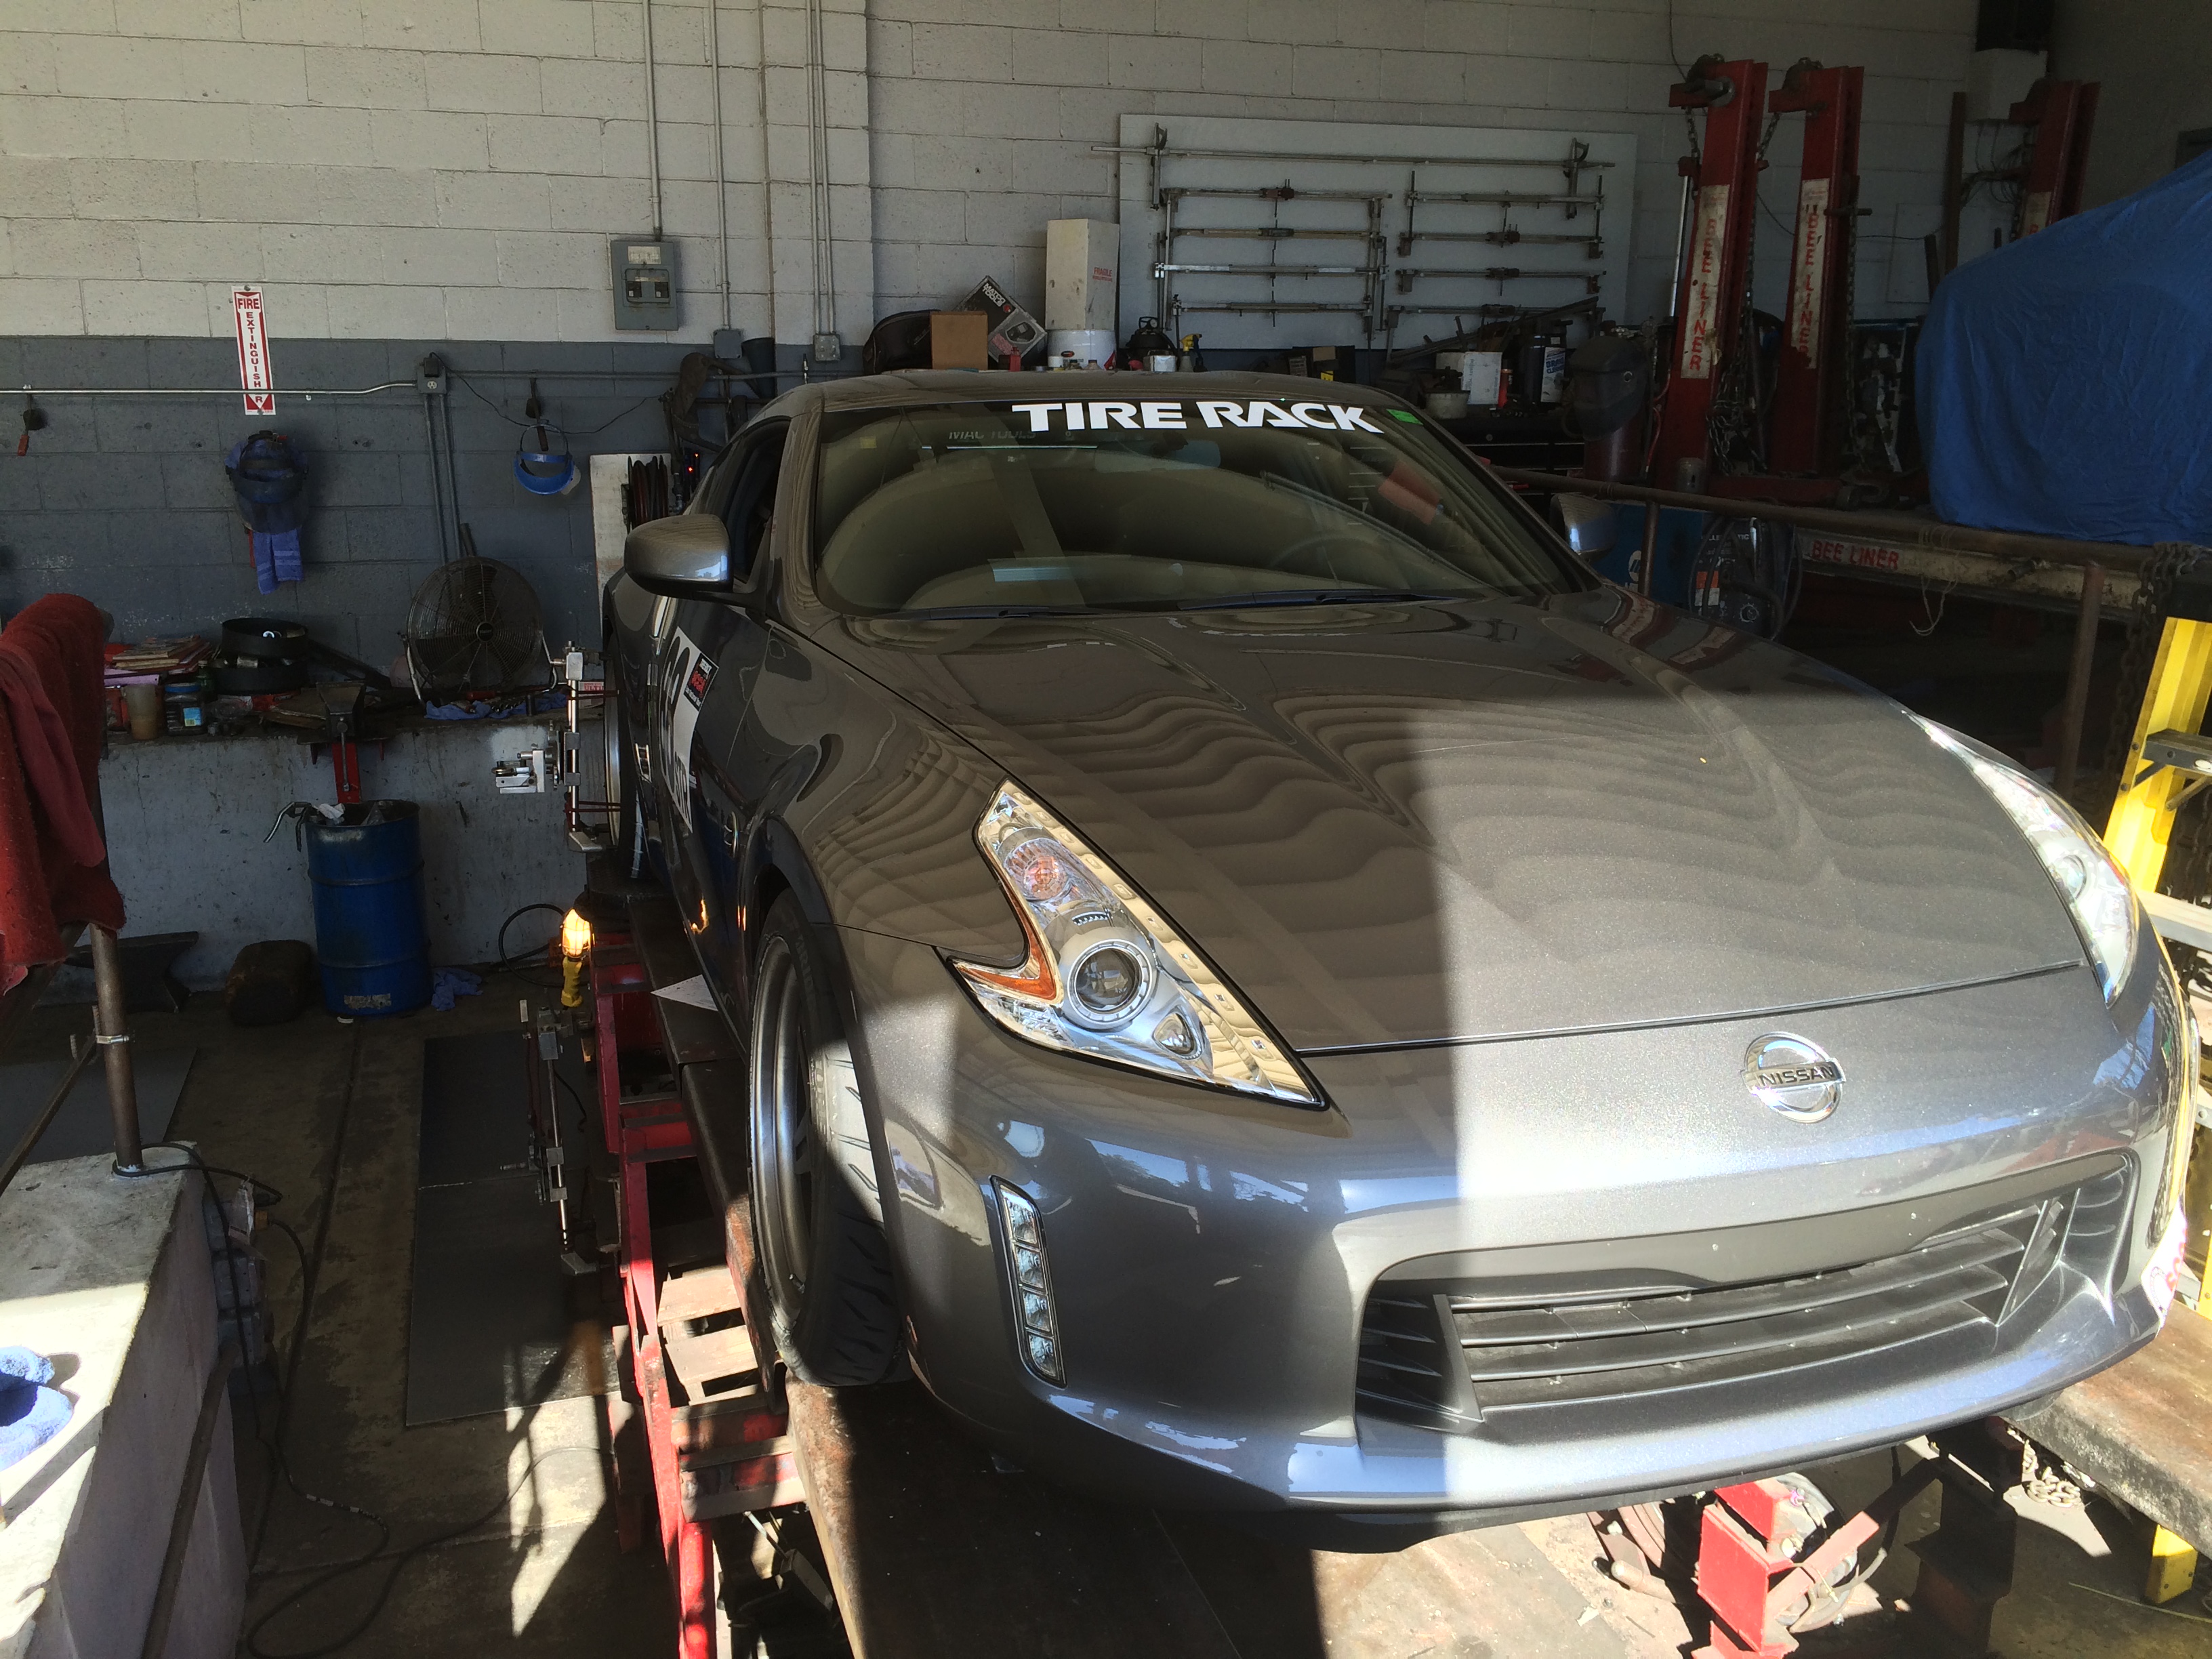
Will do a writeup when I have a chance, for now just a photo taken when arriving at Qualcomm. Taken with a cellphone in harsh light, touching it up so you can see the car makes it look HDR-ish…
First drive in STR trim
Did a lightweight “toe-only” alignment last night with the car down at its initial ride heights. With the rear eccentrics all maxed for minimum camber and toe, the rear toe was exactly zero, perfect. I don’t have the tools to do a proper camber measurement, but it looks to be in the -2 to -2.5 degree range.
The front had moved to about 1/4″ toe out with the lowering, roughly one turn of each adjuster brought it to zero. Again didn’t measure camber but it should be around -4. Even with its double wishbone suspension, the car needs a lot of static negative to work well. At least, the Z33’s (350z’s) do…sure wouldn’t mind it if I find the car can work with less. Some of these silly camber numbers are driven by the soft-sidewall street tires used in the Street Touring category. While their rubber tread compounds are very advanced providing fantastic helpings of dry grip, life, and wet weather ability – sidewall construction hasn’t made the same strides.
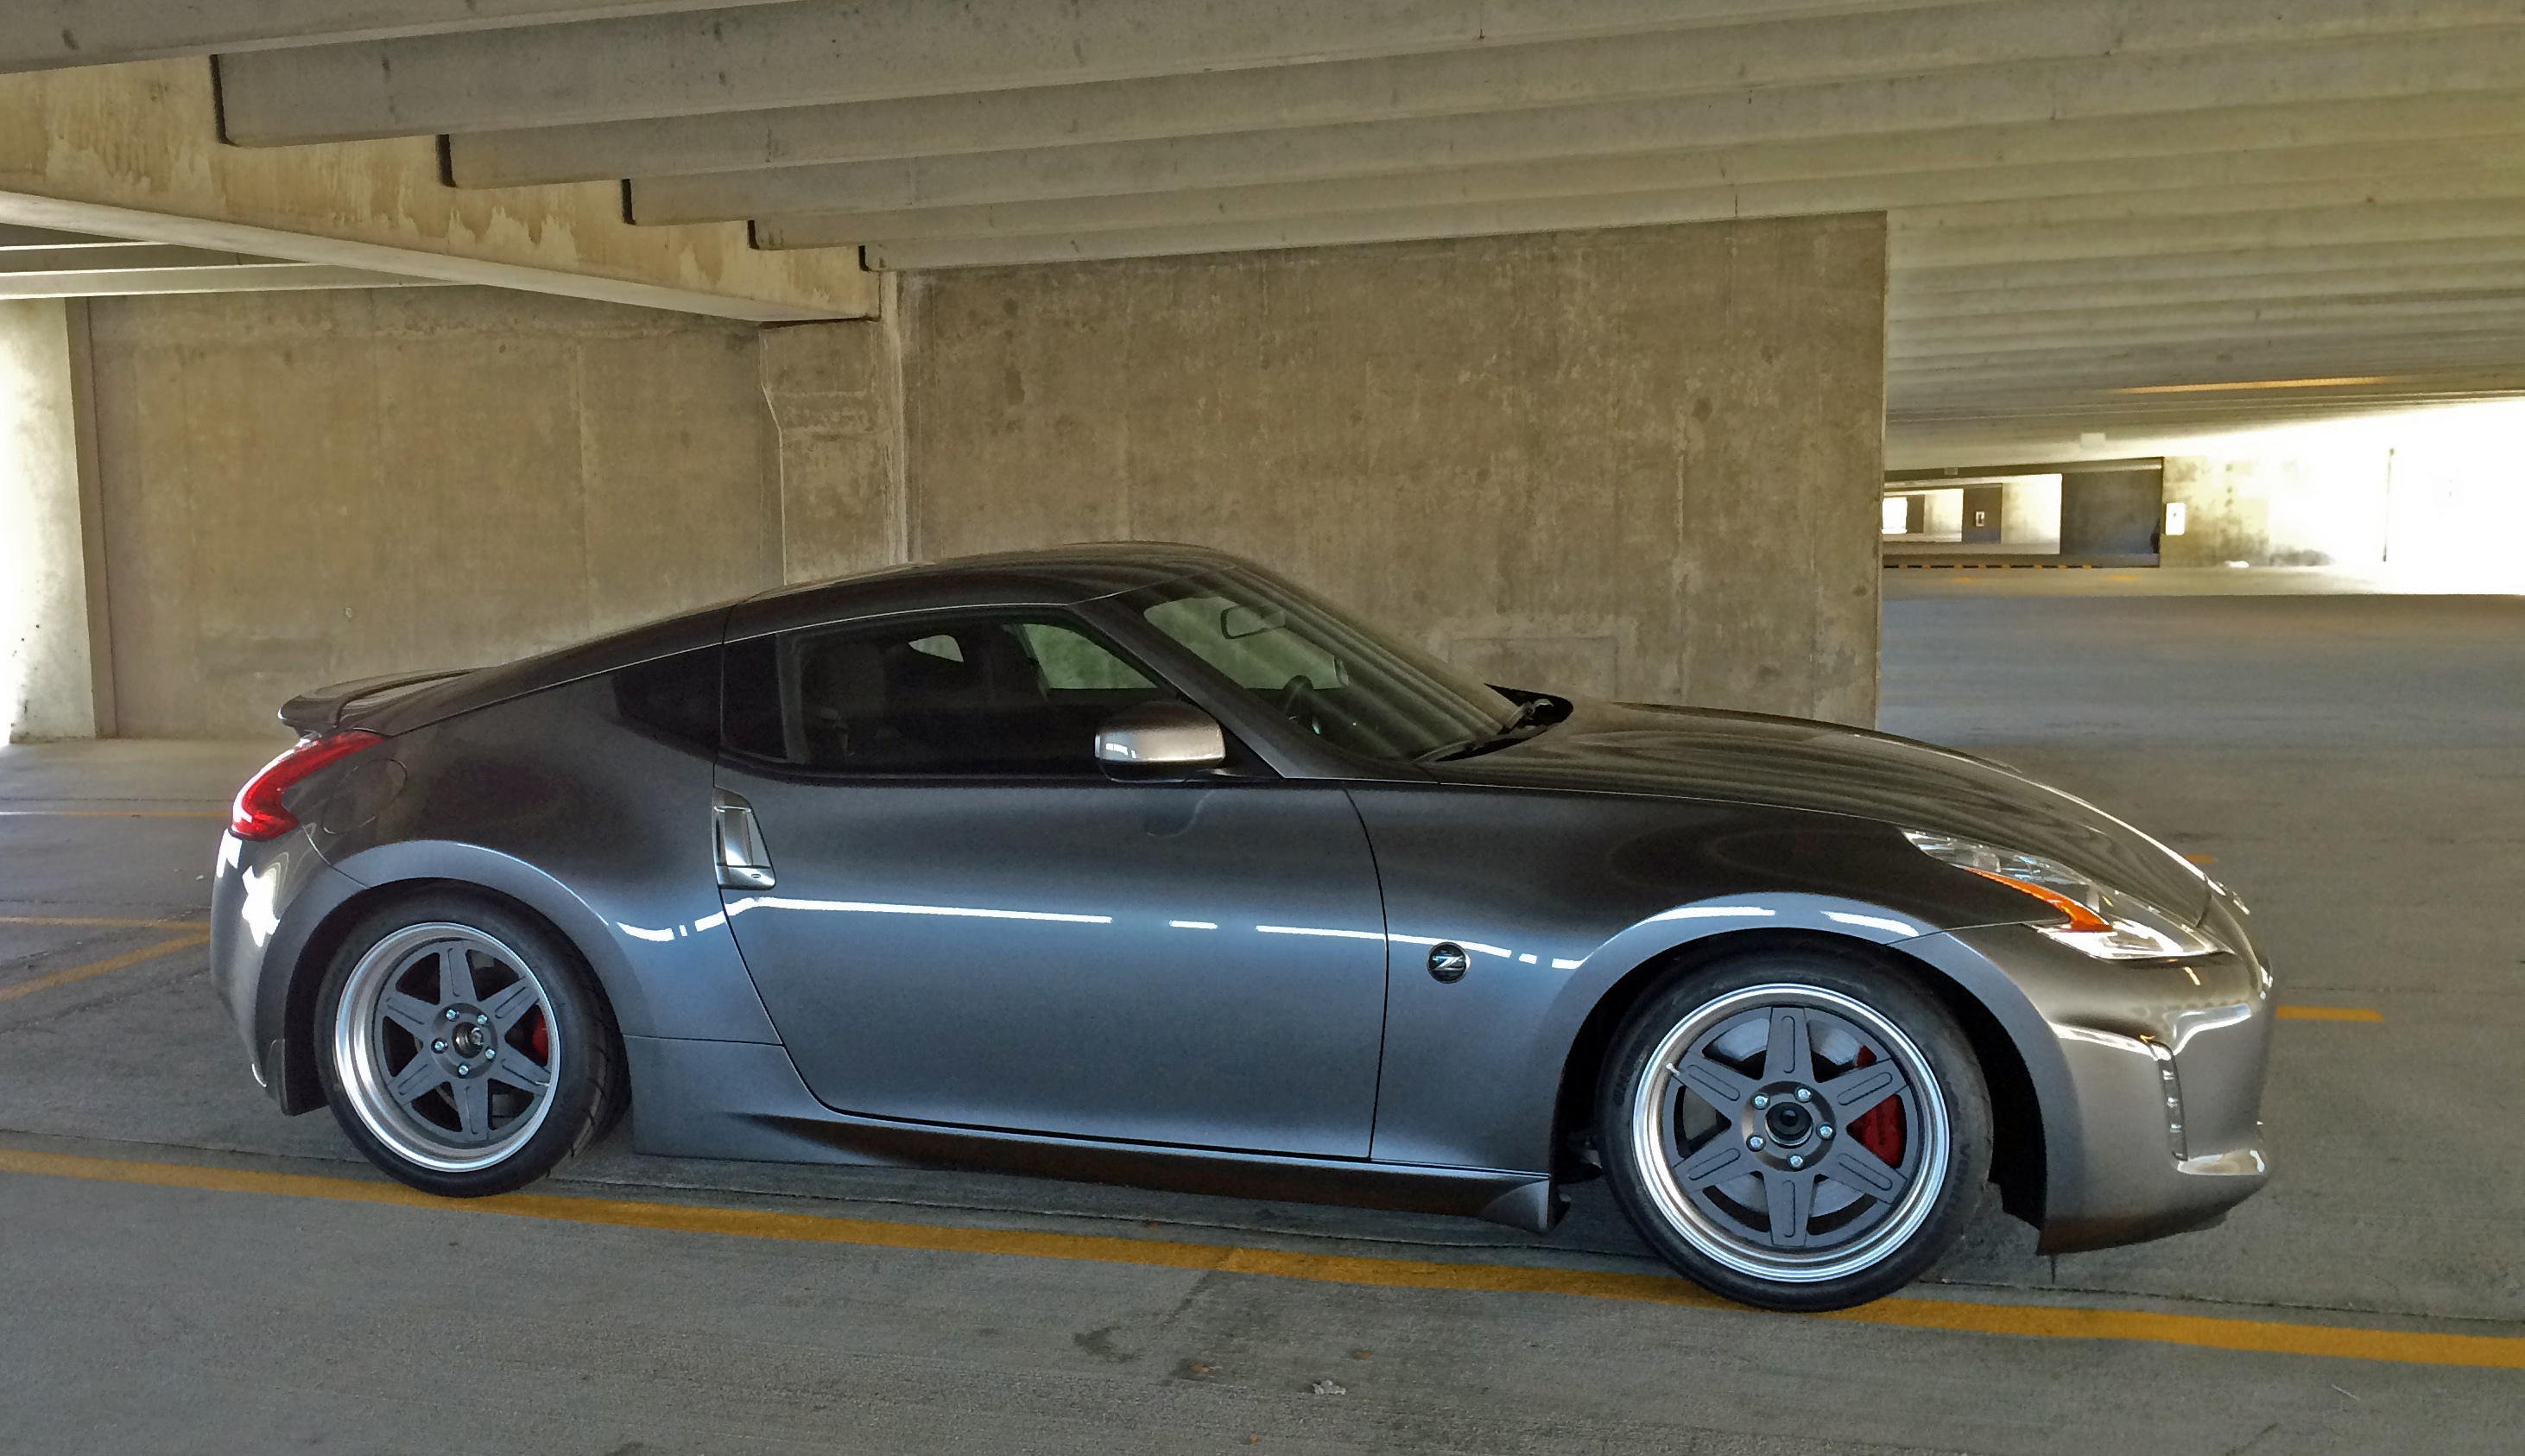
Of note, the rear toe measurements indicated 74.5″ width – pretty wide. There’s room to go inboard 2″ per side, but I hate the “sunken battleship” look. By some good fortune, these wheels worked out great, their offsets are right where I’d want them, using only the adapting spacer need to make these Camaro bolt pattern wheels fit the Z. For comparison, the Viper was about 77″ and a stock C5 Z06 is about 74″.
The front measurement was 74 7/8″ – a touch wider. With equivalent camber they’d probably be equal. The car looks soo wide in the rear, but is just as big in front.

Drove the car to work today, its maiden voyage in this initial STR trim.
On cold startup it’s pretty loud at high idle, but settles down within a few seconds. Thankfully it is not loud once settled down, and around town at part throttle. Above half throttle, it really starts to get noisy though. Doesn’t sound much like the “Chewbacca” of the Z33’s from inside, not sure how it sounds outside. I’m a little worried about San Diego’s 92db limit, guess we’ll see how it goes.
With the big oil cooler, it took a long time for the oil to get up to temp. Coolant was up to its normal spot before oil temp came off the peg (@140 degrees). That’s with the thermostatic oil cooler sandwich plate.
Car rode comfy and smooth even with the big spring rates and wasn’t really any louder inside at light throttle. There’s a little bit more mechanical noise/feeling with the rear subframe and diff being locked in so well, but it’s really not bad.
The only problem – it scraped EVERYWHERE! Could not believe how low it ended up. If you’ve ever seen a hardcore autocrosser driving around the paddock with a hardcore splitter scraping over everything…that’s what this car is doing with its factory front air dam pieces. The little air deflectors in front of the front tires are 1.25″ inches above the ground. 🙂
A lot of that comes from the wheels/tires – these are over 1.5″ shorter than stock. That means .75″ less ground clearance, and .75″ extra fender gap. There are big advantages in gearing, CG, unsprung weight, but there’s an inability to go over speedbumps that comes with those advantages.
If I end up looking at other wheels/tires, I might consider something taller (like 19’s) if need be. The short gearing means the car will be revving higher and when it gets tuned it should still be good for mid 60’s in 2nd…but I don’t want to be revving it that high any more than I have to.
Signed up for a practice Saturday, will try to get it dyno tuned before then.